- Posts: 34
- Thank you received: 18

ACMOC Membership Benefits
- FREE quarterly magazine filled with content about antique Caterpillar machines
- FREE classified listings
- ACMOC store discounts and specials
- Full Bulletin Board Access
- Marketplace (For Sale/Wanted)
- Technical Library
- Post attachments
$44 /year ELECTRONIC
$60 /year USA
$77 /year International
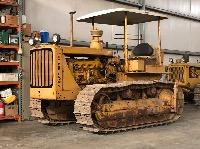
Restoring a 1946 Cat D6 5R
Yesterday, I opened all the injection pump vents, and got the pony running. I couldn't clearly see the fuel coming out from around the vent screws but there was fuel leaking all over the place. It was unnecessarily stressful and difficult because I had the D socket for the vent screws on a whacky Rube Goldberg configuration of nonsense. Of course the socket fell off and went into the gap between the injection pump housing and the engine block! I only succeeded in making a mess haha. Luckily I had a magnet with me and retrieved the socket.
Today I went back with a newly purchased 1/4" drive extension for the socket, which gave me a clear and solid shot to each vent. I had a rough time getting the pony started with the rope, but it was probably because I had mistakenly left the pinion clutch engaged. I bled the system one more time, then switched to run, gave some throttle, and the diesel fired right up. Hoorary! The engine has a nice low idle with the throttle all the way forward. Fuel pressure and oil pressure gauges were both pegged - awesome!
I drove around for a few minutes, but only got the machine to turn right once. The right steering clutch just doesn't want to release. Then I changed the crankcase oil. I only got about 2.5 gallons out, so it was lower than I thought. In the operator's manual, it says there is a drain for the oil cooler - where? Neither I nor my diesel mechanic friend could find it. But we opened both the crankcase and oil filter drains, and flushed the oil filter housing with mineral spirits for good measure. For the Wix oil filters I got, the filters fit, but the gaskets seem to be a larger diameter than the oil filter cap. Somehow my friend was able to bunch them up in a way where they lay flat in the groove of the cap.
I also drained the diesel out of the final drives, and filled those with SAE90.
At that point, I was out of time! My plan is to drive it around tomorrow, to the point where the temperature gauge actually moves. I have a few gallons of diesel in the right steering clutch compartment right now, but will probably add a few more tomorrow. Hopefully washing the compartment will help?
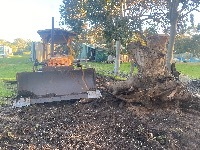
Last note - my friend pointed out that one of the mounting brackets for the blade has a fully broken weld. I'll definitely have to do something about this blade before too long. If you zoom in you can see it in the photo - the part of the bracket that's bolted to the frame is broken clean across.
Attachments:
Please Log in or Create an account to join the conversation.
Please Log in or Create an account to join the conversation.
Please Log in or Create an account to join the conversation.
Today I ran the tractor for 30 minutes and pushed some logs around. It's not leaking oil from the crank case or the final drives. I topped up the oil level while the main engine was running. There may be a very small diesel fuel leak - I need to clean the engine really well, and then observe it again.
There is a coolant leak around the pony. The pipe connecting the main engine coolant to the pony leaks at the connector 4B3041. Does anyone know how this thing works? I assume it clamps down on the pipe in some fashion but it isn't obvious.
There may be other leaks, it's not clear. I don't know whether the coolant on top of the pony was coming from failed gaskets or getting sprayed from the leaky pipe fitting.
The big downside is, I couldn't get it to turn right even once, so there was a lot of backing up and engaging the left steering clutch/brake. I believe the right steering clutch is releasing ok - when I pull both steering clutches, the machine comes to a stop. So, the problem is that the right brake won't engage. (I also tested this by engaging the brake when the machine was rolling in neutral.)
As I was talking to the previous owner's widow, she said she just remembered that the last time her husband tried to run the tractor to clear snow (probably about 4 years ago), the steering gave out on one side. So - this problem has existed for a while!
The manual is fairly clear about how to adjust the brake, but it doesn't explain how to get the clutch compartment cover off. How the heck do you do it? All the bolts came out easy, but it's so tight you can only lift it up a few inches on the inner side. What else needs to be removed to get the cover out?
This picture makes it look way more roomy than it really is haha. But the larger cover is jammed between the hydraulic boost pump (left of the photo) and the seat support (towards the front of the machine).
I don't think the fender is removable - it looks like it's welded to the frame! Though two of the bolts have to come out to remove the clutch compartment cover - they both look a little black from previous removal.
From right under the seat, you can see that the brake locking lever is actually above the steering clutch cover. You can get the lever mostly out of the way by locking it, and I did manage to get the cover up above the lever, but it was jammed in place and I couldn't figure out how to remove it.
The manual talks about adjusting the steering clutches while the engine is running, so presumably it's possible to do those (and the brakes) without removing the seat. But how?!?!
Any advice very much appreciated!
Attachments:
Please Log in or Create an account to join the conversation.
Some one beat you to the fitting with some JB weld .
Bob
Please Log in or Create an account to join the conversation.
What to adjust is not clear! But fortunately the brake adjustment screw is called out clearly in the service manual. I'll try it tomorrow.
Attachments:
Please Log in or Create an account to join the conversation.
Please Log in or Create an account to join the conversation.
I watched a few videos last night. I can't find any videos of brake adjustments on a machine of similar vintage that is fully intact, but there were a few of similar-era assembly, and one of a completely different machine that was still helpful.
These two LAOL videos show reassembly of a D4:
This "western truck and tractor" video is for a later-model D5 but still helpful:
Pacific Northwest Hillbilly D4 reassembly:
I was hoping to go up this morning but I got poison oak a few days ago and it's really bad today. It may have to wait until next week...
Please Log in or Create an account to join the conversation.
It is possible to replace a brake band without removing the fuel tank. But I always have found a way to remove the tank. I have never thought of removing the fender to work on the steering. But if not welded to something, they come off easy enough. But that requires removing fuel tank. I think maybe I better go look. The tank is the big thing in the way.
The world is a large place. But Cat did not want to waste any of it. Most all the steering clutch and brake parts only have at most 1/8 of an inch clearance when pulling out of the case. Including the larger cover, needs to be tipped just right to clear the steering booster.
I have never seen another dozer blade with the extra brace you have pictured. In my mind I cannot picture how the geometry is that it even works, but it must.
I did spot what I think is a pony motor air cleaner in the pile of 9u D6 parts. As there is at least one dismember pony on a parts tractor here, so I should have an air cleaner. I am not sure how close pony is on the 4&5R is to the 8&9U tractors.
Please Log in or Create an account to join the conversation.
Cheers,
Neil
Pittsford, NY
Please Log in or Create an account to join the conversation.
ACMOC
Antique Caterpillar Machinery Owners Club
1115 Madison St NE # 1117
Salem, OR 97301
support@acmoc.org
"I became a member recently because the wealth of knowledge here is priceless."
- Chris R
"I also joined a year ago. had been on here a couple of times as a non-member and found the info very helpful so I got a one year subscription (not very expensive at all) to try it out. I really like all the resources on here so I just got a three year. I think its a very small price for what you can get out of this site."
- Jason N


