- Posts: 3879
- Thank you received: 4

ACMOC Membership Benefits
- FREE quarterly magazine filled with content about antique Caterpillar machines
- FREE classified listings
- ACMOC store discounts and specials
- Full Bulletin Board Access
- Marketplace (For Sale/Wanted)
- Technical Library
- Post attachments
$44 /year ELECTRONIC
$60 /year USA
$77 /year International
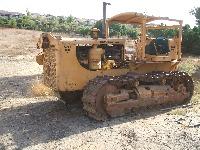
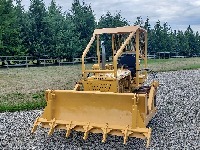
D2 going in the shop
- janmeermans
-

- Offline
- Moderator
- Member
- Posts: 1946
- Thank you received: 43
I got set up with a little table to try to weld up my rails. Just some stuff from the treasures pile, so nothing special and will go back in the treasure pile when done. The shop hoist seems to handle the tracks ok so far. After talking to a couple of welder type guys and a friend with experience welding tracks I'm going to use the 70 series wire which equals to 7018 stick rod. This is basically a working hobby machine so I'm confident that this will out last me.
d2gary,
My article on how they did the link welding "back in the day" is available in the Members Site in the electronic copy of Issue 148. It may be too late for you but it is there for anyone wanting to look. Your mailed copies are on their way in the
mail and should be arriving soon!
The follow-on article for roller build up will be in the Jan/Feb/Mar 2020 Issue 149 which we hope will reach everyone by mid-March.
JanM
Please Log in or Create an account to join the conversation.
- Riverina d4
-

- Offline
- Premium Boarder
- User
- Posts: 118
- Thank you received: 0
I Have not had any experience with the pivot shaft bushings Neil so I cant be sure about them.Would that method work on the D2 track frame to pivot shaft bushings?
All I know is that when I used this method on the roller caps the inside diameter of the cap returns to its original size. the bronze bush is the only thing that changes.
I think the Roller caps are Cast steel not Cast Iron, So I think it would be a similar exercise on the pivot Deal.
Please Log in or Create an account to join the conversation.
This is my 59th link
I'm going to start trying to get the bushing out of the caps with the heat and cool method. I still have to clean the caps so the bushing can be measured. I think a couple might be within spec. Seems like the rollers with good seals dont have that much wear, imagine that!
Got a track frame on the welding table.
Glad to have the track welding behind me
Please Log in or Create an account to join the conversation.
Please Log in or Create an account to join the conversation.
Cheers,
Neil
Pittsford, NY
Please Log in or Create an account to join the conversation.
Looks really good Gary, you're going to love that new steering!
Already liking the new steering, seems ashame to cover them up
Please Log in or Create an account to join the conversation.
Please Log in or Create an account to join the conversation.
Please Log in or Create an account to join the conversation.
Cheers,
Neil
Pittsford, NY
Please Log in or Create an account to join the conversation.
ACMOC
Antique Caterpillar Machinery Owners Club
1115 Madison St NE # 1117
Salem, OR 97301
support@acmoc.org
"I became a member recently because the wealth of knowledge here is priceless."
- Chris R
"I also joined a year ago. had been on here a couple of times as a non-member and found the info very helpful so I got a one year subscription (not very expensive at all) to try it out. I really like all the resources on here so I just got a three year. I think its a very small price for what you can get out of this site."
- Jason N


