- Posts: 174
- Thank you received: 36

ACMOC Membership Benefits
- FREE quarterly magazine filled with content about antique Caterpillar machines
- FREE classified listings
- ACMOC store discounts and specials
- Full Bulletin Board Access
- Marketplace (For Sale/Wanted)
- Technical Library
- Post attachments
$44 /year ELECTRONIC
$60 /year USA
$77 /year International
D6 8U-2517 Engine Overhaul
- sheddcanyon
-

- Offline
- Elite Boarder
- Member
Thanks and Happy Thanksgiving!
Please Log in or Create an account to join the conversation.
Please Log in or Create an account to join the conversation.
Please Log in or Create an account to join the conversation.
Please Log in or Create an account to join the conversation.
- NickyWalnuts
-
 Topic Author
- Offline
- Premium Boarder
- Member
- Posts: 87
- Thank you received: 66
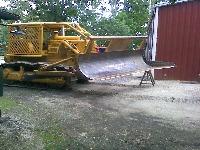
The idea of making the jack frame vs. just pulling the engine was a total gamble. Ideally, we would like to just inframe it. But we won't know if we can get away with that until we pull the main caps off and have a look at the condition of the crank. If the crank needs work, then yes, we will have to pull the engine out anyways. But if we can get away with rolling new main bearings in, the frame is totally worth it.....we will find out soon enough. Under normal circumstances, you could just crib up a standard height tractor with wood blocks to get the same result. But as you can see, this is no normal machine. We have plenty of steel on hand, and my shop foreman wasn't busy and loves being presented with an idea and having the freedom to design and build out the idea. A truly incredible talent he is....cranked that frame out in just a day.
A couple years ago I was going through the back half and master clutch of this machine and I made a post enquiring about adding glow plugs to help this machine start easier. We only use this machine to dig up trees in the nursery bare root starting in January when all the leaves have fallen and the trees are completely dormant. It was converted to electric start years ago, and it's always a bear to get it lit off in the cold. Old Magnet pointed out that I would either need to have my head machined out for the larger outer diameter (1S1970) precups, or opt for another cylinder head (7F7878) already set for the larger chambers. Last week I searched around on Machinery Trader and found a NOS head. When I called, they said it was the 7F7878. For the price of the new head, I honestly don't think I could have had all the machine work done to my old head, plus have new valve seats and valve guides installed. When I arrived, the casting was actually 6H8612, and they had written 7F7878 on it with a paint pen. I was thrown off a little bit by this, and there are a few small differences to it, but overall it looks to be good to go.
I'm not really sure what application the 6H8612 head went into originally, but there is an additional port cut into the top surface of the head just above where the water pump mates to the head. It came with a very thick block off plate to cover this port:
I'm not sure if I will have to add two longer studs to fit the block off plate, or if the existing ones will be long enough. Another difference I see is that on the face where the water pump bolts to the head, there are two additional holes. I haven't yet examined it close enough to see if the two additional holes are captive or if they pass all the way through into the water jacket and I will need to plug them :
Original head's water pump port for comparison:
The only thing I still need to verify is that the valve guides are the same inner diameter as those in the original head.....
I also had a question regarding the indexing of the precups for the glow plugs. It was said in an older post that precup 1S1970 uses a combination of sealing washer part numbers 9H4885, 9H4883, and 9H4882. To clarify, is it one washer at a time, or can you stack any combination of the three washers until you get the indexing correct?
Hope you all had a great Thanksgiving!
-Nick
Attachments:
Please Log in or Create an account to join the conversation.
- Old Magnet
-

- Offline
- Platinum Boarder
- Member
- Posts: 16722
- Thank you received: 815
One of the last D318 engines built. The complete engine would have the highly desirable later two belt pulley system for water pump and generator plus idler.
That's one washer at a time to get the glow plug indexing.
Valve guide part number for the new head is 4H0621
Bore diameter is 0.4400" min, 0.4410" max.
Please Log in or Create an account to join the conversation.
- NickyWalnuts
-
 Topic Author
- Offline
- Premium Boarder
- Member
- Posts: 87
- Thank you received: 66
We got the liners all pulled out yesterday. Found something interesting in the number 3 hole after the liners came out:
Only thing I can come up with is that may be some kind of repair sleeve to the lower bore where the liner o-rings seal to the block but I don’t really know for sure. We’ve never come across this before. Looking for insights/confirmation….
When I look at the condition of the outer surface of the old number 3 liner, the only difference I see is a little more goo built up just above where the sealing o-rings go. In the photo the liners go from left to right 1 thru 6:
Thanks!
-Nick
Attachments:
Please Log in or Create an account to join the conversation.
- Old Magnet
-

- Offline
- Platinum Boarder
- Member
- Posts: 16722
- Thank you received: 815
What material is that liner looking thing made of. Kinda looks like the old copper heat shield liners that are no longer used.
Please Log in or Create an account to join the conversation.
- NickyWalnuts
-
 Topic Author
- Offline
- Premium Boarder
- Member
- Posts: 87
- Thank you received: 66
Attachments:
Please Log in or Create an account to join the conversation.
Please Log in or Create an account to join the conversation.
ACMOC
Antique Caterpillar Machinery Owners Club
1115 Madison St NE # 1117
Salem, OR 97301
support@acmoc.org
"I became a member recently because the wealth of knowledge here is priceless."
- Chris R
"I also joined a year ago. had been on here a couple of times as a non-member and found the info very helpful so I got a one year subscription (not very expensive at all) to try it out. I really like all the resources on here so I just got a three year. I think its a very small price for what you can get out of this site."
- Jason N


