- Posts: 1281
- Thank you received: 236

ACMOC Membership Benefits
- FREE quarterly magazine filled with content about antique Caterpillar machines
- FREE classified listings
- ACMOC store discounts and specials
- Full Bulletin Board Access
- Marketplace (For Sale/Wanted)
- Technical Library
- Post attachments
$44 /year ELECTRONIC
$60 /year USA
$77 /year International
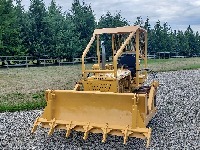
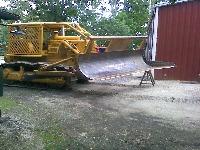
D2 going in the shop
Steel for the cylinder mounts will be in tomorrow
Please Log in or Create an account to join the conversation.
I used the d4 for a guide to build the rear mount and just copied the d2 front mount and brace.
The mounts seem super strong and I dont think there is going to be any problems
Please Log in or Create an account to join the conversation.
Please Log in or Create an account to join the conversation.
only thing I see that you may wish to improve if the mounts keep moving on the track frame side faces would be the above mentioned bolts.
Cat use a tapered seat special head bolt to try and keep the blade cylinder mount from moving on the track frame side face.
Alas I do not have any Parts Books to give you the numbers. I cannot recall if there were any dowels fitted as well--there may have been stop plates welded to the T/F to help stop forward and some for rearward movement of the mounts too.
Great job of fabricating you have done just the same, time may tell if you need to upgrade to add the retention stops etc. or not, but at least now you are aware of some mods to help if needed.
Cheers,
Eddie B.
Please Log in or Create an account to join the conversation.
Cheers,
Neil
Pittsford, NY
Please Log in or Create an account to join the conversation.
Hydraulic system next!!!
Please Log in or Create an account to join the conversation.
Please Log in or Create an account to join the conversation.
That tired old machine has seen it better days! Good Luck with the restoration! Only going to take lots of love and money.
Cat salesman here in days gone by, "Pick up the radiator cap and run a new one under it"
Radiator cap needed for repair then I am in need of a new 955 to drive underneath it. LOL
Cabin fever
ACMOC Member
Traxcavator: 60, 955E 12A08263; 57, 955C 12A04040; 57, 955C 12A03563.
1954 No.12 Diesel Motor Grader 8T14777.
1945 No.12 Diesel Motor Grader 9K9320; 9K9982
1944-46 Adams Model No. 311 Motor Grader
1943 IH T9 Tractor w/ Bullgrader Blade
Please Log in or Create an account to join the conversation.
I dont know how the purists are going to like it but I put a little exhaust stack on the starter motor exhaust. I've seen a couple done like this and really like the look.
I have a little finish welding to do but I think all of the major fabrication is done.
I made a trade deal to have sandblasting done so I will be disassembling everything and it will go to the sandblasted. I plan to coat everything with a yellowish epoxy primer and will be using the single stage urethane paint. Should be some kind of yellow by summers end!!
Please Log in or Create an account to join the conversation.
ACMOC
Antique Caterpillar Machinery Owners Club
1115 Madison St NE # 1117
Salem, OR 97301
support@acmoc.org
"I became a member recently because the wealth of knowledge here is priceless."
- Chris R
"I also joined a year ago. had been on here a couple of times as a non-member and found the info very helpful so I got a one year subscription (not very expensive at all) to try it out. I really like all the resources on here so I just got a three year. I think its a very small price for what you can get out of this site."
- Jason N


