
- Posts: 25
- Thank you received: 2

ACMOC Membership Benefits
- FREE quarterly magazine filled with content about antique Caterpillar machines
- FREE classified listings
- ACMOC store discounts and specials
- Full Bulletin Board Access
- Marketplace (For Sale/Wanted)
- Technical Library
- Post attachments
$44 /year ELECTRONIC
$60 /year USA
$77 /year International
- Forum
- Antique Caterpillar Machinery Owners Club
- DISCUSSION
- Cat D7E (SN: 47A5563) - Looking to add 24v alternator
Cat D7E (SN: 47A5563) - Looking to add 24v alternator
1 month 1 day ago #255599
by ksliger
Cat D7E (SN: 47A5563) - Looking to add 24v alternator was created by ksliger
Greetings,
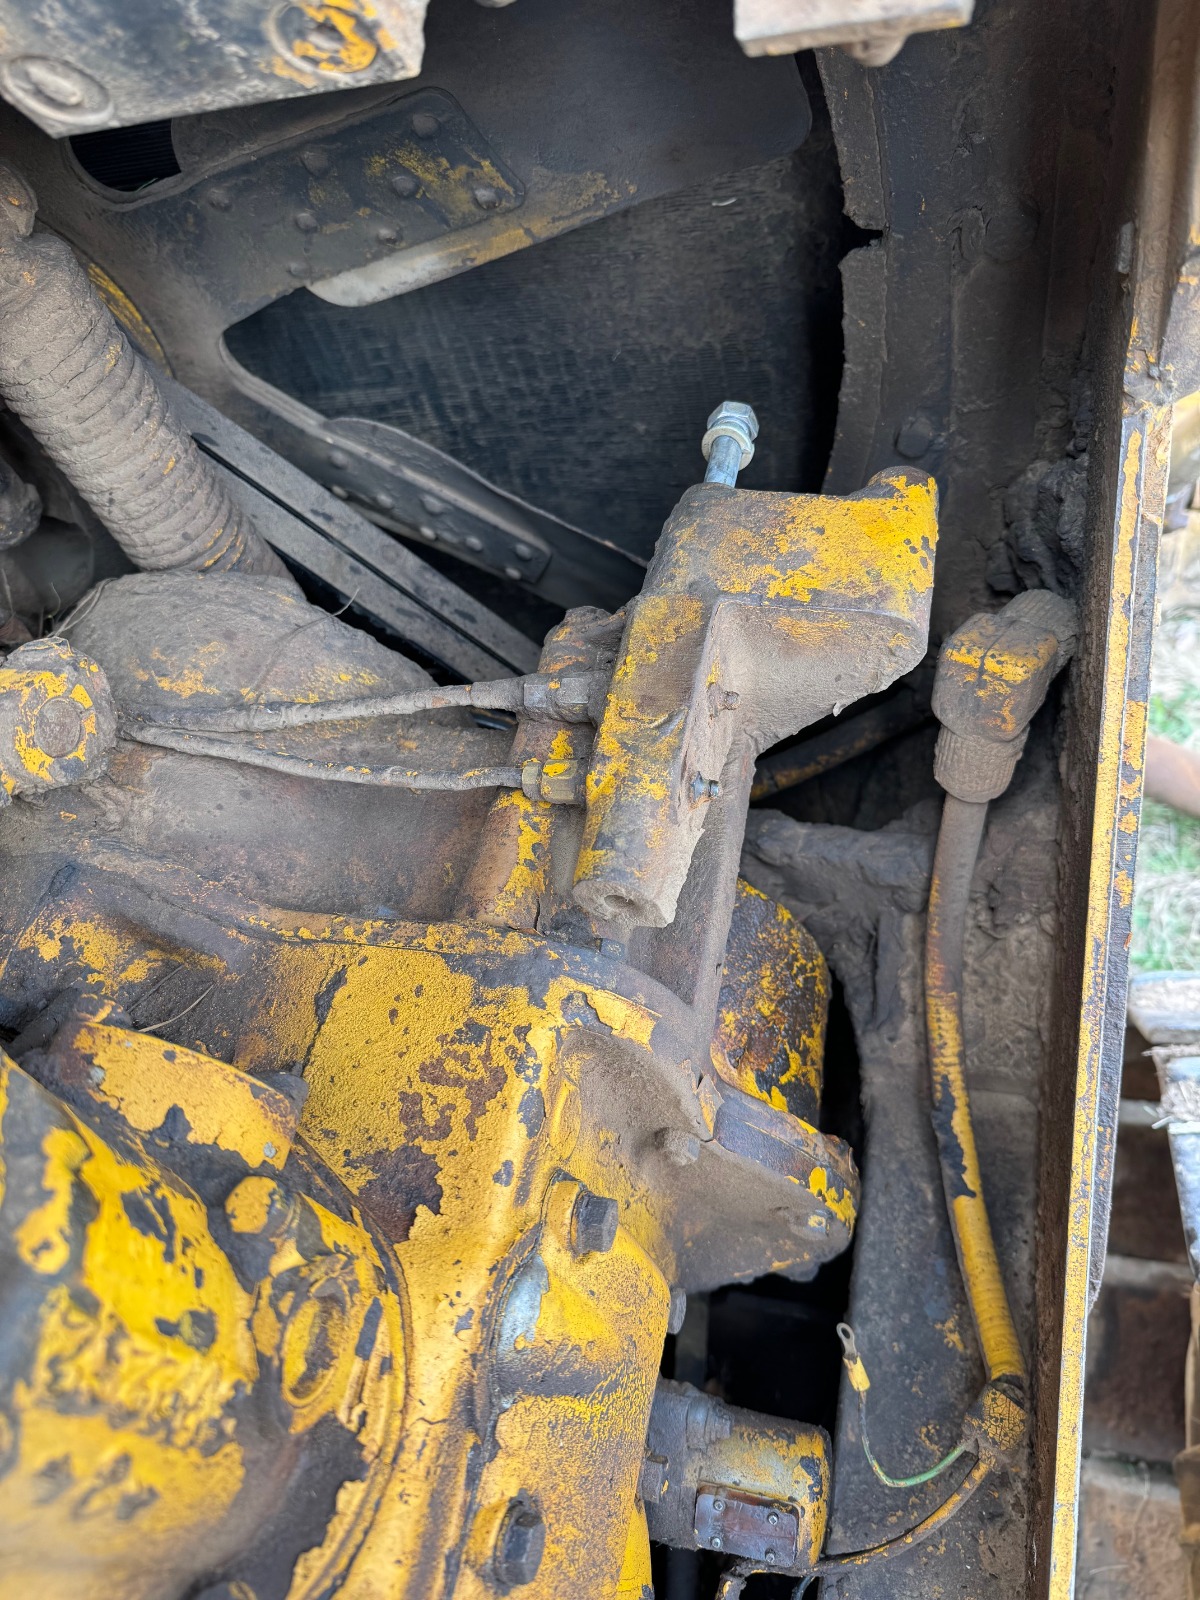
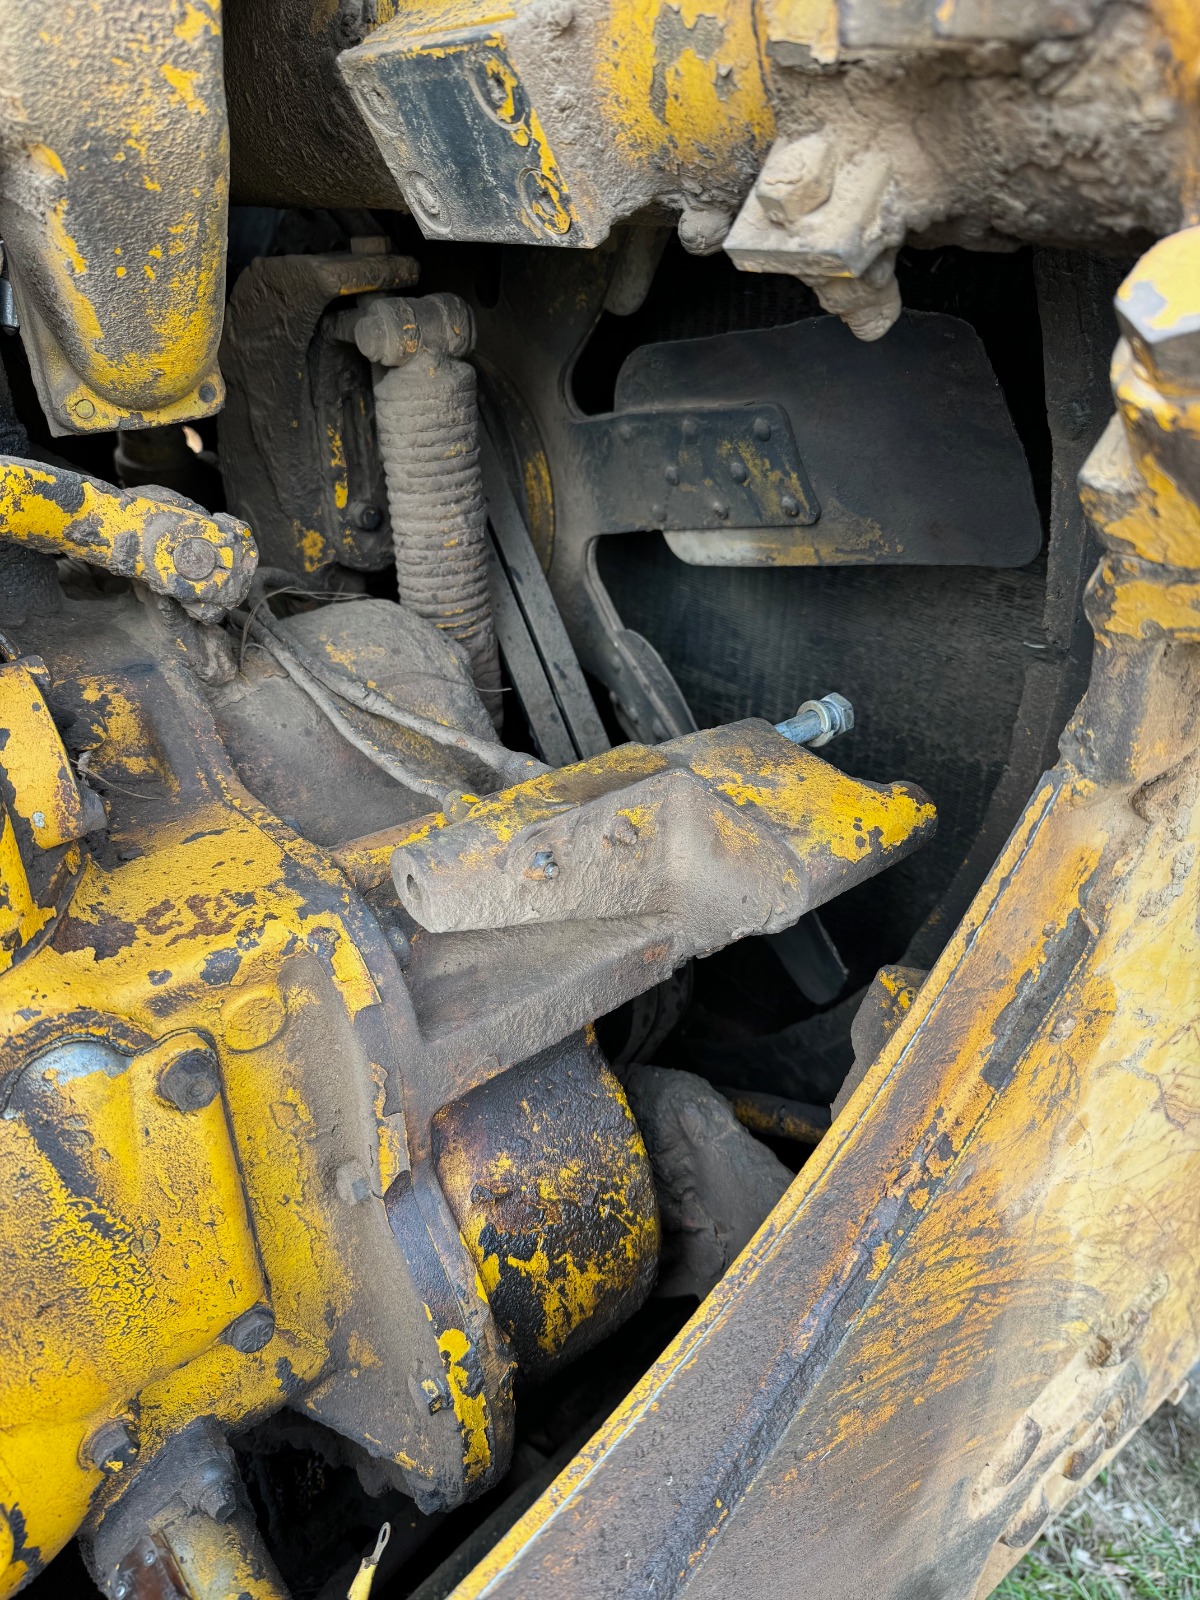
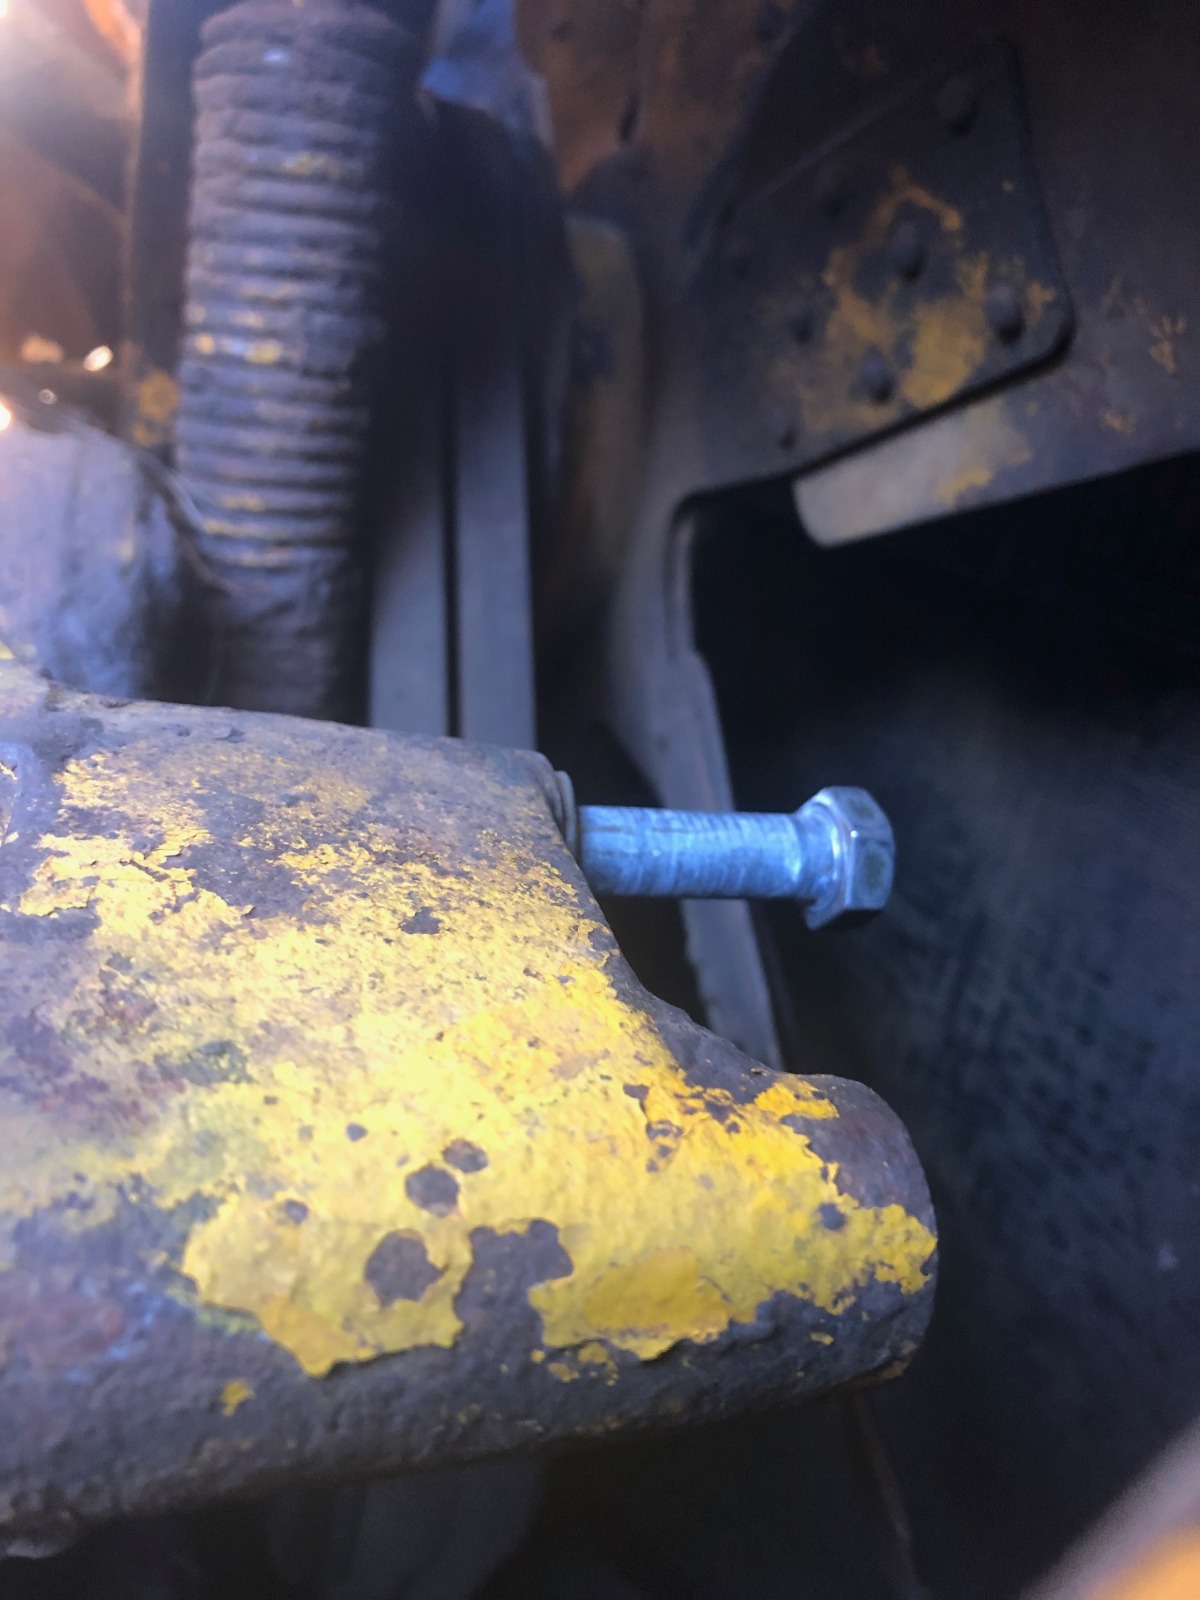
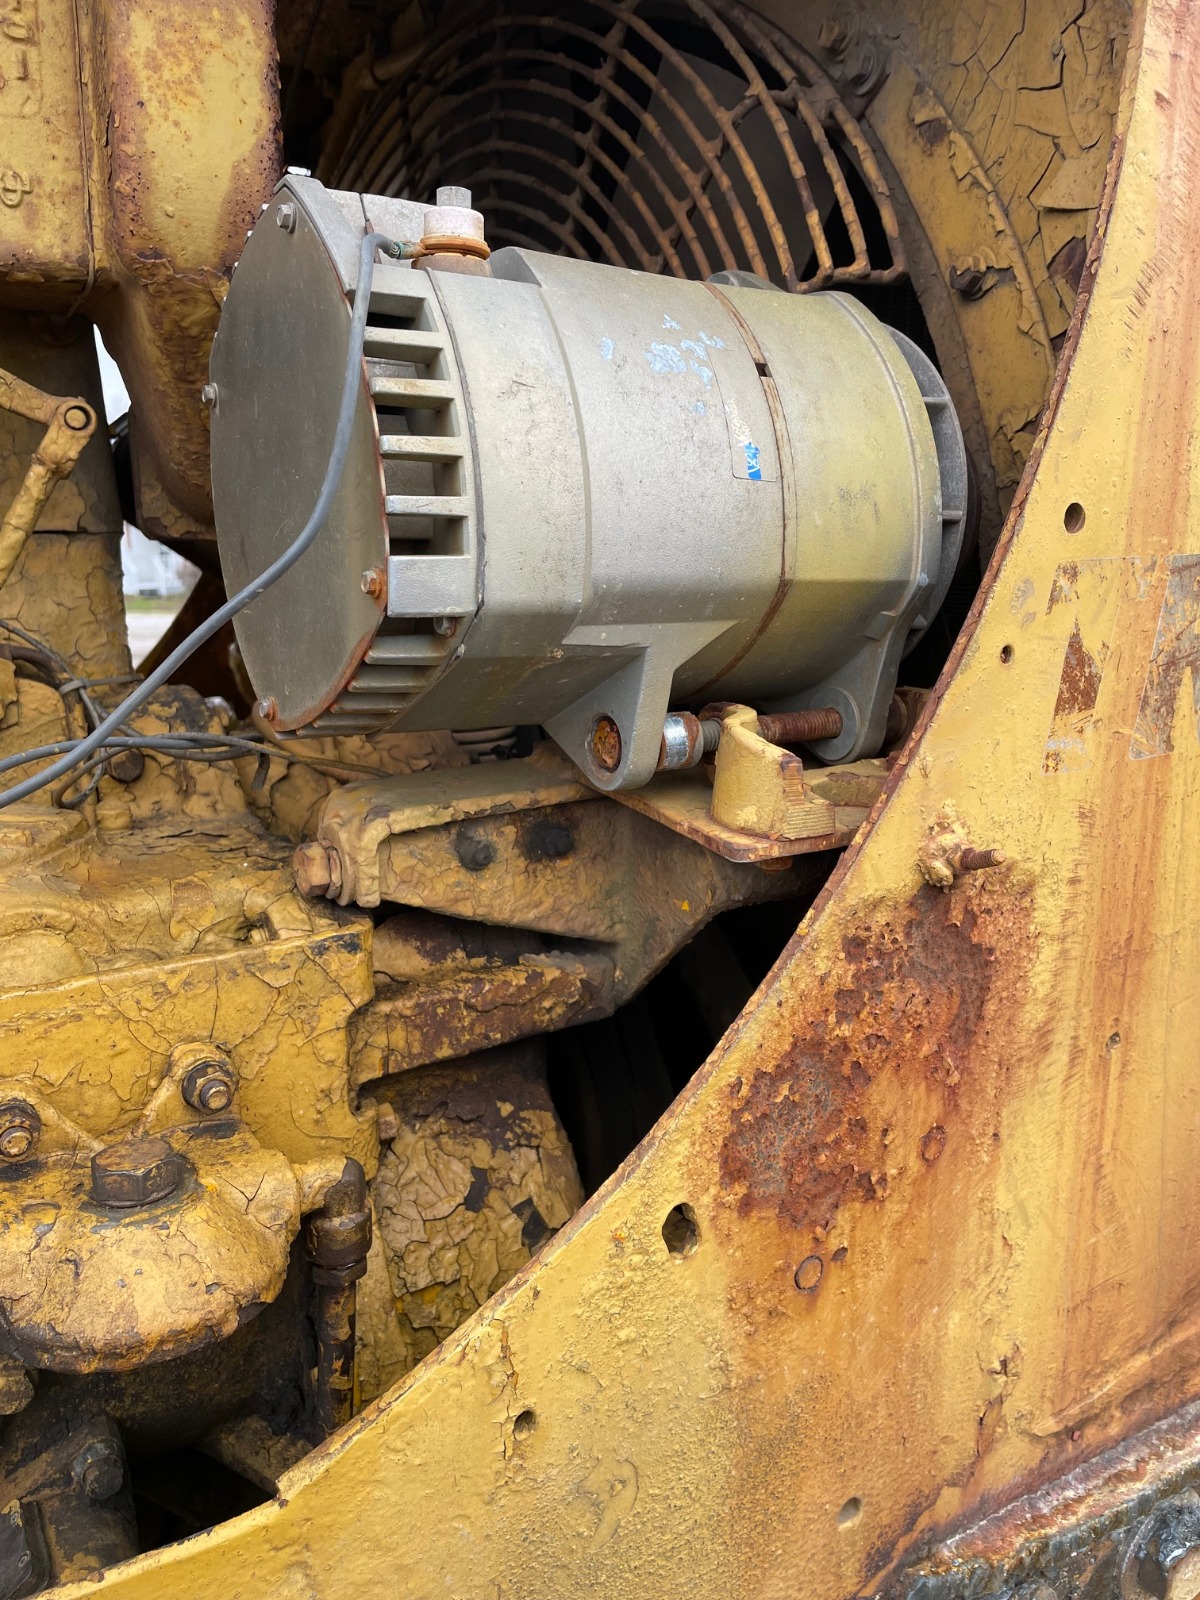
I have an old Cat D7E (SN: 47A5563) and I'm looking to add a 24v alternator. It has two large group 4D 12v batteries wired in series for 24v. It has a 24v starter. I have a 24v trickle charger on it but I'm looking for something that can help charge the batteries more quickly. I am attaching pictures that show where it looks like the old generator was installed. I would appreciate any info or suggestions on the best way to get a 24v alternator mounted. Also, looking for good options on what alternator to go with.
Thanks in advance!
Attachments:
Please Log in or Create an account to join the conversation.
1 month 1 day ago #255600
by ksliger
Replied by ksliger on topic Cat D7E (SN: 47A5563) - Looking to add 24v alternator
Here is a few more pictures:
Attachments:
Please Log in or Create an account to join the conversation.
- Old Magnet
-

- Offline
- Platinum Boarder
- Member
Less
More
- Posts: 16541
- Thank you received: 724
1 month 1 day ago #255601
by Old Magnet
Replied by Old Magnet on topic Cat D7E (SN: 47A5563) - Looking to add 24v alternator
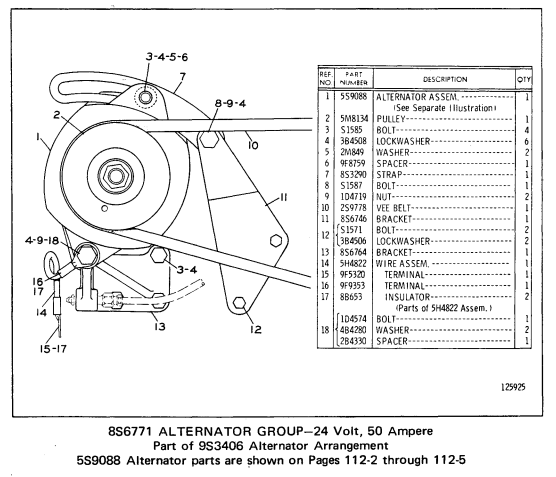
Google search a 5S9088 original type alternator.
Please Log in or Create an account to join the conversation.
1 month 1 day ago - 1 month 1 day ago #255602
by ksliger
Replied by ksliger on topic Cat D7E (SN: 47A5563) - Looking to add 24v alternator
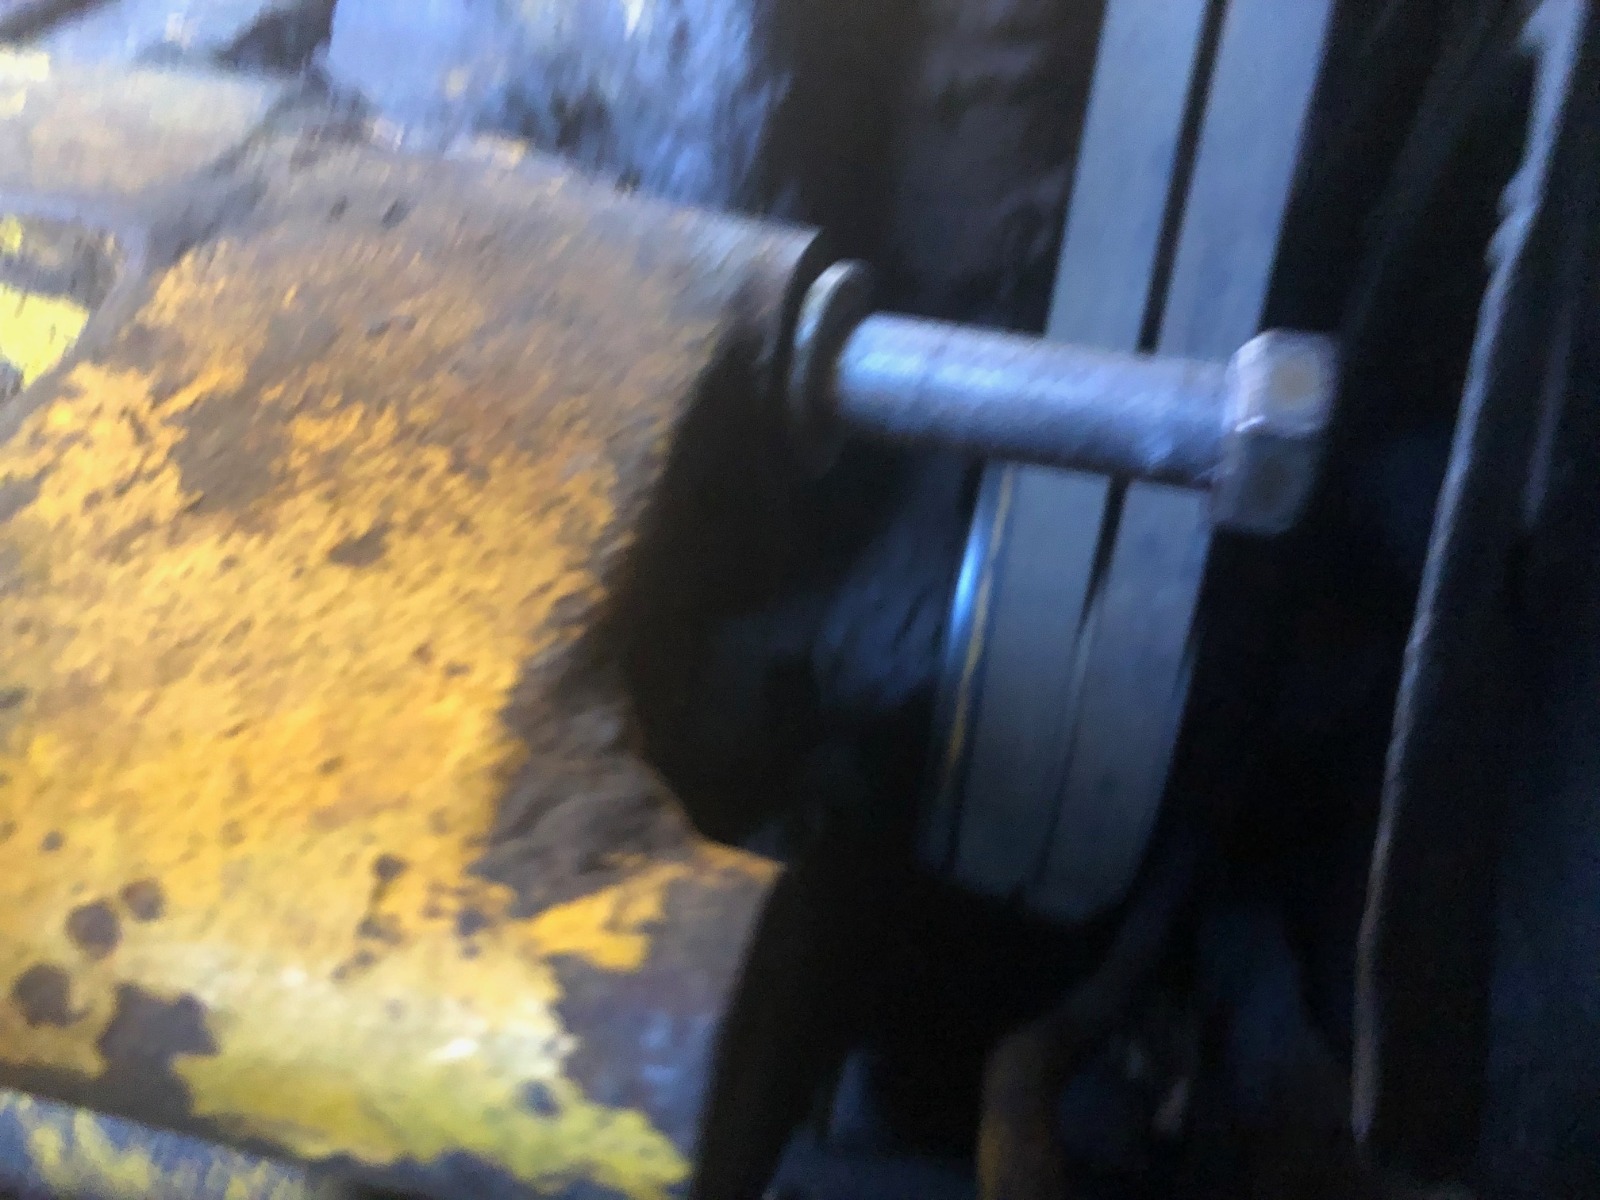
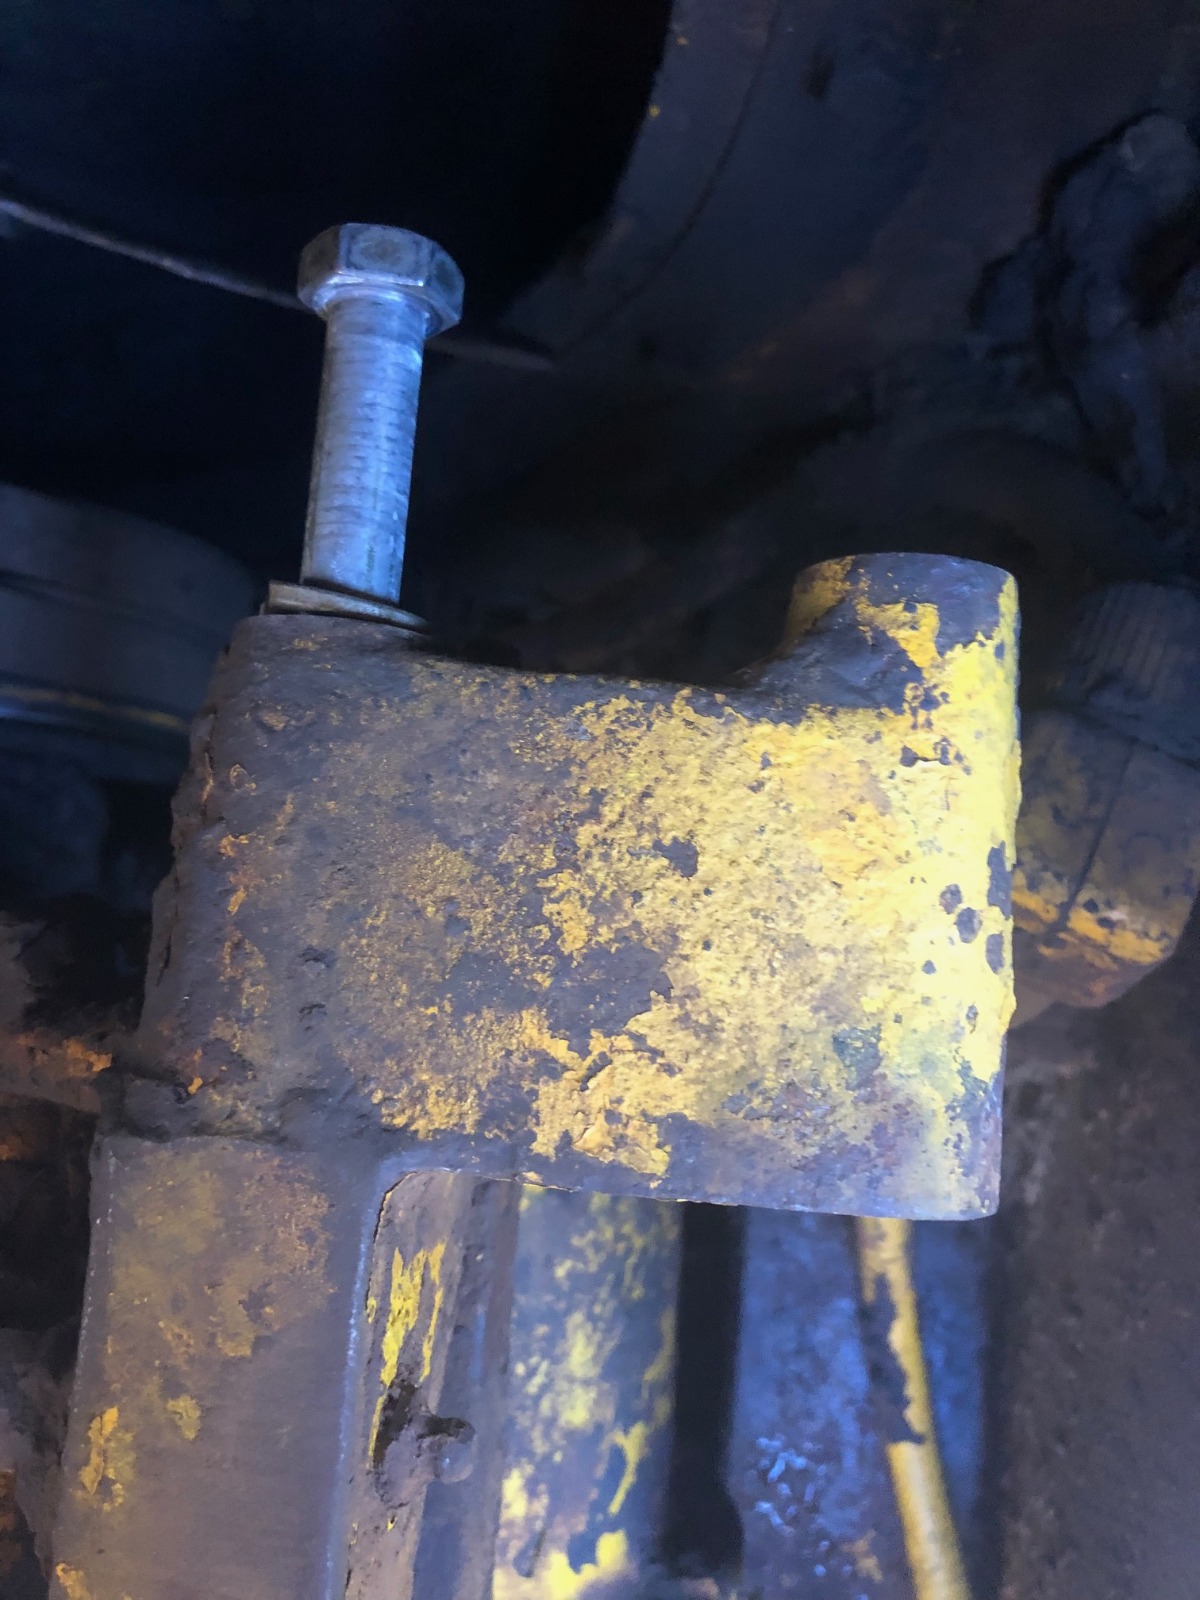
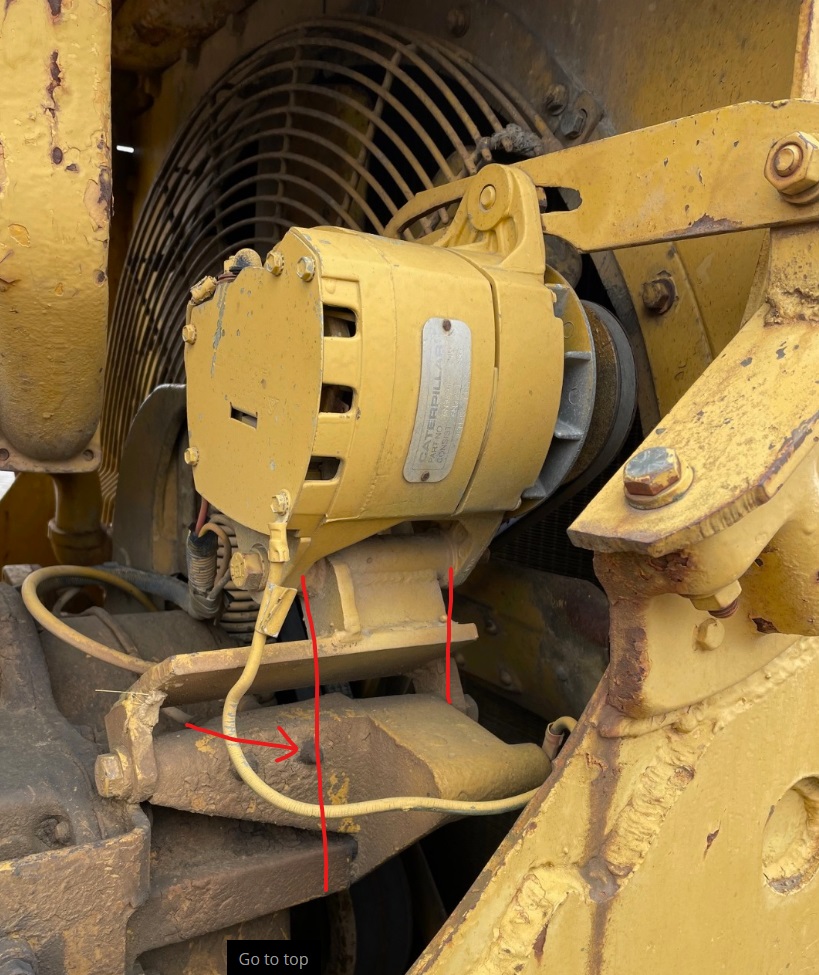
Thank you, good to see there are lots of options. I can see how the bottom would mount right up but I don't see anywhere to mount the top adjustment bracket as seen in the parts manual. Any suggestions for how to go about that? I also don't have the top bracket as seen in the picture. Does anyone have any good pictures of one that is mounted?
Attachments:
Last edit: 1 month 1 day ago by ksliger.
Please Log in or Create an account to join the conversation.
4 weeks 1 day ago #255663
by ksliger
Replied by ksliger on topic Cat D7E (SN: 47A5563) - Looking to add 24v alternator
I met a nice gentleman who is parting out some old D7 pipe layers. He shared some pictures of how others have adapted an alternator in these later SN range D7E's. I'm sharing this in case anyone is wondering how to do it like I was. From the look of it, each of these has some sort of fabricated base mounting bracket that the alternator sits on. The parts manual lists this part as 8S6764 as seen in the diagram I posted earlier. It is item (13) in this diagram. Of course, this part is no longer available from Cat, and due to the relatively low number produced in this high SN range, there are none to be found elsewhere, at least not easily. Also seen in the parts book diagram is a bracket (11) and adjustment arm strap (7). As seen in the pictures, others have adapted different methods to replace these parts with a fabricated variation. My plan is to purchase the needed parts from the gentleman I mentioned, but I hope this info may help others as well.
Attachments:
The following user(s) said Thank You: Deas Plant., seiscat
Please Log in or Create an account to join the conversation.
1 week 2 days ago - 1 week 2 days ago #256138
by ksliger
Replied by ksliger on topic Cat D7E (SN: 47A5563) - Looking to add 24v alternator
Update:
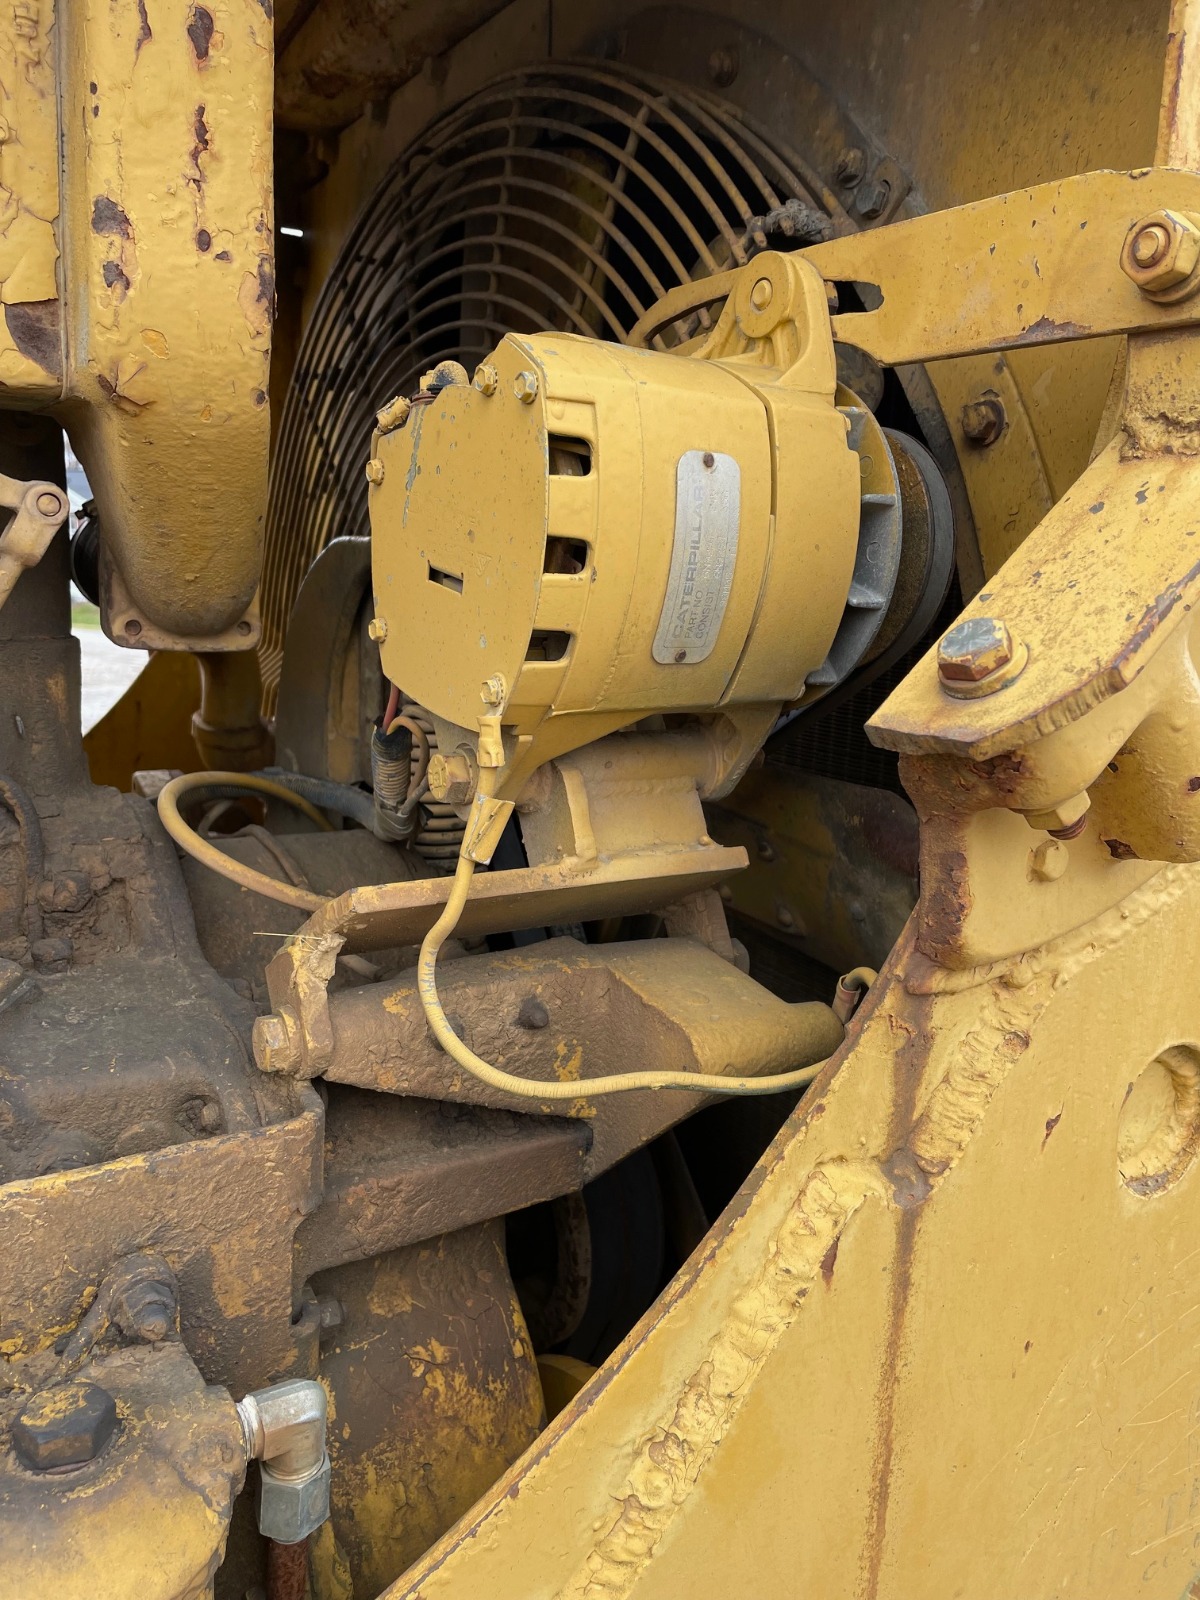
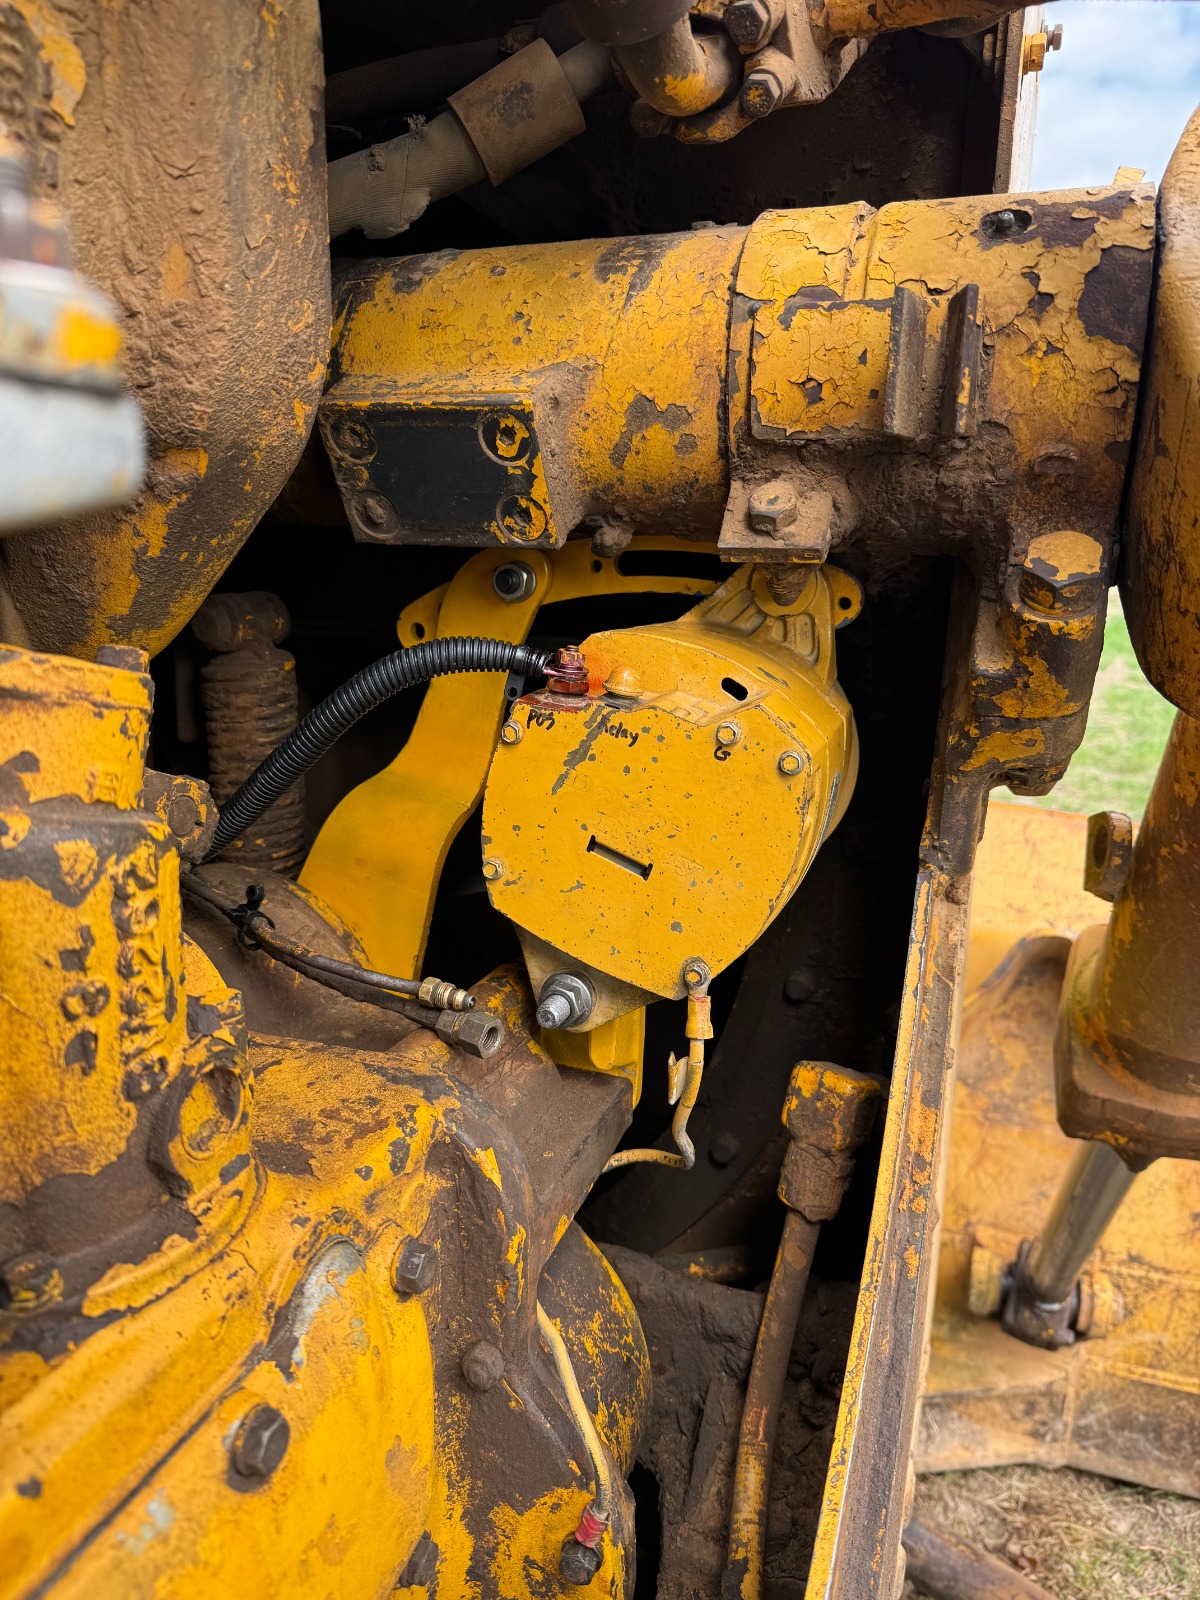
I got an alternator mounted up and working on the old D7E. I learned a lot in the process and wanted to share the info for anyone else looking to do the same. I got an alternator from a gentleman that disassembles scrap D7's and sells the parts. I will edit this post and link his forum name here once I get it. He is very knowledgeable and has an amazing selection of parts. The alternator is a 6N9294. This is a newer one than the one the parts book calls for. Upon doing a little research, I was able to determine that this is a Delco Remy 20SI. This alternator comes in several different amperage ratings. This one is 35 amps. The parts book calls for an alternator with part number 5S9088. I believe this is actually a Delco Remy 33SI. Both are medium/heavy-duty alternators and the 20SI is just a little smaller with less amperage. The smaller size of the 20SI form factor was a better fit for my situation.
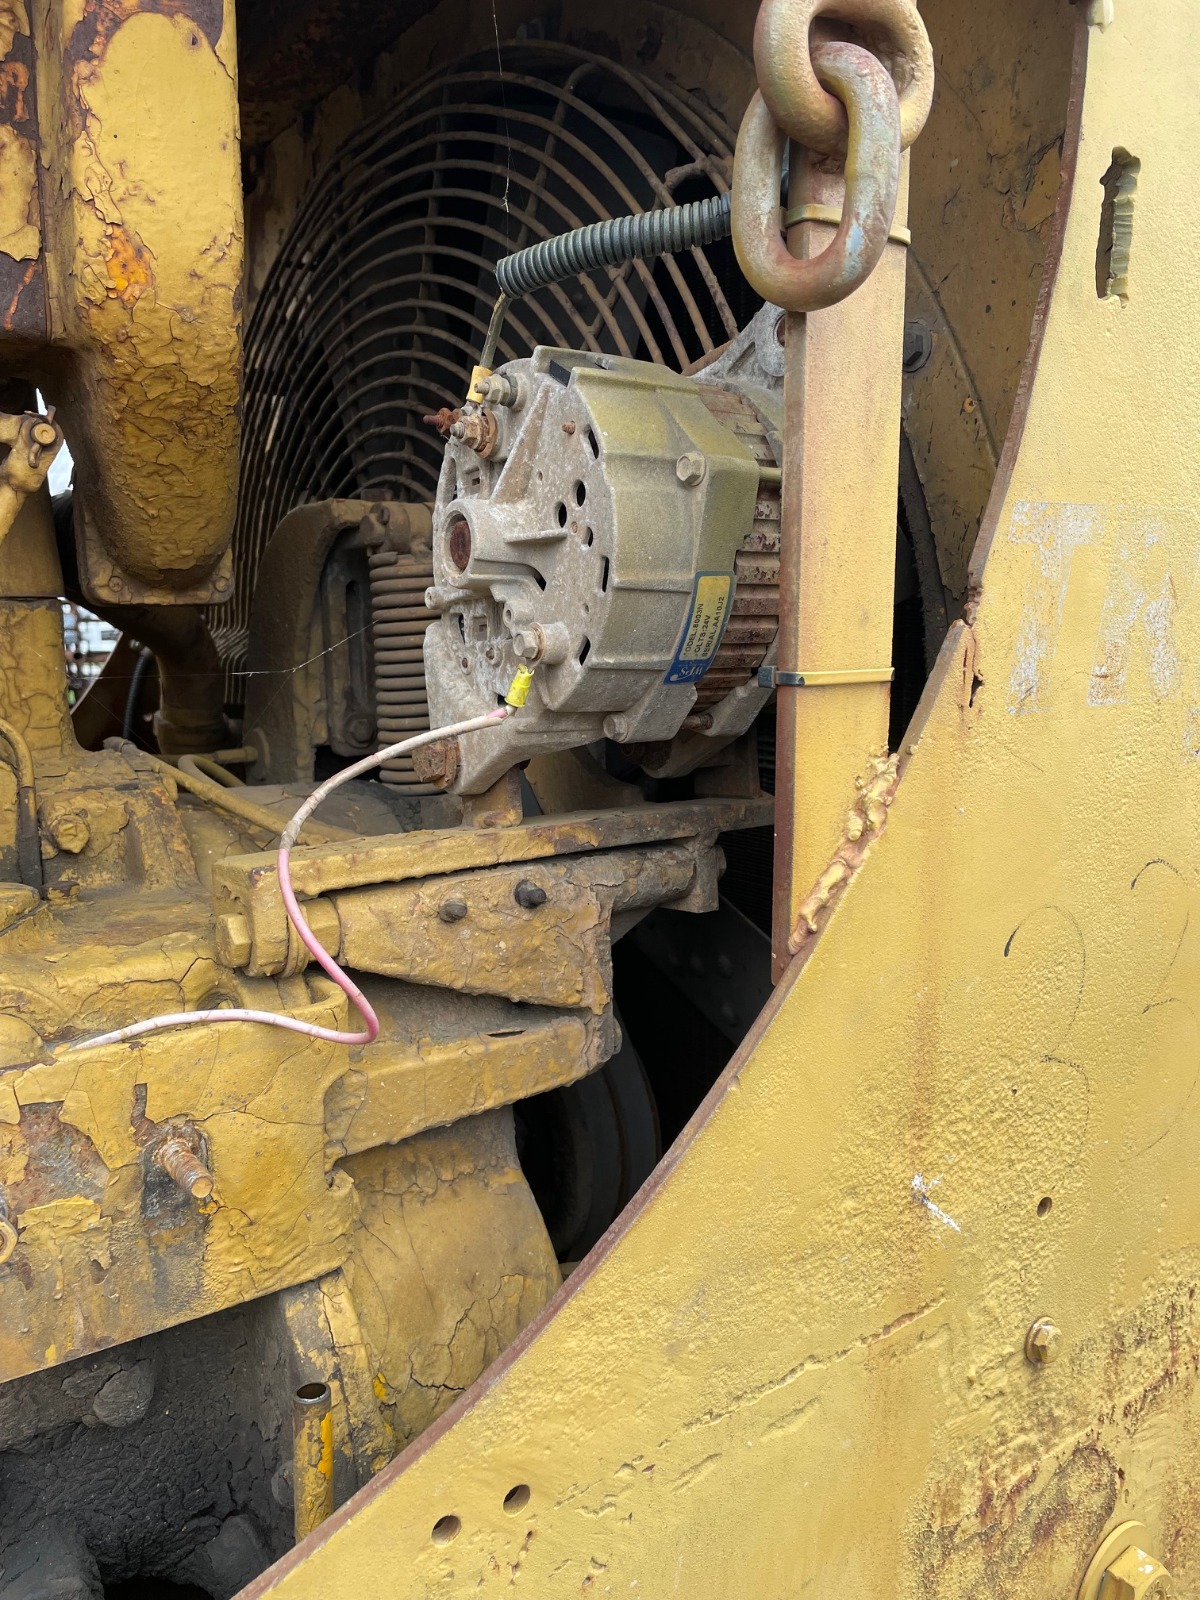
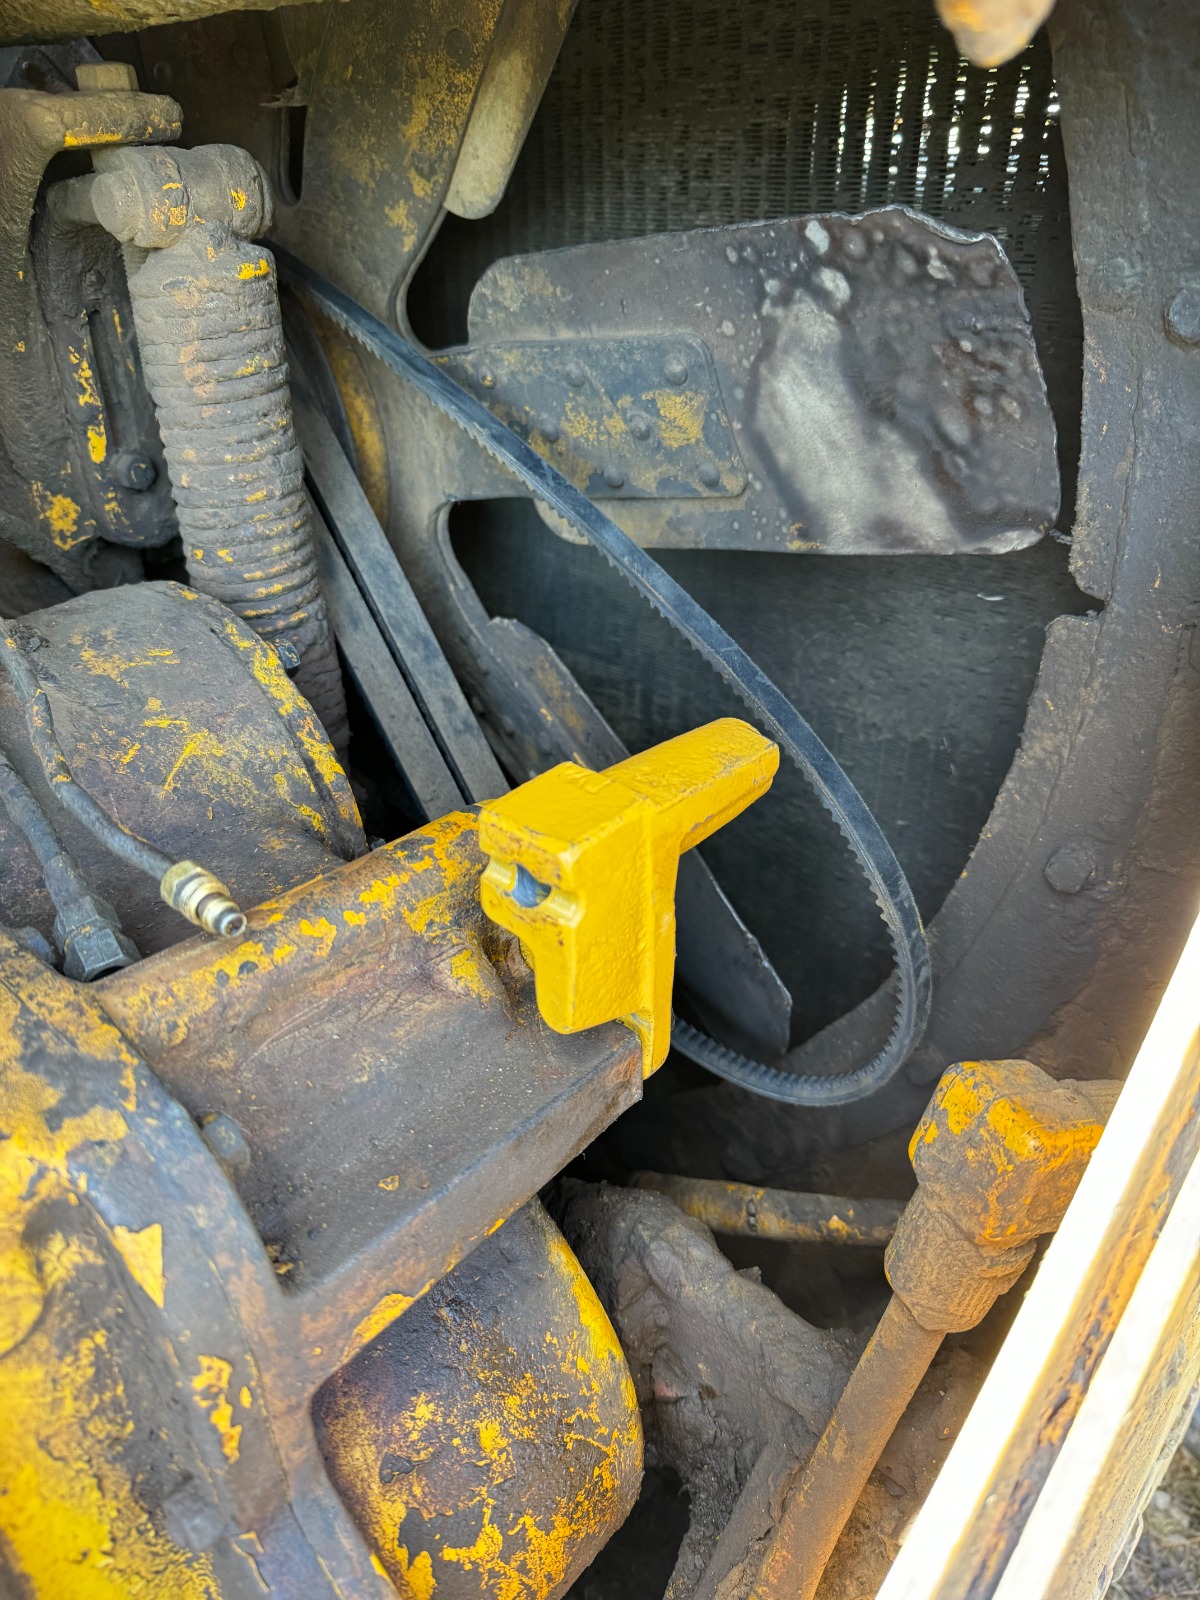
To get the alternator to fit, the original mounting bracket, seen below, had to be modified. Thankfully, the gentleman I got the alternator from also had one of these mounting brackets that had already been modified. Essentially, a straight cut will need to be made that goes right through the center of the zerk fitting in the picture below. This allows the alternator to sit lower than seen in the picture with the red lines. See the next pictures for the modified mounting piece and the final configuration. FYI, the zerk fittings for the remote grease points can just be relocated. I'm happy to share how I did this if anyone is interested.
Once the alternator was all mounted up, it was a simple matter of just running a wire to the positive post on the starter solenoid. This effectively joins the alternator output to the positive terminal of the battery. The alternator also needs to be connected to the frame of the D7 for proper grounding, as seen in the picture.
Please let me know if anyone has questions.
I got an alternator mounted up and working on the old D7E. I learned a lot in the process and wanted to share the info for anyone else looking to do the same. I got an alternator from a gentleman that disassembles scrap D7's and sells the parts. I will edit this post and link his forum name here once I get it. He is very knowledgeable and has an amazing selection of parts. The alternator is a 6N9294. This is a newer one than the one the parts book calls for. Upon doing a little research, I was able to determine that this is a Delco Remy 20SI. This alternator comes in several different amperage ratings. This one is 35 amps. The parts book calls for an alternator with part number 5S9088. I believe this is actually a Delco Remy 33SI. Both are medium/heavy-duty alternators and the 20SI is just a little smaller with less amperage. The smaller size of the 20SI form factor was a better fit for my situation.
To get the alternator to fit, the original mounting bracket, seen below, had to be modified. Thankfully, the gentleman I got the alternator from also had one of these mounting brackets that had already been modified. Essentially, a straight cut will need to be made that goes right through the center of the zerk fitting in the picture below. This allows the alternator to sit lower than seen in the picture with the red lines. See the next pictures for the modified mounting piece and the final configuration. FYI, the zerk fittings for the remote grease points can just be relocated. I'm happy to share how I did this if anyone is interested.
Once the alternator was all mounted up, it was a simple matter of just running a wire to the positive post on the starter solenoid. This effectively joins the alternator output to the positive terminal of the battery. The alternator also needs to be connected to the frame of the D7 for proper grounding, as seen in the picture.
Please let me know if anyone has questions.
Attachments:
Last edit: 1 week 2 days ago by ksliger.
Please Log in or Create an account to join the conversation.
- Forum
- Antique Caterpillar Machinery Owners Club
- DISCUSSION
- Cat D7E (SN: 47A5563) - Looking to add 24v alternator
Time to create page: 0.167 seconds
ACMOC
Antique Caterpillar Machinery Owners Club
1115 Madison St NE # 1117
Salem, OR 97301
cat@acmoc.org
Become a Member!
"I became a member recently because the wealth of knowledge here is priceless."
- Chris R
"I also joined a year ago. had been on here a couple of times as a non-member and found the info very helpful so I got a one year subscription (not very expensive at all) to try it out. I really like all the resources on here so I just got a three year. I think its a very small price for what you can get out of this site."
- Jason N