
You are correct, the springs and rollers along with the ramps in the cover assy. is what is supposed to hold the governor in position. Not a whole lot you can do with these and was pretty much a bum design used in a lot of tractors of the era. If the ramps are badly worn to where the rollers wont grip the recommendation is to change out the cover and replace any worn parts. A light oil during assembly is all that is recommended as far as lubrication.
So does the wear occur to the inside of the cover or to the cam or both? Do I just replace all the guts? As a side note, when I took it apart the gasket fell apart so I put it back together without it. Tightened the bolts and it locked the lever. Backed them off enough to let lever work but still tight and now holds good. I know it's not the right way to do it but works for the time being.
So does the wear occur to the inside of the cover or to the cam or both? Do I just replace all the guts? As a side note, when I took it apart the gasket fell apart so I put it back together without it. Tightened the bolts and it locked the lever. Backed them off enough to let lever work but still tight and now holds good. I know it's not the right way to do it but works for the time being.
The throttle control hub needs NO lubrication just needing to be clean and dry, there is a gasket within the bolt up face that needs to be in place for weather protection also gap spacing, the 2 rollers and 3 springs also need to be in good order, a cable tie is a great help in the assembly of the unit with any wear marks on the outer hub face only needing the hub rotating 90deg to put a new face within the working scope of the control, the hub is a very good item and works very well it just needs a small bit of care now and then, the new replacement cost from CAT will make your eyes mist up some but all the parts are low cost (Rollers Springs Gasket) tctractors
My D4D was acting the way you describe I got new springs for it. I was surprised how compressed the old one were compared to new. The new springs cured mine, if your rollers have flat spots then replace them as well.
Good luck
Bruce P
Thank you all for the advice. I will take another look at it and probably put some new parts in it. I'm curious how to use a zip tie in assembly. It was a challenge for these old sausages to get it back together.
Here is the typical spiel for the governor control...
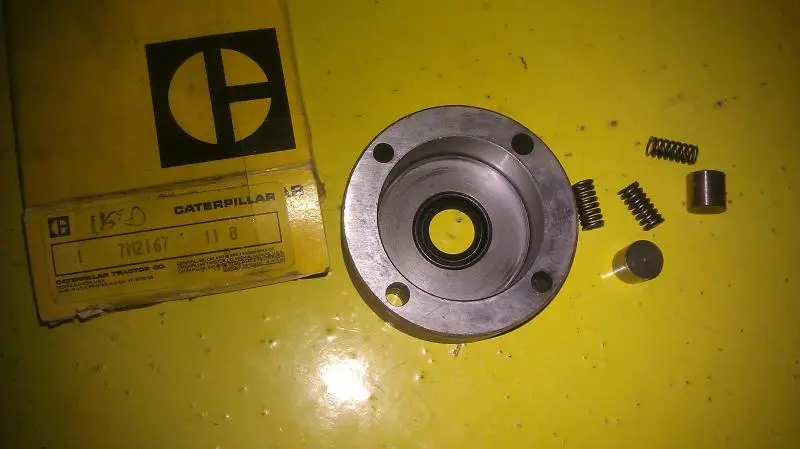
This throttle control item is used on many bits of CAT equipment, the picture O.M. has posted looks to be the control fitted to the D6C tractor, I place the 2 rollers and 2 springs into their location on No3 and secure them with a Zip Tie, then add the single spring to the top face of No3, then fit the small spindle section down to link up with this spring feeding on the outer cover that has the 4 bolts in, once the cover is roughly half way down the 2 rollers pushing the zip tie lower, I snick out the zip tie pressing the control cover into its location taking care not to damage the gasket, this is a common task for me to undertake so I have had springs and rollers flying all directions, so I use a zip tie to strip them and re-assemble the unit with a lot more ease.
tctractors
I have a fix for those touchy governors.
I replace the governor arm linkage pivot, cut it off, jig it up and braze a shaft collar in its place. Install a drill bushing in the hole and replace the clevise pin with a bolt of proper shank length and thread (stainless steel) along with a locking nut. Then dial in what ever added friction is needed by tightening the bolt and squeezing the yoke.


Our channel highlights machines from the earliest Holt and Best track-type tractors, equipment from the start of Caterpillar in 1925, up to units built in the mid-1960s.
Antique Caterpillar
Machinery Owners Club
1115 Madison St NE # 1117
Salem, OR 97301
Terms & Privacy
Website developed by
AdCo
"I became a member recently because the wealth of knowledge here is priceless."
-Chris R