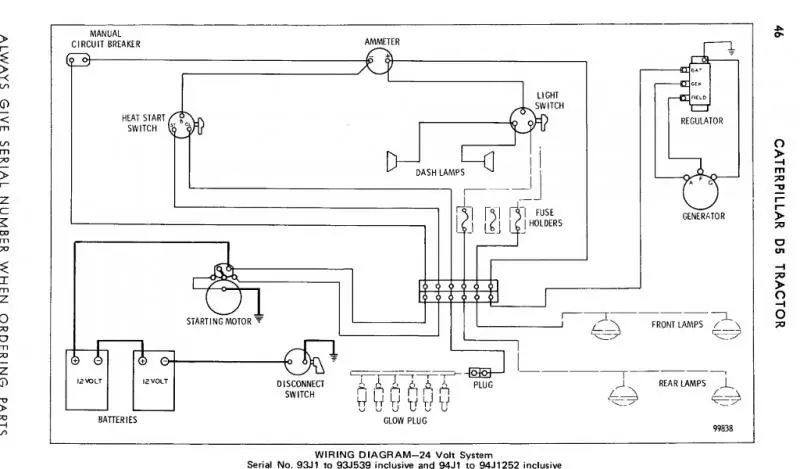
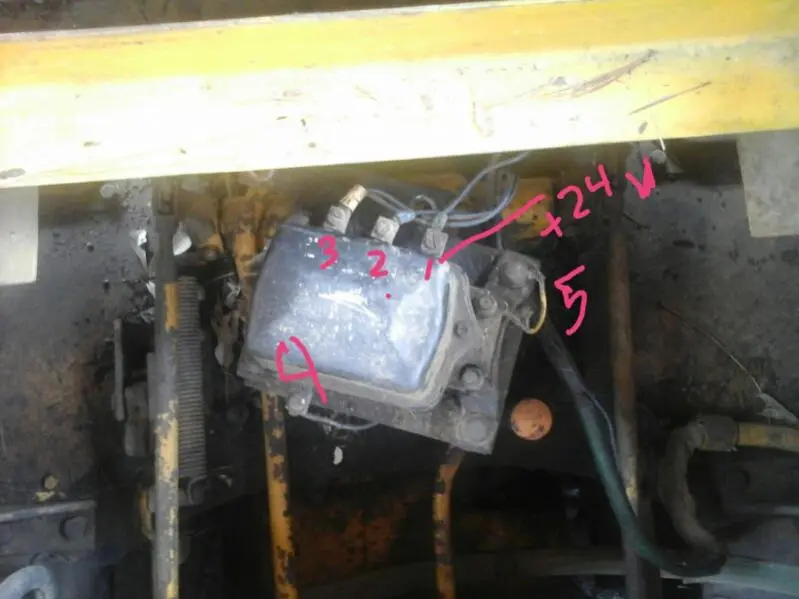
Bat is 1
Arm/GEN is 2
FLD is 3
Ground is 4-5 bypassing the rubber isolators
Have you polarized the generator?
Neil is right. If you remove the screws and clips holding the wires on, the terminals on the regulator are stamped. Never a bad idea to clean all connections.
That’s the usual procedure for DELCO units.
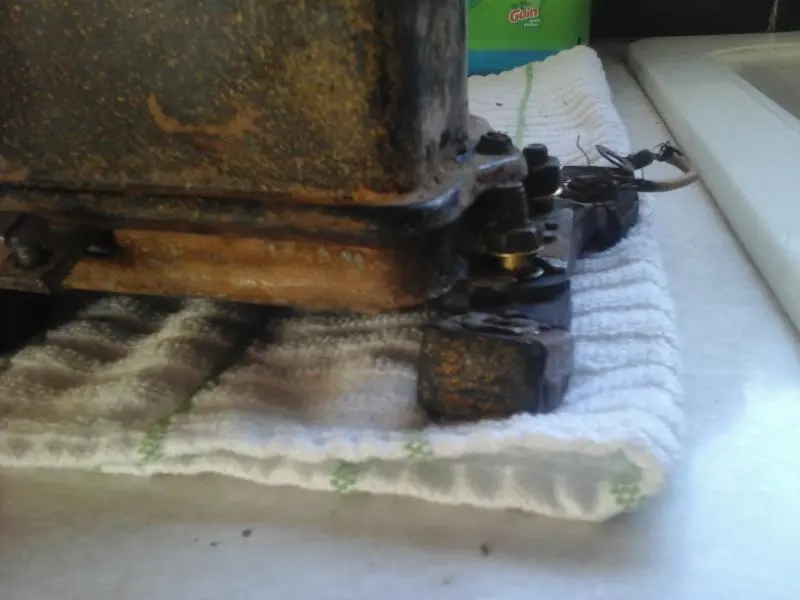
I got it off and cleaned it. Terminals are indeed stamped. Under the cover looked perfect. What's the importance of the regulator being suspended by rubber? The little rubber bushings are gone. With a ground wire coming out the back is the little frayed ground wire needed also?
[attachment=59192]20200612_182925.jpg[/attachment]
Yes ground wire is needed too.
The vibration is why the regulator is almost never mounted directly on the engine or generator itself. The regulators inside vibrate as part of their normal function, external vibration can’t help!
[quote="ccjersey"]Yes ground wire is needed too.
The vibration is why the regulator is almost never mounted directly on the engine or generator itself. The regulators inside vibrate as part of their normal function, external vibration can’t help![/quote]
I got the regulator mounted again on the rubber isolation pads. Before I connected everything I wanted to check the Arm and Field wires from regulator to generator. I found all terminals had a short to ground. I then proceeded to the generator to find the ARM and FLD terminals grounded there also. Disconnecting the wires indicated no short to ground in the wires. In short I have the generator off now and it shows continuity across all 3 generator terminals. I guess I need to open it up as that doesn't sound right.


Our channel highlights machines from the earliest Holt and Best track-type tractors, equipment from the start of Caterpillar in 1925, up to units built in the mid-1960s.
Antique Caterpillar
Machinery Owners Club
1115 Madison St NE # 1117
Salem, OR 97301
Terms & Privacy
Website developed by
AdCo
"I became a member recently because the wealth of knowledge here is priceless."
-Chris R