Grease the water pump bearings and go ahead and move it. The leak should be coming from a weep hole instead of through the bearings and out around the shaft. The weep hole may be plugged with hardened dust and then the coolant has to go through the bearings.
Usually not too hard to replace the seal if you have a bronze impeller. The cast iron ones can be stuck hard enough to break if you put a puller on the outer edge. Using a steering wheel puller with bolts threaded into the impeller works better. Protect the impeller shaft threads from damage!
Thank You ccjersey for the advise and info. I will most likely be looking for some more help once I get a chance to take things apart.
Bruce
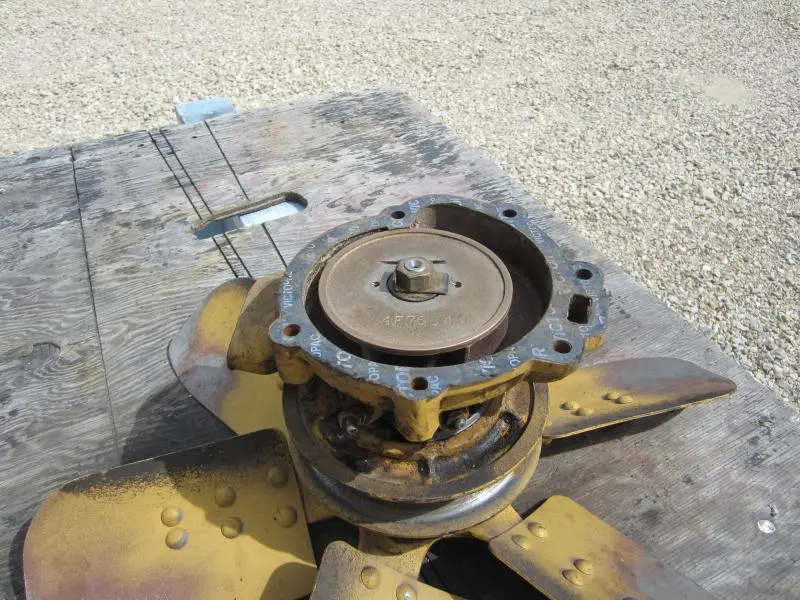
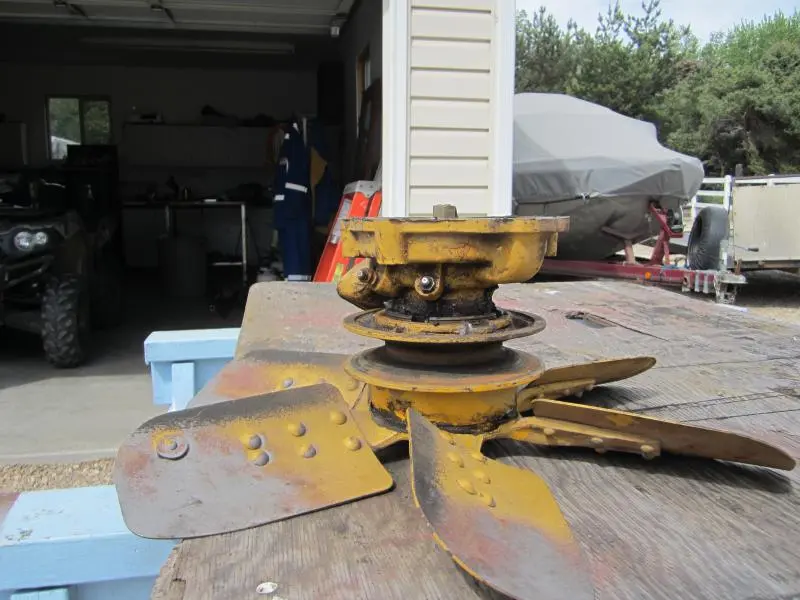
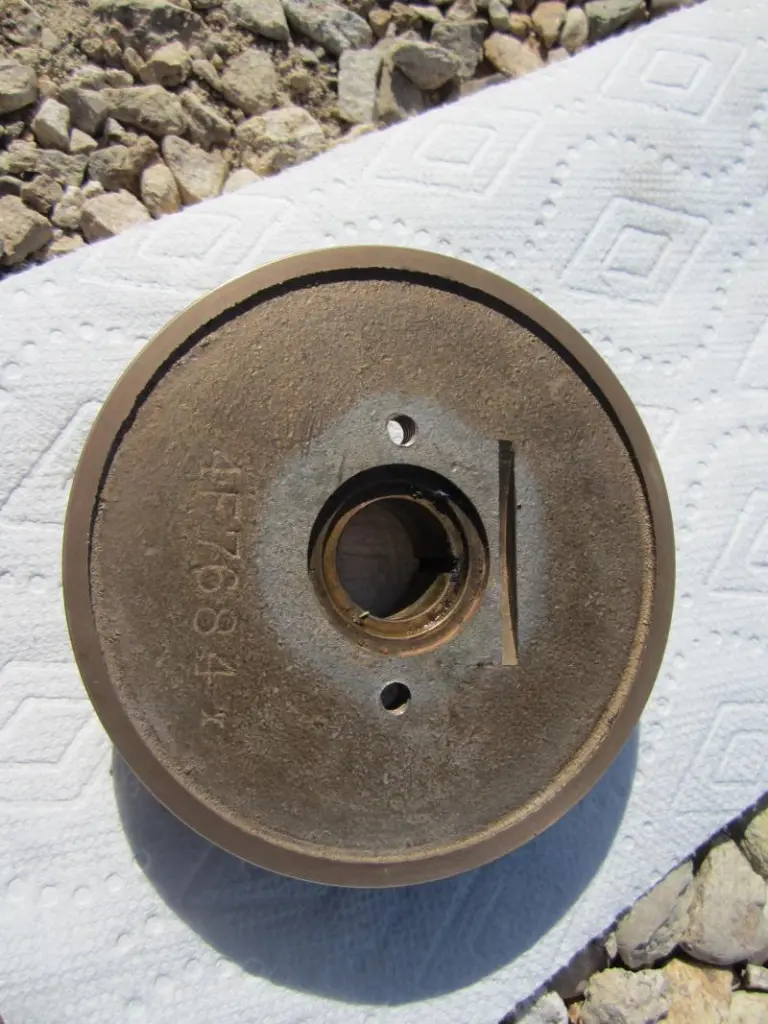
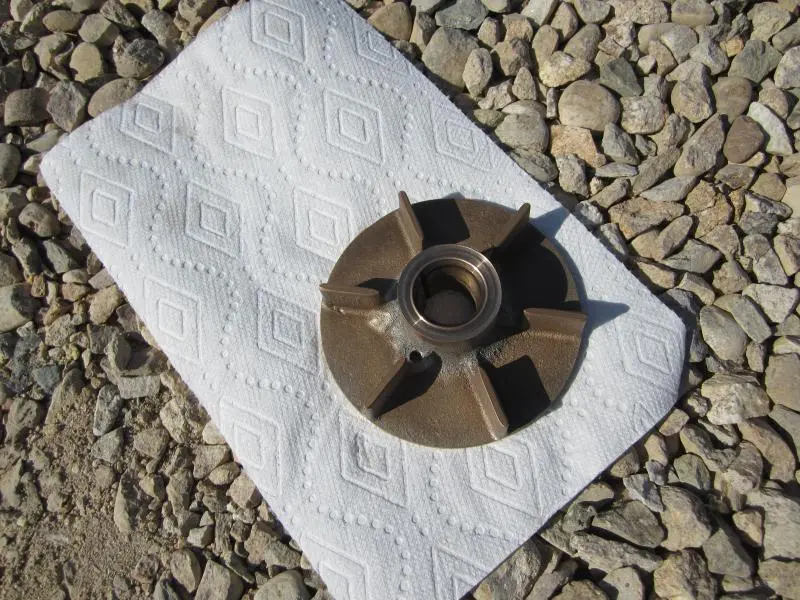
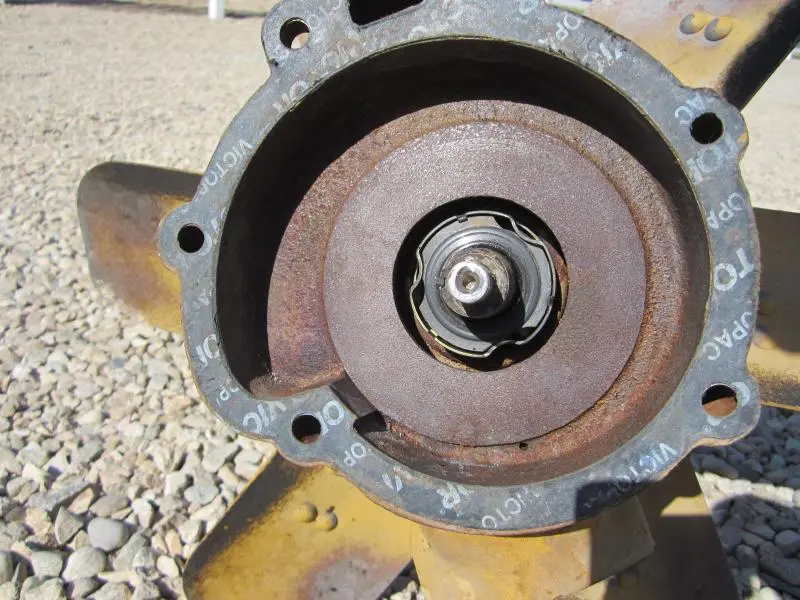
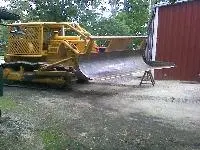
The snow has melted in the high country so I was able to get to the D4 to start this project. I got the fan and water pump assembly removed and brought it back to town to work on it. I do have the brass impeller and was able to pull it without a problem. I would like to get to the cat dealer this week to order parts. I am looking for any advise about what else I should look for in the way of maintenance while I have the unit out of the machine. Is the seal assembly 4F4769 the correct part number? I have not done one of these before. I am going to post some photos that might help anyone else in the future. I do believe the leak was from the drain hole and not through the bearings. The bearings seem to be snug and ok.
You have two grease fittings on the housing, that's a big NO!, grease pressure will build up and push grease out of the seal and fill up the fan pulley. Look in the parts book,[I don't have mine handy at the moment] for that serial number and order the relief fitting and the grease fitting. Also take note that for certain serial numbers the relief valve is either on the upper or on the lower position of the pump housing. Also I believe the lock for the impeller nut is supposed to fit down in the notch on the impeller.
Thanks Rome K/G, That was going to be another question I was going to ask. The bottom fitting should be the grease fitting and the top the relief valve according to my operation and maintenance instructions. They both looked like grease fittings to me and I am not sure what the relief valve should look like. Someone before me must have replaced it with the wrong fitting. I will try to find a replacement relief valve.
Bruce
Cat has them Bruce. I just bought one a few months ago because I threw the one out on my D2 as I thought it was a mangle grease nipple. You can check if the center plunger pulls outwards just by pulling on it with your fingers - it only has a light spring in it
That seal number crosses to 4n7526 that is also used on a D6. I think you have a good number that probably fits the D4/D315 as well.
I recently purchased one from local CAT dealer and one from global parts zone for about 1/3 the cost. I did not like the way the cheaper one was made. It may be fine but it is different from the OEM. Though they are the same outward appearance, the bellows assembly with the carbon ring is loose in the brass cup. I am sure once the impeller is installed it will push the bottom of the bellows against the bottom of the seal cup and hold the minimal coolant pressure just fine, but I am used to the whole thing being glued together like the one from CAT.
One thing to check is that the face of your bronze impeller has not worn enough so that there is not enough to compress the seal bellows spring properly. A new impeller from CAT is about $160 but it will have a ceramic seat glued to the face. I have a standard type 21 pump seal I am planning to install in another D6 pump as a trial to be able to use impellers missing the ceramic seat or worn too much to use with the standard seal carbon ring running directly on the face of the impeller. I will try to get that finished up and post a thread discussing it.


Our channel highlights machines from the earliest Holt and Best track-type tractors, equipment from the start of Caterpillar in 1925, up to units built in the mid-1960s.
Antique Caterpillar
Machinery Owners Club
1115 Madison St NE # 1117
Salem, OR 97301
Terms & Privacy
Website developed by
AdCo
"I became a member recently because the wealth of knowledge here is priceless."
-Chris R