Someone will time in with a picture. Easy way is loosen locking nut on the front of the collar turn collar clockwise and check
For overcentre latch when it snaps over and stays lock nut back up.
Try not to let the clutch load right up in a stall this will make adjustments more frequent.
Mark
Hi Team,
scans for above, save 'em while they are up.
Cheers,
Eddie B.
Sorry about the order it is not how I loaded 'em--system has gone crazy again--maybe it is just me????????????
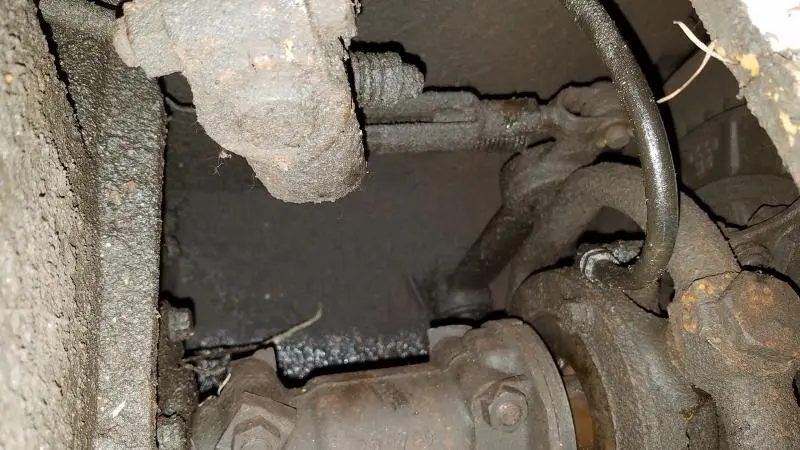

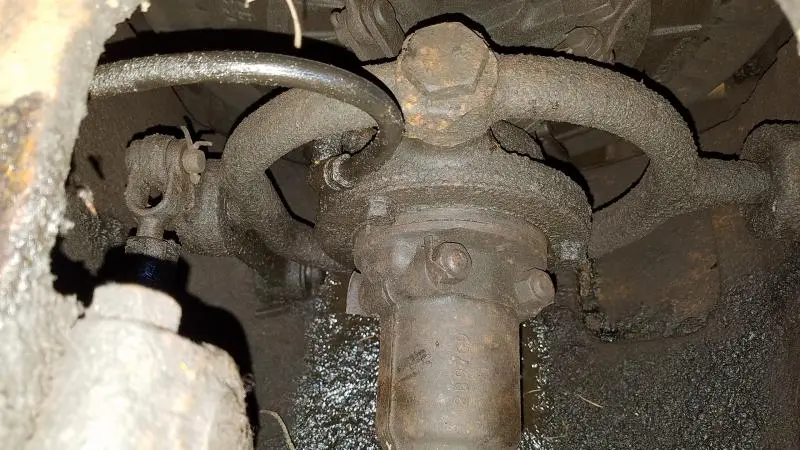
OK mine doesn't quite look like any of those manual photos.
[attachment=43563]20170718_204419.jpg[/attachment][attachment=43564]20170718_204413.jpg[/attachment][attachment=43565]20170718_204258.jpg[/attachment][attachment=43566]20170718_204210.jpg[/attachment]
Yes it is. Use the 4 pic.
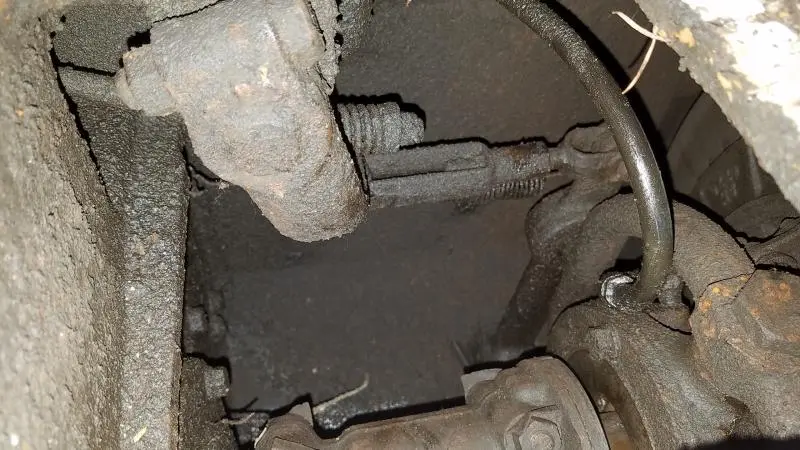
The collar shown in the pics is NOT the one you adjust, you need to look towards the engine.
Engage clutch you will get a better view.
You will see 4 levers that engage the clutch plate.
You need t.o look for the locking bolt as shown in the pic.
Mark
Hi,
if you come in from underneath, thru the covered opening shown to the right of the drive shaft in your pics, you will be further forwards and in the area to access the adjuster bolt when it is turned to the correct orientation as described.
Cheers,
Eddie B.
So if I have to go from the bottom, my shop which is pretty new to me has a service pit. Pretty old cement, will my D4 damage the cement much to drive it in over the pit to adjust the clutch? Seems like it would be vastly easier then trying to crawl under there in the dirt. Secondly the pushrod and yoke from the clutch lever? What if anything do I need to adjust with it, noticed there is also a spring and nut for adjustment on it in the photos. Is that for the clutch brake adjustment?
if you're worried about the concrete, lay down a couple 2x8's to drive on, or a some plywood, or even old tires or conveyor belting. if the machine doesn't have corks on the tracks it is less likely to damage the concrete, but it may make little pock marks under each grouser. if you turn the machine on the concrete it will definitely cause some marks. and driving it up over the edge of the concrete you will definitely want protection on the edge of the concrete, it always seems to chip the edges the worst.
You alreadythe top cover plate off so why not do it from there.
I always do mine from the top, easier if you have to do in the paddock.
I think from the bottom is only if you have a wet clutch.
And yours is the dry clutch arrangement.
I just used a 3/4 socket and long extension.
Mark


Our channel highlights machines from the earliest Holt and Best track-type tractors, equipment from the start of Caterpillar in 1925, up to units built in the mid-1960s.
Antique Caterpillar
Machinery Owners Club
1115 Madison St NE # 1117
Salem, OR 97301
Terms & Privacy
Website developed by
AdCo
"I also joined a year ago. had been on here a couple of times as a non-member and found the info very helpful so I got a one year subscription (not very expensive at all) to try it out. I really like all the resources on here so I just got a three year. I think its a very small price for what you can get out of this site."
-Jason N