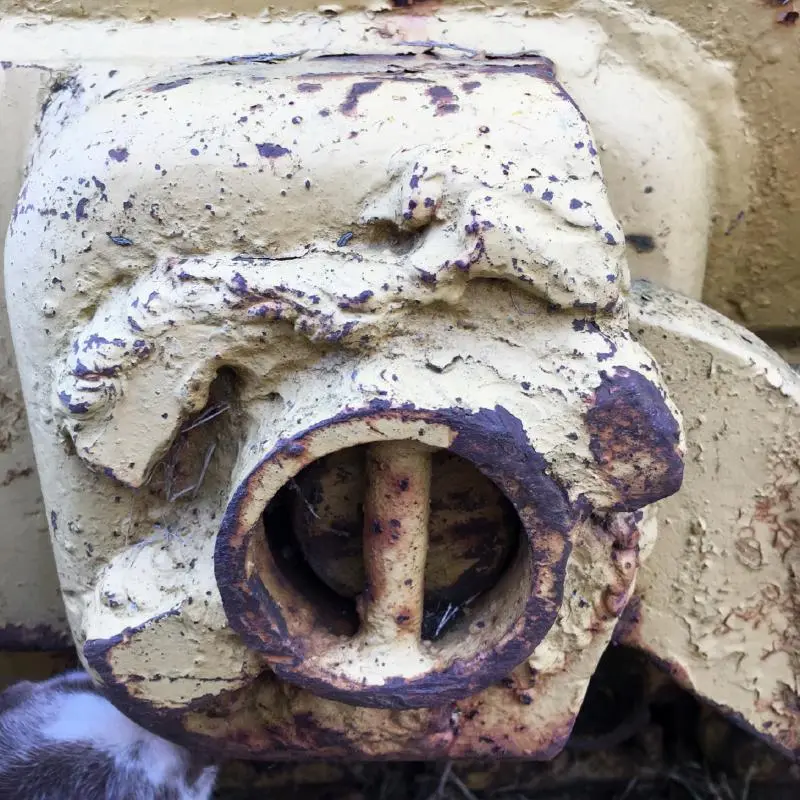
Yes that is buggered. There should be a flanged pin there with 4 holes, two of them tapped for forcing screws.


.webp)
.webp)
Maybe these pictures will help. There is also bushing in there. I had new ones made.
Have a good day....Bill
[quote="Cysco"]Maybe these pictures will help. There is also bushing in there. I had new ones made.
Have a good day....Bill[/quote]
Bill Thanks for the photos. I'm still trying to figure out why they laid all of that weld on there, I can't tell just what can of worms I would be opening if I try grinding down all that weld to try to fix it right.
Do you know the model of your blade, is it a Cat blade?
Thanks again for the reply.
outbackrider
In my experience the main problem is the under designed pin flange. The usual thing is for the flange to get ruined trying to extract a rusty pin. Next, the remains of the pin are beat back in and welded shut.
It is a Cat 2A blade.
Stephen....fortunately for me the pins were in good shape and grease was applied. The only thing I had to do was drill, tap and install Helicoils for the bolts to hold the pin in. I have had no issues since fixing ......so far.
Bill
When I got my Grampa's the pin on one side was held in place by a piece of rebar welded over it, as the bolt holes were all buggered. The other side was also mess. I had to basically build a new pin on one side and rethreaded the other.
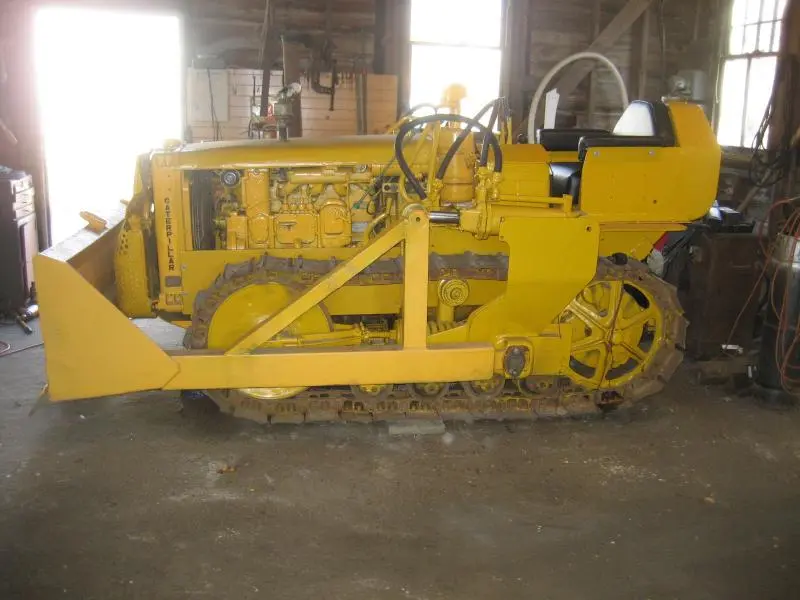
BTW that is one slick-looking D2.
G
It is a Cat 2A blade.
Stephen....fortunately for me the pins were in good shape and grease was applied. The only thing I had to do was drill, tap and install Helicoils for the bolts to hold the pin in. I have had no issues since fixing ......so far.
Bill
[quote="Cysco"]It is a Cat 2A blade.
Stephen....fortunately for me the pins were in good shape and grease was applied. The only thing I had to do was drill, tap and install Helicoils for the bolts to hold the pin in. I have had no issues since fixing ......so far.
Bill[/quote]
Bill, grease sure goes a long way for getting these back apart. I am in favor of anti seize as well.
I have removed blades, c frame and cylinder supports from a number of 2S and 2A blades, corrosion is the common factor in my area. Those pins can grow together until dynamite is needed, also the bolts that hold the supports to the track frame get the special treatment (beating will continue until morale improves) .


Our channel highlights machines from the earliest Holt and Best track-type tractors, equipment from the start of Caterpillar in 1925, up to units built in the mid-1960s.
Antique Caterpillar
Machinery Owners Club
1115 Madison St NE # 1117
Salem, OR 97301
Terms & Privacy
Website developed by
AdCo
"I also joined a year ago. had been on here a couple of times as a non-member and found the info very helpful so I got a one year subscription (not very expensive at all) to try it out. I really like all the resources on here so I just got a three year. I think its a very small price for what you can get out of this site."
-Jason N
