Hi Team,
scan should cover your carby. The scan was copied from my D7 SRB Form No :- 7196C and is same family as RD6 carby.
Cheers,
Eddie B.
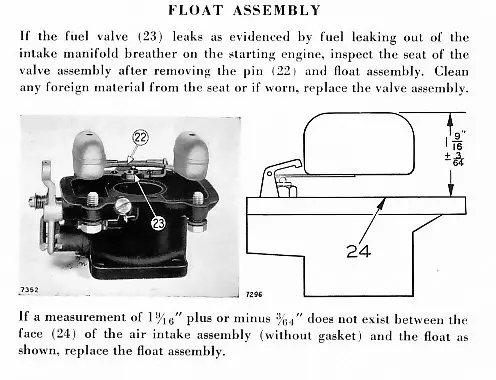
Generally speaking when/if your out in the field a rule of thumb concerning the height of the float flat surface is (GENERALLY) parallel to the flat surface of the carb bowl. This should get you home. If the carb sets at an angle on the engine all bets are off.
caterpillarman, did you find the carb parts you needed I have tried to get mine apart but so far no luck
it is soaking after a little heat treatment but so far neither has proven effective in releasing the parts
Olfolks, dont have those parts yet. just putting together the rest of the carb.
ok when I took that plug out there wasn't a needle thing on or under it just the brass jet screwed down into the hole which is what I am having a fuss getting out maybe I should post a pic of it see if we are working toward the same end ?
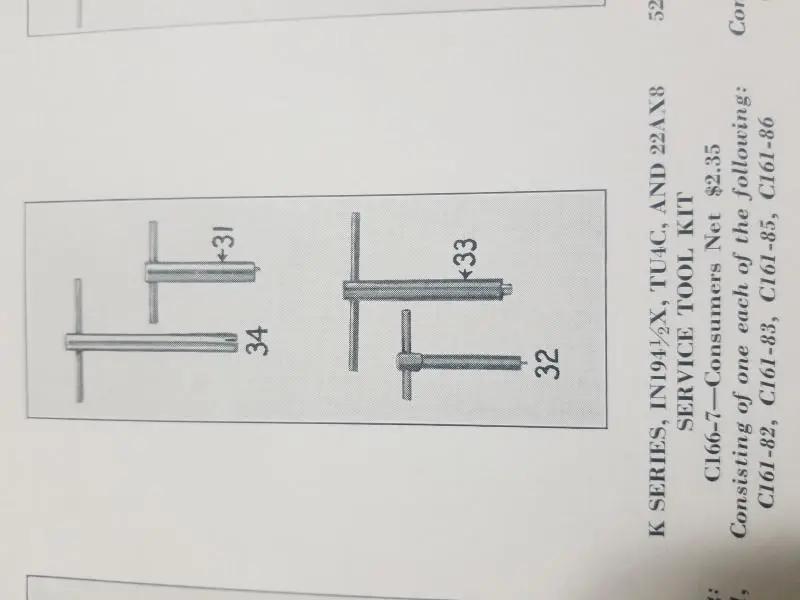
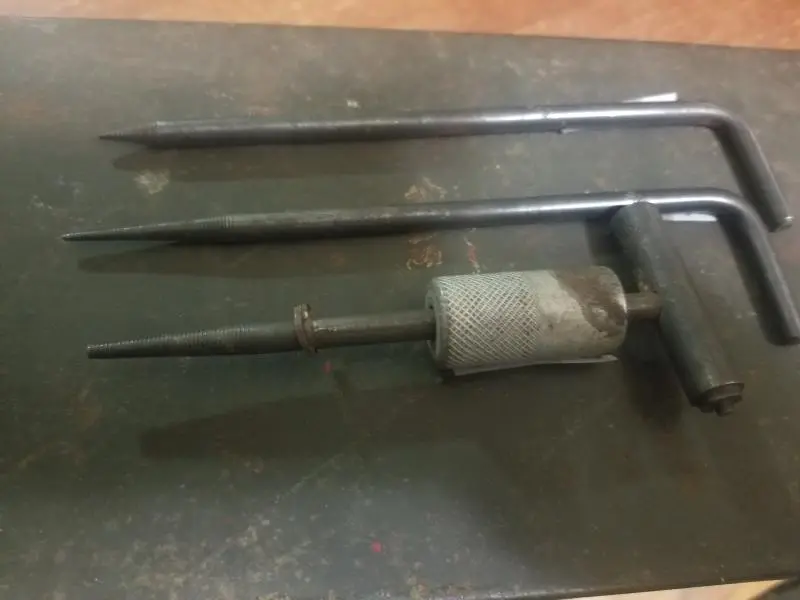
I have found those jets extremely hard to get out. Mostly they have already had the wrong size screwdriver bungle the slot. If you have a way, make a special screwdriver that is the right thickness, width, and has a pilot on the end to keep it centered. If you do get the first part unscrewed, the rest is usually well stuck inside. I have used a small screwdriver or long easy out to wiggle it loose. Don't forget the gasket at the end. I have had to use a special cutter to eat the brass past the threads, then recreate the threaded part of the brass and solder it to the tube. On a carb that had been frozen & split the bowl, I disected the body with a saw and saved every part I could.
Stephen, Thanks for the advice!
Per 7M, 3t, and 4t Army repair Manual the specs and drawing are the same as the above RD6 specs
I had a very rusted carb to work with and thought very hard about buying a better one, but instead I threw all the parts in a bucket of Evopo-Rust and let it set for about 2 weeks. I would go through the bucket every few days and pull out all the parts and wash them off, pick at the rust, run drills in the holes best I could and then put the parts back in the bucket. I was worried about the brass jets but I saw no effect on them. I did get all passages clean with drill bits (by hand) and put the parts back in for a few more days as when the Evopo-Rust is done it leaves the metal a nice clean gray finish. I did not remove any brass jets, thinking I could do that later if it didn't work right. The carb works fine.


Our channel highlights machines from the earliest Holt and Best track-type tractors, equipment from the start of Caterpillar in 1925, up to units built in the mid-1960s.
Antique Caterpillar
Machinery Owners Club
1115 Madison St NE # 1117
Salem, OR 97301
Terms & Privacy
Website developed by
AdCo
"I became a member recently because the wealth of knowledge here is priceless."
-Chris R