Just wondering if you had the taper pin out? It looks like a straight shaft.
[attachment=48163]image.jpg[/attachment]
The d4400 use's a different pump. carbon seal, taper shaft to hold impeller...Thanks WA7OPY
There is also a woodruff key involved.
Must be a later d4400 the three that I have all have a rope packing.
Tractor wise the pump changed at s/n 7J5104-up
when you heat the ass. then cool. thinking it will will release.the opposite effect is achieved. the impeller will shrink more so.when
parts are heated [to expand].then is the time to separate. after the parts cool.[as in your case].even more heat is required to bring it back to its original condition. [your logic is correct if you heat a bearing race to remove.the race cannot expand but very little.due to the bore housing,therefor it will shrink.]
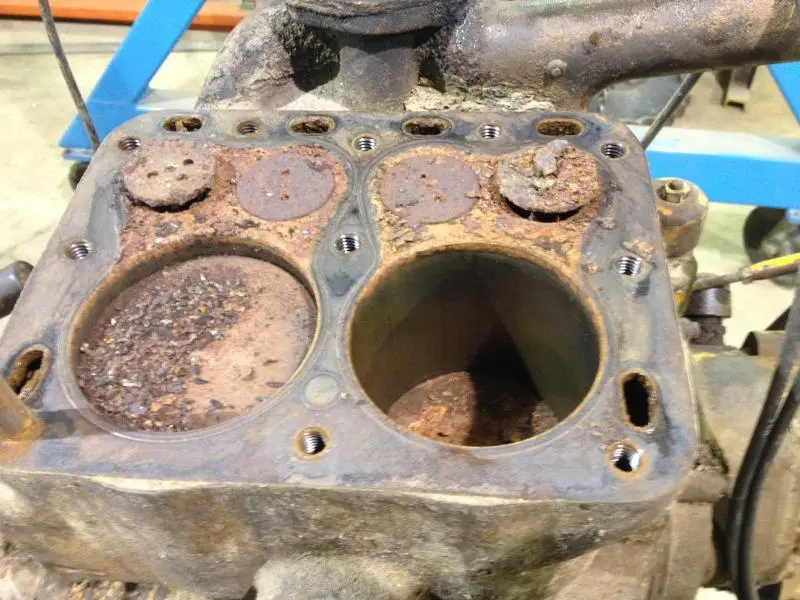
I would only try to remove the impeller when the hub was hot, then let it cool down totally before I would try once more. Anyway I removed the impeller from the 2nd pump tonight. The 2nd pump impeller is brass and it came off easy, the bad thing is there is no race for the carbon seal to ride on just cast iron that is badly pitted. The split pulley is in bad shape (the belt has been slipping for years the way it looks)
Looks like 2 pumps to make one and I will have to machine in a race for the seal to ride on. It will be a trick to set the housing up in the lathe to machine it.....WA7OPY
I don't know what you are dealing with as far as seals but I know there are aftermarket seals that have a ceramic seat that is shaft mounted. This seals around shaft and backs up to the impeller hub. Caterpillar used to offer the seat washer separate from the impeller on the D311/D315/D318 engines for example but now they only sell the impeller with the seat bonded to the face of the hub.
I have one that is detached that I will try an epoxy on but my plan is to use a type 21 seal that the seat mounts in the cast iron housing sealed by an o-ring. To get a seat that fits the approximately 2" housing bore, I had to go with a seal for a 1-1/4" diameter shaft, so my plan is to bring the shaft diameter up to 1-1/4" using a plastic sleeve glued on with something like RTV silicone or a brush-on gasket sealer.
I will post pictures when I get into that project.
I also have a D333 water pump on a grader that I simply refaced and polished the grooved cast iron impeller hub and installed a new standard seal. It has been leak proof for a long time now on a machine that might run 20 hours a year.


Our channel highlights machines from the earliest Holt and Best track-type tractors, equipment from the start of Caterpillar in 1925, up to units built in the mid-1960s.
Chapter Two
| Highacres Farm, Dewey Lane, Brackenfield, Derbyshire DE55 6DB, UKChapter Nineteen
| 2 Winkleigh Rd, Exeter TAS 7275
Antique Caterpillar
Machinery Owners Club
1115 Madison St NE # 1117
Salem, OR 97301
Terms & Privacy
Website developed by
AdCo
"I also joined a year ago. had been on here a couple of times as a non-member and found the info very helpful so I got a one year subscription (not very expensive at all) to try it out. I really like all the resources on here so I just got a three year. I think its a very small price for what you can get out of this site."
-Jason N