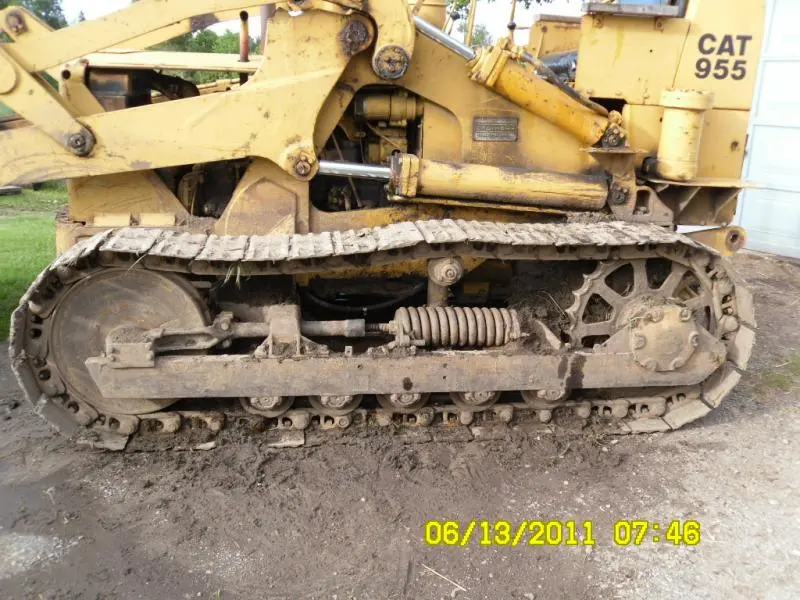
Looks about right for tension adjustment.....should be able to pry the track up 1-1/2 in to 2 in. over the carrier roller.
Maximum recommended adjustment extension is 4 in. hex nut to hex nut.
thanks OM, will take the measurements this week and see how close i am.
rod
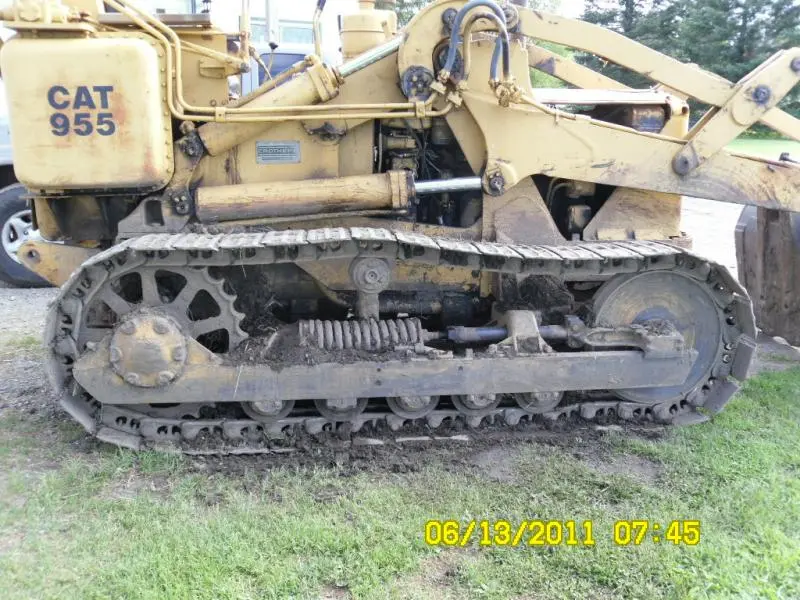
You might want to back that critter up 5-10 feet and then take another look at the tracks. By backing up, just about all the slack will wind up on top. I've never seen that in any of the books, it's just something I've noticed over the years. It's also easier to turn the adjusters with the slack on top.
ol' Grump
i figured it would change a bot after I had moved it.. I will be moving it this week and check the tension again afterwards..
thanks
rod
ol grump--i thought that by backing up you put tension on the top track and pull the slack out---going forward puts the bottom track in tension and slacks up the top?? :noidea:
Recommendation is to drive the tractor back and forth to equalize adjustment then re-check.
dpendzic
You're correct. I pooched that one and didn't realize it 'til later yesterday morning. I forgot to mention that pulling forward would put the slack on the top of the tracks. Should'a remembered that!
I'm in the middle of taking a link out of the tracks on my D4, got one side done yesterday and today I'm gonna have help on the other side. The reason is that with the 5 roller frames the tracks were brushing against the rear of the "C" frame, not because the chains were worn out. It was either that or lengthening out the side bars and I thought it would be easier to shorten the tracks. .now I'm wondering if lengthening the side bars wouldn't have been easier😆
Paul--i just adjusted the tracks on my D3B yesterday and final move was forward to get the most slack.thats why i was up on the subject. I had them very loose from the winter when i was pushing snow.
Yep--we choose a course of action and it may or may not be the best way to go!! 😆
Right know i am trying to pull the rear pin on the lift cyl. so i can reseal it---can't believe I snapped a 1/2 grade 8 new bolt pulling on the pin---i guess some heat is next.
Going by the first picture I would tighten the track a bit more, the sprocket looks to be worn way out of pitch and looks to be built up,be careful of rocks or the like as with no belly guards it is easy to crack an oil pan or casing.
👋 dpendzic
I leave the cylinder in situ,it is easier to undo the gland with the cylinder held solid in place,with the gland undone take the rod pin out,block up the cylinder and remove the rod,put the eye of the rod in the drawbar and block it up at the piston while you undo the nut.
AJ


Our channel highlights machines from the earliest Holt and Best track-type tractors, equipment from the start of Caterpillar in 1925, up to units built in the mid-1960s.
Antique Caterpillar
Machinery Owners Club
1115 Madison St NE # 1117
Salem, OR 97301
Terms & Privacy
Website developed by
AdCo
"I became a member recently because the wealth of knowledge here is priceless."
-Chris R