John Deere used the same carb on pony motors on their 720 and 730 series tractors.
This place has a nice website and were very responsive to my questions. This link takes you to the appropriate kit for a D4. Well, the kit works on D2 and D4 ponies.
http://www.mcdonaldcarb.com/product_p/k2067.htm
Also, here are some details regarding carb and numbers, etc. from the carb shop website.
http://www.thecarburetorshop.com/TrackitsC.htm#TracCate
1949 D2 (pony engine) Zenith TU4C 10368 5F-3527
1949 D2, D4 (pony engine) Zenith TU4C 10365 5F-3530
1949 D4 (pony engine) Zenith TU4C 10367 5F-3528
Thank you for pointing me in the right direction.
pulling an old post back up...😉
I am a mechanic.
I just bought a 1941 D4 Cat. All there....pony motor fires, but Carb is Dirty. So I want to rebuild it , then move forward with Diesel motor firing....
Are there any tricks to rebuilding this Thing....
I am looking for video now too....Its Small enough once apart I am going to Sonic wash it....
Old Iron is Cool, but I know things can be wacky sometimes.....
Thanks, John in Oregon.
Important to remember that you adjust these carbs a little differently from most. All the idle mix screws are actually changing the amount of AIR that mixes with a set amount of fuel. So back them out to lean the mix.
I think the high speed mix screw will be normal (turn it out to richen mix). It screws in horizontally (has the little bell crank that was mentioned earlier) or screws in vertical depending on the year it was made.
When you reinstall the carb note that the "finger" on the throttle rod must be installed on the "far" side of the knob on the end of the throttle linkage pin to pull the throttle closed against the pull of the governor linkage. Pushing the throttle knob in should let the governor spring pull the throttle open.
The typical old carb that will run the pony only with a lot of choke and has no power turning the diesel is either experiencing mild fuel starvation from trash in the supply or float valve.......or most likely it has a plugged passage across the bottom of the bowl from the high speed jet to the high speed metering well. There is a hex head plug on the bottom corner of the bowl next to the throttle body that opens into the end of that passage but does not allow proper cleaning of the horizontal passage unless the soft plug is drilled. I used a bead of soft rosin core solder to plug that passage when I did mine. A .177 caliber lead pellet should also work well. Or the sealer coated BB's as already mentioned.
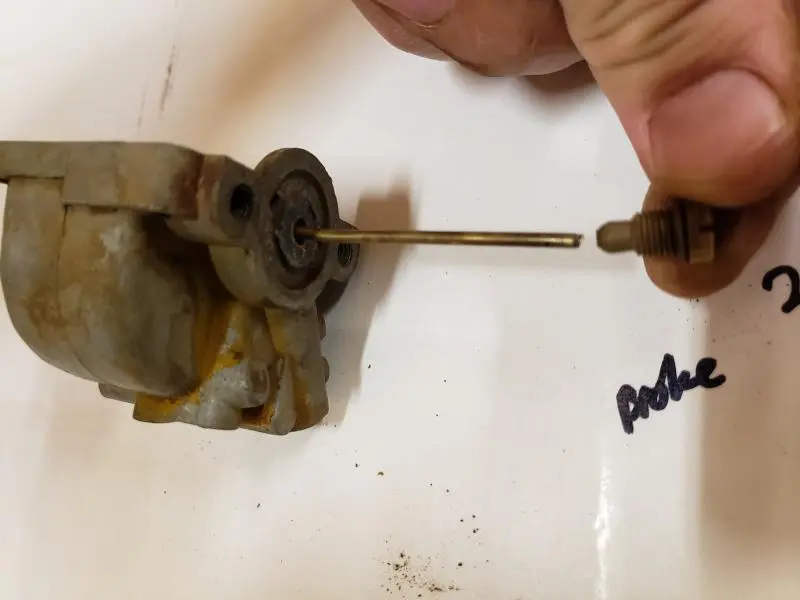
If it won't idle, then the idle port in the cast iron throttle body may be clogged as mentioned already. The brass jet is removable for cleaning only by driving it inward into the venturi (throttle body off the engine obviously!) When it is replaced, (tap in from outside) the grooves must be oriented properly so the fuel is admitted to the venturi at the proper point in relation to the edge of the throttle plate while it is nearly closed and resting against the idle speed screw.
Im so glad to see that there is more in depth detail about rebuilding the pony carb since the last time ive been on this site. Ive had mine off the d4 ht4 for a going thru a few times over the past years and I think the last was a failure. Just glad to see more info and pics available these days. Hope my old cat part numbers are still in stock or I will be trying the john deere kit.
Yes there are a couple of tricks:
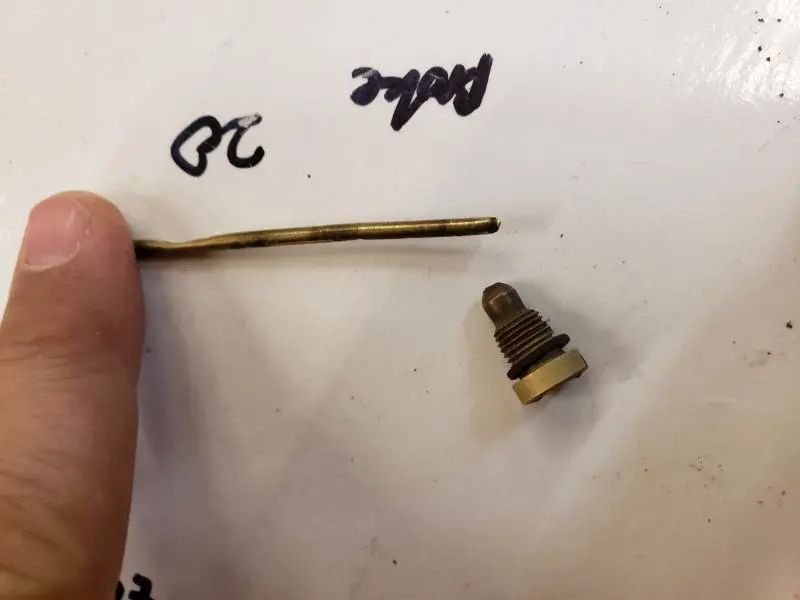
- drill out the soft lead plugs, particularly those on the fuel bowl to gain access to the cross-passages that typically clog on this carb. Use a drill bit in your hand (important!) once the plug is out to drill through the gunk. Once you have them clean (feel free to check with us with photos if you're not sure), use BB pellets to plug the holes back up. Some epoxy them in - I didn't and mine don't leak - clean and round is what you want. Push the bb head in and the tail will also compress nicely to form a seal
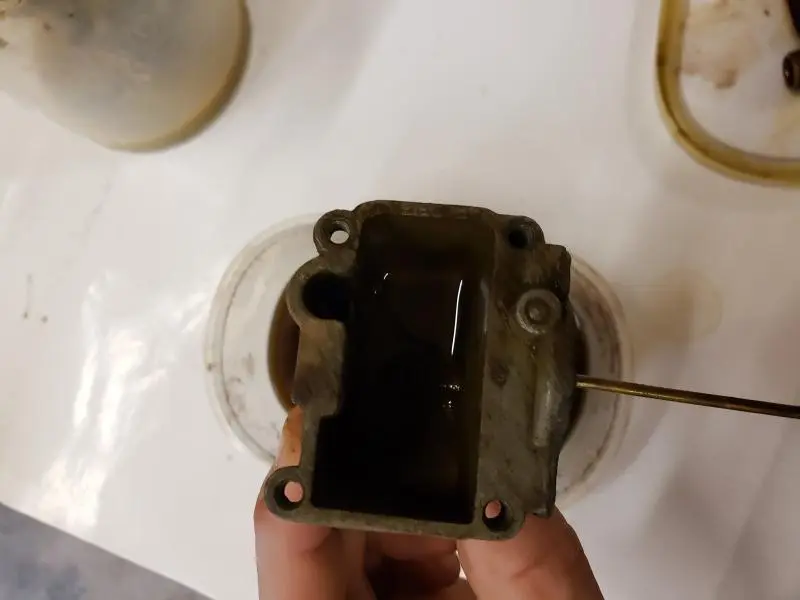
- carefully separate the bowl from the throttle body and check that the bullseye gasket is intact. Your kit will have new one but if the old one is chewed out, it can indicate that it is worth skimming the two faces flat with a stone (by hand)
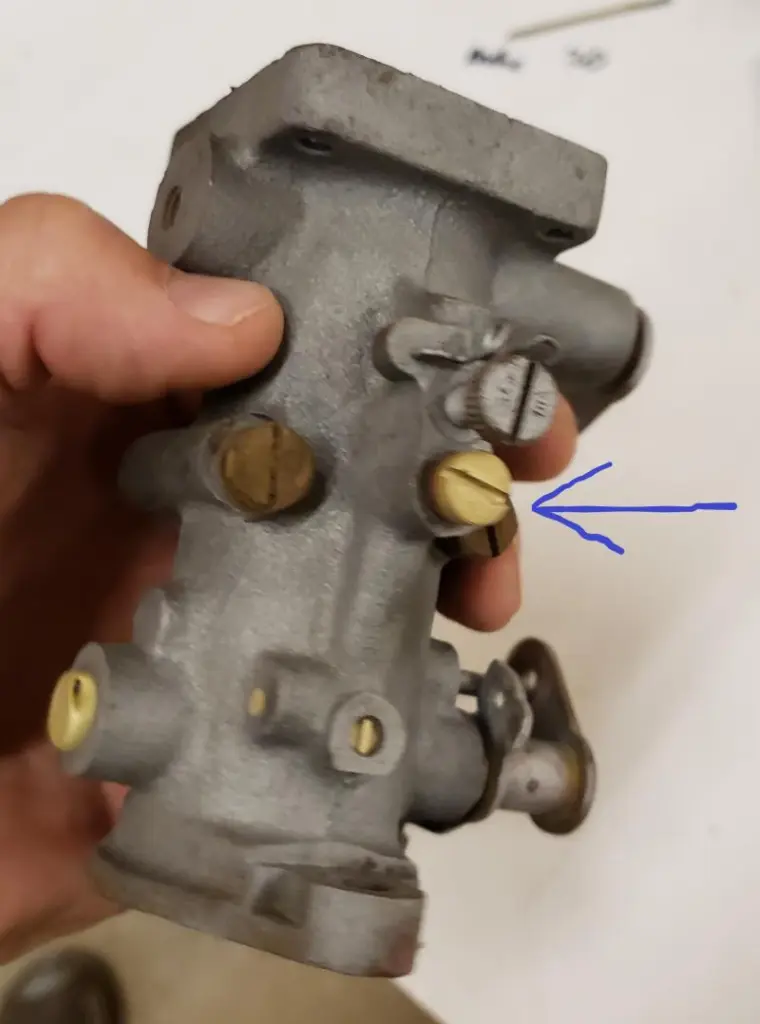
- if the main jet adjusting screw is oriented horizontally, then remove the cover over it and verify that the 90 degree crank that it bears on is actually 90 degrees - it's easy to over tighten and thus bend it
- check that the idle port brass plug is oriented with the notch at the very bottom. Disregard the orientation of the bar on the back of the plug - what's important is that the notch is lowermost - this will give a good idle
- if you need to remove the main jet, make up a good screwdriver that fits very well. They're in there good and it's easy to munch up the top of the jet body
- post pictures!


Our channel highlights machines from the earliest Holt and Best track-type tractors, equipment from the start of Caterpillar in 1925, up to units built in the mid-1960s.
Chapter Nineteen
| Wheatlands Warracknabeal Agricultural Museum 34 Henty Highway, Warracknabeal 3393Chapter Nineteen
| 1234 Carngham - Lake Goldsmith Road Lake Goldsmith VIC 3373Chapter Two
| Folds Farm, Godshillwood, Fordingbridge, Hampshire, SP6 2LU
Antique Caterpillar
Machinery Owners Club
1115 Madison St NE # 1117
Salem, OR 97301
Terms & Privacy
Website developed by
AdCo
"I also joined a year ago. had been on here a couple of times as a non-member and found the info very helpful so I got a one year subscription (not very expensive at all) to try it out. I really like all the resources on here so I just got a three year. I think its a very small price for what you can get out of this site."
-Jason N
