

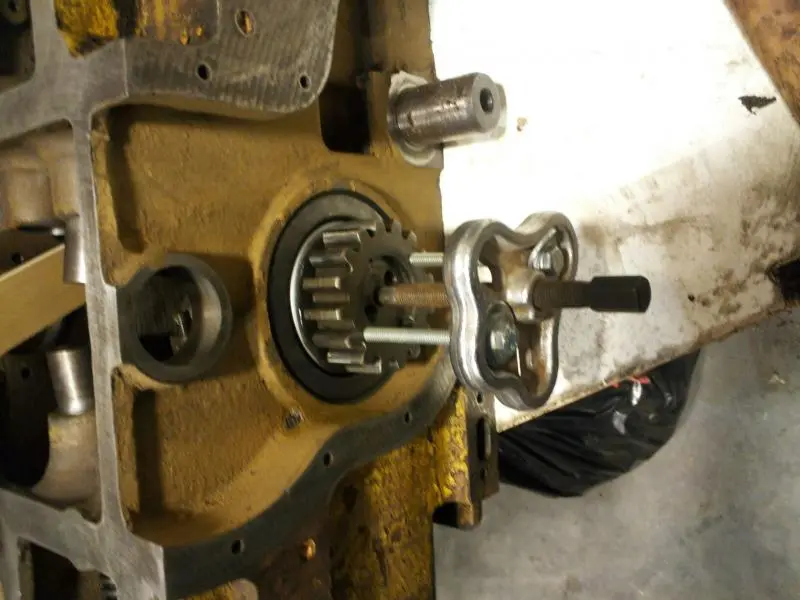
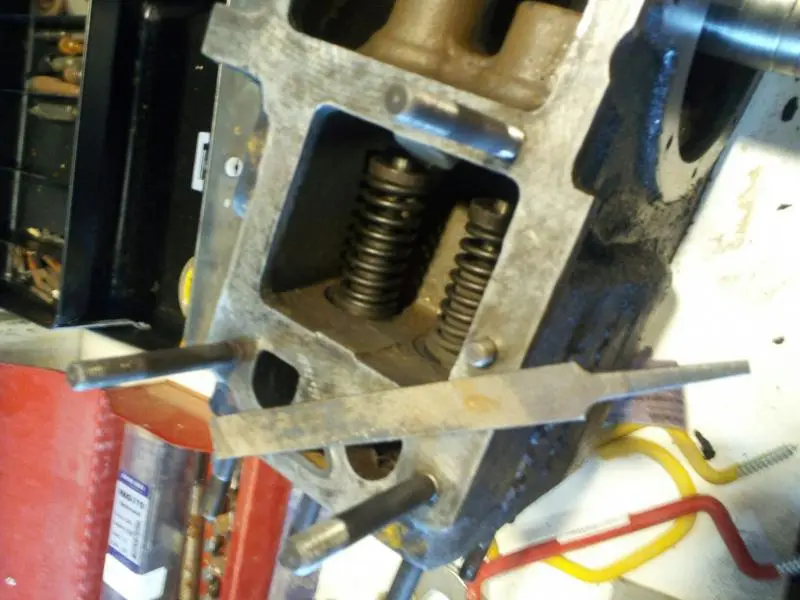
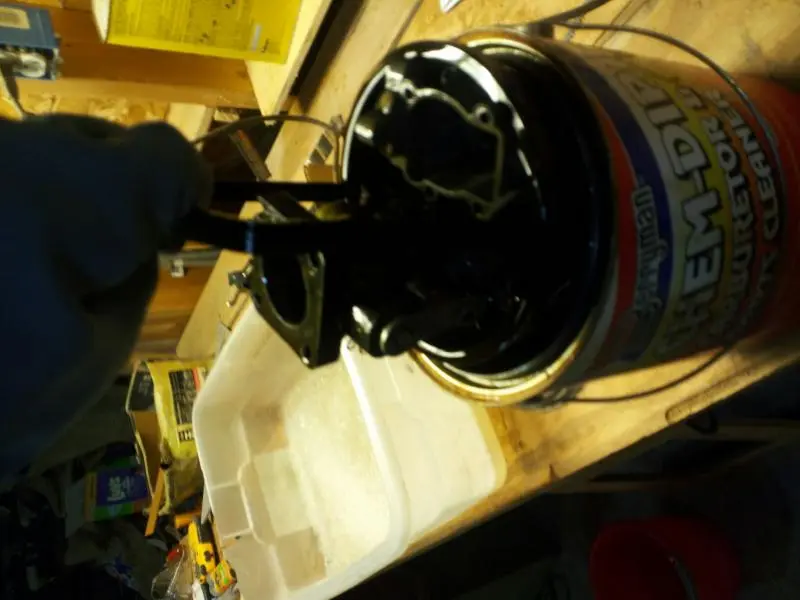
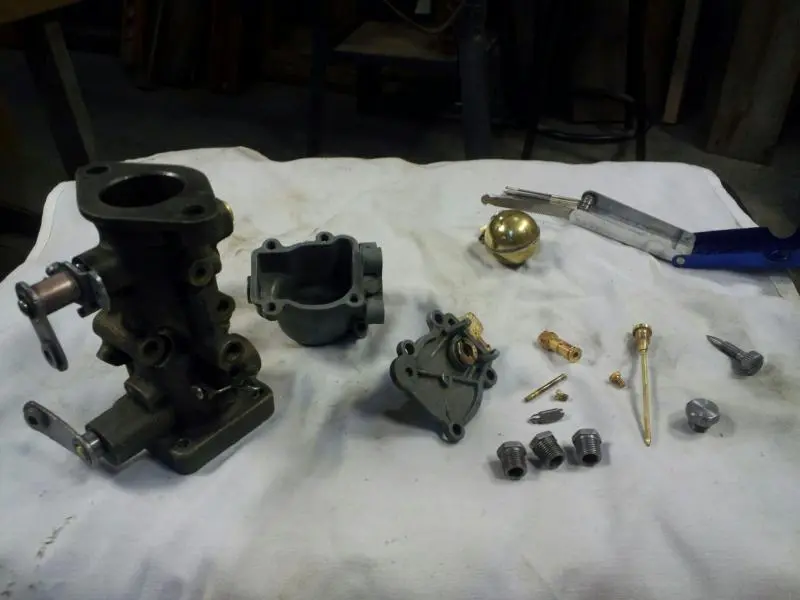
Well I finished braking it all down. I had one stud that was missing and the hole needed to be rethreaded. I then cleaned all the gasket surfaces with a file. The crank Gear came right off with a puller. I used a valve spring compressor on the valve springs and with a couple taps on the valve heads the keepers fell right off. I made sure to label and keep all valves in there original home. A couple of the valves look like they need to be ground down, as well as the seats. I took the crank to a local machine shop to see if it was serviceable. Luckily it was, for the very reasonable price of 60$. Today I ordered some new crank bearings and rod bearings from Florin tractor for 165$, all .030 undersized, they were the best price by far. Thanks to the parts source posting that everyone has been contributing to. I also ordered the seals and all the gaskets from my local cat dealer for around 100$ . I soaked the cab in carb cleaner over night and now is squeaky clean. I still need to drill out the plugs and make sure all those passages are clean as well. I still need to measure the cylinders and decide on what to do with rings. Here are some photos of the latest work. Thanks for tuning in ...more to come
Be sure they know what there doing. 40 years ago I took a crank, valves and block for a pony eng. to what was supposed to be the best motor shop in town....they ruined it all. My blue eyes saw purple for days. Getting a little purple tint now just remembering that. I had plenty of spare parts but still....they ruined my stuff.
Be sure they know what there doing. 40 years ago I took a crank, valves and block for a pony eng. to what was supposed to be the best motor shop in town....they ruined it all. My blue eyes saw purple for days. Getting a little purple tint now just remembering that. I had plenty of spare parts but still....they ruined my stuff.
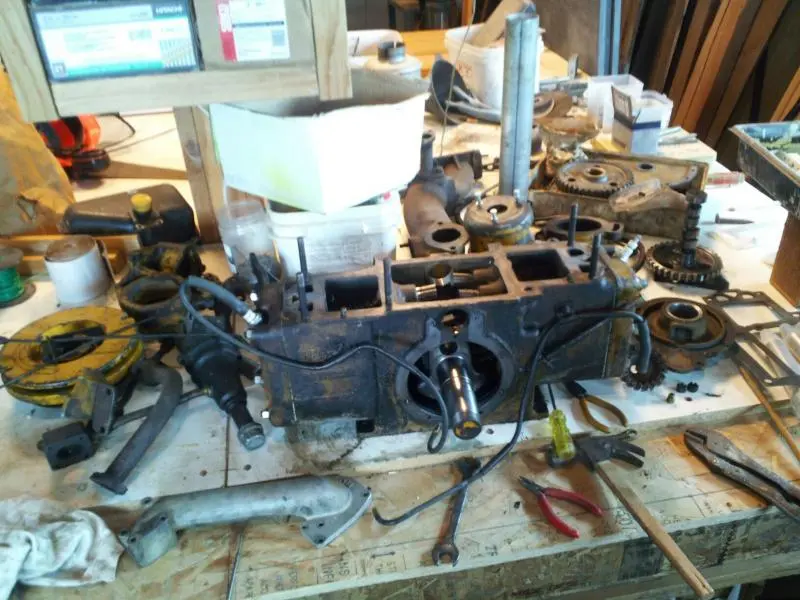
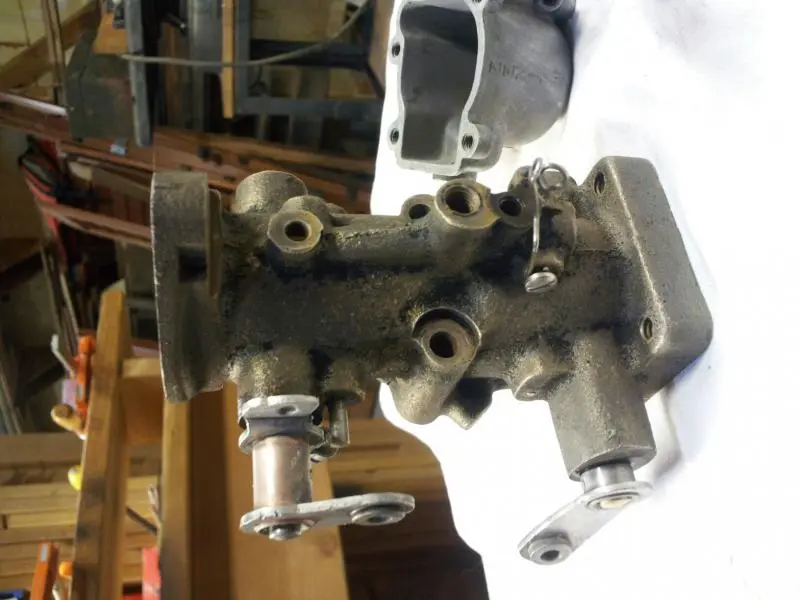
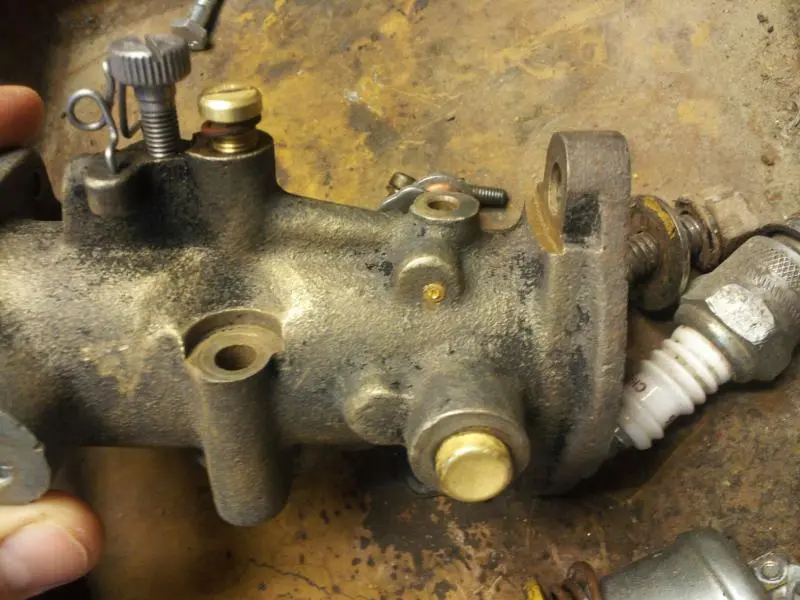
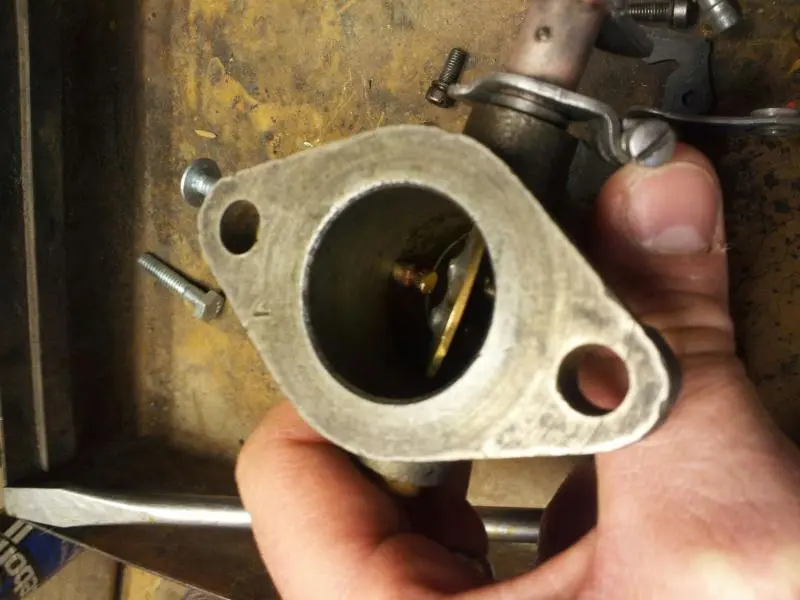
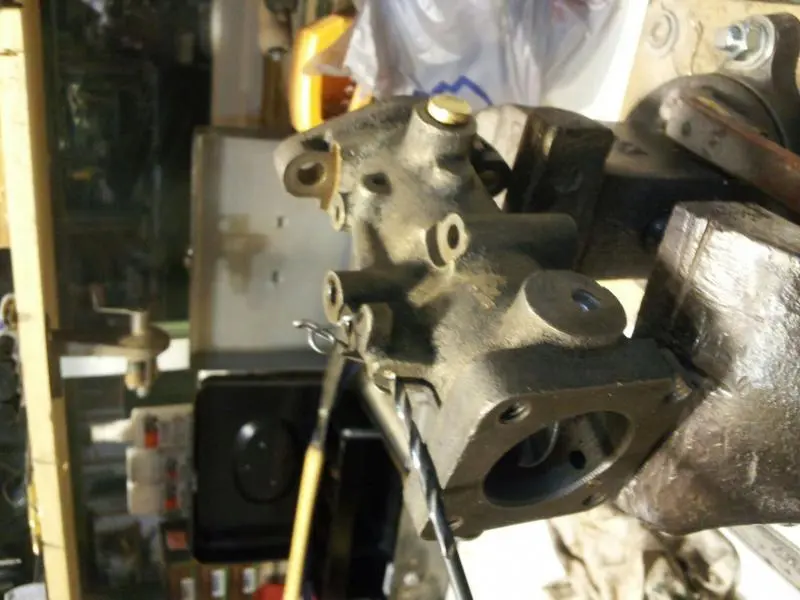
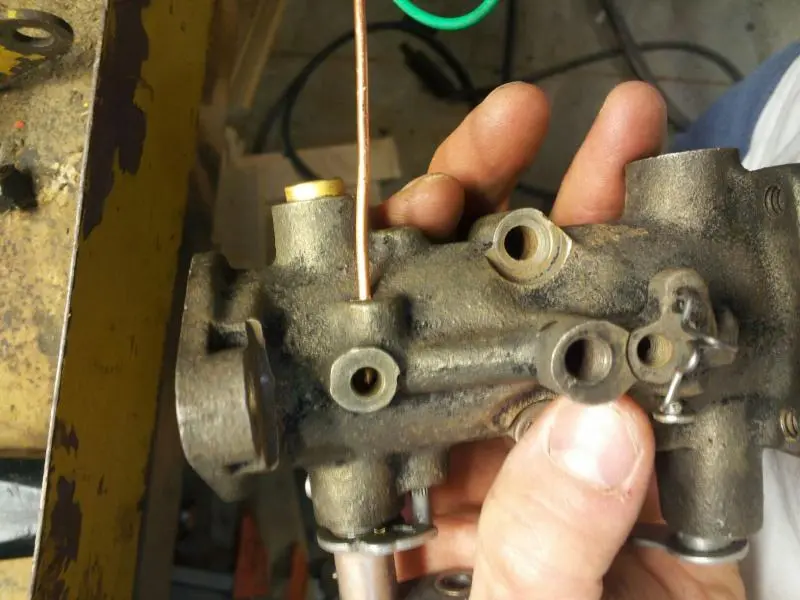
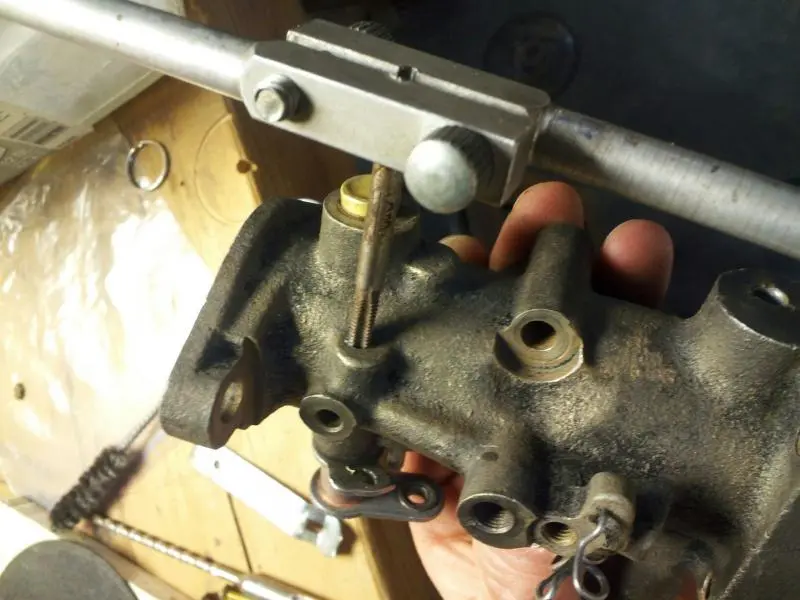
JW, in your 7th photo above, look in that hole in line with the throttle shaft. You'll see a little brass plug with a ridge down the center. Now look at the plug from the inside of the throat. Notice that the tiny notch is on the engine side of the throttle plate when it's closed, and that the surface of the plug is level with the throat wall. That's how it needs to be oriented when you put the plug back in after driving it out with a suitable drift. To remove, open the throttle so it's out of the way, then tap the plug all the way through into the throat. To reassemble, tap it back in from the outside. In other words, in both disassembly and reassembly, always drive the plug into the carb throat. Don't try to drive it outwards or you'll mung the inner surface and notch.
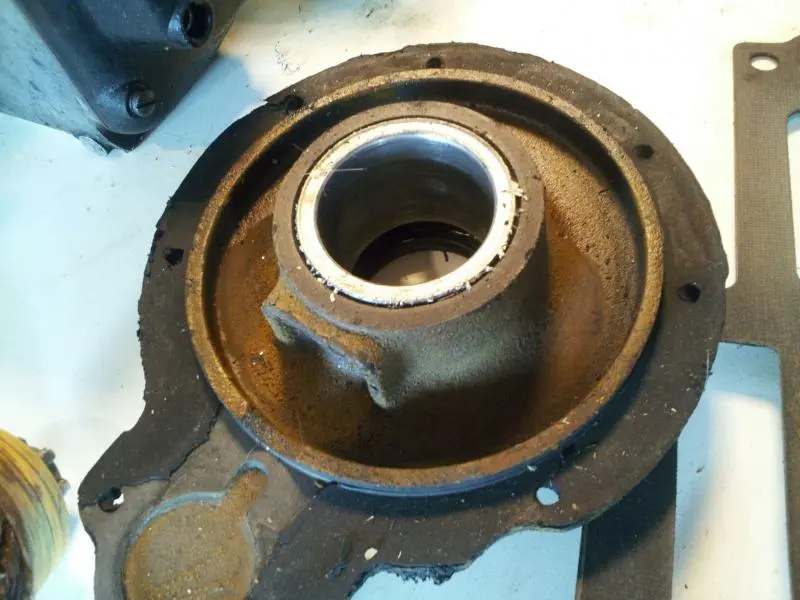
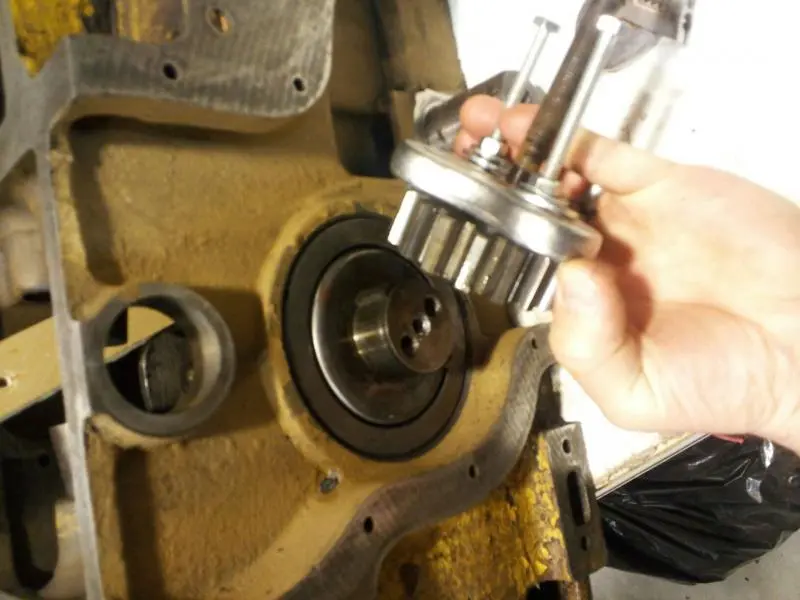
Otherwise, looking really good. Check that big shiny washer behind the pinion gear on the crankshaft. That's what the pinion-end seal rides on. I replaced mine because it was rust-pitted but yours looks clean. Your pinion gear holds that washer solid so it turns with the shafte - there's no key or what-have-you on that washer as I recall.
[quote="Neil"]JW, in your 7th photo above, look in that hole in line with the throttle shaft. You'll see a little brass plug with a ridge down the center. Now look at the plug from the inside of the throat. Notice that the tiny notch is on the engine side of the throttle plate when it's closed, and that the surface of the plug is level with the throat wall. That's how it needs to be oriented when you put the plug back in after driving it out with a suitable drift. To remove, open the throttle so it's out of the way, then tap the plug all the way through into the throat. To reassemble, tap it back in from the outside. In other words, in both disassembly and reassembly, always drive the plug into the carb throat. Don't try to drive it outwards or you'll mung the inner surface and notch.
Otherwise, looking really good. Check that big shiny washer behind the pinion gear on the crankshaft. That's what the pinion-end seal rides on. I replaced mine because it was rust-pitted but yours looks clean. Your pinion gear holds that washer solid so it turns with the shafte - there's no key or what-have-you on that washer as I recall.[/quote]
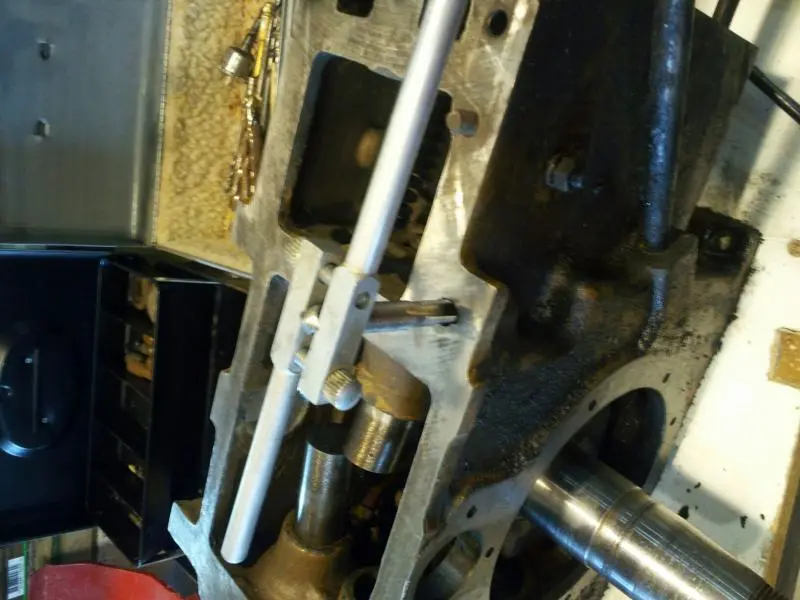
is that the hole where the long needle jet goes into?
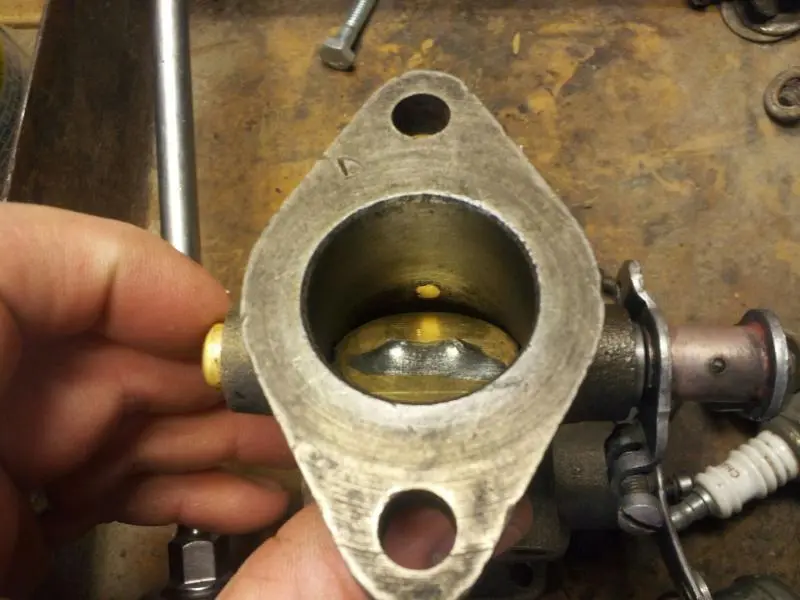

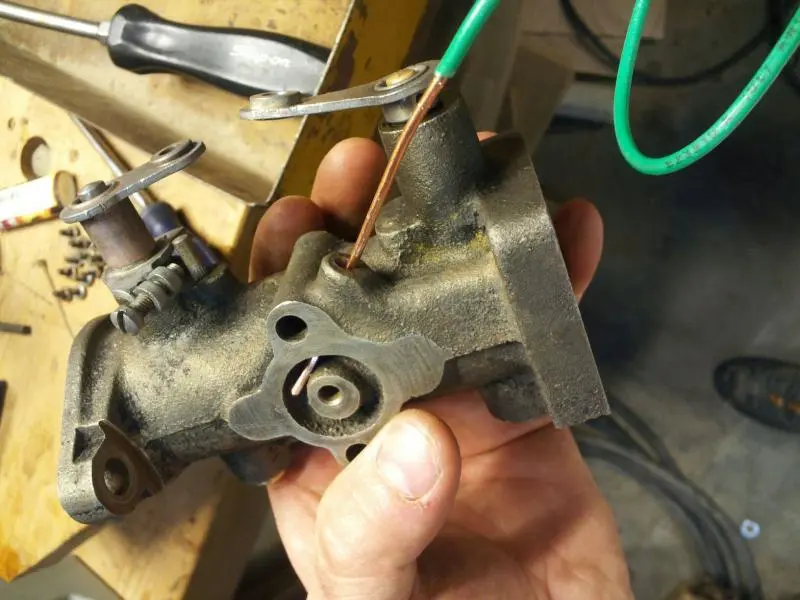
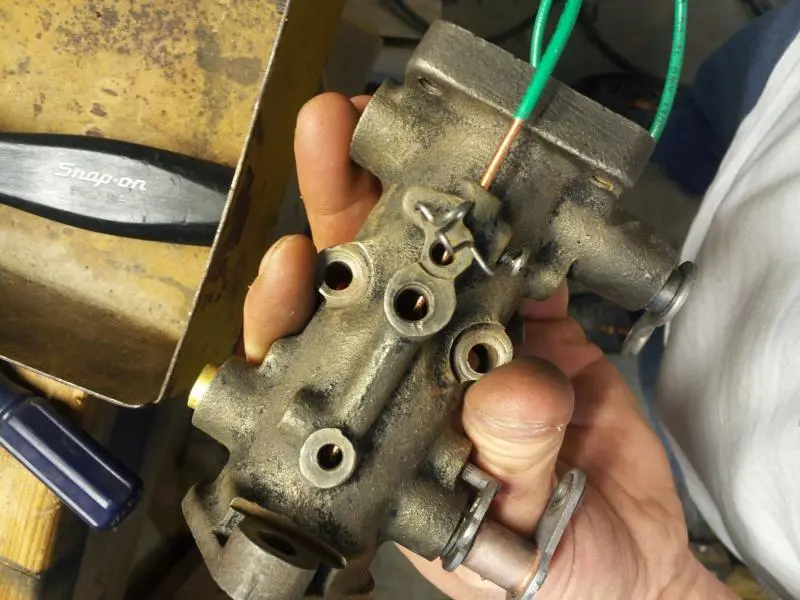
here are some better pix so I can hopefully understand what you mean
Yes, that's it. Notice in the second picture that you have two notches; a larger and a smaller. I oriented it so both were below the throttle plate when it was closed. My pony now idles very sweetly and slow. There was some guidance that the ridge on the outside should be straight up and down but it's more important that the notches on the inside are below the throttle plate, and that the plug is flush with the inside surface of the throat. From what I can see in the photos, your plug looks correctly situated, so, if you drive it through and out to clean the passage, just reinstall it in the same position that it is now and you'll be golden. You can determine if you need to clean it by squirting some gas down that passage to see if it spurts out the notches. If it does, you're probably already in good shape.
Yes, that's it. Notice in the second picture that you have two notches; a larger and a smaller. I oriented it so both were below the throttle plate when it was closed. My pony now idles very sweetly and slow. There was some guidance that the ridge on the outside should be straight up and down but it's more important that the notches on the inside are below the throttle plate, and that the plug is flush with the inside surface of the throat. From what I can see in the photos, your plug looks correctly situated, so, if you drive it through and out to clean the passage, just reinstall it in the same position that it is now and you'll be golden. You can determine if you need to clean it by squirting some gas down that passage to see if it spurts out the notches. If it does, you're probably already in good shape.
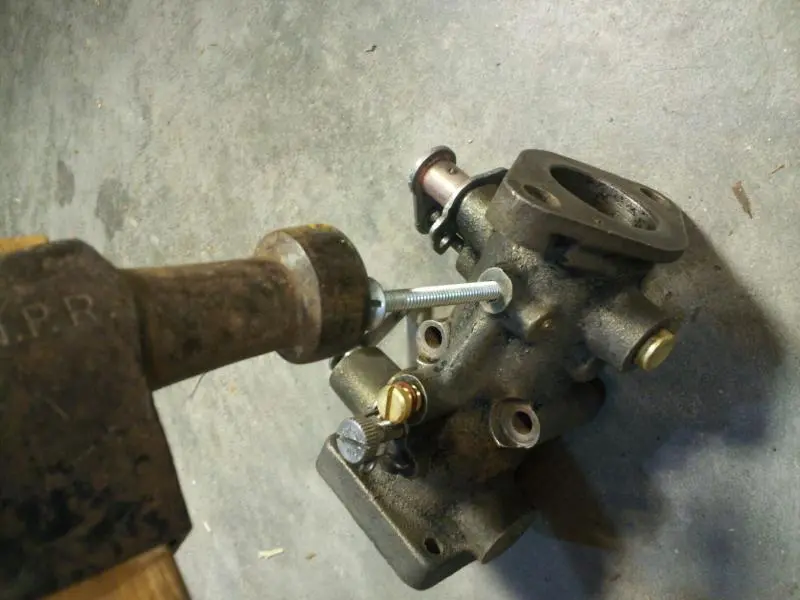
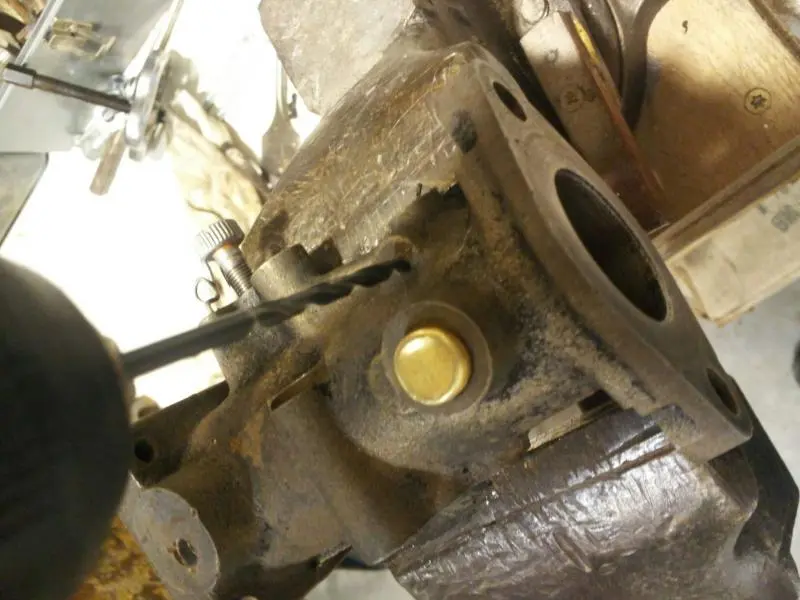
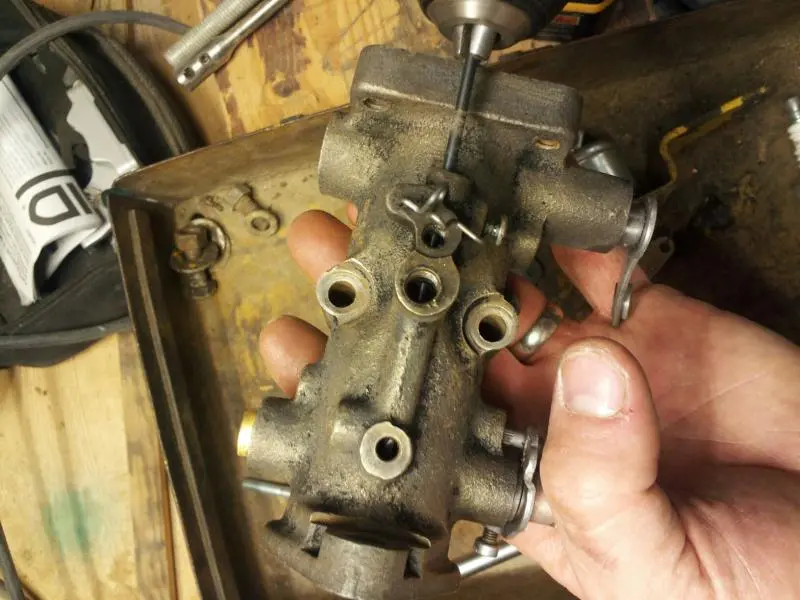
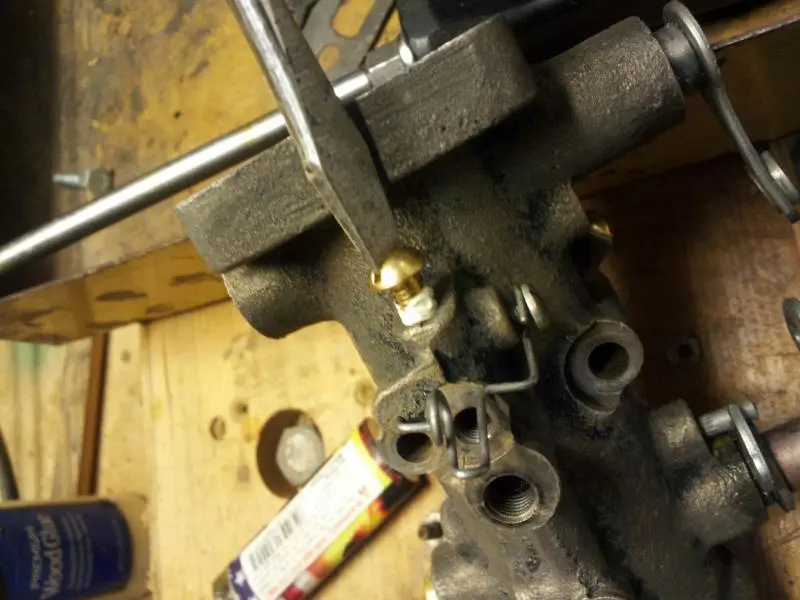
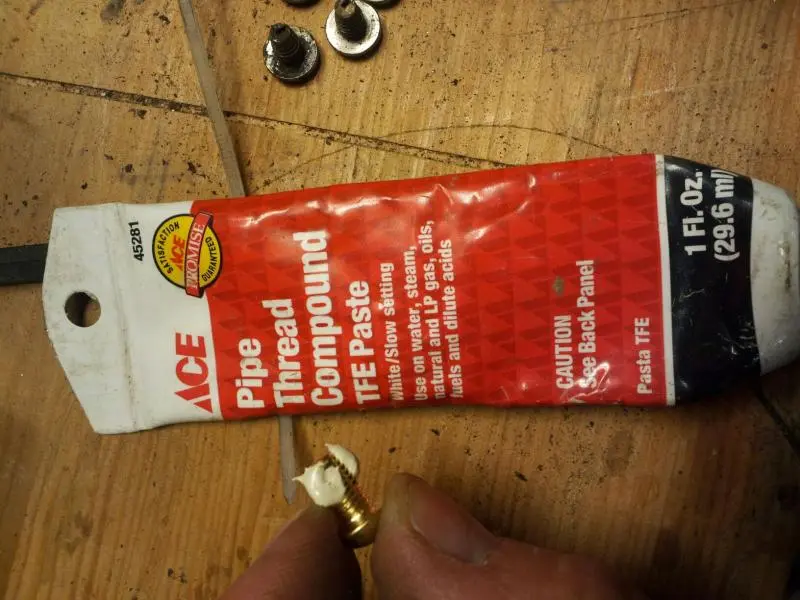
Thanks Neil good thing you mentioned to drive that pin out because it was clogged up. along with the other ones I drilled out all of those passages were clogged up but now they are squeaky clean thanks to my sweet drill bit and apiece of wire. And to finish it off with a healthy dose of break cleaner. I made sure to put that brass plug back in the same way and managed to get it back flush with the inside of the opening. here are some step by step pix off the process. the screws were 0.33 $ each and I had a tube of this sealant laying around ...both available just about any where. the screws are 10/32 and the tap for them was 4.00 $ Make sure when drilling out these plugs that you are careful not to push to hard and drill to far. you only need to drill through the existing plugs and deep enough to receive the new screw/plug. Thanks for tuning in I will have more to come 😖hocked:


Our channel highlights machines from the earliest Holt and Best track-type tractors, equipment from the start of Caterpillar in 1925, up to units built in the mid-1960s.
Chapter Two
| Highacres Farm, Dewey Lane, Brackenfield, Derbyshire DE55 6DB, UKChapter Nineteen
| 2 Winkleigh Rd, Exeter TAS 7275
Antique Caterpillar
Machinery Owners Club
1115 Madison St NE # 1117
Salem, OR 97301
Terms & Privacy
Website developed by
AdCo
"I became a member recently because the wealth of knowledge here is priceless."
-Chris R