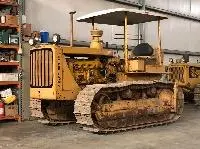
The carburator is made of some kind of pot metal. The bottom of the bowl took the most damage.
[img]https://imgur.com/pSvUQIj.png[/img]
This took a bit of machining to sort out.
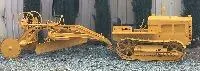
[img]https://imgur.com/rJnVTBt.png[/img]
And fixed:
[img]https://imgur.com/dROucgr.png[/img]
Welcome! Nice project to keep you busy; After you are done, it should give you plenty of operating pleasure and pay for itself.
Did you check oil levels of the steering booster under the seat cushion? Lack of oil would make it difficult to pull back on the steering.
Looks like your fuel bowl had plenty of moisture in it at one time; glad you have the abilities to make new parts/repair.
Keep on sending in photos and definitely ask questions. Thanks, JM
Welcome nice work you have done!
if it runs and drives I wouldn’t do anything more until you figure out the steering problem first. Skinner
"i reject your reality and substitute my own" - adam savage. i suspect my final words maybe "well shit, that didnt work"
instead of perfection some times we just have to accept practicality
dont rechrome the rams just make new shafts and fit new seals. the seals are available from the dealer. when we did ours we did both rams for a little bit more than the price of just the rechroming for one ram.
the existing rod eye is welded to a new bit of chrome shaft after it has been machined and threaded for the piston. you reclaim the eye by machining through the original weld. the eye has a step machined on it that locates in a bore turned in the end of the shaft to a neat fit
now hopefully the ram barrel and piston are serviceable. barrels can be remade by cutting the ends off and fitting a new bit of cylinder tube and hone to size.
the fittings are SAE code61 and are still readily available at any hose and fittings joint. the hose to use with the original clamp on fittings is sae100R2AT this is a non-skive hose with those fittings. if you reuse the fittings fit new grade 5 fine thread high tensile bolts nuts and washers.
hydraulics hoses are measured in dash size a dash is a 16th of a inch for example dash 12 hose and fittings are 3/4 inch bore.
if you dont have parts books get them if you have part numbers the dealers can help you. also so can a google search. there is separate parts books for the machine itself, the hydraulics unit and the blade. if you become a paid member you can access electronic copies of what manuals are in the members library. the list is constantly growing.
Thanks guys!
trainzkid88 great info on those cylinders. I was thinking I would probably do as you suggested - I had found induction hardened 1045 chrome plated rod is... not cheap, but not as expensive as I thought it might be! I'll have to see if lathe bed is long enough for the machining work.
Dave, thank you for the info and link about those seals. I pulled the seat today and did a little poking around - as it's all accessible now I'm going to pull the steering unit and reseal it.
I did pop the top cover off the hydraulic steering unit, and found that my right side clutch rod doesn't travel as far forward as the left. So, I think my issues are further down in the machine.
This picture is with no levers pulled, just as it sits:
[img]https://imgur.com/uNQYzbO.png[/img]
"i reject your reality and substitute my own" - adam savage. i suspect my final words maybe "well shit, that didnt work"
instead of perfection some times we just have to accept practicality
when we priced ours it was 700 bucks each just for the chroming. plus parts plus labour.
the cousin did them i think he just used a normal chrome shaft i dont think it was induction hardened.
"i reject your reality and substitute my own" - adam savage. i suspect my final words maybe "well shit, that didnt work"
instead of perfection some times we just have to accept practicality


Our channel highlights machines from the earliest Holt and Best track-type tractors, equipment from the start of Caterpillar in 1925, up to units built in the mid-1960s.
Chapter Two
| Folds Farm, Godshillwood, Fordingbridge, Hampshire, SP6 2LU, UKChapter Twenty Nine
| Hawkesbury Showground, Racecourse Rd, Clarendin, NSW, AustraliaChapter Nineteen
| Victoria Park, Urana NSW
Antique Caterpillar
Machinery Owners Club
1115 Madison St NE # 1117
Salem, OR 97301
Terms & Privacy
Website developed by
AdCo
"I became a member recently because the wealth of knowledge here is priceless."
-Chris R