ACMOC
Login
ACMOC
new grader help wit hid and info

new grader help wit hid and info

Showing 1 to 10 of 35 results
1
moonshadows
Topic Author
Offline
Send a private message to moonshadows
Posts: 28
Thank you received: 0
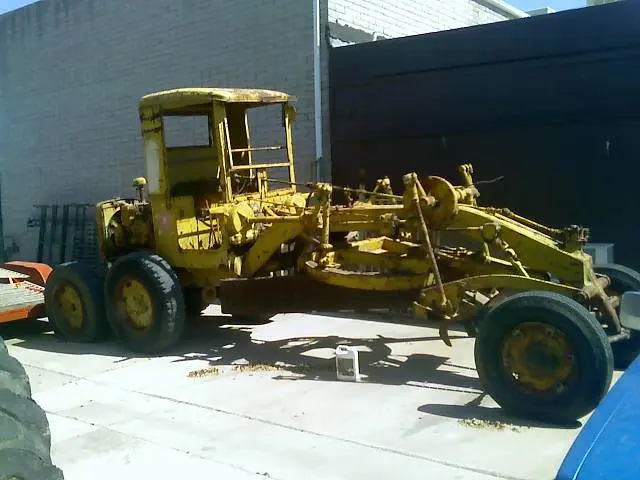
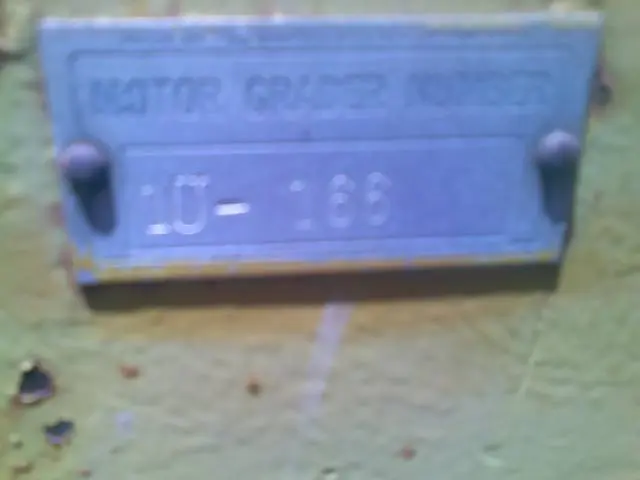
well iam finally going to get my "new" grader tomorrow my dad found it on craigslist for me and bought it two weeks ago and i finally had time to go get it. today was the first time i got to see it in person the only number i could find was a tag that had the number 1U-166 stamped into it. i need ot know what model this grader is so i can start researching for parts and manuals so i can get it going. the thing is in fair shape looks bad but not too bad really tell me what you know about it any info or advise ---scott
Attachment
Attachment
Please log in or create an account to join the conversation.
Tue, May 13, 2008 6:05 AM
Old Magnet
Offline
Send a private message to Old Magnet
Posts: 16,695
Thank you received: 17
That would be a model # 212 of 1947 vintage with D3400 engine (same as early D2's)
Please log in or create an account to join the conversation.
Tue, May 13, 2008 6:54 AM
D4Jim
Offline
Member
Send a private message to D4Jim
Location: NW Kansas
Posts: 1,318
Thank you received: 5
Reply to Old Magnet:
That would be a model # 212 of 1947 vintage with D3400 engine (same as early D2's)
Scott, have you been around old Cat graders before? There are a zillion grease zerks on the critters and several places one has to check for fluids in gear boxes etc. A good set of manuals is definitely in order.
Does it run? Looks like a pretty decent machine with scarifier and all. Keep us posted on the progress!!

Cats Forever

Please log in or create an account to join the conversation.
Tue, May 13, 2008 9:05 AM
moonshadows
Topic Author
Offline
Send a private message to moonshadows
Posts: 28
Thank you received: 0
Reply to D4Jim:
Scott, have you been around old Cat graders before? There are a zillion grease zerks on the critters and several places one has to check for fluids in gear boxes etc. A good set of manuals is definitely in order.
Does it run? Looks like a pretty decent machine with scarifier and all. Keep us posted on the progress!!
i dont know anything about graders it is supposed to run or it did in the past when pull started. the pony is stuck iam going to look into getting it going also have been reading and looking into the electric start conversions listed on this site thanks for the info on the vintage and model that will help in getting manual i like old junk like this and dont mind tinkering and making obsolete parts i also have a 35 mccormick deering td-40 w/ b/e blade setup on it and a bunch of little bit newer junk too but i really like the older stuff more ---scott

p.s. this is not going to be a show piece it has work to do when i get it going i use my old junk ๐Ÿ˜Š
Please log in or create an account to join the conversation.
Wed, May 14, 2008 3:23 AM
moonshadows
Topic Author
Offline
Send a private message to moonshadows
Posts: 28
Thank you received: 0
Reply to moonshadows:
i dont know anything about graders it is supposed to run or it did in the past when pull started. the pony is stuck iam going to look into getting it going also have been reading and looking into the electric start conversions listed on this site thanks for the info on the vintage and model that will help in getting manual i like old junk like this and dont mind tinkering and making obsolete parts i also have a 35 mccormick deering td-40 w/ b/e blade setup on it and a bunch of little bit newer junk too but i really like the older stuff more ---scott

p.s. this is not going to be a show piece it has work to do when i get it going i use my old junk ๐Ÿ˜Š
also it has new 8.25 20 tires on the front but the rears are mis matched junk even has one 24.5 on one of the rims what size is supposed to be on the rear ??? i was guessing 1100x24 but would like to find out before searching ---scott
Please log in or create an account to join the conversation.
Wed, May 14, 2008 3:32 AM
D4Jim
Offline
Member
Send a private message to D4Jim
Location: NW Kansas
Posts: 1,318
Thank you received: 5
Reply to moonshadows:
also it has new 8.25 20 tires on the front but the rears are mis matched junk even has one 24.5 on one of the rims what size is supposed to be on the rear ??? i was guessing 1100x24 but would like to find out before searching ---scott
I believe the 212 came out with 10-24 tires. If you get a wider tire, it will be larger diameter and it may not fit as the 212 has limited space.

http://www.denmantire.com/catalog/8.pdf

13-24 is the most common grader tire but it is to large for the 212.

You might send an email to ccjersey as I believe he has a 212.

Cats Forever

Please log in or create an account to join the conversation.
Wed, May 14, 2008 12:41 PM
ccjersey
Offline
Send a private message to ccjersey
Posts: 4,422
Thank you received: 0
Reply to D4Jim:
I believe the 212 came out with 10-24 tires. If you get a wider tire, it will be larger diameter and it may not fit as the 212 has limited space.

http://www.denmantire.com/catalog/8.pdf

13-24 is the most common grader tire but it is to large for the 212.

You might send an email to ccjersey as I believe he has a 212.
That's right, the machine came with 7.00x20's front and 10.00x24's rear. Later machines after 9T4762 had 21's on the front, but there were optional rims to convert that back to 20's and also wheels to take the 10.00x24's on the front.
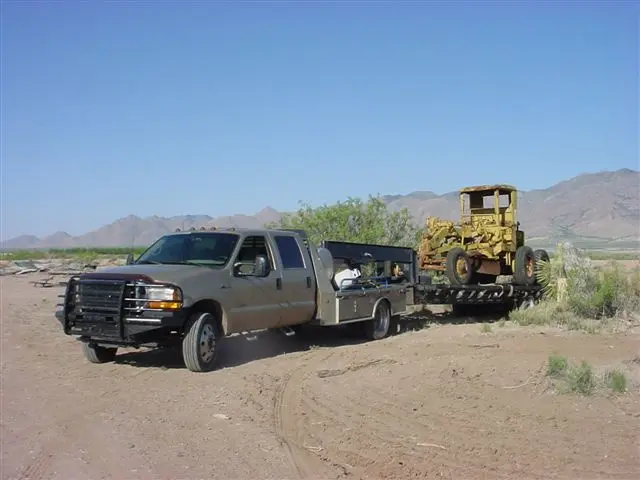
D2-5J's, D6-9U's, D318 and D333 power units, 12E-99E grader, 922B & 944A wheel loaders, D330C generator set, DW20 water tanker and a bunch of Jersey cows to take care of in my spare time๐Ÿ˜„
Please log in or create an account to join the conversation.
Wed, May 14, 2008 8:19 PM
moonshadows
Topic Author
Offline
Send a private message to moonshadows
Posts: 28
Thank you received: 0
Reply to ccjersey:
That's right, the machine came with 7.00x20's front and 10.00x24's rear. Later machines after 9T4762 had 21's on the front, but there were optional rims to convert that back to 20's and also wheels to take the 10.00x24's on the front.
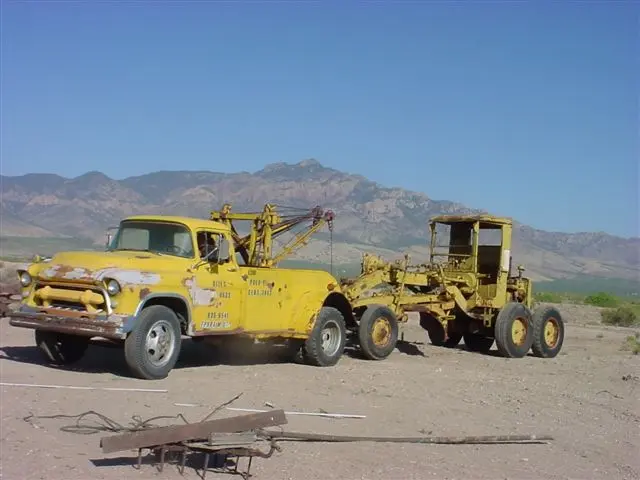
that is good info it has two 1100 24's one i think might be a 1000 24 and one 1100 24.5 ??? the two 8.25 20 on the front are new and i thought they looked a little big/wide for the rims but they will be ok for now i guess --- the pony is stuck so i will probably get some oil into the cylinders today see if i can free it up and start making parts to do that electric conversion like i saw on here i was told this unit ran recently by pull starting it so hopefully ill get it all going ---scott
Attachment
Attachment
Attachment
Please log in or create an account to join the conversation.
Wed, May 14, 2008 11:04 PM
ccjersey
Offline
Send a private message to ccjersey
Posts: 4,422
Thank you received: 0
Reply to moonshadows:
that is good info it has two 1100 24's one i think might be a 1000 24 and one 1100 24.5 ??? the two 8.25 20 on the front are new and i thought they looked a little big/wide for the rims but they will be ok for now i guess --- the pony is stuck so i will probably get some oil into the cylinders today see if i can free it up and start making parts to do that electric conversion like i saw on here i was told this unit ran recently by pull starting it so hopefully ill get it all going ---scott
Attachment
Attachment
Attachment
Potential killer problems include
breaking the vertical shaft coming into the bottom of the control gear box (later machines had a shear pin in this shaft) so make sure you don't drive one of the controls into the end of it's travel. It will train you not to do this by smacking your palm as it jumps out of engagement. Best to wear gloves and make sure your control levers have grips on. You want to quickly engage and then completely disengage the controls, not attempt to "ease it in" like it was a clutch. It is a gear dog type engagement that meshes up when you push or pull the lever.

Steering box is expensive and getting rare. There are some substitutions from larger/later graders that can be done. It's worth rebuilding or adjusting the slack out of the worm bearings as needed to keep it from shattering the worm when the rack climbs out on the end of the worm thread and jams. CAT quoted $1200 for a new worm when we asked.


Looking at your pictures, I doubt you will be bothered by water in things, but you might want to drain a bit of oil out of the two blade lift boxes on the front of the main control box just to make sure there's not water in the bottom of those boxes. We had one with and one without water.

I have been amazed what ours will do on so little hp. Hope you find everything is in good shape.

It won't be a whole lot of trouble to take the pony motor heads off to clean the cylinders inside. You can usually reuse the gaskets, or they aren't too expensive anyway. Tighten head nuts evenly to 32 foot pounds when you go back.

Plug wires should be WIRE core, not carbon core and most common recommendation is NGK AB6 plugs.

If you have to go into the magneto, pay attention to how the rotor is timed to the gear behind before you remove it. You probably will have to file the points and regap them to 0.014-0.018 inch gap.

Almost certainly have to remove and clean the carburetor bowl, lines and tank. It is a great idea to add a filter inline once you get your carburetor clean so it will stay clean. there seems to always be some more rust somewhere even if you reline the fuel tank with one of the splashing compounds that are available. Then if you cut off the starting motor by running the carburetor dry each time, you will have very little trouble with fuel varnishing up on you or deteriorating your float.

Good luck!

Have Fun!
D2-5J's, D6-9U's, D318 and D333 power units, 12E-99E grader, 922B & 944A wheel loaders, D330C generator set, DW20 water tanker and a bunch of Jersey cows to take care of in my spare time๐Ÿ˜„
Please log in or create an account to join the conversation.
Thu, May 15, 2008 1:20 AM
moonshadows
Topic Author
Offline
Send a private message to moonshadows
Posts: 28
Thank you received: 0
Reply to ccjersey:
Potential killer problems include
breaking the vertical shaft coming into the bottom of the control gear box (later machines had a shear pin in this shaft) so make sure you don't drive one of the controls into the end of it's travel. It will train you not to do this by smacking your palm as it jumps out of engagement. Best to wear gloves and make sure your control levers have grips on. You want to quickly engage and then completely disengage the controls, not attempt to "ease it in" like it was a clutch. It is a gear dog type engagement that meshes up when you push or pull the lever.

Steering box is expensive and getting rare. There are some substitutions from larger/later graders that can be done. It's worth rebuilding or adjusting the slack out of the worm bearings as needed to keep it from shattering the worm when the rack climbs out on the end of the worm thread and jams. CAT quoted $1200 for a new worm when we asked.


Looking at your pictures, I doubt you will be bothered by water in things, but you might want to drain a bit of oil out of the two blade lift boxes on the front of the main control box just to make sure there's not water in the bottom of those boxes. We had one with and one without water.

I have been amazed what ours will do on so little hp. Hope you find everything is in good shape.

It won't be a whole lot of trouble to take the pony motor heads off to clean the cylinders inside. You can usually reuse the gaskets, or they aren't too expensive anyway. Tighten head nuts evenly to 32 foot pounds when you go back.

Plug wires should be WIRE core, not carbon core and most common recommendation is NGK AB6 plugs.

If you have to go into the magneto, pay attention to how the rotor is timed to the gear behind before you remove it. You probably will have to file the points and regap them to 0.014-0.018 inch gap.

Almost certainly have to remove and clean the carburetor bowl, lines and tank. It is a great idea to add a filter inline once you get your carburetor clean so it will stay clean. there seems to always be some more rust somewhere even if you reline the fuel tank with one of the splashing compounds that are available. Then if you cut off the starting motor by running the carburetor dry each time, you will have very little trouble with fuel varnishing up on you or deteriorating your float.

Good luck!

Have Fun!
what is the sequence of the serial numbers ?? this one is 1U-166 found a book for 9t1 and up is that newer or older "1" would be first or is the letter the important part then t would be first ??? let me know thanks ---scott
Please log in or create an account to join the conversation.
Thu, May 15, 2008 10:58 AM
ccjersey
Offline
Send a private message to ccjersey
Posts: 4,422
Thank you received: 0
Reply to moonshadows:
what is the sequence of the serial numbers ?? this one is 1U-166 found a book for 9t1 and up is that newer or older "1" would be first or is the letter the important part then t would be first ??? let me know thanks ---scott
the 9T 212 graders would be the next newer models to yours. I believe the main difference between the last 1U graders (made from 1946-1947) is the change to the D311 engine from the D3400 engine.

Someone had a 9T that had had a D3400 put into it, so at least where the engine bolts up, they were the same. At any rate, all Caterpillar products were all constantly being improved over the years, so even with the same serial number prefix, there will be differences as the series progressed. Your grader might be closer to an early 9T machine (made in 194๐Ÿ˜Ž than a later 9T (made in the mid 1950's)is (except for the engine)

As far as the prefix goes, I don't know if there is any system to the sequence of the prefixes through the years. In the late 40's to 50's there were U series tractors in the D2, D4, D6 and D8 size (the D7 of that era was the T series) but as your grader shows, there were also U machines at other times as well. So I would be interested to know any system of selecting the prefixes (first number and letter on the old machines and first 3 positions on the later machines)
D2-5J's, D6-9U's, D318 and D333 power units, 12E-99E grader, 922B & 944A wheel loaders, D330C generator set, DW20 water tanker and a bunch of Jersey cows to take care of in my spare time๐Ÿ˜„
Please log in or create an account to join the conversation.
Thu, May 15, 2008 9:52 PM
Showing 1 to 10 of 35 results
1
YouTube Video Placeholder

Follow Us on Social Media

Our channel highlights machines from the earliest Holt and Best track-type tractors, equipment from the start of Caterpillar in 1925, up to units built in the mid-1960s.

Upcoming Events

Veerkamp Open House 2025

Chapter Fifteen

| Placerville, CA

Stradsett Park Vintage Rally

Chapter Two

| Stradsett, Nr Downham Market. Norfolk PE33 9HA UK

Chapter 2 The Link Club's AGM

Chapter Two

| Faulkner Farm, West Drove, Wisbech, Cambridgeshire, PE14 7DP, UK
View Calendar
ACMOC

Antique Caterpillar
Machinery Owners Club

1115 Madison St NE # 1117
Salem, OR 97301

[email protected]

Terms & Privacy
Website developed by AdCo

Testimonials

"I became a member recently because the wealth of knowledge here is priceless." 
-Chris R

Join Today!