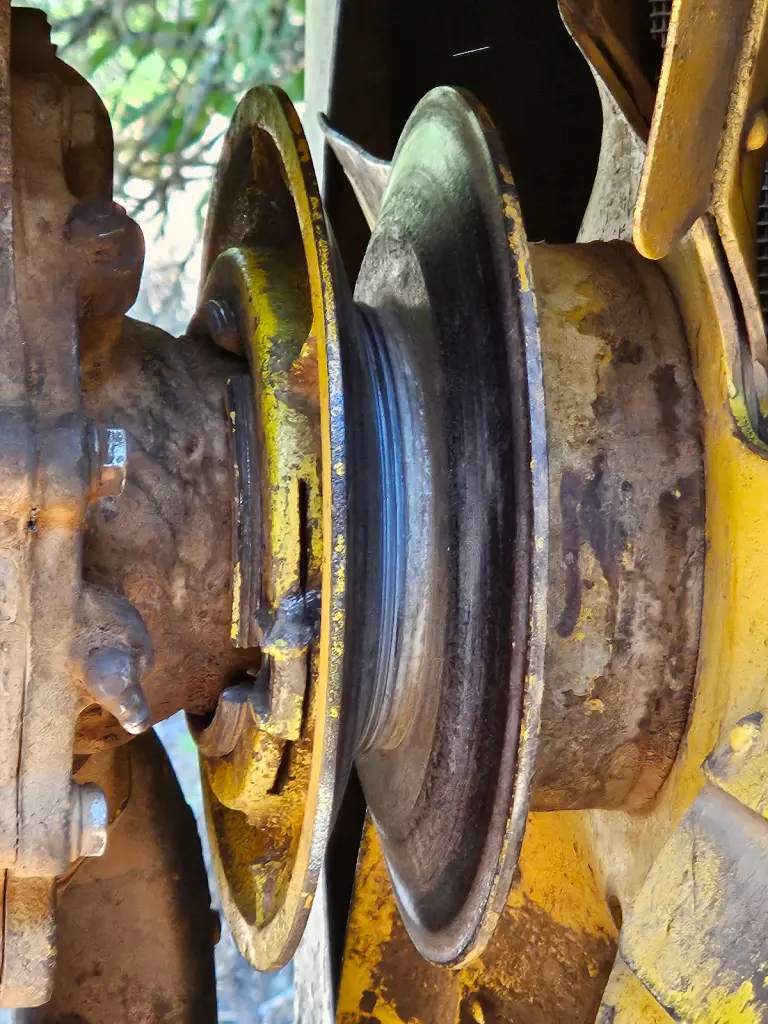
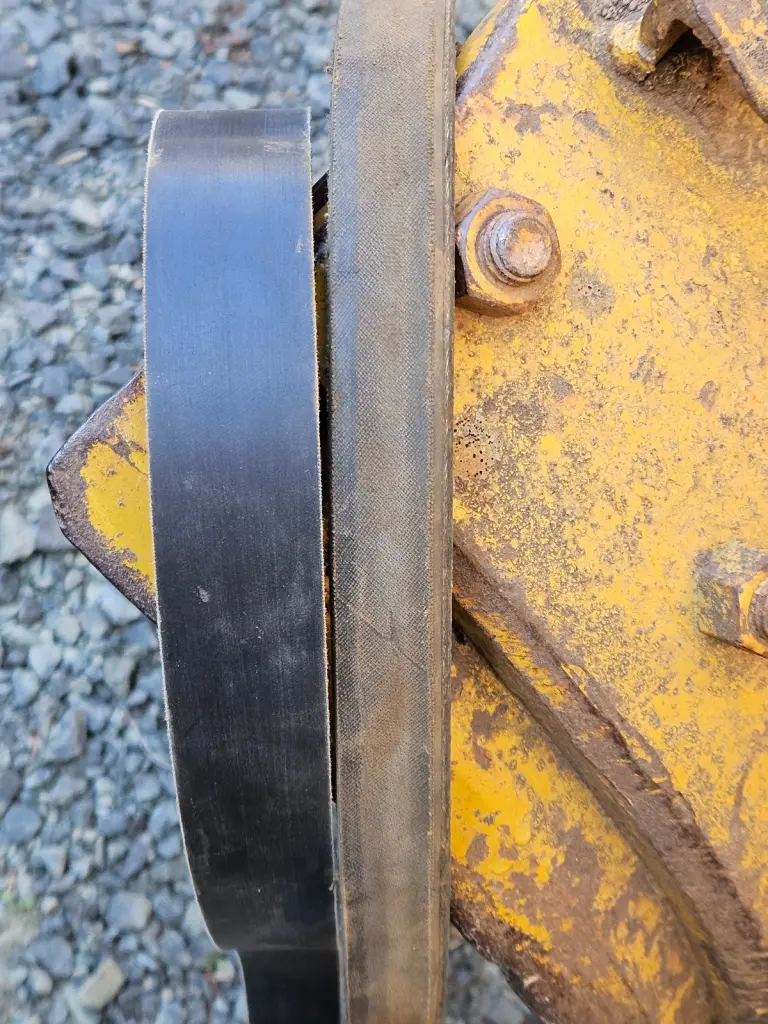
NEVER beat on that adjusting ring where the lock bolt goes through, now you bent it in and screwed up the threads!
Thank you. That makes sense now that I cleaned out the slot behind the where the lock nut goes through. It looked solid when it was full of dirt and grease. I saw a prior post about using a spanner to help break it loose and save the threads. Of course, that was after this one was already damaged.
Do you think the threads and adjusting ring are something that could be repaired?
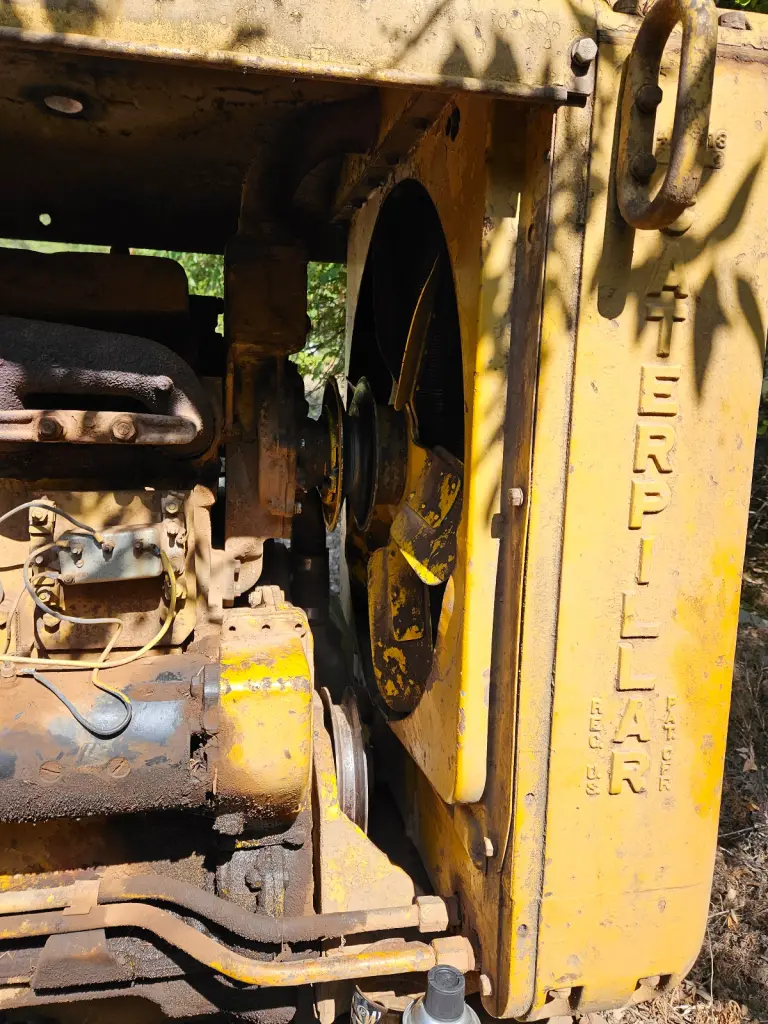
Still curious if its possible to install a new belt without removing the radiator and fan/pump.
You might be able to take a chisel and open that back up, but may still damage the threads. Yes just get the belt around the fan then install it on the pulleys. Make sure you have the right belt for that serial number, some fan pulleys were different diameter and used a different belt.
The fan pulley groove sides are worn as well which will hasten belt wear. If you're going to pull the pulley off, you could send it to a shop and get him to reface the faces back to the correct consistent angle. Ideally you'd want to do it to both the fan and crank pulleys. While you have the fan pulley off, use a thread file to clean up the adjusting threads - you should be able to spin the adjuster half by hand. To loosen or tighten, jam a rod (wrench, whatever you have that will fit) from the adjuster webs to a suitable place and then turn the fan blades. That way you're not pounding on the adjuster
Some antiseize on the threads will make it a lot easier the next time you have to adjust the belt
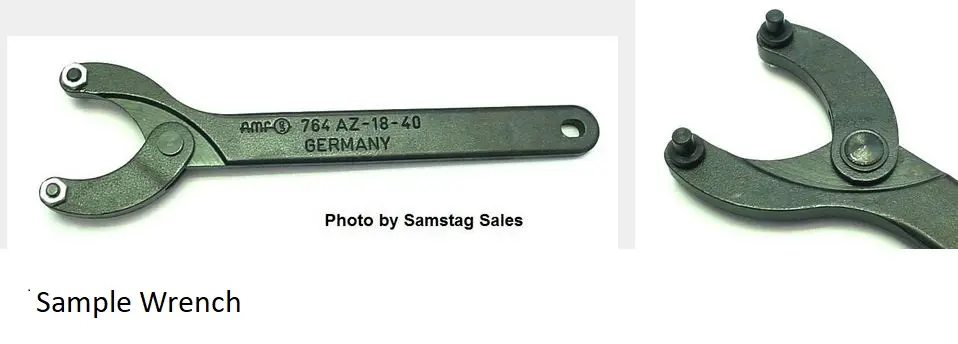


The proper tool for adjustment is an adjustable spanner wrench with the right size pins.
Once the lock screws are removed the holes a counter bored to accept the pins (before there buggered up).
D4's use 1/4" pins, D6 uses 5/16"
[attachment=73853]AMF Face Pin Spanner #1.JPG[/attachment]
[attachment=73855]AMF Face Pin Spanner #2.JPG[/attachment]
[attachment=73854]AMF Face Pin Spanner #3.JPG[/attachment]
use a hacksaw blade to clean some of the damage up, then tap a small screwdriver in the slot and adjust it, dont worry about the sides of the pully you are probably not going to run it enough to hurt the belt
You have a wonderful day. Best wishes. Deas Plant.
Hi, PaulBmf.
The new belt should go on without removing anything - assuming that you have the right belt. Bear in mind that old belt would also have been somewhat stretched and so you may need to back the adjustment off a bit more on the top pulley. I would be starting by adjusting the top back some more and then putting the belt over the top pulley first.
If it is missing out by a LOTTTT, it may be that you have the wrong belt for your machine.
Going by the look of that fan pulley, the wear showing there would cause belt damage, A photo - or two - of the old belt may also give a clue. You could run a new belt on that pulley but it would likely quickly wear to a similar shape.
Try wiggling the fan to see if there is any movement in the fan bearings. Funny thing about fan bearings on these machines - if the bearings are worn, it is likely that the seals will be leaking.
DON'T take too much notice of this post 'coz I'm 'justa pore, dumm bulldozer op'rator' so what would I know about graders?
Just my 0.02.
"i reject your reality and substitute my own" - adam savage. i suspect my final words maybe "well shit, that didnt work"
instead of perfection some times we just have to accept practicality
i wondered how they where adjusted. i knew you turned the nut to close up the sheave and thus adjust the belt. but how it was supposed to be turned was a mystry. thanks OM. the other name for them is gland nut spanners many hydraulic rams have pin type gland nuts.
You have a wonderful day. Best wishes. Deas Plant.


Our channel highlights machines from the earliest Holt and Best track-type tractors, equipment from the start of Caterpillar in 1925, up to units built in the mid-1960s.
Chapter Fifteen
| Placerville, CAChapter Two
| Stradsett, Nr Downham Market. Norfolk PE33 9HA UKChapter Two
| Faulkner Farm, West Drove, Wisbech, Cambridgeshire, PE14 7DP, UK
Antique Caterpillar
Machinery Owners Club
1115 Madison St NE # 1117
Salem, OR 97301
Terms & Privacy
Website developed by
AdCo
"I also joined a year ago. had been on here a couple of times as a non-member and found the info very helpful so I got a one year subscription (not very expensive at all) to try it out. I really like all the resources on here so I just got a three year. I think its a very small price for what you can get out of this site."
-Jason N