Welcome to the site and the "disease"!
That thing looks pretty good for having been sitting in the bushes for ten years!
You say Western WA; I am in Olympia and have a 4U that I have done a bunch of work on. Where are you located?
Greg
Congratulations! You've just developed yellow fever for which the cure is more cowbell, er, more examples of these yellow machines..
Step 1 - update your profile (top right of this page) with your location, as there may be local members who can help.
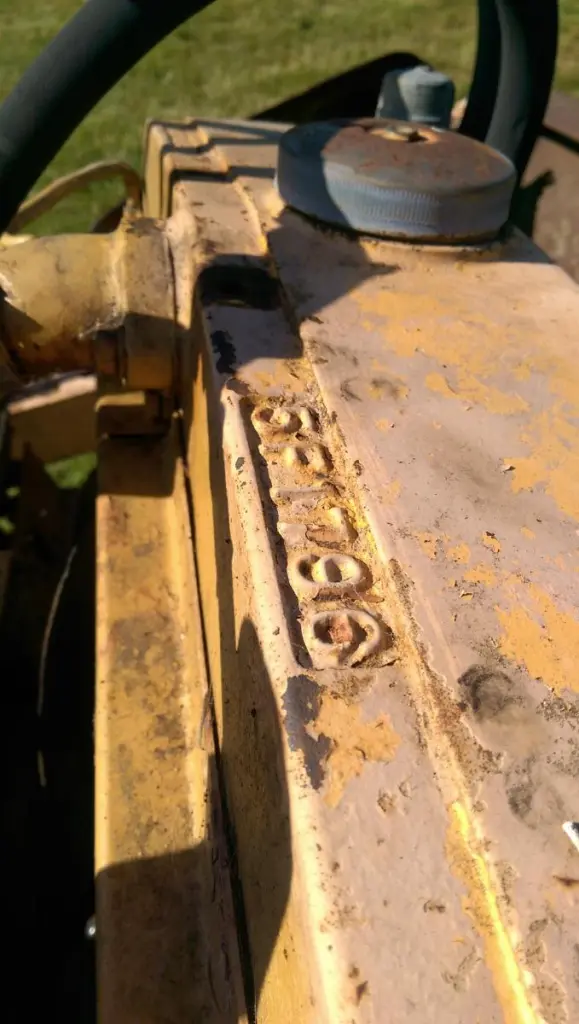
Step 2 - you've done this, which is to give an appraisal of the machine and its serial number - well done - 50% of folks don't first time, and the other third ; ) also don't.
Then, there are drain plugs in the bottom of the main engine oil pan, the clutch housing, the transmission housing, the two final drive housings, and the pony. Pull them all and dump all the oil to recycling. The main engine dipstick is just a pull-out, but the cap has probably frozen to the tube. Get your gas-axe and heat the head up some, and use a gentle persuader to tap it up - it will come up.
Realistically you're probably going to strip the engine and clutch down, and likely the steering clutches too but we can get to them later. For the pony motor, check for spark and the condition of the spark plug wires as they crack and can leak over time. Your carb may need cleaning but you never know until you try. Take one of the screws off the front of the pony governor and squirt a kids medicine syringe of oil in there.
Then, fill the pony up to the mark with fresh engine oil, put some gas in the tank, and see if you can start it. If it does start, don't run it for more than a couple of minutes as it relies on the main engine cooling system to flow, and if the main engine isn't turning, the coolant won't flow. Regardless of whether you can get it started or not, then pull the cylinder heads off the pony (9/16 nuts). The gaskets are reusable. Look for rust blocking the small passages at the bottom. Depending on how blocked they are will help you make the call on whether to cleaning the pony cooling passages thoroughly or not. Replace the heads.
Let the engine sit for a while (days/weeks/months - however long you care for) with diesel or kero in the cylinders and see if you can free it up. You'll likely need to remove the main engine cylinder head so you can tap the pistons with a block of wood. You can wail on them a fair bit so don't worry about hurting it too much. If it's being reluctant to free up, set the kero on fire in each cylinder hole a couple of times to give it a couple of expansion cycles, which will likely let the pistons let go. While you're doing that, take a look at the bottom end by removing the main engine side covers. That will help you make the call on whether to pull the crank. Also look for any trace of coolant leaks from the cylinder liners.
Should the engine free up and the cylinders "look" ok, it could be worth putting the main head back on and seeing if you can get some compression. However before you can do that, you'll need to get the pony able to spin the main engine.
There is a four bolt cover on top of the main clutch housing - take that off and inspect the interior and components. Wiggle the levers and see what does and does not move. If mostly it moves but the pressure plate doesn't release, then you'll need to split the tractor to separate the main clutch. It's not too bad a job - you'll need to remove the blade and the dashboard to get at all the bolts. The fenders are also bolted across the clutch and transmission housing so they need to be loosened.
So give it a thorough inspection and report back here.
For parts, most items are readily available for this machine. A couple of things such as main bearings are getting a little harder to source but still possible.
Definitely get hold of the parts machine because many of the parts from the clutch backwards can be used, particularly if the 5U's main clutch is the single piece transmission input shaft. The 5U main engine is of no use to you but the pony if it has one is the same.
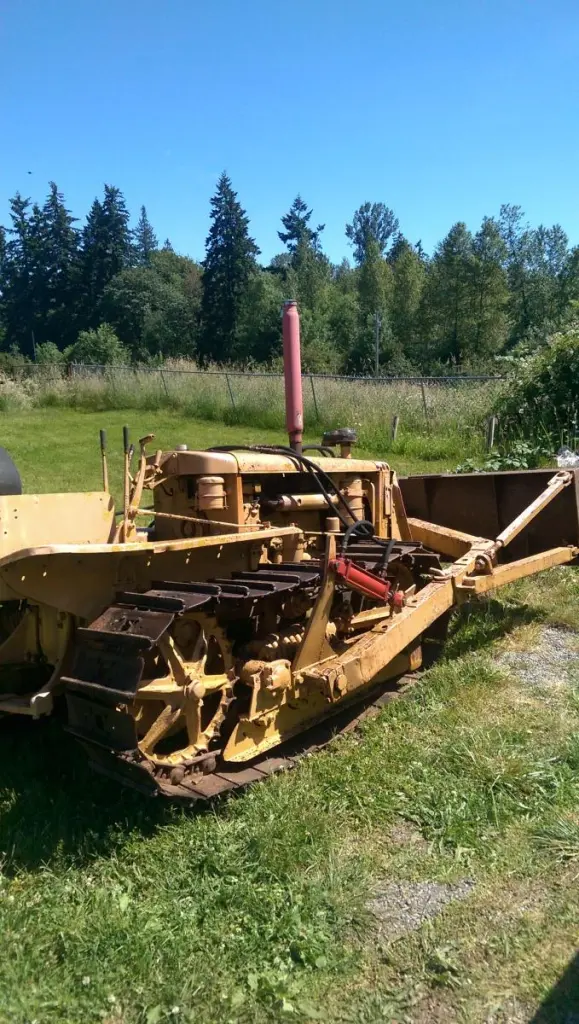
First off, welcome to the forum and congratulations on saving that old Cat from its long-time resting place. The serial number you gave indicates that it's a 1942 model year, production that year started at 5J 5148 and ended at 5J 6158. (Interesting side note - there were no D2's built in 1943 because of the War Effort, so your model was among the last built until 1944.) However, by looking at the pictures I do see that your machine has the later style, "U" series D2 radiator installed on it which indicates that there's a possibility of some mis-matched components on this unit. It's not a big deal, but have you checked that the engine and rear end serial number tags both match on this one? I doubt that there's been a complete engine change done to this machine in the past though, because it still has the correct style manifolds on the diesel engine and I think I can see the distinctive "J" series compression release linkages down on the RH side of the engine block on the lifter covers, plus in your post directly above you mentioned the small gasket between the pony and diesel head so that indicates that it still has the "J" series engine in it. The reason that style radiator intrigues me is because it can't directly be swapped out with the original "J" series radiator because of the distinct mounting bracket differences. To do it without swapping the whole engine, at the very least the front cover would have to be changed and I don't know for sure if that's possible. You got me thinking, now, lol!
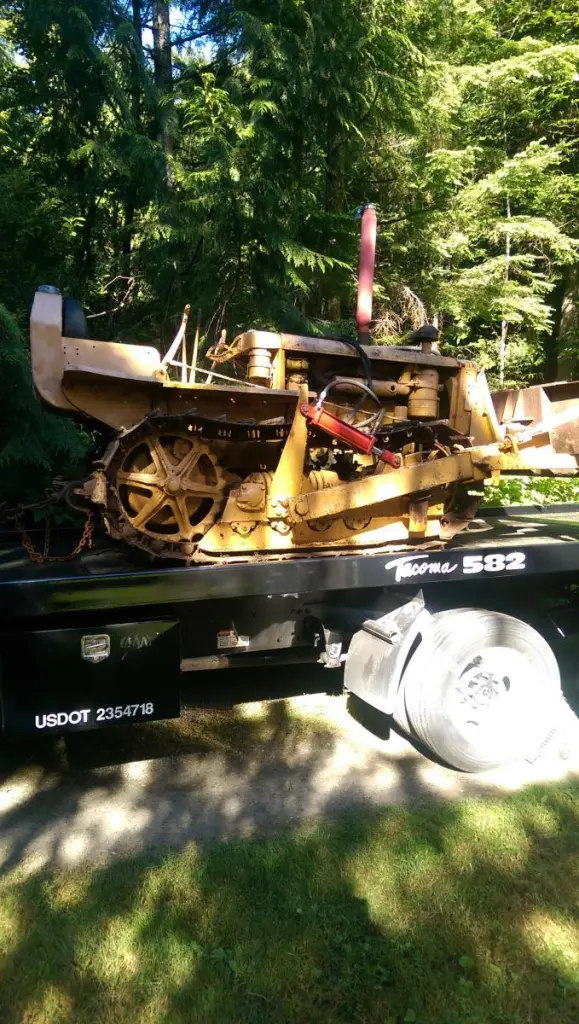
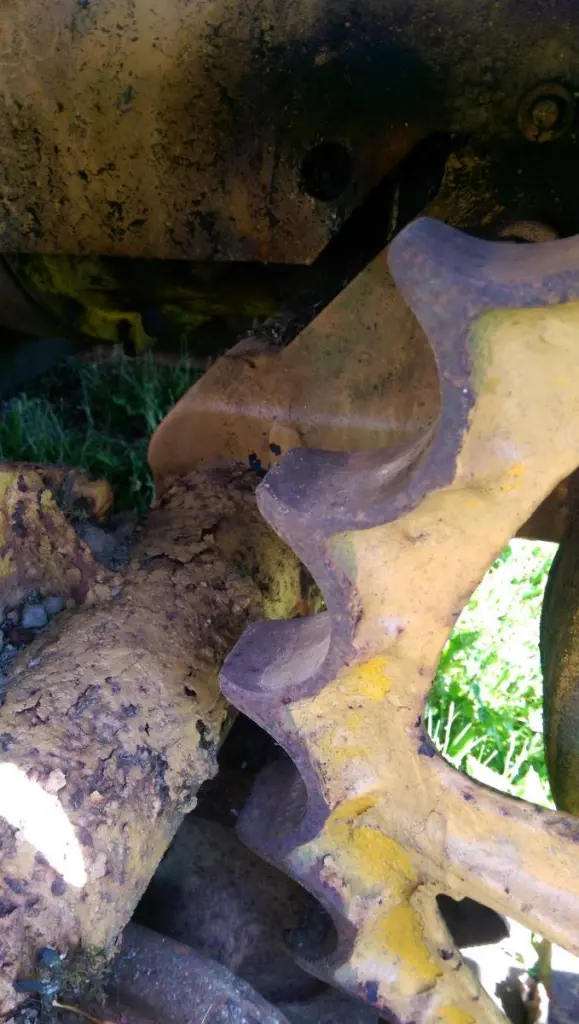
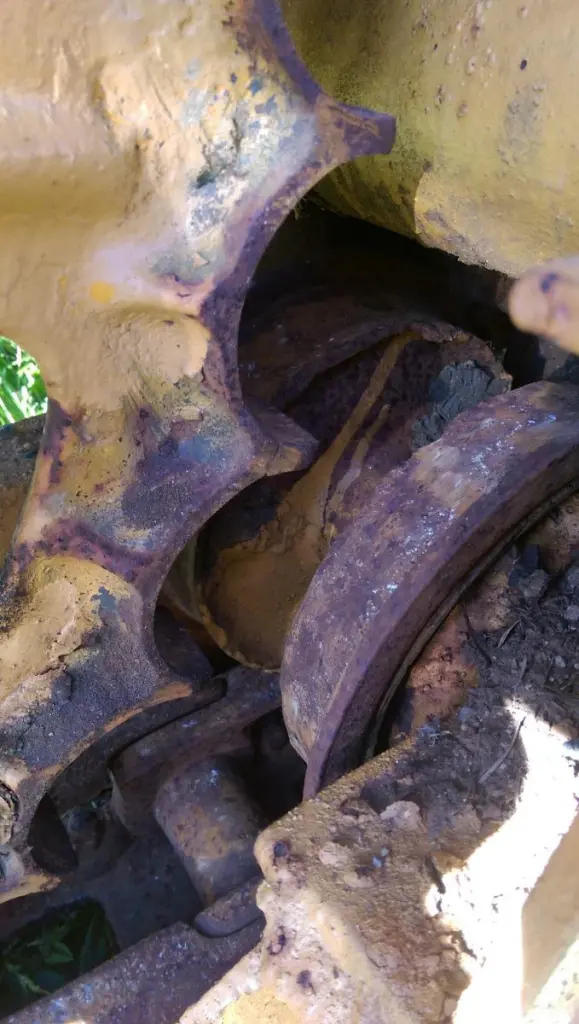
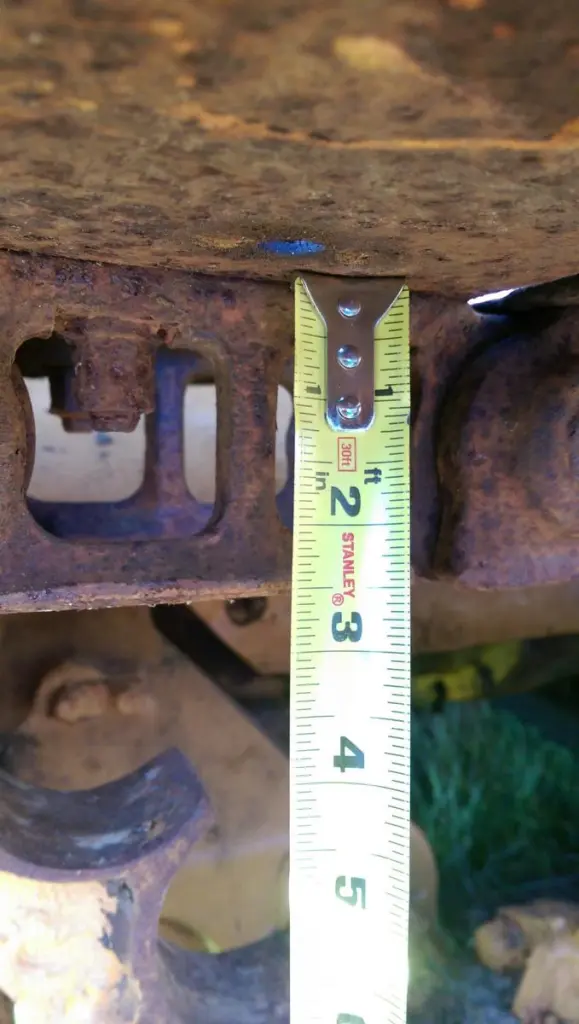
It's hard to really assess undercarriage condition without up-close, detailed pics of the various components. At first glance I can see that the tracks are on backwards, not a good thing because of the design of the pins/bushings in the links - when they're on backwards it actually causes increased wear because each bushing is having to pivot under pressure on the sprocket as it picks each link up off the ground, whereas if they're on the correct way the bushing stays put on the sprocket and the pivoting occurs inside the bushing on the pin. Also, the design of the track pads will actually cause them to scoop more dirt into the undercarriage when they're running backwards, leading to more wear. The sprocket teeth look a little sharp, but we would need more pics of the rollers and idlers as well as a height measurement on the links to give you a better idea.
You mentioned parts availability, and that is getting to be more of a problem all the time with these old Cats. Not only engine parts but undercarriage parts as well. Engine bearings can be especially hard to find, some guys have resorted to having them custom made. But components can still be found, it takes a good network of like-minded people and a lot of patience, but I think you've come to the right place for that. Good luck with your new Cat!
First off, welcome to the forum and congratulations on saving that old Cat from its long-time resting place. The serial number you gave indicates that it's a 1942 model year, production that year started at 5J 5148 and ended at 5J 6158. (Interesting side note - there were no D2's built in 1943 because of the War Effort, so your model was among the last built until 1944.) However, by looking at the pictures I do see that your machine has the later style, "U" series D2 radiator installed on it which indicates that there's a possibility of some mis-matched components on this unit. It's not a big deal, but have you checked that the engine and rear end serial number tags both match on this one? I doubt that there's been a complete engine change done to this machine in the past though, because it still has the correct style manifolds on the diesel engine and I think I can see the distinctive "J" series compression release linkages down on the RH side of the engine block on the lifter covers, plus in your post directly above you mentioned the small gasket between the pony and diesel head so that indicates that it still has the "J" series engine in it. The reason that style radiator intrigues me is because it can't directly be swapped out with the original "J" series radiator because of the distinct mounting bracket differences. To do it without swapping the whole engine, at the very least the front cover would have to be changed and I don't know for sure if that's possible. You got me thinking, now, lol!
It's hard to really assess undercarriage condition without up-close, detailed pics of the various components. At first glance I can see that the tracks are on backwards, not a good thing because of the design of the pins/bushings in the links - when they're on backwards it actually causes increased wear because each bushing is having to pivot under pressure on the sprocket as it picks each link up off the ground, whereas if they're on the correct way the bushing stays put on the sprocket and the pivoting occurs inside the bushing on the pin. Also, the design of the track pads will actually cause them to scoop more dirt into the undercarriage when they're running backwards, leading to more wear. The sprocket teeth look a little sharp, but we would need more pics of the rollers and idlers as well as a height measurement on the links to give you a better idea.
You mentioned parts availability, and that is getting to be more of a problem all the time with these old Cats. Not only engine parts but undercarriage parts as well. Engine bearings can be especially hard to find, some guys have resorted to having them custom made. But components can still be found, it takes a good network of like-minded people and a lot of patience, but I think you've come to the right place for that. Good luck with your new Cat!
Dang it, when I re-read your initial post I spotted a couple of your questions that I forgot to answer.
There was a major design change done to the U series machines effective with serial numbers 4U 6373 and 5U 13237, but any "U" series machine built before that has some common parts.
The main difference between the J series and early U series D2's was the diesel engine. The J series used the 3 3/4" bore D3400 diesel engine and the U series used the 4" bore D311 engine. Not many components interchange between those two power plants, but the pony motor blocks and innards are the same - they just have different manifolds and top covers attached to them. The D3400 and D311 engines share a common bell housing bolt pattern so either one could be bolted up to a "J or "U series chassis and made to work, but would require a few other minor pieces to be swapped also like clutches and pressure plates, air cleaner, dash, hood, etc. Main clutch discs and flywheels are different between the two series, the J clutch disc is smaller and thinner than the U series because of the power output difference of the engines.
Rear end, final drive, and transmission components mostly interchange between the two series. Undercarriage parts all utilize the same dimensions but minor details like track roller and idler seal and bearing cap designs changed, but all components will interchange without problems with the exception of the main springs (the big leaf spring that extends between the track frames and attaches under the diesel engine) as there were a couple of design changes done to that assembly over the years. Only the parts manuals can tell you which ones will interchange based on serial numbers.
The dipsticks for both engines are just a press-fit on the tubes, the one you have is just likely rusted on a bit.
You don't necessarily have to loosen the pony motor to remove the diesel cylinder head, but I strongly recomment it. It will make the job easier plus allow you to get that small gasket you asked about reinstalled properly.
Don't feel bad about the backwards tracks, it's little details like that that anybody new to Cats would likely miss. These old machines all share a common characteristic, and that is that many people have tried to work on them over the years and not all of them got everything put back completely right. It's not too bad of a job to get them on correctly though, once the blade is removed just swap them from side to side and you're good to go.

OK, So I now feel much better spending 250 bucks on this dozer! The kerosene soak overnight freed up the diesel, I can rotate the engine throughout most of its travel without feeling any ridges in its movement until the fan belt slips! I can also hear the remaining kerosene moving around with the decompression lever engaged! 🤘
I took some pictures of various items you all had asked about, as well as the radiator, but not from below yet..
Now I just need to figure out how to get the pinion lever to move up.
Also, I assume that the clutch lever in the forward position is disengaged correct?
Here are some pictures:
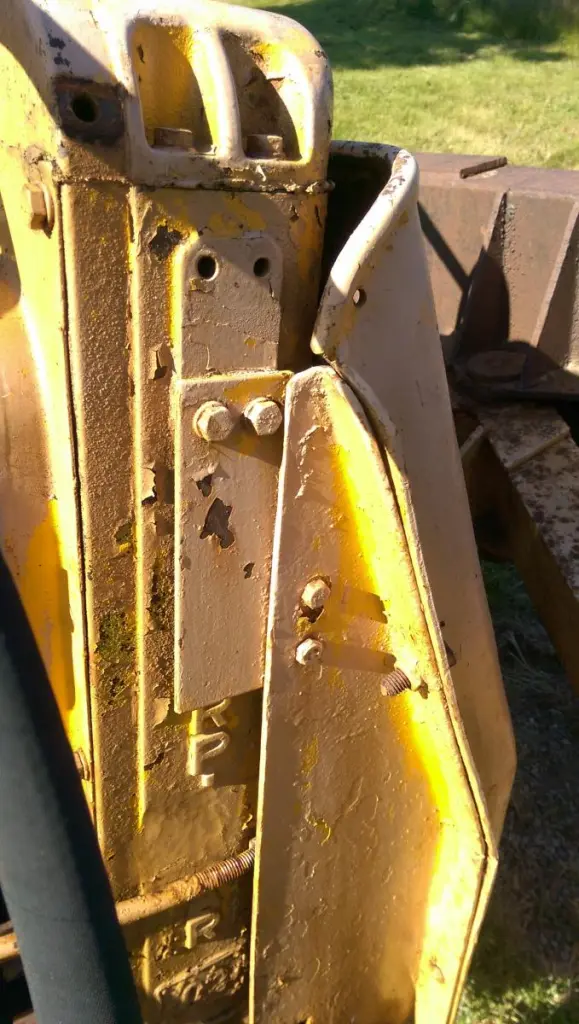
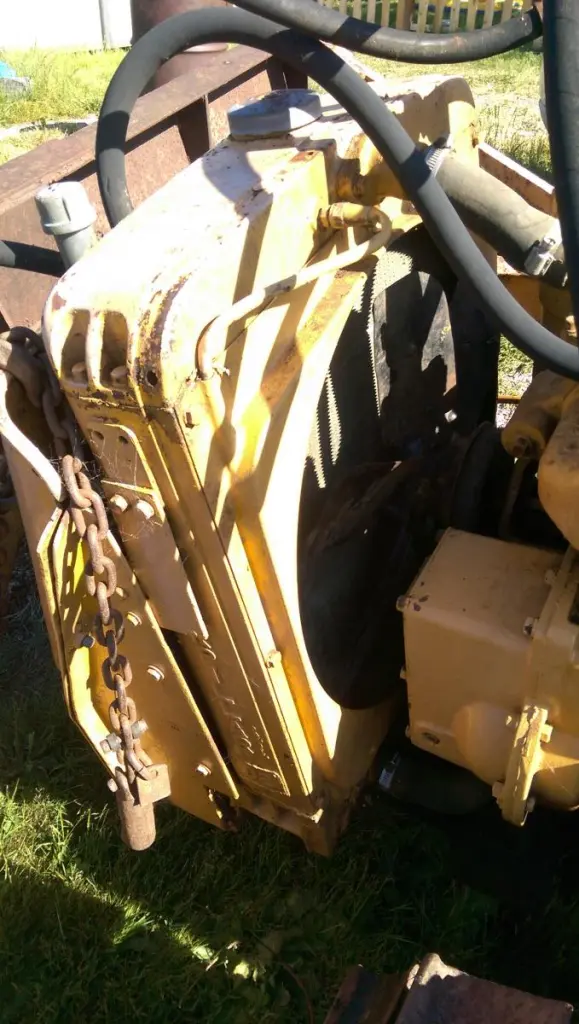
Radiator:
[attachment=29501]IMAG0091.jpg[/attachment] [attachment=29502]IMAG0090.jpg[/attachment] [attachment=29503]IMAG0083.jpg[/attachment]
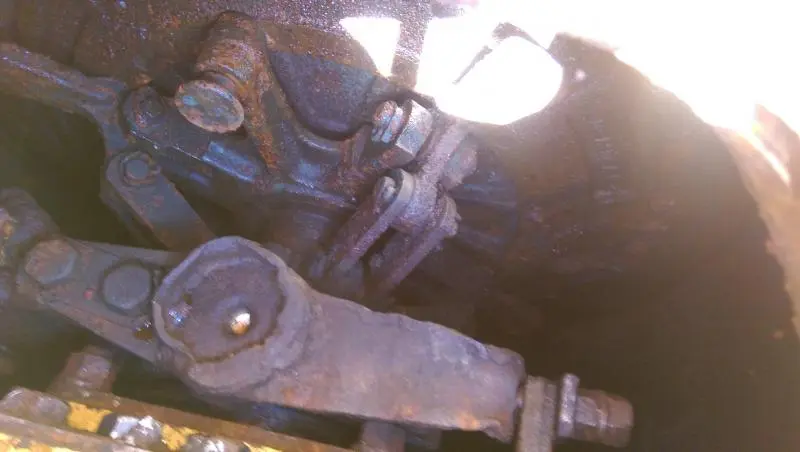
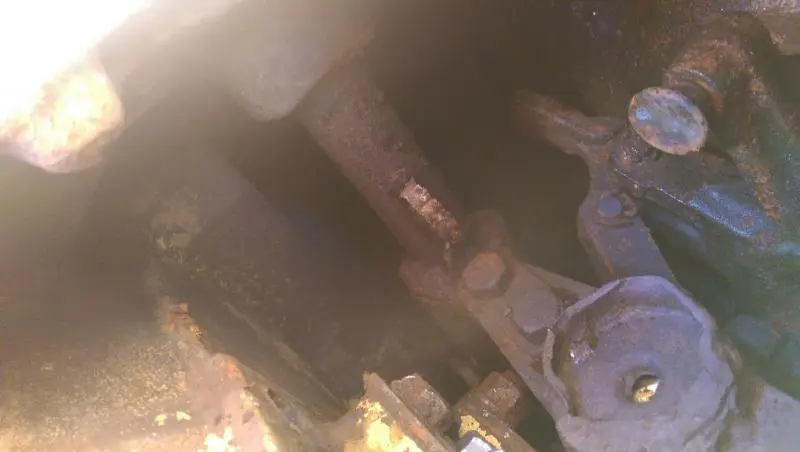
Clutch:
[attachment=29504]IMAG0080.jpg[/attachment] [attachment=29505]IMAG0093.jpg[/attachment]
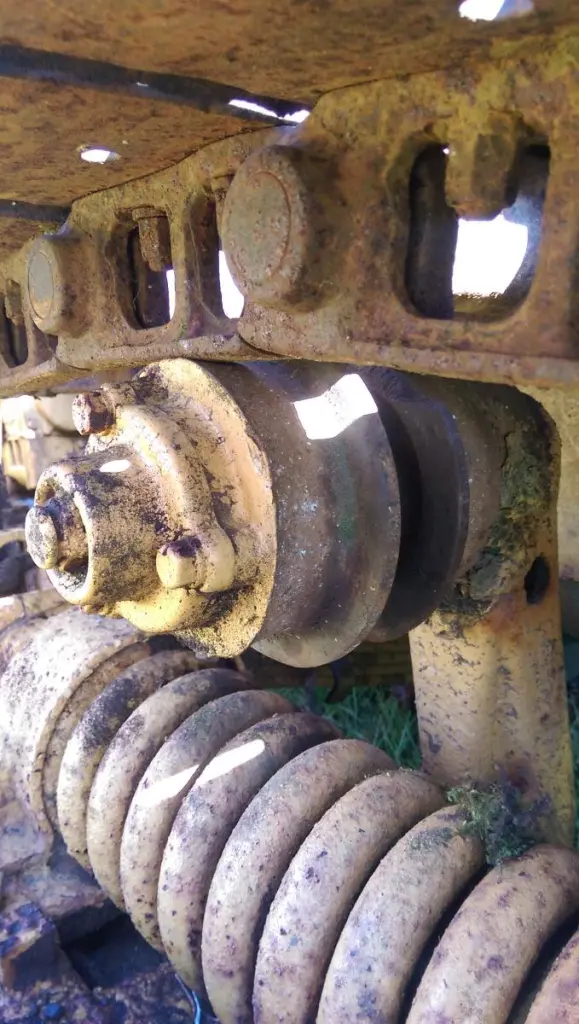
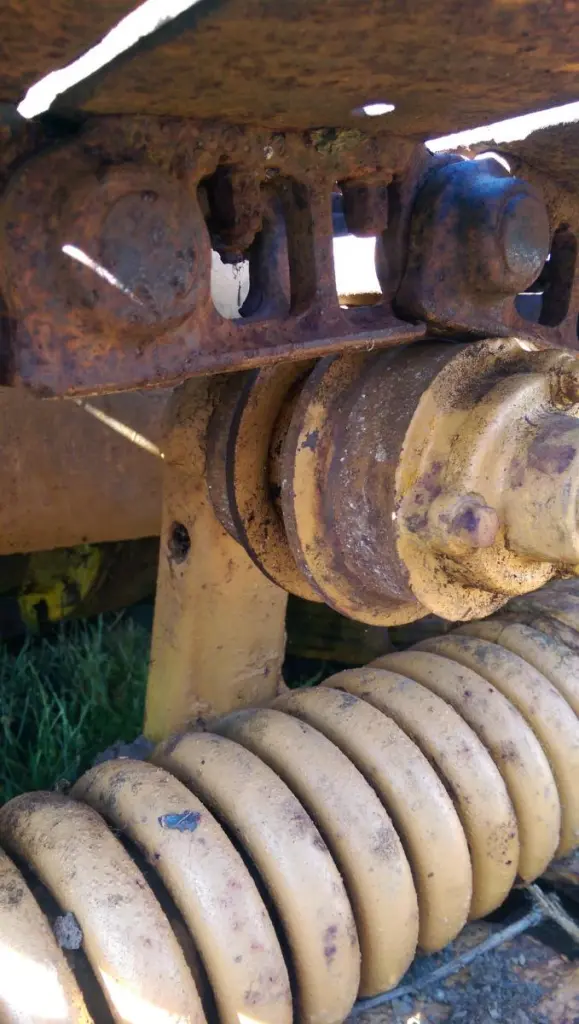
U/C and Tracks:
[attachment=29506]IMAG0084.jpg[/attachment] [attachment=29507]IMAG0085.jpg[/attachment] [attachment=29508]IMAG0086.jpg[/attachment] [attachment=29509]IMAG0087.jpg[/attachment] [attachment=29510]IMAG0089.jpg[/attachment] [attachment=29511]IMAG0092.jpg[/attachment]
The first thing I would have to do is to put the correct ell fitting on the radiator overflow line, that just bugs me! Start looking for rollers and chains because what I see is mostly shot. The carrier rollers could be welded & turned, but the chains are long gone, new are 1/2" taller! I would like to see how the later radiator was crafted onto the early engine as well.


Our channel highlights machines from the earliest Holt and Best track-type tractors, equipment from the start of Caterpillar in 1925, up to units built in the mid-1960s.
Chapter Two
| Highacres Farm, Dewey Lane, Brackenfield, Derbyshire DE55 6DB, UKChapter Nineteen
| 2 Winkleigh Rd, Exeter TAS 7275
Antique Caterpillar
Machinery Owners Club
1115 Madison St NE # 1117
Salem, OR 97301
Terms & Privacy
Website developed by
AdCo
"I also joined a year ago. had been on here a couple of times as a non-member and found the info very helpful so I got a one year subscription (not very expensive at all) to try it out. I really like all the resources on here so I just got a three year. I think its a very small price for what you can get out of this site."
-Jason N