Sounds like the recoil spring is being compressed rather than the idler moving.
The trick is to drive the machine back and forth after every 50 or so pumps .
It is rather dis heartening to spend ages pumping grease only to find the track too tight and having to let most of it out .
Thanks for the reply Andrew. I did drive it back and forth a bit. I also put blocks under the blade and lifted the idlers off the ground, thinking there would be less pressure forcing them back. I think I'll take the spring cover off and take a look to see what's going on.
One note of Caution -
Do NOT remove the grease zerk to relieve the pressure. It is a bullet waiting for release.
cts
I had an idler/adjuster do that and the idler had twisted a little from wear and locked into the frame--a little twisting with a bar and a light pull on it got it moving out again
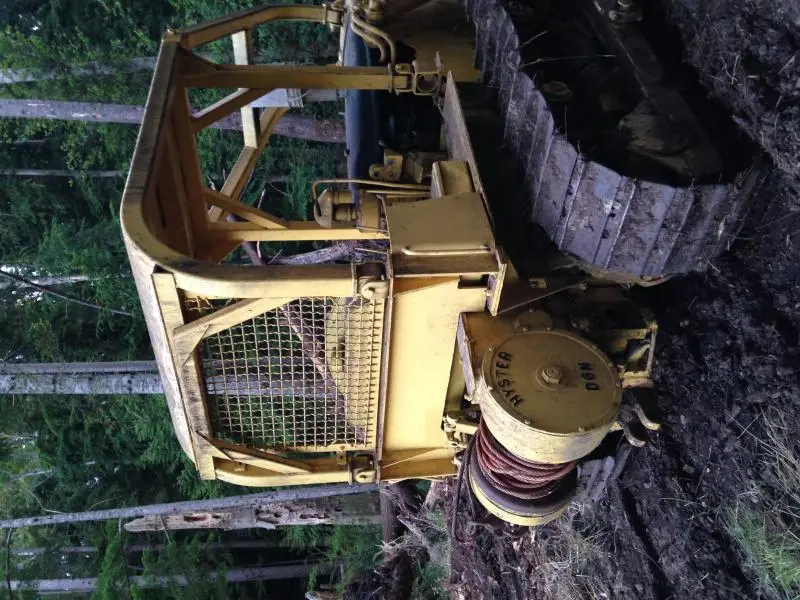
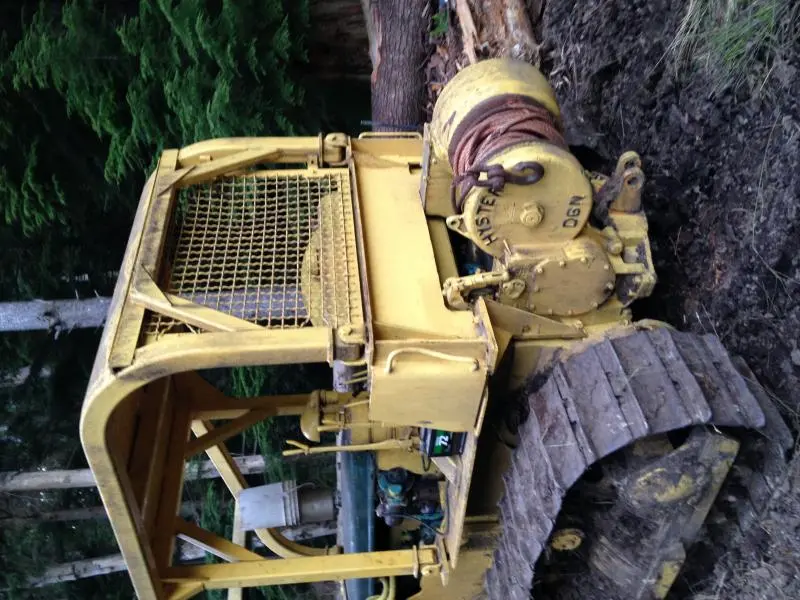
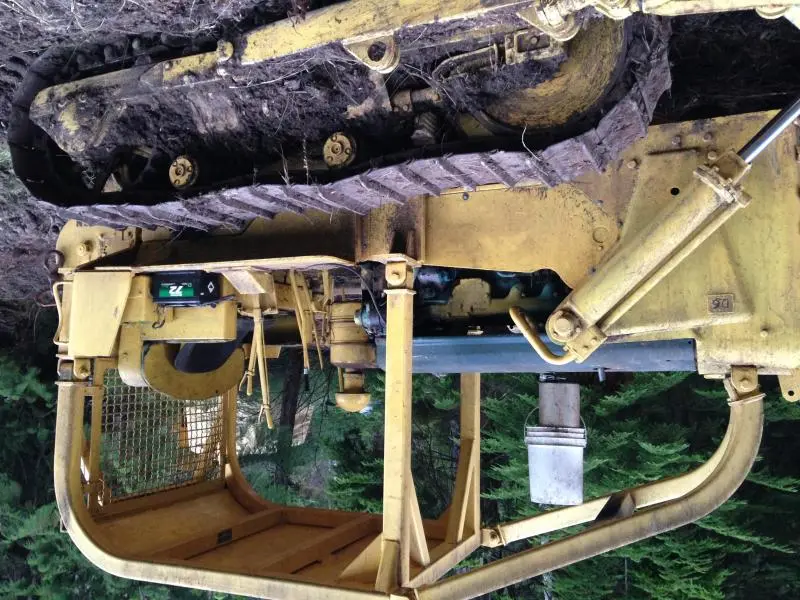

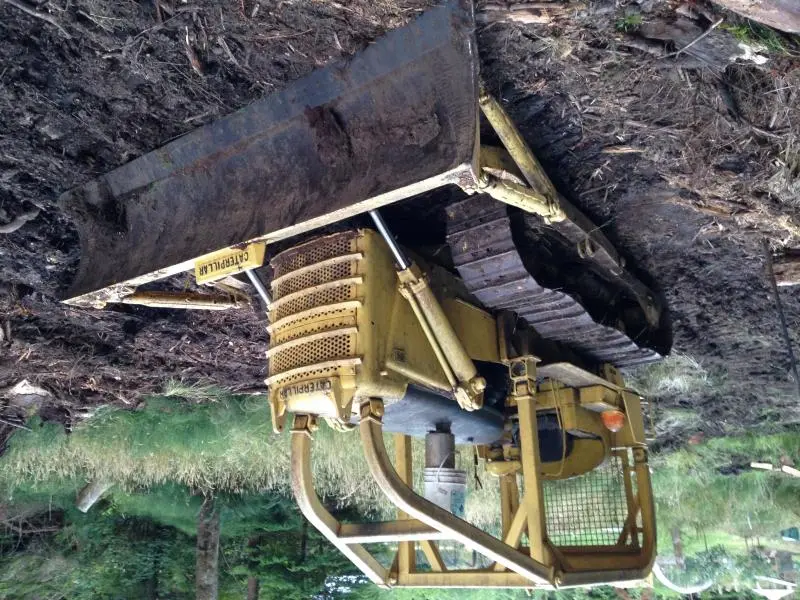
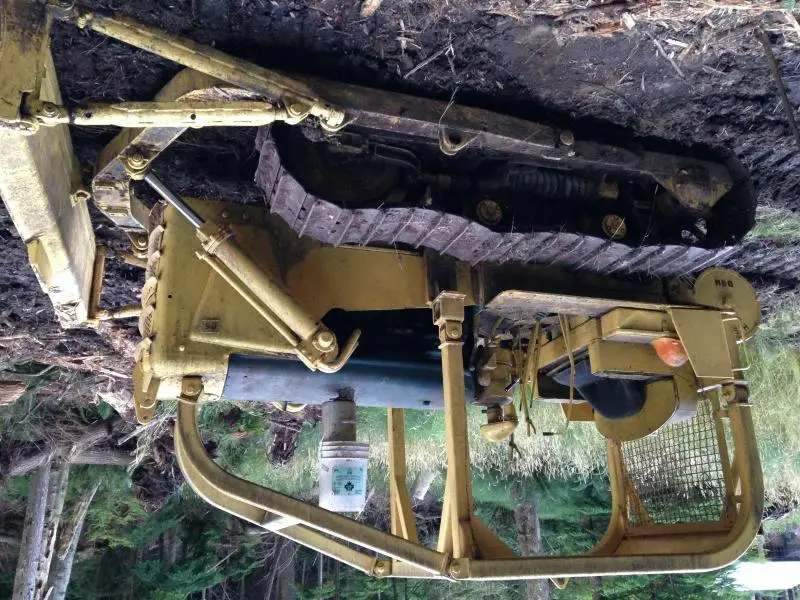
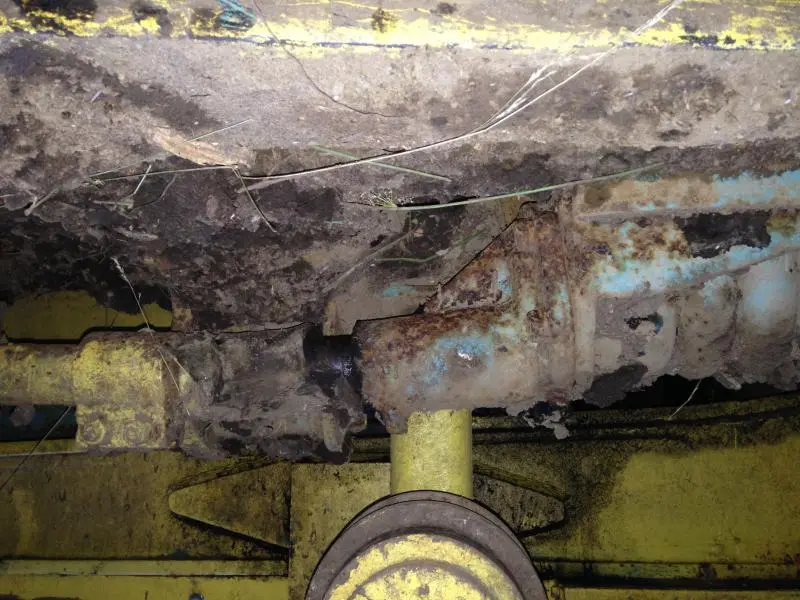
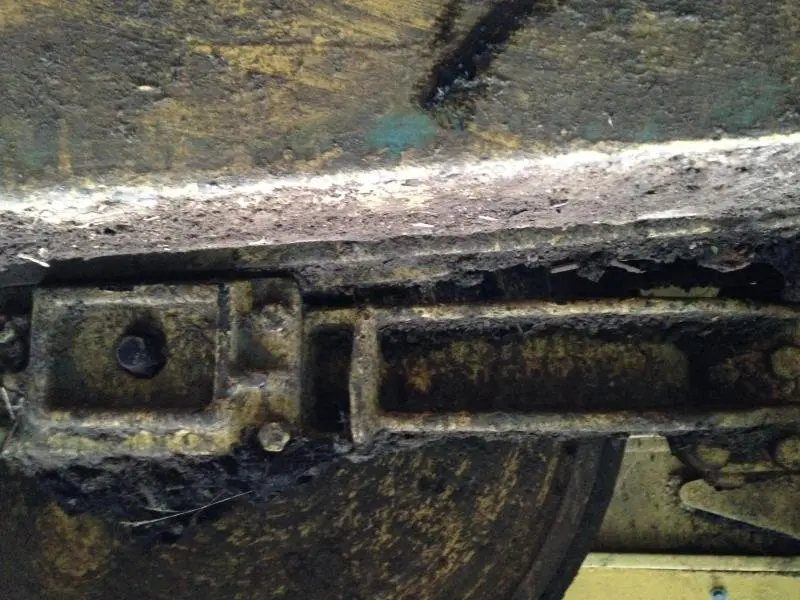
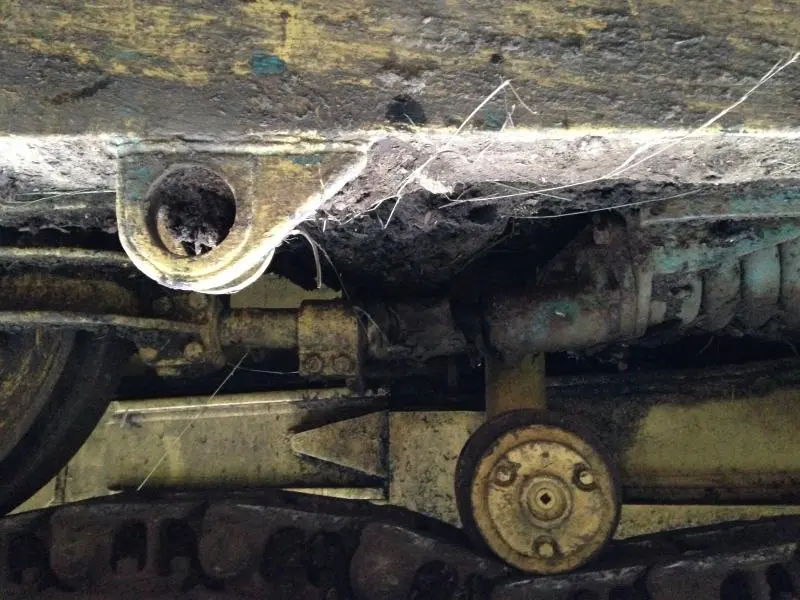
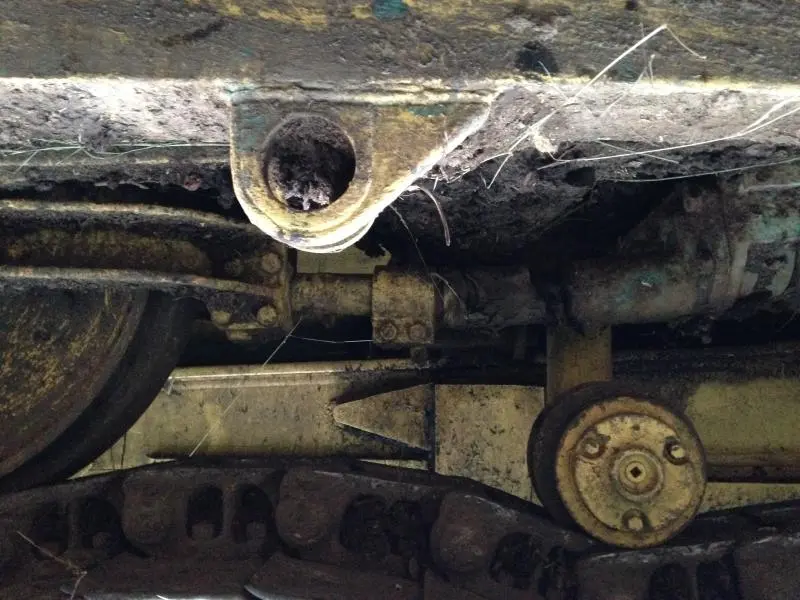
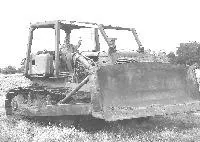
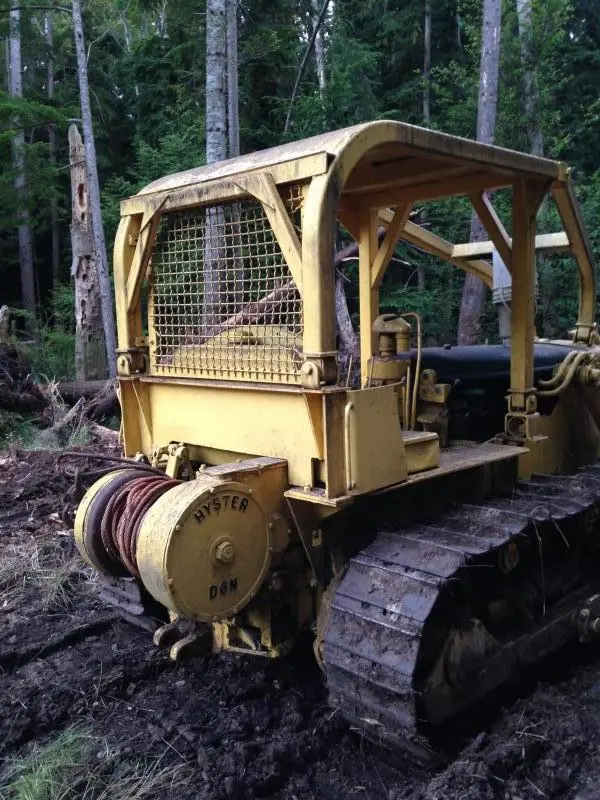
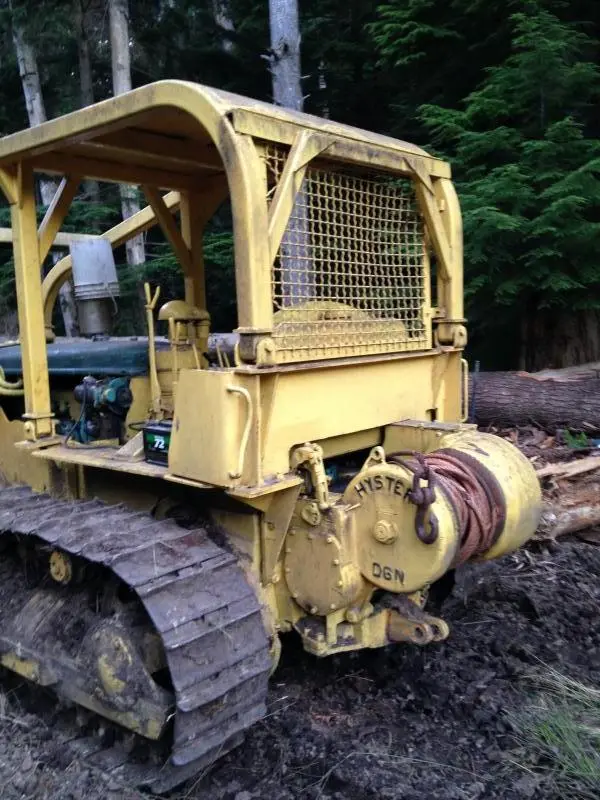
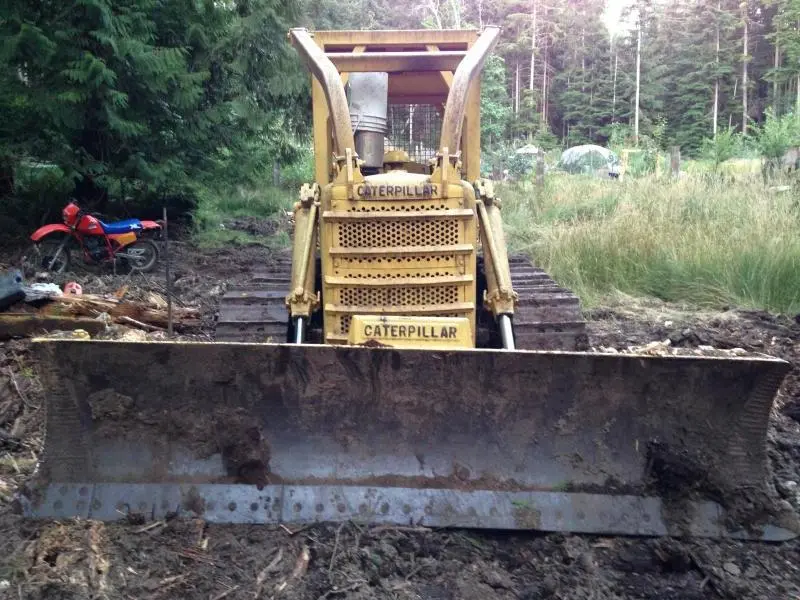
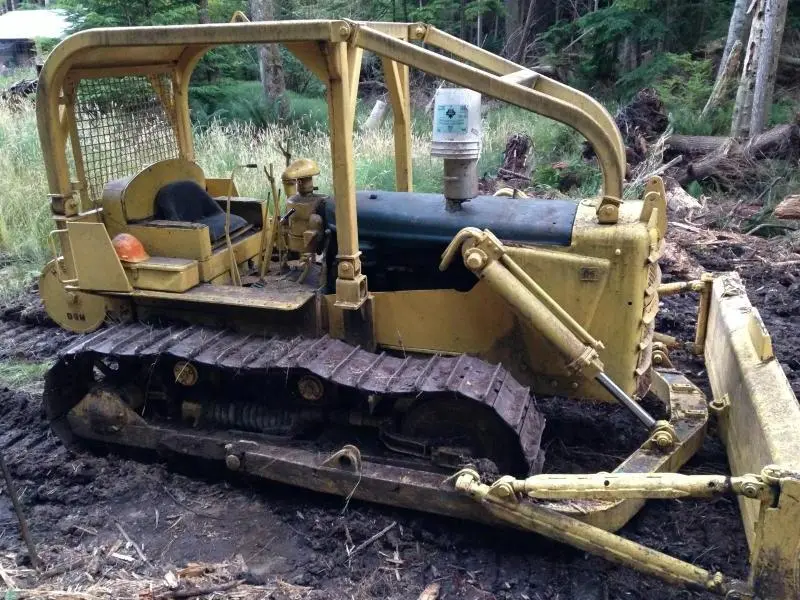
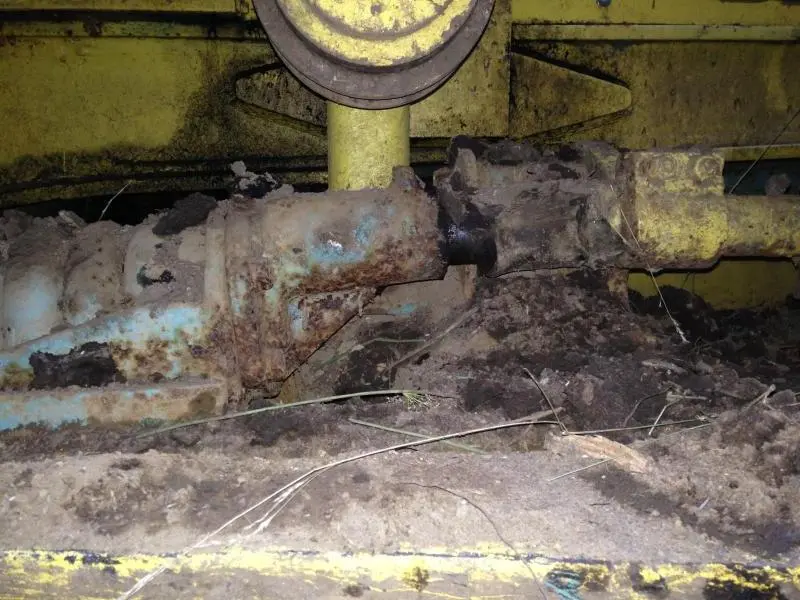
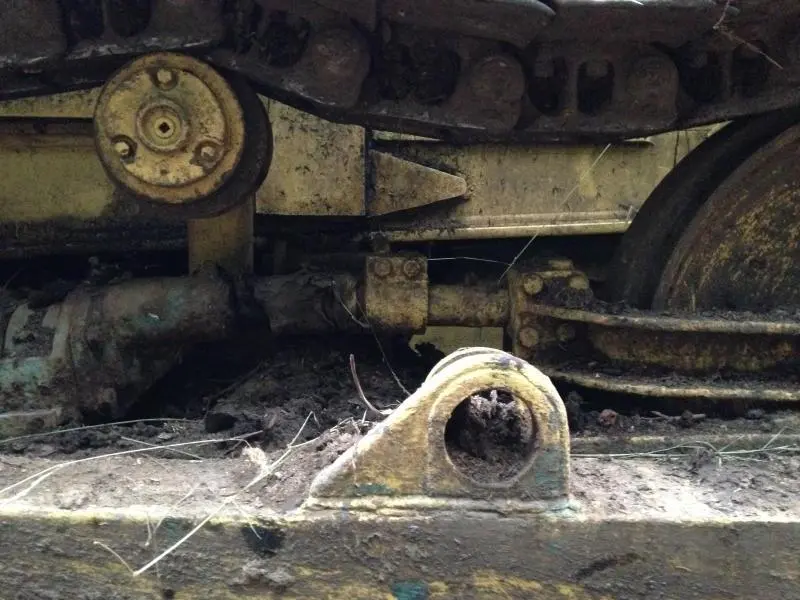
Hey guys, I think I have figured out the track adjustment problem. It looks to me like the adjuster rod is bent causing the idler to be cockeyed in its slides, jamming it. Is it possible to get this rod straightened? Can I get it out without splitting the tracks? Here are some pics and a few of the new machine. I can't figure out how to turn my pics over. They looked normal in my computer. They were taken with an iPhone. Could one of the moderator please turn them the right way
[attachment=43706]IMG_2569.jpg[/attachment][attachment=43707]IMG_2568.jpg[/attachment][attachment=43708]IMG_2567.jpg[/attachment][attachment=43709]IMG_2566.jpg[/attachment][attachment=43710]IMG_2565.jpg[/attachment][attachment=43711]IMG_2564.jpg[/attachment][attachment=43712]IMG_2563.jpg[/attachment][attachment=43713]IMG_2562.jpg[/attachment][attachment=43715]IMG_2560.jpg[/attachment][attachment=43714]IMG_2561.jpg[/attachment]


[attachment=43716]IMG_2569.jpg[/attachment] [attachment=43717]IMG_2568.jpg[/attachment] [attachment=43718]IMG_2567.jpg[/attachment] [attachment=43719]IMG_2566.jpg[/attachment]
[attachment=43720]IMG_2565.jpg[/attachment] [attachment=43721]IMG_2564.jpg[/attachment] [attachment=43722]IMG_2563.jpg[/attachment] [attachment=43723]IMG_2562.jpg[/attachment]
[attachment=43724]IMG_2561.jpg[/attachment] [attachment=43725]IMG_2560.jpg[/attachment]
The upload was acting up so this post might have been edited as I was doing this.
Craig
I dont think the rod is bent I think the guid it is meant to slide thru is part missing as in rusted off, it looks that way in the photo maybe just covered with dirt and the bolts have come out
The bracket stops the rod from lifting and and lifting and twisting the idler yoke as it has done
Maybe have a scratch around with with a smallish crow bar type thing o and scrape all the dirt off to see whats happened, perhaps clean the other side as well because it is most probably still all there and it will show you what you are chasing
Once you work out if its missing or the bolts have worn thru or are missing you will need to back the adjuster out and either stick a bar in the teeth on the sprocket and drive the machine to pull the idler or drive it up slowly on to a suitable stump or chain block it back to get the rod and yoke to sit back down flat so they can be clamped
Paul
Hi Team,
as Paul said, there appears to be a Guide Assembly partly missing--rusted away. It is also a SAFETY Support for the Equalizer Spring end to rub and react upon when the front of the machine rears up and tries to carry the track frame--usually occurs when forcing a hyd. blade down and lifting the nose of the machine.
P/No for the older screw type adjuster type was 7B5485 but may well be the same P/No for the two styles of Hyd. adjuster, maybe someone that has a later P/Book to mine can help out.
DANGER :- also of Note is the Zerk mentioned that is in the Early style Relief/Adjuster screw that MUST NOT be Removed as it does not relieve the adjuster grease pressure and will eject at high velocity.
These are Special Zerks that have the ball check down inside the zerk body--cheap zerks have the ball check visible at the connector end and these tiny balls have been known to fly out, when sufficiently pressurized, with fatal results.
After this the relief valves were modified to have no removable zerk as they were machined in one piece.
Cheers,
Eddie B.
I am wondering if mine got cut off when the hydraulic adjuster conversion was done. I can't see any place it would be when I scrape the dirt away. There isn't one on the other side either. I'm going to pressure wash it tomorrow to be able to see better. On the 977 loader it looks like the hardbar is doing that job. Does anyone have a picture so I can try making one and welding it on or is it not a part that can be easily made? Thanks for all the responses, Robyn.


Our channel highlights machines from the earliest Holt and Best track-type tractors, equipment from the start of Caterpillar in 1925, up to units built in the mid-1960s.
Chapter Two
| Highacres Farm, Dewey Lane, Brackenfield, Derbyshire DE55 6DB, UK
Antique Caterpillar
Machinery Owners Club
1115 Madison St NE # 1117
Salem, OR 97301
Terms & Privacy
Website developed by
AdCo
"I also joined a year ago. had been on here a couple of times as a non-member and found the info very helpful so I got a one year subscription (not very expensive at all) to try it out. I really like all the resources on here so I just got a three year. I think its a very small price for what you can get out of this site."
-Jason N