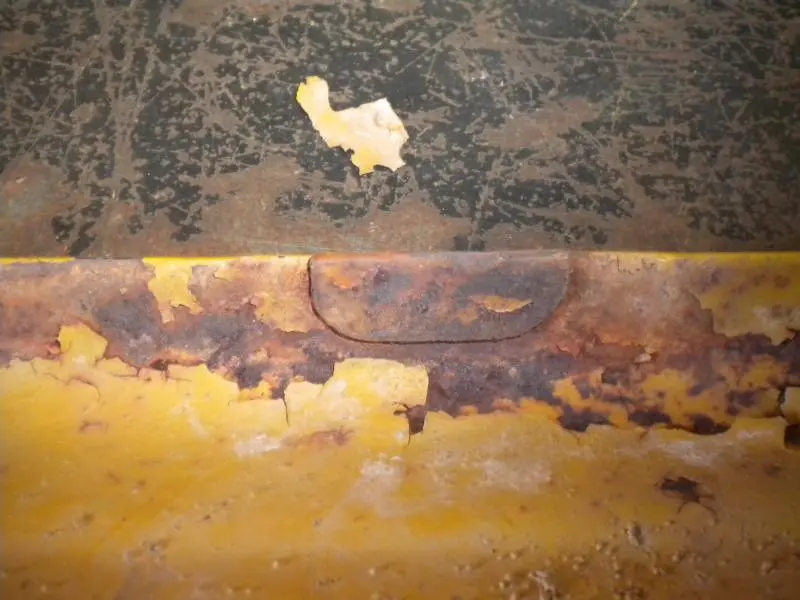

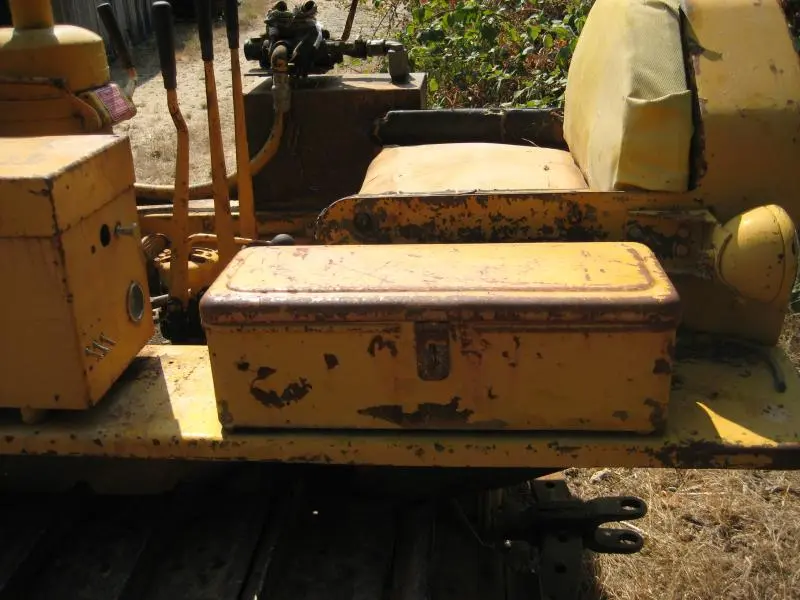
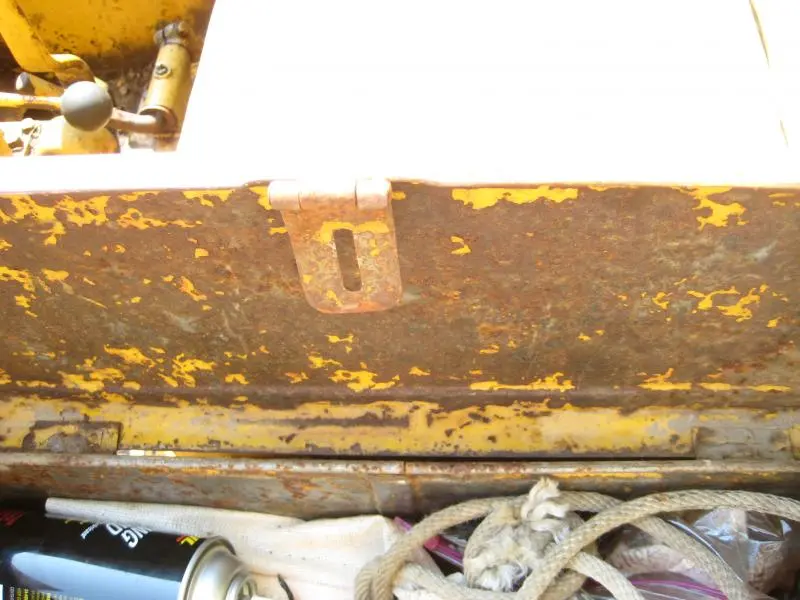
Here is how my D25U toolbox is mounted, and I believe it is factory. There are two hinges for the top.
Thanks Ken, that'l give me a start. I still have the hinges, so it just looks like a beefy rectangular hasp.
Ahhh..but I spotted some 'electrification on your machine that mine does not have 😆 , thus your box is mounted forward of the "arm support" and forward of the rear lamp. I would think that a pony start would call for it to be mounted a bit more rearward for all around ease.
I've pretty much ruled out the right side mount. My google image search results all have something wacky with those boxes mounted on the right side. I would think from an "ease of use" standpoint, the operator spends most of his time on the left side of the machine, and thus a left mount.
Hi Team,
Sales Sheets I have for both the U and J series show pix of the toolbox on either the right or left hand sides in the same for/aft position as Kens pix.
Ken has a hyd control on his right fender so I guess it was swapped or fitted to suit.
I believe the box needs to be sited for/aft as per Kens so it clears the rear lamp bracket and any attachment controls.
It would appear that the choice governed by convenience of attachments/personal choice that the box can be fitted either side and be correct. The majority of pix show the box on the left side. I see this side as being convenient to access the starting rope for the pony seeing as the left side has the pony controls etc..
Hope this helps.
Cheers,
Eddie B.
Here it is on one I had without battery box
[attachment=14389]008.JPG[/attachment]
Check your parts manual for the s/n you have....it will show the correct box and position for rope or pony start.
@ Eddie, thanks! I'm heading down the road of left side, aligned with the arm rest.
@ Painter, appreciated the pic. If you still have the machine, do I spot an extra fender support bracket on that left side (rearward?) Perhaps added on?
@ Old Magnet, thanks. My book (page 37 of the parts catalog) references only the box and fastener part numbers. No mention of location. If you could post the verbiage you see in your book, it would be appreciated (rope start, no 'lectrics, 3J 51XX). Your posted info was helpful in confirming the hinges were spot welded on, which I can confirm. Mine are currently bolted through what I can now say are light duty, countersunk screw, brass constructed, hinges. I've got some work ahead of me now. The hardware store does not have anything I really like right now to start with.
I'm guessing those box mounting spacers are...oh..perhaps...1/4'' high?
I was referring to the later D2 5U13237-up, don't have the 3J manual.
I can post that if you wish.
Seem to recall the spacers being a little taller...maybe 1/2"??? I'd have to go check.
[quote="Old Magnet"]I can post that if you wish.....
Seem to recall the spacers being a little taller...maybe 1/2"??? I'd have to go check.[/quote]
Please.....and thanks!!
Here it is.....
This is for the longer frame/fender models......


Our channel highlights machines from the earliest Holt and Best track-type tractors, equipment from the start of Caterpillar in 1925, up to units built in the mid-1960s.
Antique Caterpillar
Machinery Owners Club
1115 Madison St NE # 1117
Salem, OR 97301
Terms & Privacy
Website developed by
AdCo
"I also joined a year ago. had been on here a couple of times as a non-member and found the info very helpful so I got a one year subscription (not very expensive at all) to try it out. I really like all the resources on here so I just got a three year. I think its a very small price for what you can get out of this site."
-Jason N