Chadm,
Whoops! At least you did not hit a stump going downhill the having the tractor keep going by jumping through the blade arms!
First make sure you have a nice clean cut end on the cable preferably done with a cutting torch. Place the blade lift lever in Float position. To make up to the CCU, pull 10 feet or so of cable out of the bottom of the CCU after having led it down the back side of the drum. Then push the cable back up through the hole and into the slot keeping it on the side of the slot next to the drum wall. Pull several feet up though the slot (and square hole in the rear of the CCU) then bend the cable back and feed it through the slot until the end is about even with the drum surface. Now push the wedge you found on the ground into the slot between the two runs of cable. Pull the slack out of the cable that leads back forward to the blade until the cable is bent above the wedge and snug in the slot. Now you can start the tractor and take in the slack. Obviously, it is important to first situate the slot in the drum just right in order to see what you are doing and also to performs all the steps I noted. Having a Cat bar and a "BFH" is also important.
Have fun! This CAN be exasperating until you get it down pat.
JanM
You have a wonderful day. Best wishes. Deas Plant.
Hi, Chadm.
Jan Meermans failed to mention that there is a wedge-shaped pocket built into the cable drum - what he is calling 'the slot'. Putting the CCU control lever in float should allow you to rotate the drum to get it to the best position to replace the cable and the wedge as he described. You may find that you need to have the drum in one position to get the cable through the first time and then move it a little to make it easier to form the loop and push the cable back through the pocket ready to insert the wedge and tighten it in place by pulling on the long end of the cable and/or hammering on the back of the loop.
TWO points to watch -
1. Placing the control lever back in neutral after getting the drum to where you need it will prevent it 'running away' from you.
2. Make VERY sure that the dead end of the cable protrudes back through the pocket to the side from which it entered before you commence tightening it up. It doesn't need to protrude by much but it does need to protrude.
Just my 0.02. Hope it helps.
What sort of PCU are we dealing with here.
Andrew,
Good point. Deas and I are discussing the "How to" for a #25 or #29 CCU. Chadm did not state which CCU he had.
I have very little experience with a Letourneau unit.
JanM
You have a wonderful day. Best wishes. Deas Plant.
Hi, Jan M and Andrew.
Apparently, so I am told, I have been known to be wrong. I even dimly remember once when it MIGHT have happened. LOL.
But I think the wedge is a bit of a giveaway this time.
Just my 0.02.
I have several tractors here with PCU's and the wedge clamping system for the Drum is not familiar to me .
Perhaps they are too old ?? The D7 7M here has a front mounted PCU that I have never changed the cable.
There is another PCU in the paddock .Perhaps I will have a look today and see if it has the clamping type in question.
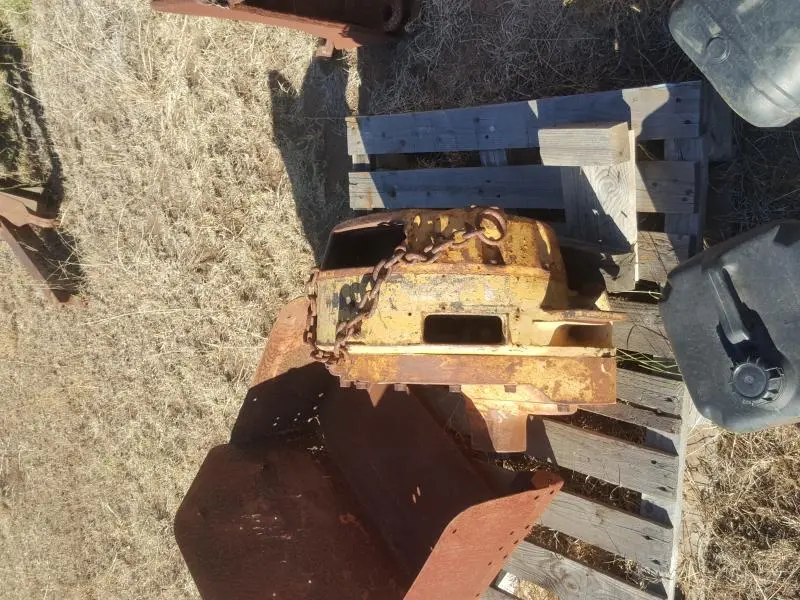
The PCU pictured is for sale and belongs to Paul Griffith.
What fell out is the wedge, just loop the cable through the socket on the drum and pull it snug, leave only about an inch of the end of cable stick out of the socket after the cable is pulled snug. Wind the the cable evenly on the drum.
Don't forget to shut the engine down while you are working on the CCU and cable, the clutch grabbing while you are working on it doesn't bear even thinking about!!
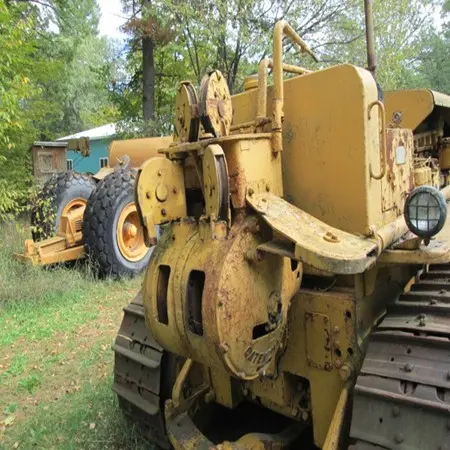
Thankyou for the instructions. I am not familiar with the different ccu's but i found a picture of what mine looks like and have attached it. Thanks again, really appreciate how quick the responses came in.
[attachment=51167]ccu.jpg[/attachment]
You have a wonderful day. Best wishes. Deas Plant.


Our channel highlights machines from the earliest Holt and Best track-type tractors, equipment from the start of Caterpillar in 1925, up to units built in the mid-1960s.
Antique Caterpillar
Machinery Owners Club
1115 Madison St NE # 1117
Salem, OR 97301
Terms & Privacy
Website developed by
AdCo
"I became a member recently because the wealth of knowledge here is priceless."
-Chris R