drive the unit up on some blocks on the other side to get the track frame to oscillate, then get a welder and weld the broken bolt out of the idler yoke. you can heat the yoke where the bolt is. the loose bolt should come out with some pursuasion.
you shouldn't need to split the track to do this.
I've had really good luck welding a nut on the broken bolt and then just unscrewing it. The heat from the welding seems to break it loose. Lots of wd40 or similar while it's hot will draw the juice down into the threads. If this doesn't work you can always go to the more aggressive cutting merhods.
oscilates the track frames and gives you more head room by lifting the engine out of the way.
you can use 7018 wedling rod and weld to the broken bolt in the casting, then just kepp welding it until it is out the back of the hole, then weld a nut on.
you could do it with mig welder as well, just hold the wire in the centre of the hole and it wont stick to the cast yoke.
I am honestly not sure if which bolts you are referring but what rymram is talking about is building up some weld on the top of the broken bolt. stacked up welds.
I just figured I would share my experience in removing broken bolts, because I got very good at it. Our excavator needed several lower track rollers. 4 bolts per roller, and most of them snapped, and about flush with the frame. Our procedure was to weld a a very thick, beefy washer to the broken bolt, then weld a nut to the washer, then clobber the new nut with a sledge, and they ALL walked right out.
Things to be careful of.
1. Do not weld your female threads or you won't be turning anything. We used thick washers because we could better control the isolation of the welds.
2. Ensure your welder can throw down enough power to get real penetration.
3. clean before you weld! Now if you stick weld, that stuff is amazing at welding crap, but you gotta make sure you get a good bond.
4. Smack before you turn! Smacking the bolt works! I use this on everything, even before shit breaks!! The threads try to rust (bond) together, requiring WAY too much torque to turn. The smack breaks this bond and it will work even on tightened bolts.
If you wanna go a step further as you really need a bolt out, don't care about the bolt, and have help. Have one man on a wrench applying reasonable torque but not insane. Have another man with a flat punch and sledge smacking the bolt head. This trick has saved my life on some very long bolts.
I only bring this up because I have learned over the years that preparing for battle is half the fight. The time to do this is when you know a bolt has been in for decades and BEFORE you break it and go dragging a welder over. You MUST free the threads before you twist on them.
If you weld it up and the weld breaks,don't give up just clean up and weld it again. I have had to weld some several times but always had them come out if I kept trying.
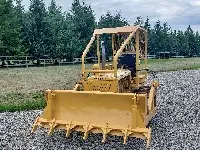
Don't forget to removed the tension on the track when you work on your idler and your d7 serie number is stamp on side motor near the starting engine transmission and on the rear stering cluch housing up left side
Wow, thanks you guys; you are an amazing volume of knowledge and hard earned wisdom. I'll get started on this in a few days and let you all know how well an idiot does at following instructions.👋


Our channel highlights machines from the earliest Holt and Best track-type tractors, equipment from the start of Caterpillar in 1925, up to units built in the mid-1960s.
Chapter Nineteen
| Wheatlands Warracknabeal Agricultural Museum 34 Henty Highway, Warracknabeal 3393Chapter Nineteen
| 1234 Carngham - Lake Goldsmith Road Lake Goldsmith VIC 3373Chapter Two
| Folds Farm, Godshillwood, Fordingbridge, Hampshire, SP6 2LU
Antique Caterpillar
Machinery Owners Club
1115 Madison St NE # 1117
Salem, OR 97301
Terms & Privacy
Website developed by
AdCo
"I also joined a year ago. had been on here a couple of times as a non-member and found the info very helpful so I got a one year subscription (not very expensive at all) to try it out. I really like all the resources on here so I just got a three year. I think its a very small price for what you can get out of this site."
-Jason N