You have a wonderful day. Best wishes. Deas Plant.
Hi, BVAL.
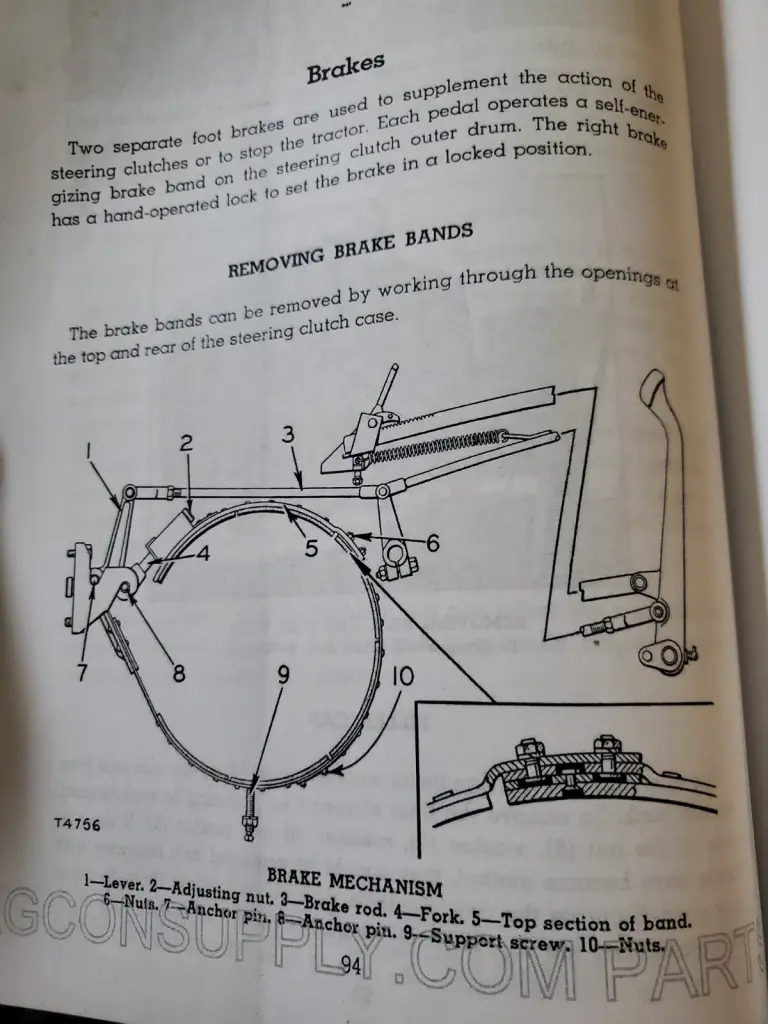
Unless I am much mistaken, the support screw, 9, is under the steering clutch/brake housing and is accessed from under the machine. That being the case, there is always the possibility that some previous encounter with Mother Earth has broken it off.
Just my 0.02.
Hi, BVAL.
Unless I am much mistaken, the support screw, 9, is under the steering clutch/brake housing and is accessed from under the machine. That being the case, there is always the possibility that some previous encounter with Mother Earth has broken it off.
Just my 0.02.
You should have 3 3/4 inch free movement at top stering cluch lever
Gemdozer, I typed that horribly above should state it does move 3 3/4 as the manual states not sure what I was thinking when I typed that up.
The stering cluch adjustement rod is in rear side housing near the brake bolt adjustement and you have to loosed the jam nut and turned the big nut right side for adjusted or left side for desajusted
You are referring to number 2 in the photo I attached correct?
No the number 2 is the brake nut adjustement the big nut is bolted to the top yoke and shaft from hydrolic control boster
No the number 2 is the brake nut adjustement the big nut is bolted to the top yoke and shaft from hydrolic control boster
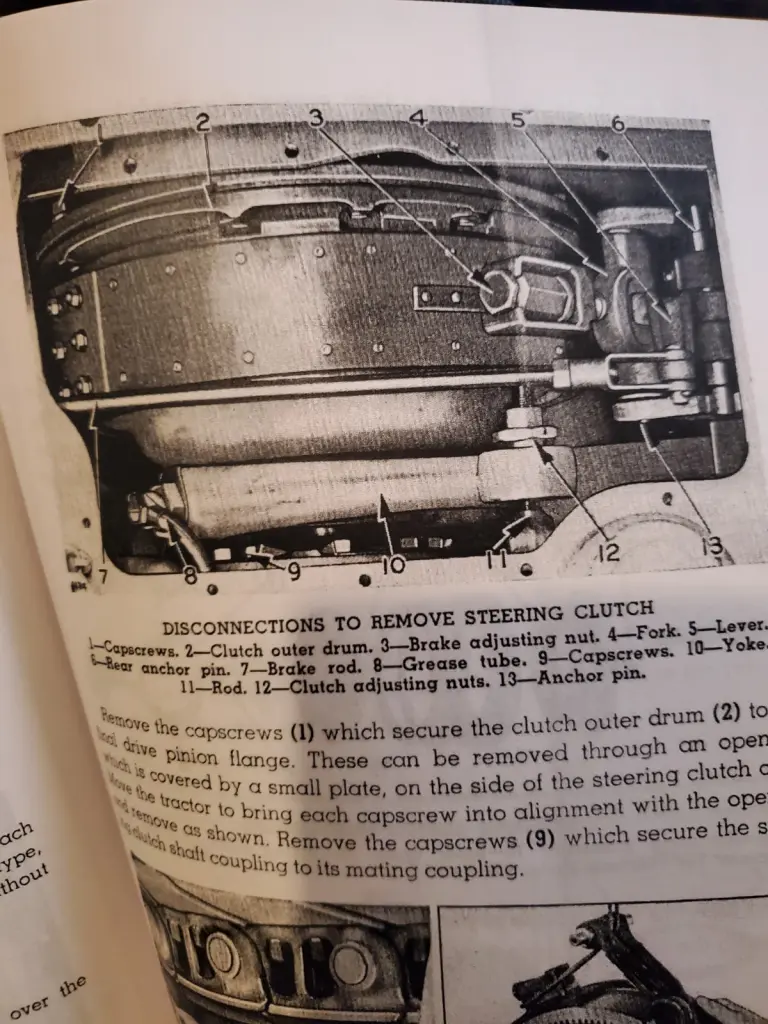
Number 2 is the brake adjustment. The support screw is under the tractor sticking out of the case, has small curved piece welded to case to protect the screw and lock nut. The steering clutch adjustment is no shown in diagram posted. It is a large nut(I want to say 1 5/8 inch head but large none the less) with cone shape on the bottom with a lock nut. DO NOT ADJUST THE DIFFERENT ROD GOING INTO THE BOOSTER until you have the other things correct. And most likely you never adjust those unless the uneducated have already been there.


Our channel highlights machines from the earliest Holt and Best track-type tractors, equipment from the start of Caterpillar in 1925, up to units built in the mid-1960s.
Antique Caterpillar
Machinery Owners Club
1115 Madison St NE # 1117
Salem, OR 97301
Terms & Privacy
Website developed by
AdCo
"I also joined a year ago. had been on here a couple of times as a non-member and found the info very helpful so I got a one year subscription (not very expensive at all) to try it out. I really like all the resources on here so I just got a three year. I think its a very small price for what you can get out of this site."
-Jason N