I have an angle blade on the D7. It can be centered, angled left or angled right by selecting the appropriate holes on the U-frame. It has a lot of slop up and down at the corners which make it hard to do certain kinds of dozing where I want to keep the side sloping under control. Any ideas on how to tighten it up would be appreciated.
The blade will have to come of the U frame, so you can see the wear. It could be the pin or the brackets on the blade or the U frame itself has worn. Probably some wear in all the points that move on the center of blade. If your lucky fixing one might be enough.
Hi, TOP.
As an 'emergency' measure, you can wind the tilt braces either all the way forward or all the way back on BOTH sides. This will help to take SOME of the movement out. How much it can take out will depend on the total amount of wear and where it is.
But, as Ray54 has said, you need to take the blade OFF the C-frame to see where some of the wear is, especially around the center pivot and swivel - and to be able to fix it. Wear in the angle braces and the receivers on the C-frame can be deal with while the blade is in place.
Just my 0.02.
You have a wonderful day. Best wishes. Deas Plant.
The blade will have to come of the U frame, so you can see the wear. It could be the pin or the brackets on the blade or the U frame itself has worn. Probably some wear in all the points that move on the center of blade. If your lucky fixing one might be enough.
Thanks Ray54 and Deas. That's something I am not able to do right now.
I am not sure how the blade comes off the center pivot. It is visibly quite worn. But there doesn't seem to be any way to remove the pivot.
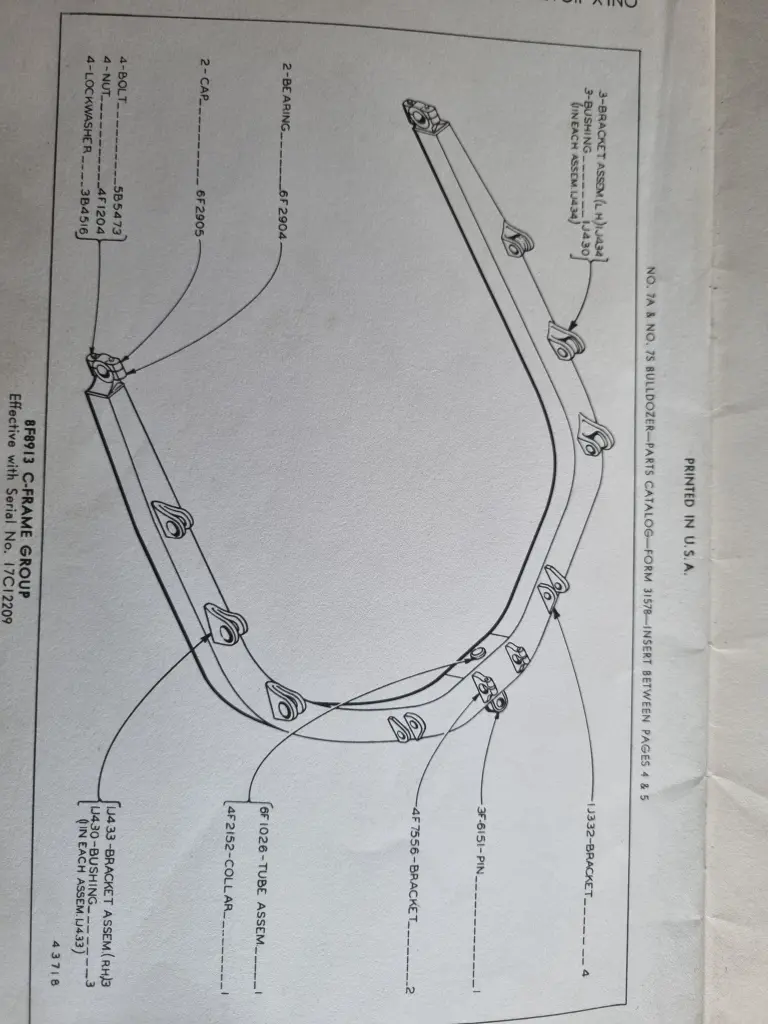
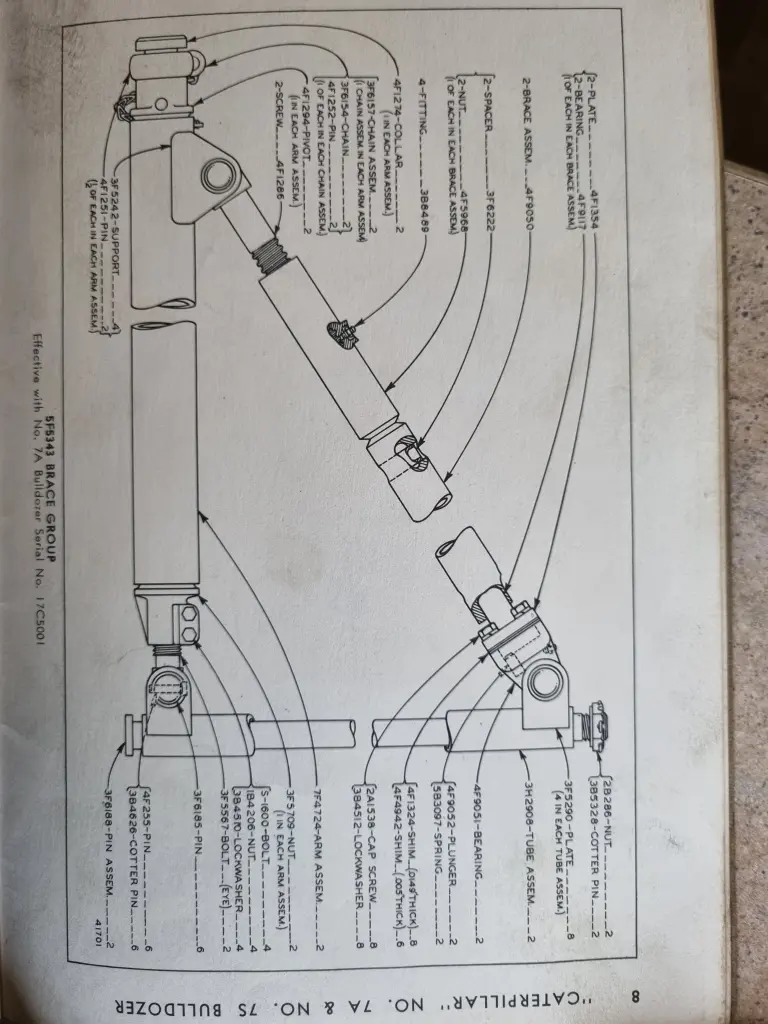
There is a lot of play between 4F1251 and 4F1274 (The pin and collar on the Brace Group) and between 4F1251 and 4F1231/4F1232 brackets. That controls the pitch of the blade. The center pin 3F6151 and associated component are very worn. Not sure how people deal with this.
You could adjusted the braces each side and this should help
You could adjusted the braces each side and this should help
Which braces? This is an S blade on a C-frame.
I looked at the pins on the angle adjustments and they are quite loose in the brackets. I wonder how they have traditionally been reconditioned? Have people welded them up and machined them oversize?
Probably line-bore plus new pins is the solution. Perhaps some of those angle brackets on top of the side-arms could just be directly replaced (figure out whether it's worth line-boring them or it's easier just to make new fittings - you'd need six of them so that could justify making them
Hi, Top.
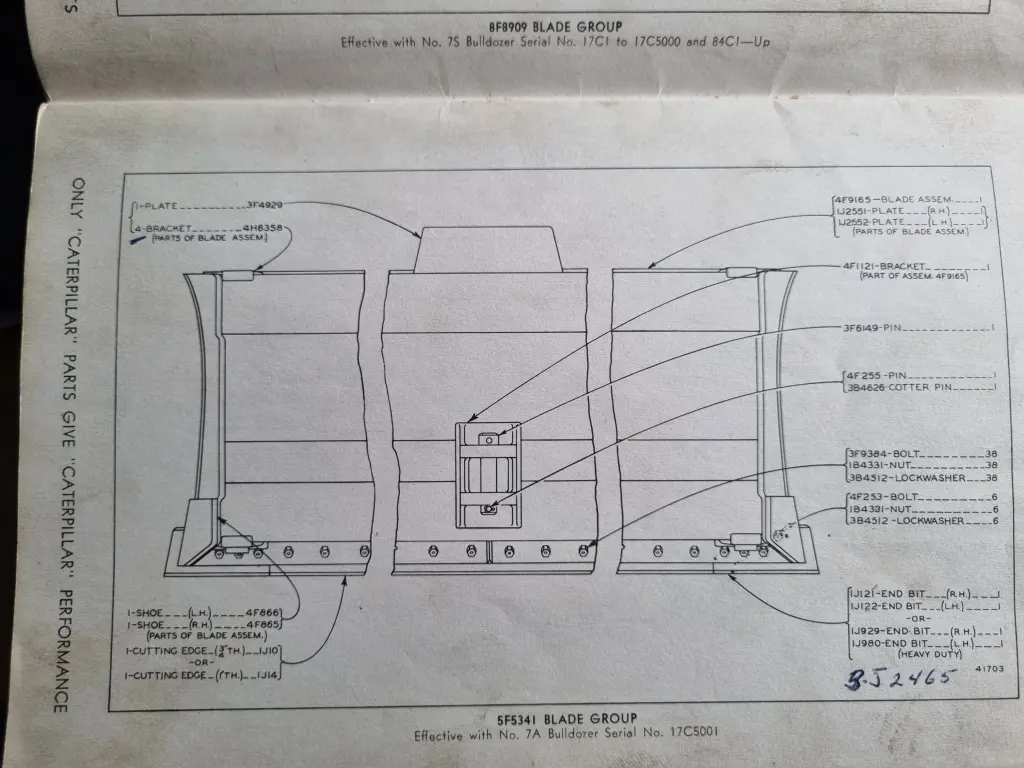
An "S" blade will not mount to a "C" frame without a LOTTT of modifications. Without seeing photos of your blade and 'guessing' that the parts drawings you have shown above are representative of your blade, I would suggest that you have an angling blade mounted on its correct "C" frame.
The center pivots on angle blades are notorious for wearing, as are the angle braces. You 'may' be able to take up some of the wear in the angle brace pockets on the "C" frame by pushing the taper as far into the pocket as it will go and then sliding spacers on to the inner end of the taper before you insert the retainer pin.
The center pivot izza whole different ball game. The blade attachment point is 'relatively' easy to access for rebuilding AFTER you remove the blade from the "C" frame. The center swivel in the "C" frame izza bit more of a challenge as it would require either cutting out the old swivel tube and replacing it or rebuilding the tube and line boring it. In either case, the old center swivel pin could be rebuilt and machined back to standard.
The quickest 'easy' fix, as I said earlier, is to wind the tilt braces as far back as they will go to take as much of the slack as possible out of the system. If that doesn't make enough difference, you are faced with either some serious rebuilding or getting another machine.
The biggest issue with those old Cat angling blades was the sheer numbers of wearing parts in them. A little wear in each of them quickly adds up to a LOTTTTA wear cumulatively.
Just my 0.02.
You have a wonderful day. Best wishes. Deas Plant.
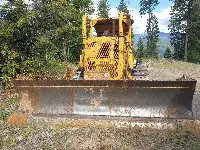
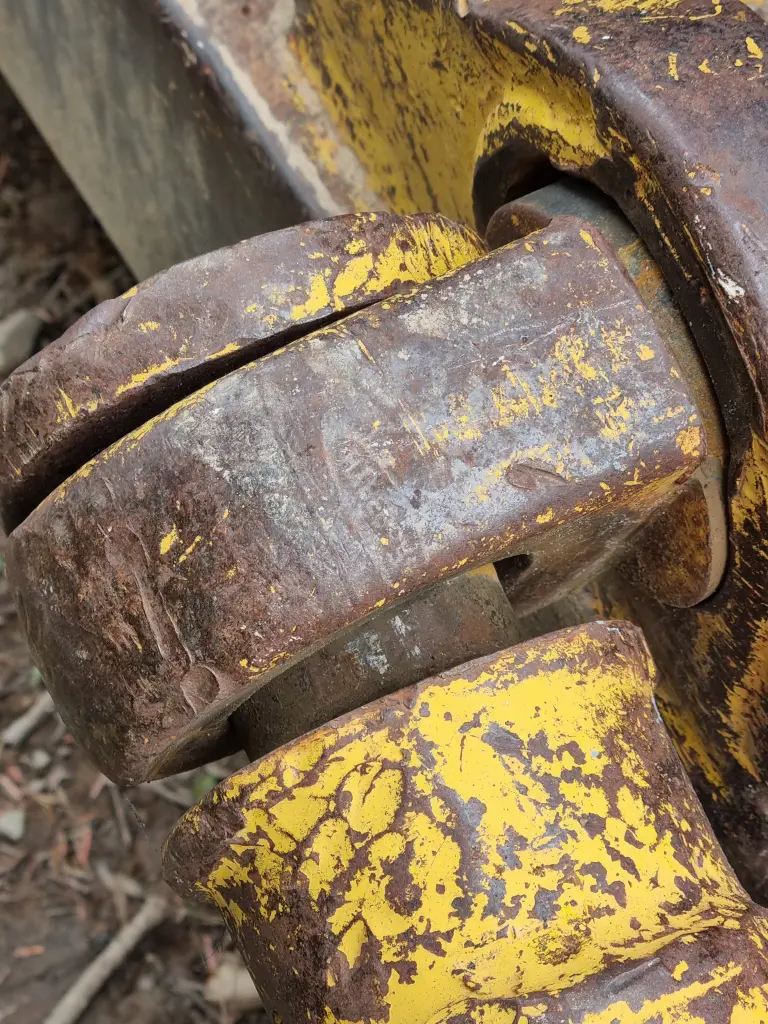
Below are pictures of the actual wear. Deas, this isn't a little wear. haha. I saw 7A and 7S on the cover of the parts book. Looking inside this would be the 7A. I found the location of the serial number. However, all that remains are the two drive rivets. Somebody will a backhoe must have tried pulling the dozer out of a hole and used the blade as a convenient place to pull.
Looking at the parts book and the pin holding the blade on in the pictures below I would say that is the one part that might let go while in use. I got this to cut a road out of the side of the mountain I live on. I don't think I'll be doing any fine grading with it.
Your idea of using spacers on the side bracket connection makes sense. If I had a welder I could probably make a spacer to take up the front back play on the angle brackets too.
As far as adjusting the angle brackets my goal there is to be able to lower one cutting edge effectively so I can control the outslope on my road cut.
Hi, TOP.
Methinks that blade has seen a LOTTTTA work, and probably some HARD work. There should be a serial number stamped into the steel under where that tag was torn off, between the two rivets.
"IF I had a welder . . . . . " IF you had a welder, you could do a LOTTTTA things to tighten up that blade - like making spacers in two halves that you could slide into the gap shown in your photo above and weld in place - or re-build the tapers on those angle braces to more closely fit the pockets, all time consuming but do-able relatively cheaply - IF you had a welder.
Alternatively, you could take those angle braces off, take them to a welding shop and have them rebuilt to remove some of that wear. The down side of that approach would be that you would be placing more load on those rebuilt parts and reducing the load share going to the center pivot in the "C" frame.
I carry a MIG/TIG/Stick welder WITH an aluminum spool gun in my baby camper - see the photo.
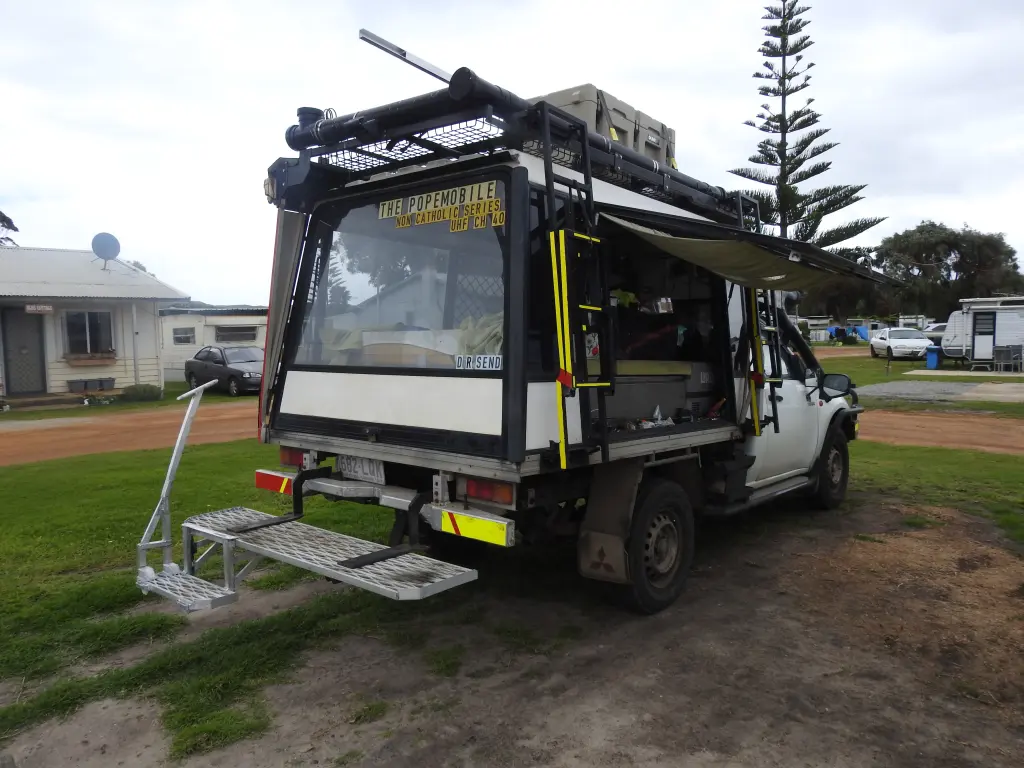
There is now a water and dust-proof aluminum box behind the right rear wheel which houses said welder, said box having been made with said welder and aluminum spool gun.
Hint, hint.
When cutting roads into side hills, I prefer to leave the road sloping SLIGHTLY outward toward the drop-off to allow any runoff to go over the side in a 'sheet' rather than forming into destructive streams. I learned this in an environment which had monsoonal rain and cyclones, aka hurricanes.
Hope some of this helps.
Just my 0.02.
You have a wonderful day. Best wishes. Deas Plant.


Our channel highlights machines from the earliest Holt and Best track-type tractors, equipment from the start of Caterpillar in 1925, up to units built in the mid-1960s.
Antique Caterpillar
Machinery Owners Club
1115 Madison St NE # 1117
Salem, OR 97301
Terms & Privacy
Website developed by
AdCo
"I became a member recently because the wealth of knowledge here is priceless."
-Chris R