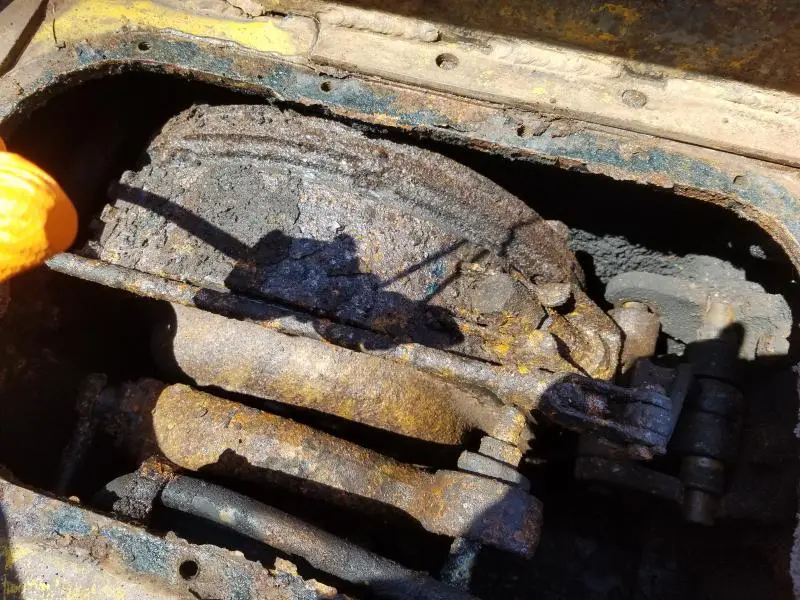
These levers are probably best taken out and welded up and re bored to size which together with a new pin fixes the problem.
You might also have an issue with the steering booster the solution to which is covered in other threads.
that's nice cat. let us know where you are from as that help's there might be someone close by that can help you out. i did weld up some on my d2 and re-drilled. find some oil-light bushings to push in if might be easy than welding up and drilling. keep up the good work
There is a spanner type wrench to tighten the final drive/sprocket shaft bearings. They should be as tight as you can get them with the 4' or so handle on the tool. Lots of places that run CAT tractors will have one. The crowbar method will probably get it close if you can find a good point to pry against.
The sprocket may move by putting a long bar between it and the track frame if it is loose enough to cause a leak. If the leak is only from the outside of the sprocket, and tightening the bearings doesn't work, you can replace that seal without pulling and pressing the sprocket back on (40-50 tons??????). If it's leaking inside the sprocket, the sprocket has to come off the taper spline shaft to replace the seal.
Sprocket can also be loose on the shaft, so it may move with a prybar even if bearings are tight. You won't find out until you try tightening the bearings and it doesn't work.
I would try to drill out the sloppy holes in lever and clevises to fit an oversize pin before I went to the trouble to weld and redrill to standard.
Take the cap off the outside (four bolts) and make sure the big nut on the axle is tight. Do this before attempting to adjust bearings with the spanner wrench.
Thank y'all for the input. Ive got a bunch of 1/2 and 3/4 inch plate that I was going to try to fab a spanner wrench from. If I cant stop the leak that way Ill just bite the bullet and rebuild the final while Ive got it all torn apart. Theres a local repair guy that can come pull/push the sprocket for me for a couple hundred bucks. Well worth it for the right tool. Im kinda anal when it comes to my machinery. I dont like the standard "farmer" quick fixes. But I'll take all the tips and tricks I can come by. Theres no replacement for prior experience, thats where you fine folks come in!


Our channel highlights machines from the earliest Holt and Best track-type tractors, equipment from the start of Caterpillar in 1925, up to units built in the mid-1960s.
Antique Caterpillar
Machinery Owners Club
1115 Madison St NE # 1117
Salem, OR 97301
Terms & Privacy
Website developed by
AdCo
"I became a member recently because the wealth of knowledge here is priceless."
-Chris R
