Hot wire to one side of the ampmeter12 ga. 12 ga wire from other side of ampmeter to Batt on voltage regulator. All other wires , lights etc. to same side of ampmeter Generator and regulator wires Gen to gen, field to field. If ampmeter reads backwards, reverse wire sides. After market 1 wire alternator would attach to same Batt wire as regulator batt.
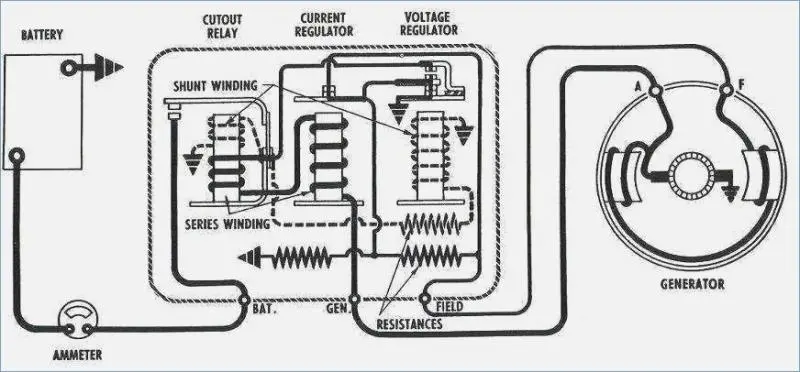
My problem is that the paper label on the regulator is gone. I found a picture showing the terminals on a regulator and generator. Will these connections be correct for my D6B?
[attachment=52162]6-volt-generator-wiring-diagram-fun-projects-voltage-regulator-for-of-12-volt-generator-voltage-.jpg[/attachment]
Regulator terminals are pretty standard by that time......BAT.....GEN........FLD........left to right
If you take the screw and the little clamp plate off, the 3 letter labels are stamped in the steel terminals. Its a good idea to do this so you can sand or scrape the surface to get good contact.
The cutout was probably stuck from heavy charging current. Should not happen, but that's about all I can think of. You should sand the surface with fine sandpaper, (not emery cloth for some reason), so it doesn't stick again from current passing through a small bump getting it hot and melting the surfaces together.
Once you get it hooked up you will need to polarize the generator. This is usually accomplished by momentarily shorting between the BAT and GEN terminals.
Got the voltage regulator connections all cleaned up and installed back on the dozer. The one wire that was not cut going to the generator was connected to the FLD terminal at the regulator. I found the wire that was cut and connected it to the other wire from the generator and connected the other end at the regulator to the middle terminal (GEN). BAT of course to positive battery connection at the starter and regulator. Dash has volt meter so no ammeter connections. Made sure I had a good ground connection on the regulator case. New battery disconnect switch installed. Cleaned all electrical connections. Crimped and soldered all the new terminals I put on the wires. It got dark on me so in the morning I will polarize the generator by a jumper wire touched to the BAT and GEN terminals at the regulator and then start it up. Got my fingers crossed that all will work. Those battery ground cables are tough to get hooked up behind the dash on the new cut-out switch. Also got a new muffler and raincap put on. Got some fiberglass work to do on the dash cover. Thanks for all the information.
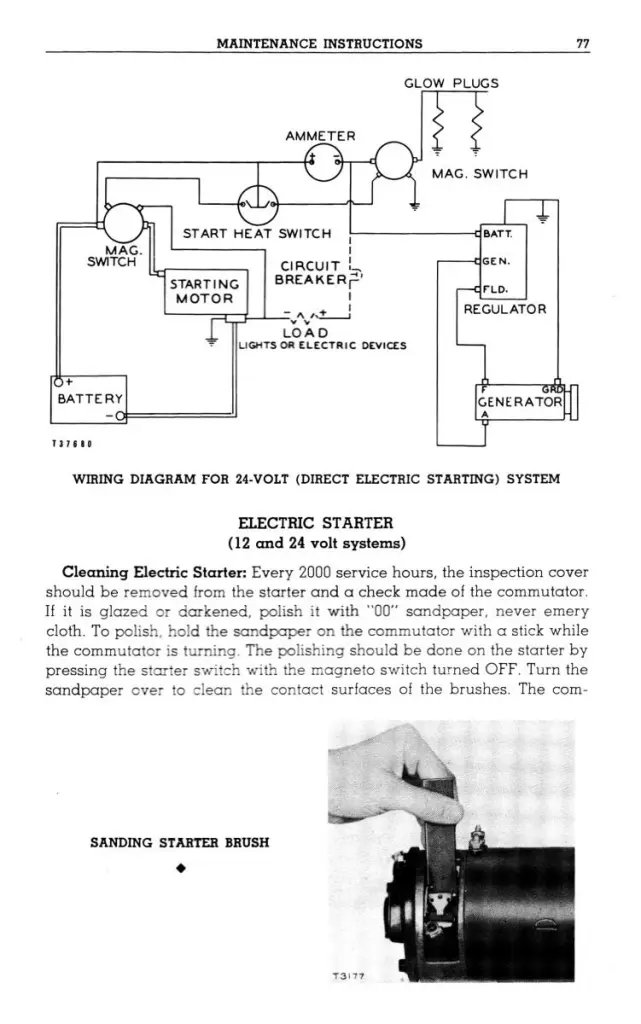
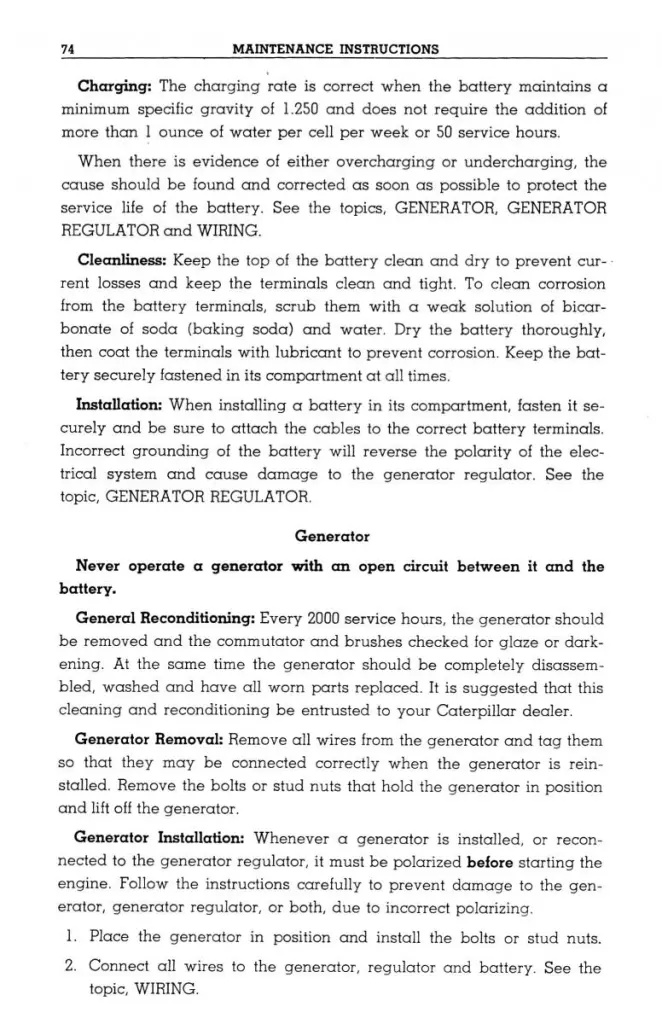
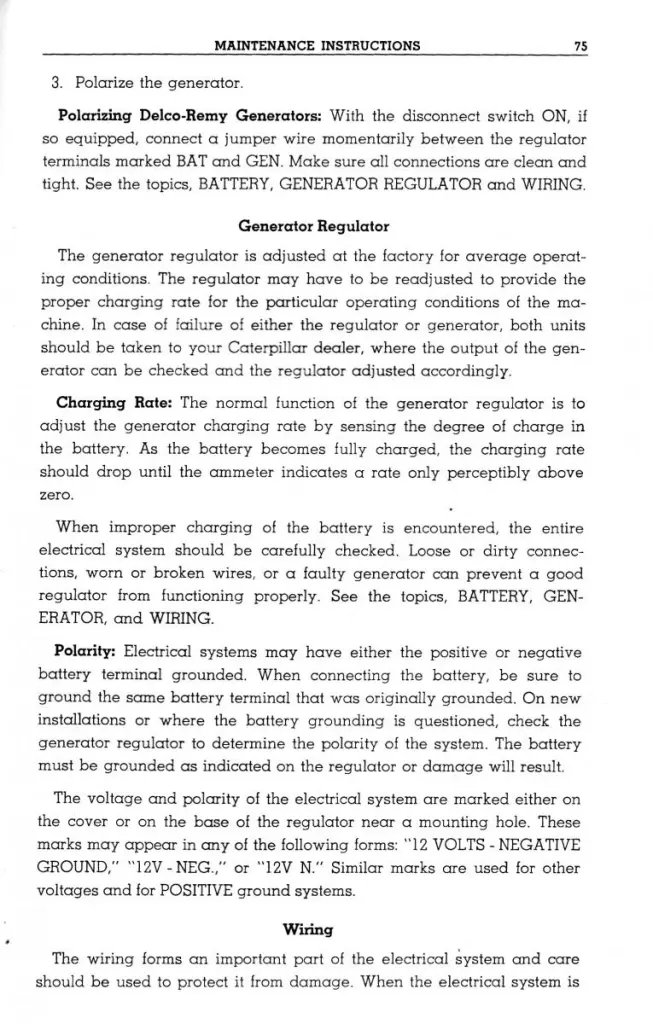
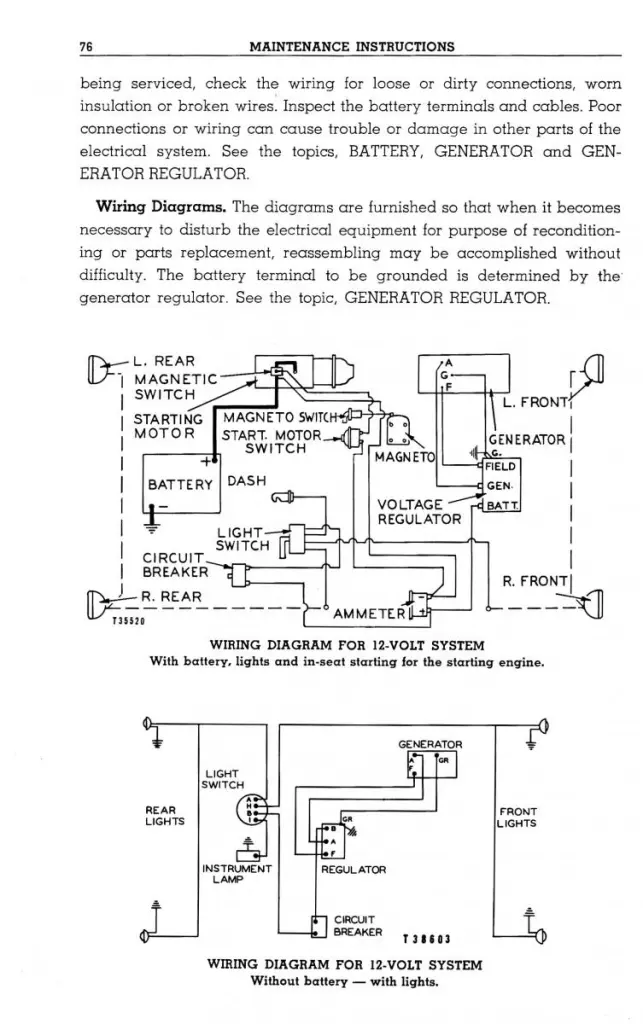
Hi Hdonly, I was out of town so this is too late, maybe this will be of use later or to others. These pages are from the D6B Operation and Maintenance Instructions.
[attachment=52246]Wire&Gen 1.jpg[/attachment] [attachment=52247]Wire&Gen 2.jpg[/attachment] [attachment=52248]Wire&Gen 3.jpg[/attachment] [attachment=52249]Wire&Gen 4.jpg[/attachment]
I threw in the 12V systems too.
Craig


Our channel highlights machines from the earliest Holt and Best track-type tractors, equipment from the start of Caterpillar in 1925, up to units built in the mid-1960s.
Chapter Twenty Nine
| Hawkesbury Showground, Racecourse Rd, Clarendin, NSW, AustraliaChapter Eighteen
| Geoff Ralph Drive, Taabinga, 4610, Kingaroy, Qld.Chapter Thirty
| 3429 Copper Coast Highway Paskeville, SA 5572
Antique Caterpillar
Machinery Owners Club
1115 Madison St NE # 1117
Salem, OR 97301
Terms & Privacy
Website developed by
AdCo
"I also joined a year ago. had been on here a couple of times as a non-member and found the info very helpful so I got a one year subscription (not very expensive at all) to try it out. I really like all the resources on here so I just got a three year. I think its a very small price for what you can get out of this site."
-Jason N