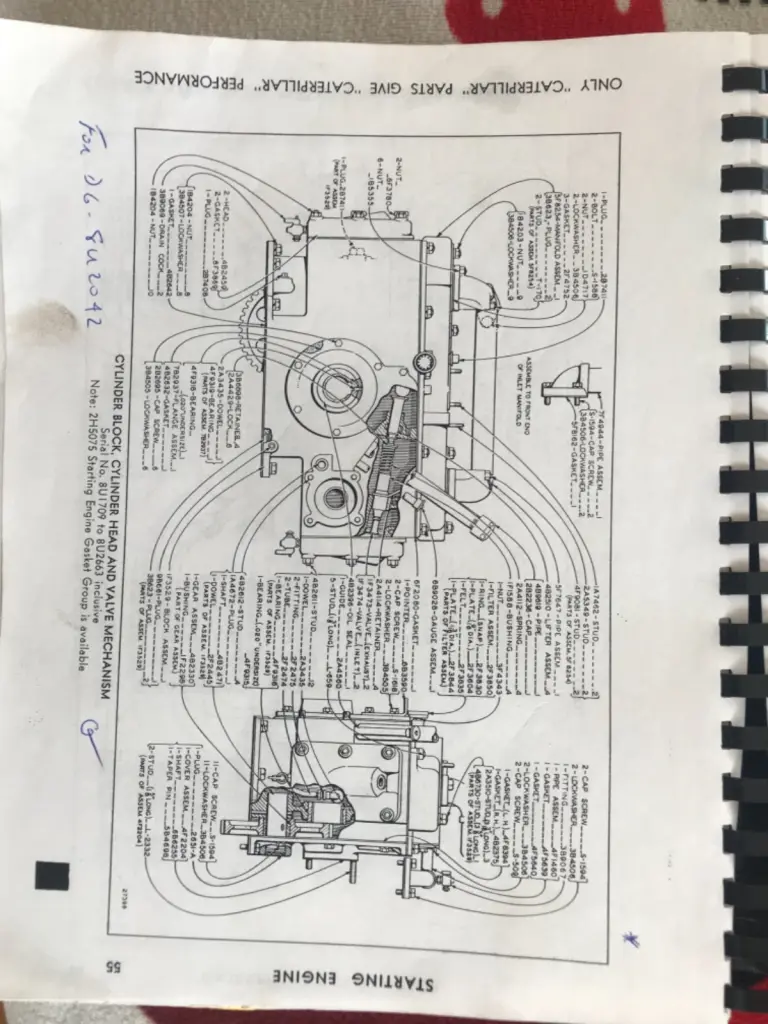
The numbers you are reading off the parts are actually casting numbers in a lot of cases. You need to go by the parts numbers in the parts book for ordering parts. The difference in numbers between casting and parts usually, but not always, reflect the number of machining operations done to the casting. So if there are no machining operations the casting and part number will be the same. There are always exceptions but that's the general explanation of why casting and part number don't match.
The small filter you refer to is actually connected to the intake runners in the top cover. There is a small hole, about 0.050" diameter that serves as a drain for raw gas that might be discharged from the carburetor. This hole is almost always found to be plugged. Nice to have it functional but not a show stopper.
Thank you Old Magnet, can’t tell you how much better that makes me feel knowing a number difference is normal. No sign Pony was ever replaced so I’ll play it straight and stick with part numbers for the 8U-2042 model I have. Will post pics of the rebuild along the way and certain to have more questions! On to the machine shop tomorrow!

Ok, today was a bit of a setback. Unfortunately the bore press at Steve's Machine Shop in Liberty NY came up just a little short on the 22-3/8" wide block. He recommended a couple of nearby shops to consider and I'll check them out on Monday. Said he's been in business over 40 years working on all kind of equipment back to the 20's including heavy machinery and has never got stumped like that. He looked the Pony over and said he would just polish its crank (not cut) and replace the main and crank bearings and that it was time to bore the cylinder, replace the pistons, valves, springs and bushing guides (didn't ask about the connecting rods, thoughts?). My measurements show the cylinders have worn from a Std. Bore of 3.126-3.127" to 3.1368" ( 0.0103" oversize wear), Pistons Skirts worn from Std. 3.120-3.121" to 3.1162" (-.0043" wear) and Piston Lands from Std. 3.106-3.107" to 3.1018" (-0.0047" wear). The compression ring gap when inserted into the bore was 0.065" and should be 0.012-0.022". Animal cruelty!So, the plan is to locate a shop and continue the journey. I'm going to post a bunch of pics her of the tear down to show a few things and ask some questions. New to the forum I'm not sure what the policy might be for posting too much. I ran a test and saw that there is a limit for each reply so I'll do it in a couple of parts.
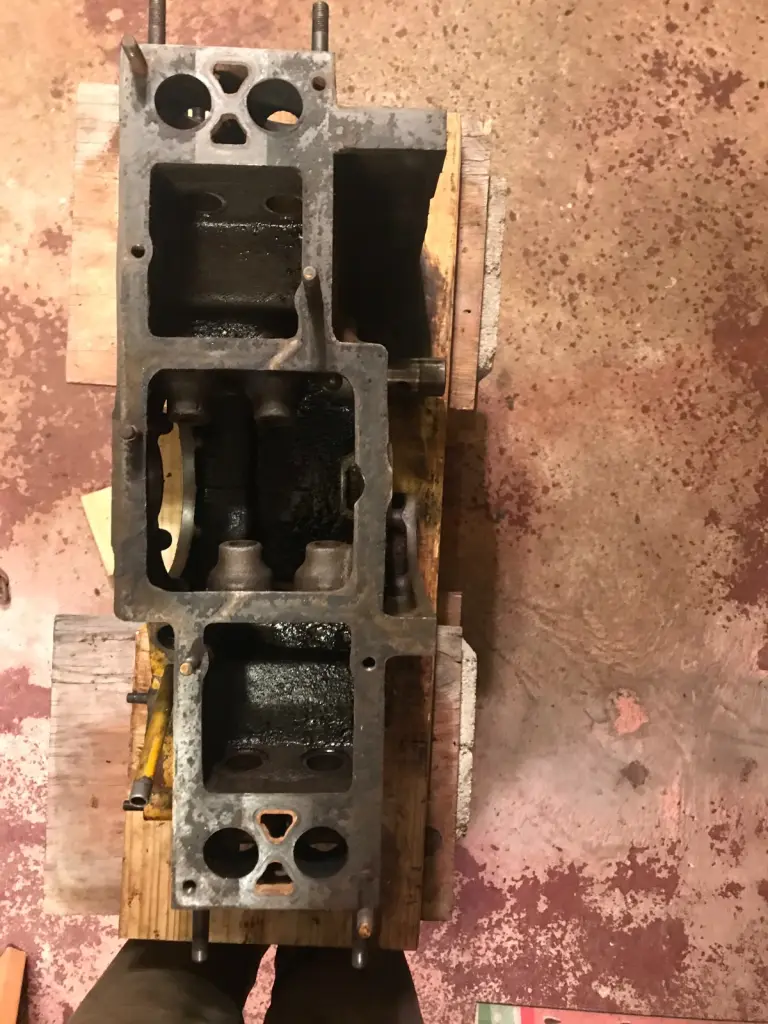
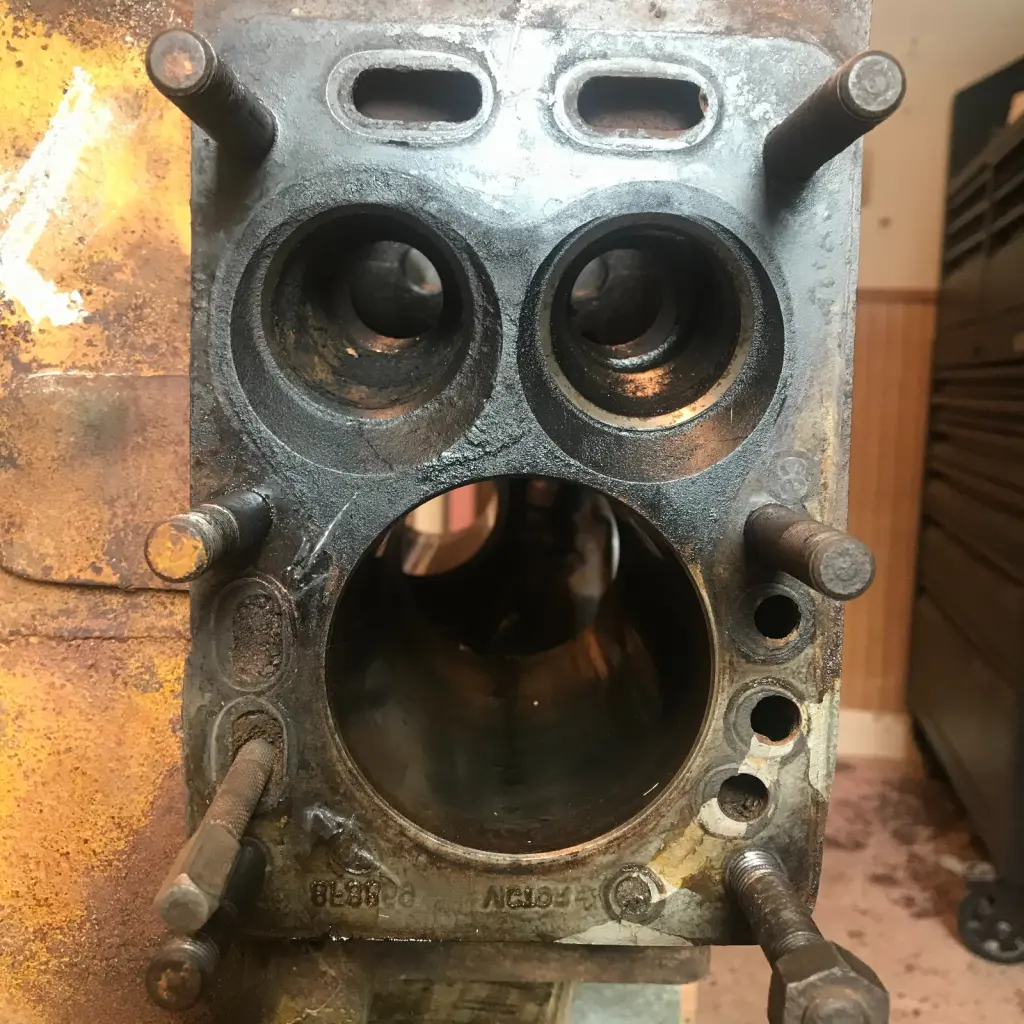
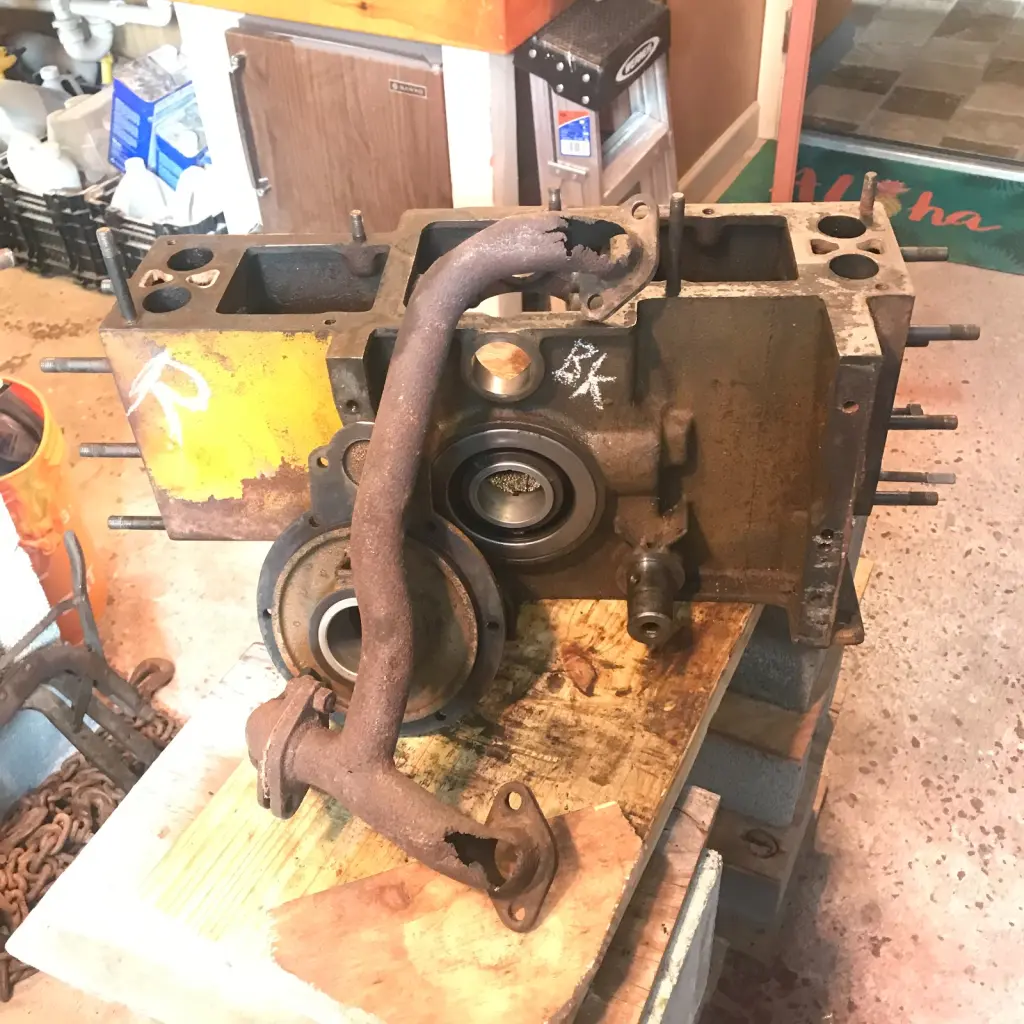
[attachment=61894]1 - Block (Top).jpg[/attachment]
Block (Top)
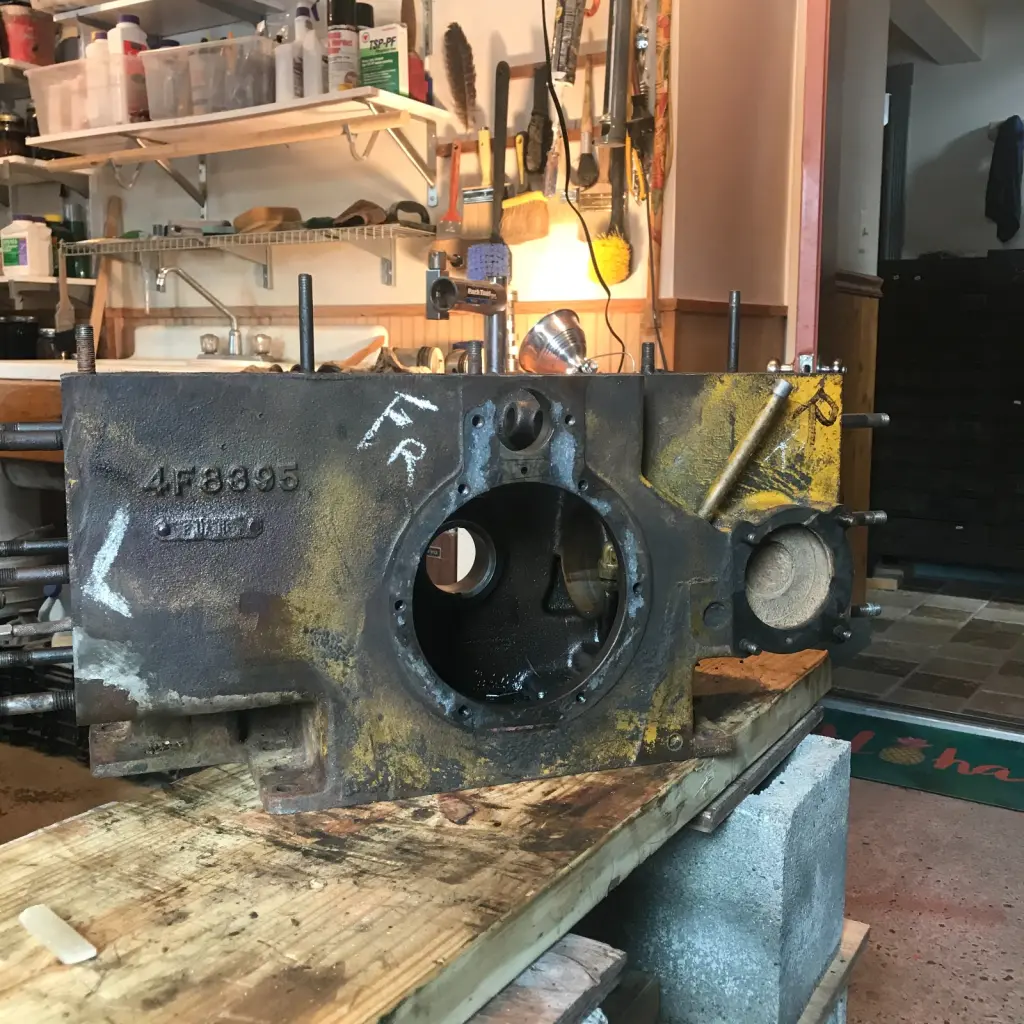
[attachment=61895]2 - Block (Front).jpg[/attachment]
Block (Front)
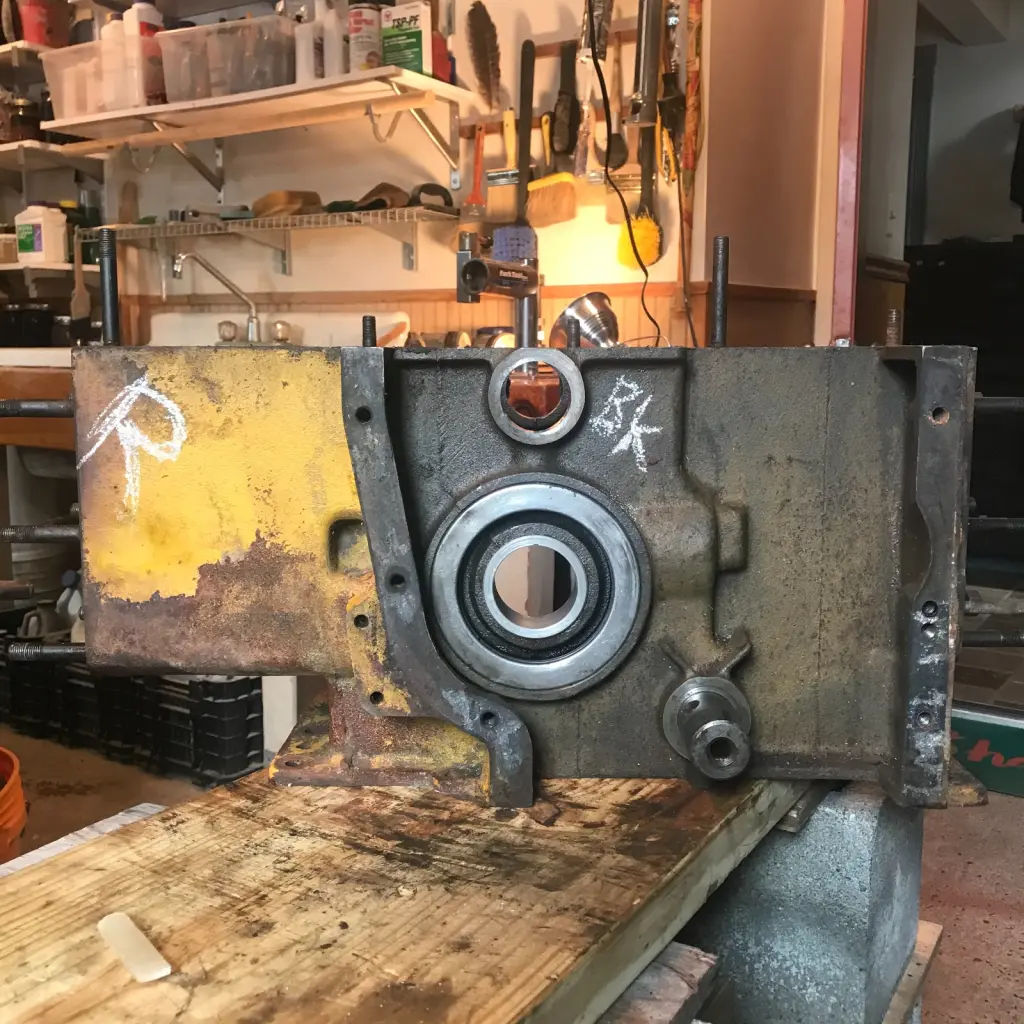
[attachment=61896]3 - Block (Back).jpg[/attachment]
Block (Back)
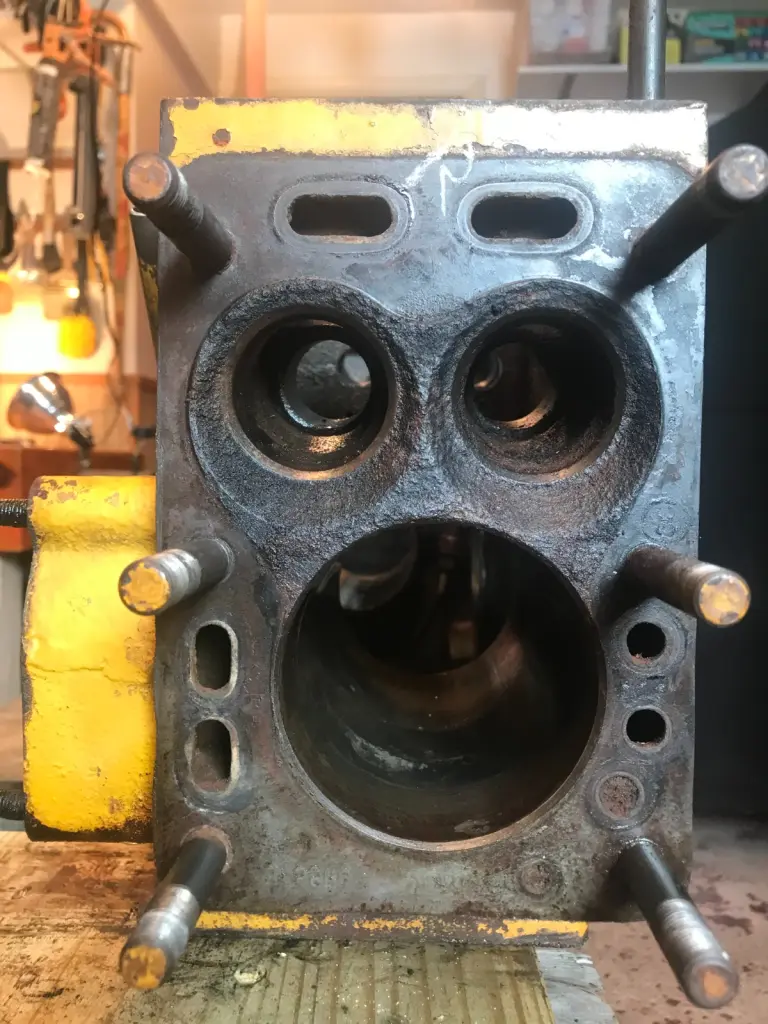
[attachment=61897]4 - Block (Right).jpg[/attachment]
Block (Right) - Water ports on lower right is clogged
[attachment=61898]5 - Block (Left).jpg[/attachment]
Block (Left) - Water ports on lower left clogged
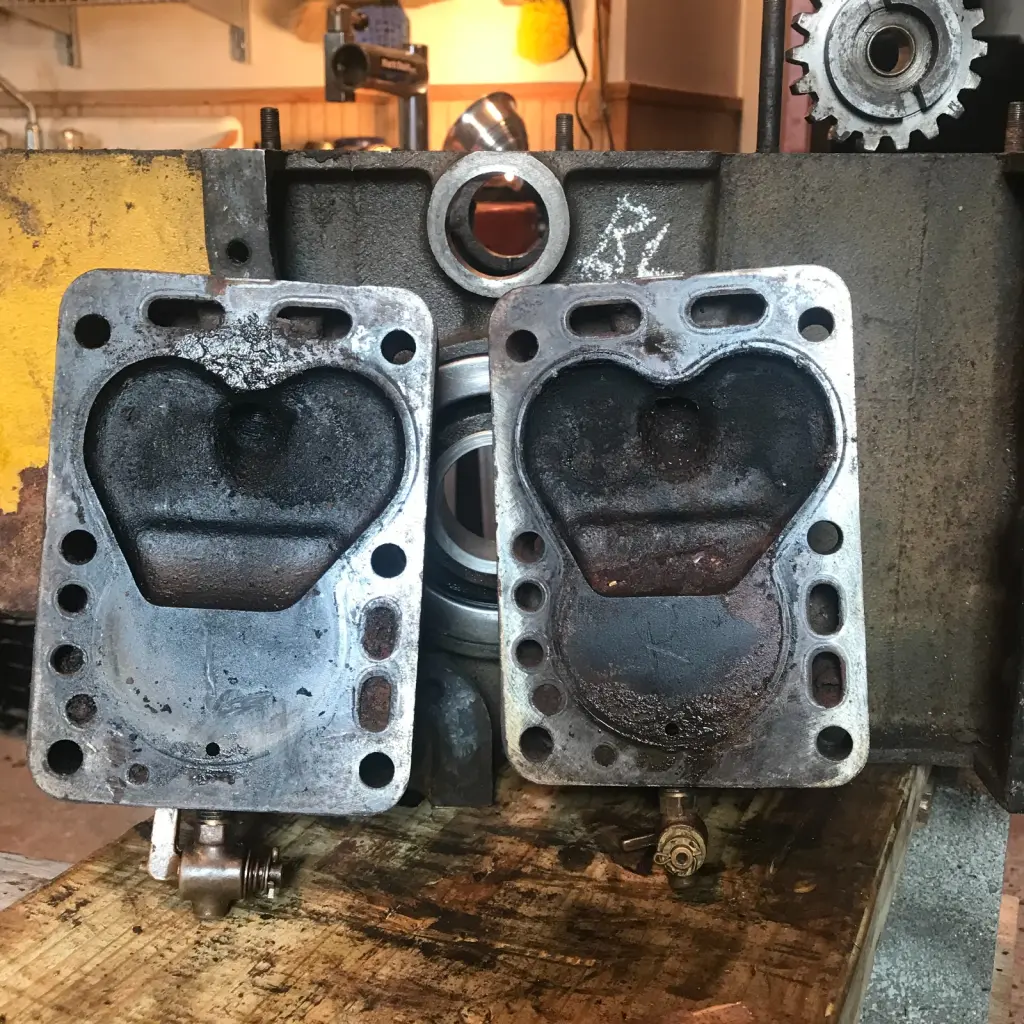
[attachment=61899]6 - Heads (L,R).jpg[/attachment]
Heads (L,R) - Water ports clogged on lower portion. Machine has been sitting for 18 years with me now and never put to work. Would start regularly until Pony was too difficult to keep running 3 years ago. Machine has remained in a Garage in a Box for last 8-10 years waiting for a Pony rescue. Undercarriage and main engine and other essentials all work good. When running the Pony I would always have to drain coolant out of the heads, one side more than the other can't remember which.
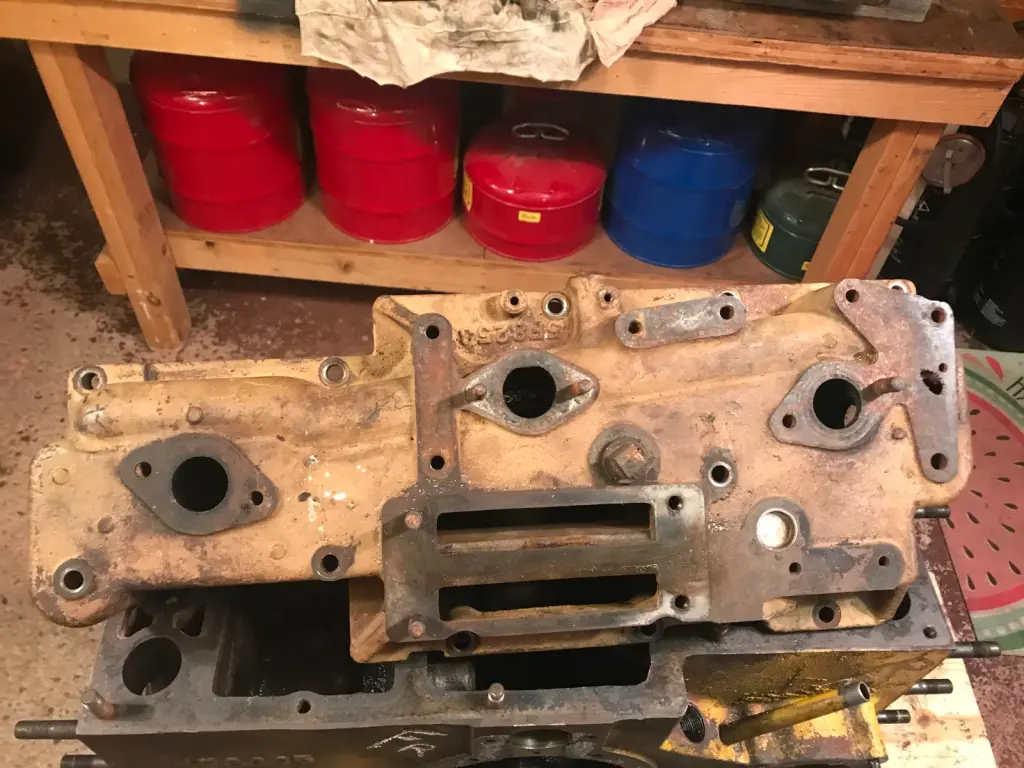
[attachment=61900]7 - Top Cover.jpg[/attachment]
Top Cover - If you look close on right side you will see a hole eaten through the cover where the Starter bracket goes.
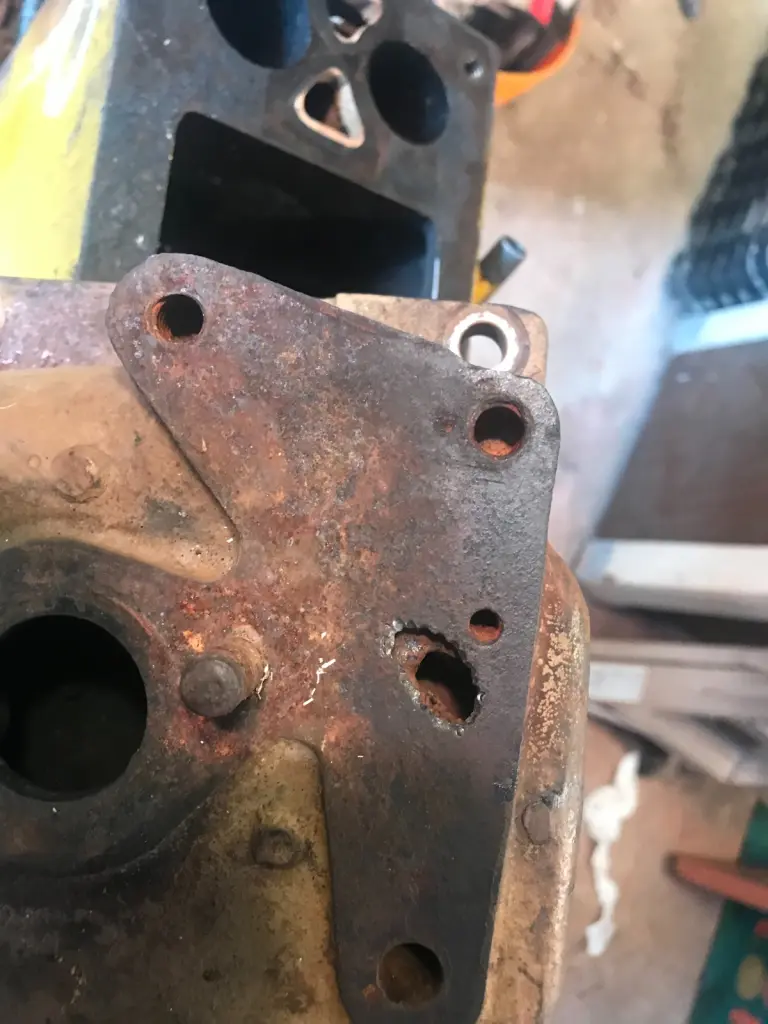
[attachment=61901]8 - Top Cover Defect.jpg[/attachment]
Here it is a little closer. Next photo will reveal why ... I think.
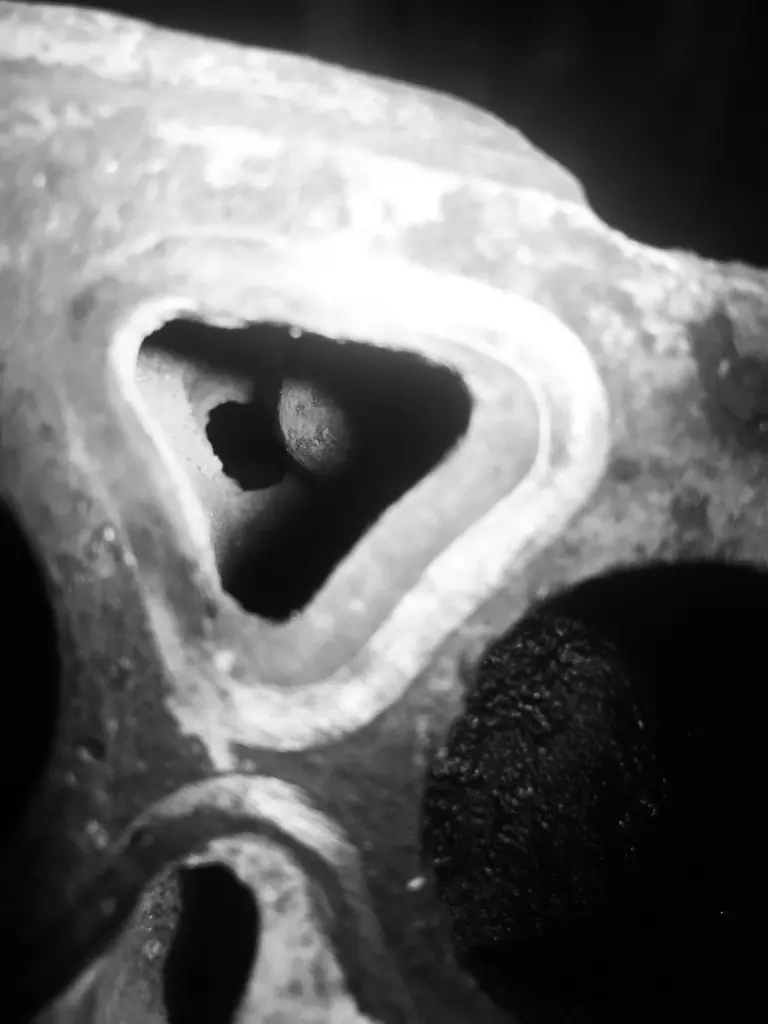
[attachment=61902]9 - TC Defect (Polyp).jpg[/attachment]
Bottom side of Top Cover - Defect in casting showing a "Polyp" of iron that didn't make it to where it should have.
[attachment=61903]10 - Top Cover Underside.jpg[/attachment]
Top Cover Underside
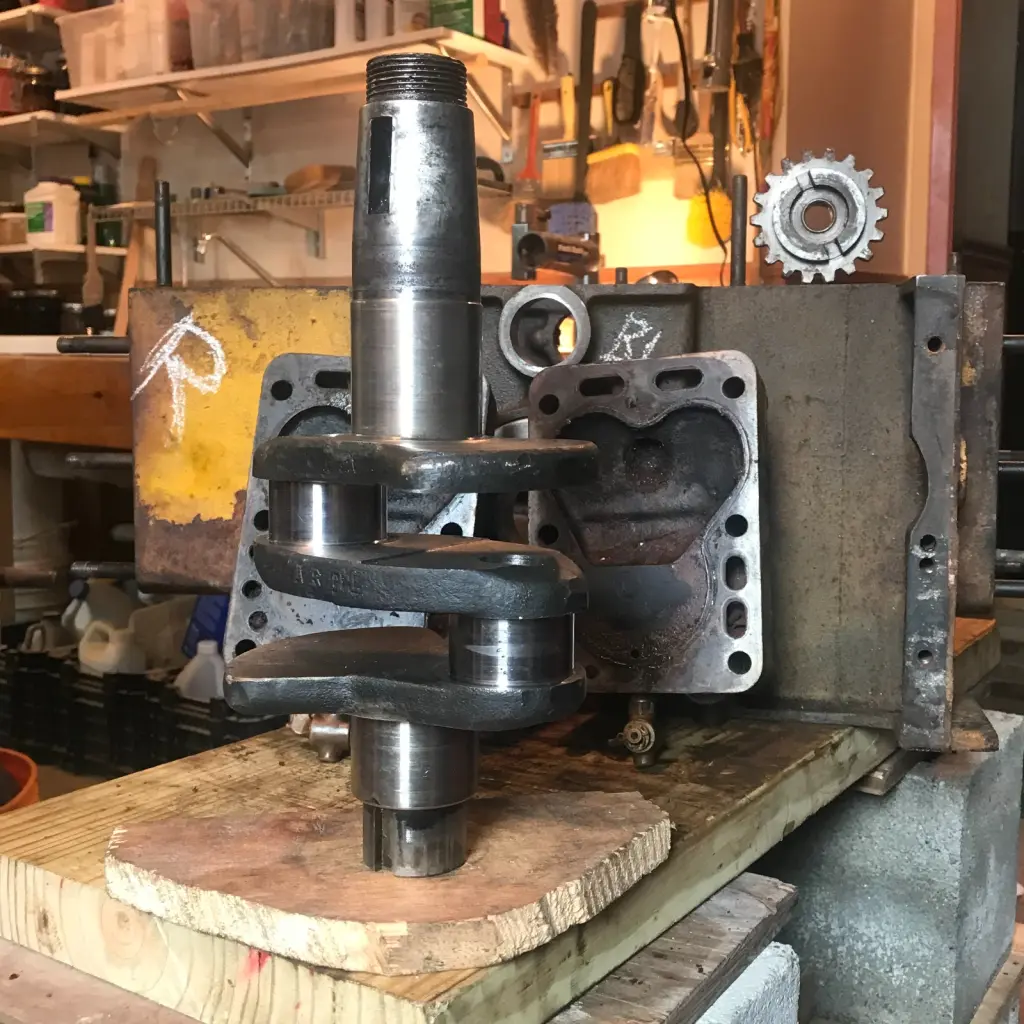
[attachment=61904]11 - Crankshaft.jpg[/attachment]
Crankshaft
[attachment=61905]12 - Crank Gear.jpg[/attachment]
Crankshaft - Timing Gear Side
[attachment=61906]13 - Crank Flywheel.jpg[/attachment]
Crankshaft - Flywheel Side

More pics on teardown:
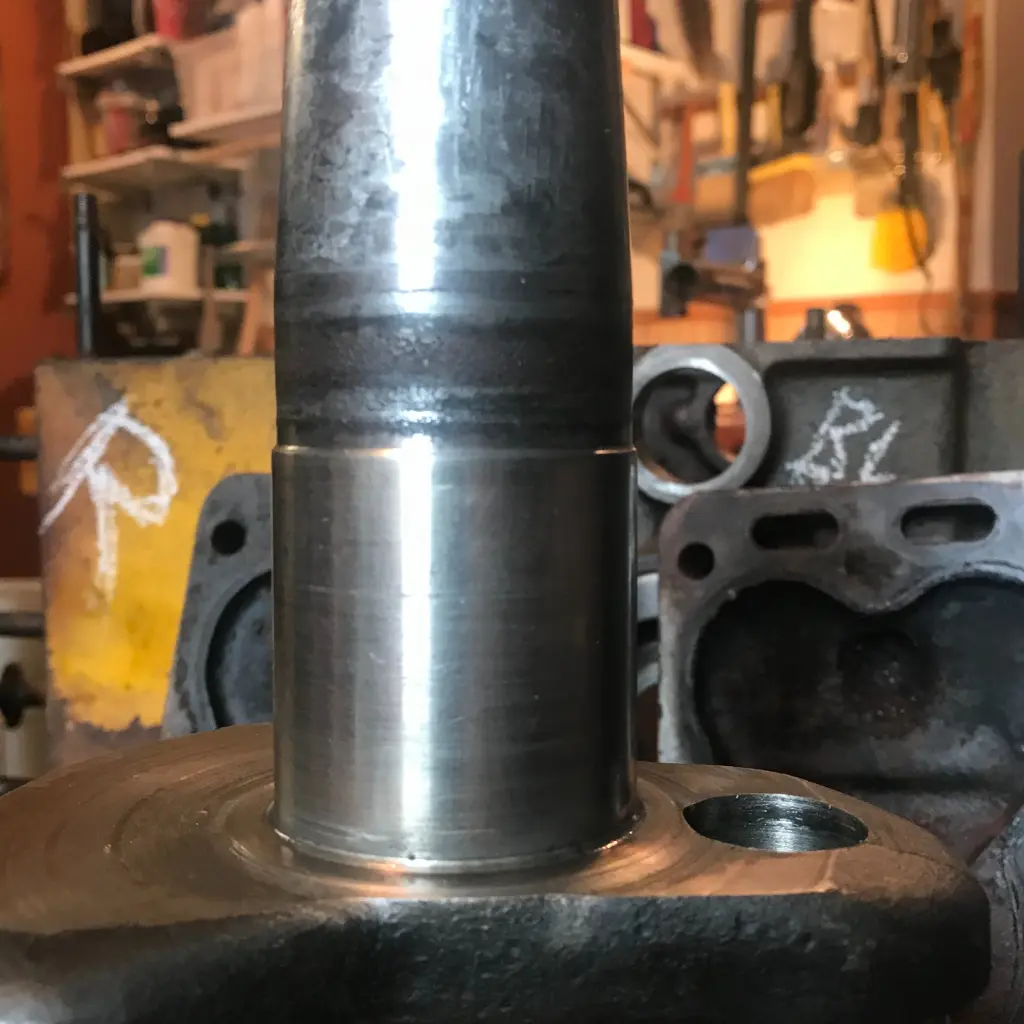
[attachment=61907]14 - Main Journal CG.jpg[/attachment]
Main Journal - Timing Gear Side; Spec is 1.9995-2.000" with 0.005" out of round. Looks good (I think).
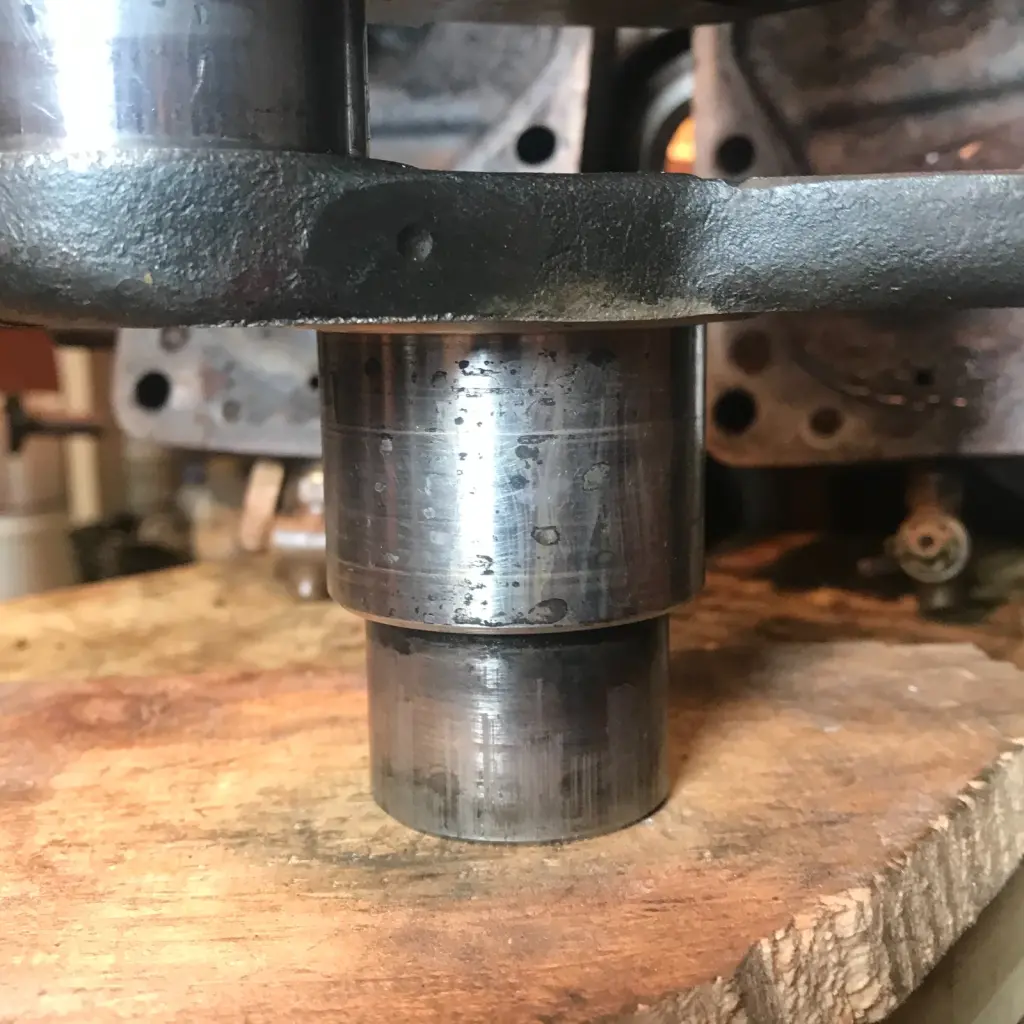
[attachment=61908]16 - Main Journal FW.jpg[/attachment]
Main Journal - Flywheel Side Ok
[attachment=61909]15 - Crank Journal Lft Piston.jpg[/attachment]
Left Connecting Rod Journal; Spec is 1.8745-1.8750" with 0.003" out of round. Ok
[attachment=61910]17 - Crank Journal Rht Piston.jpg[/attachment]
Right Connecting Rod Journal - Ok
[attachment=61911]18 - Main Bearing Flywheel Side.jpg[/attachment]
Main Bearing - Flywheel Side; Some scoring, Replace
[attachment=61912]19 - Main Bearing Timing Gear Side.jpg[/attachment]
Main Bearing - Timing Gear Side; Some scoring but not as bad as TG side; Replace
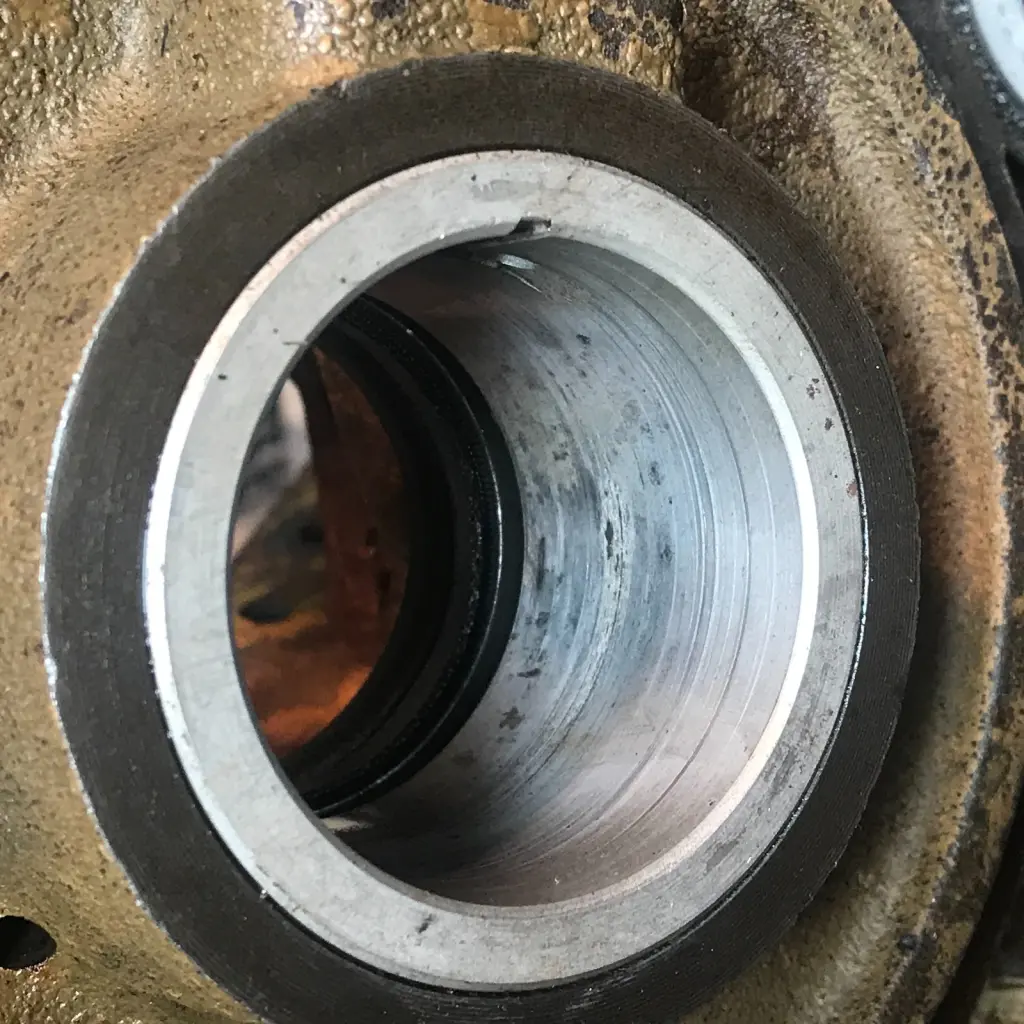
[attachment=61913]20 - Crank Bearing Left Piston.jpg[/attachment]
Connecting Rod Bearing - Left Piston; Scoring; replace
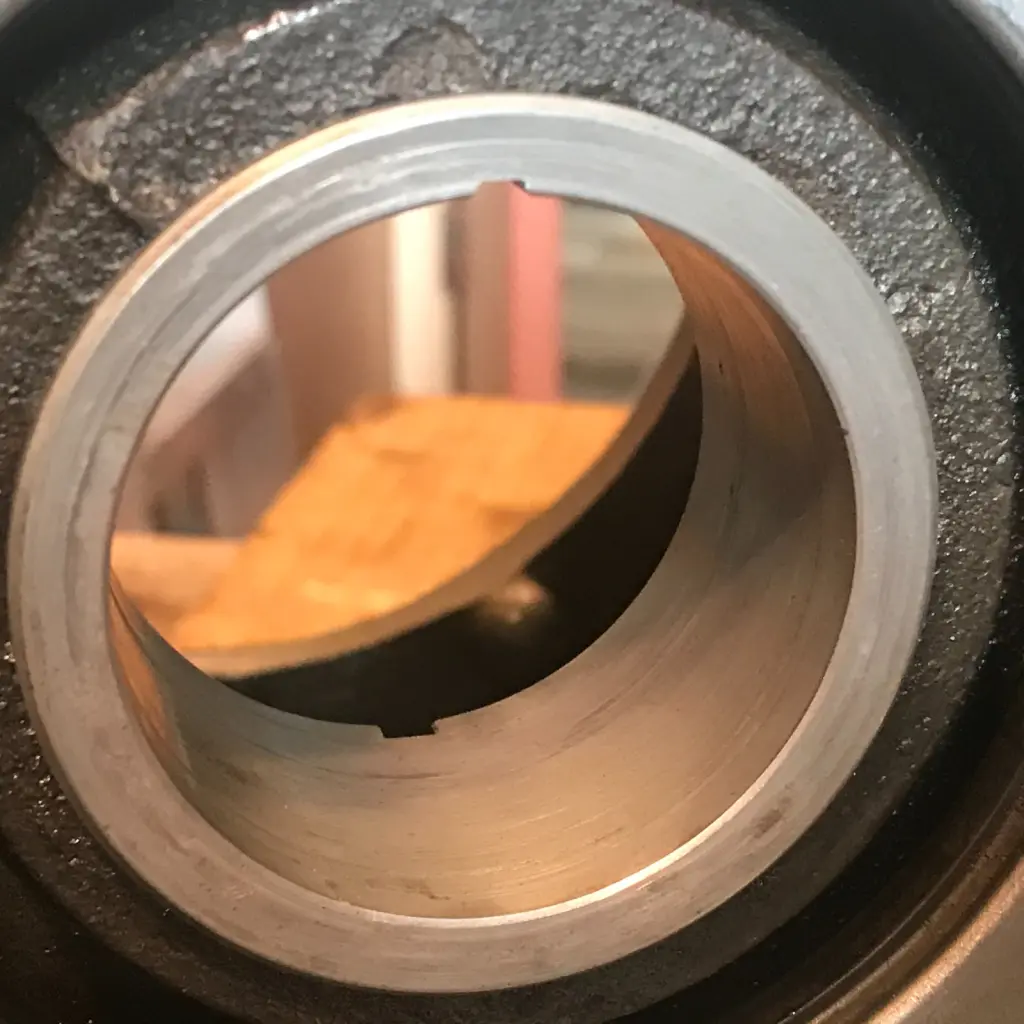
[attachment=61914]21 - Crank Bearing Right Piston.jpg[/attachment]
Connecting Rod Bearing - Right Piston; Scoring; replace
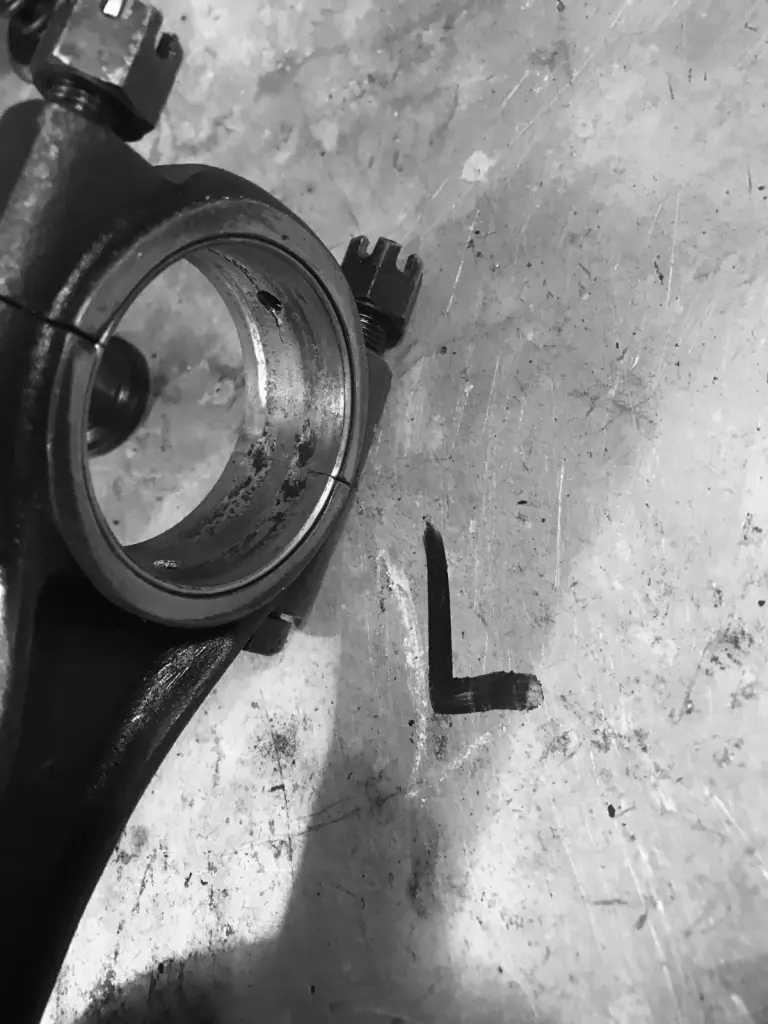
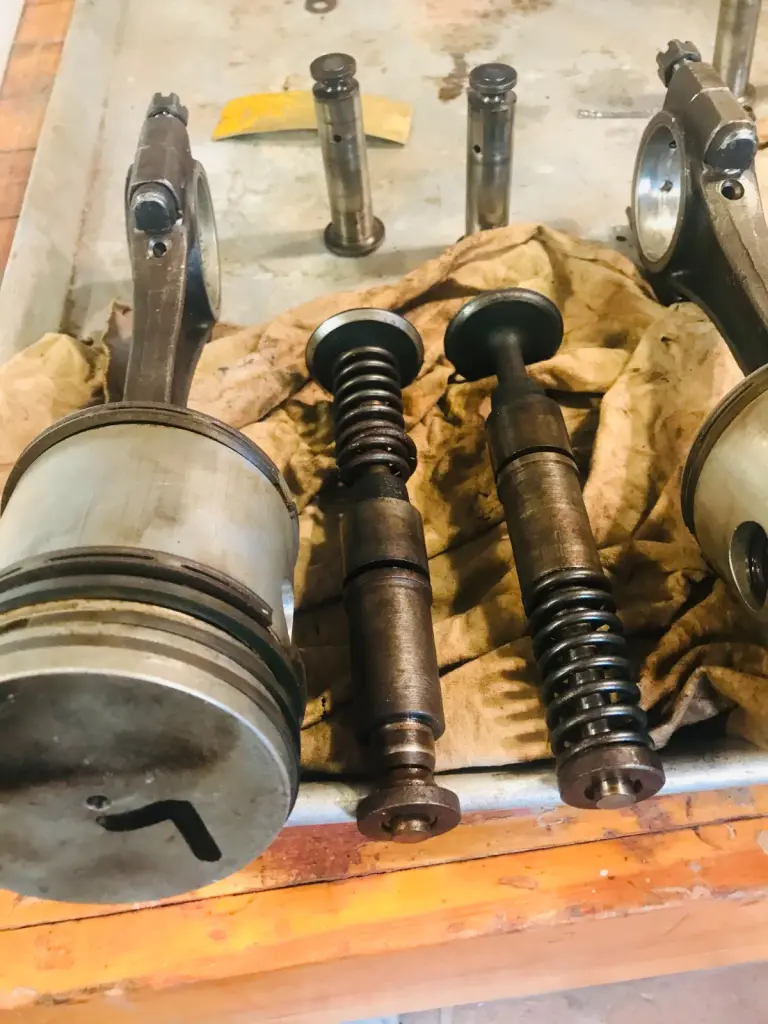
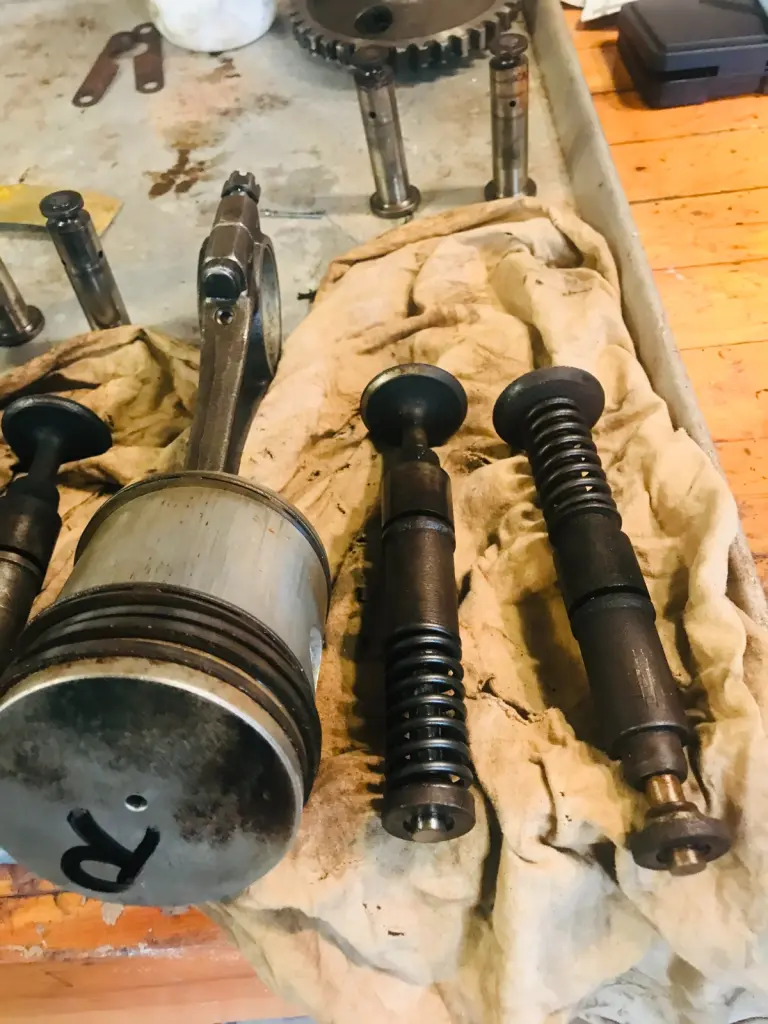
[attachment=61915]22 - Left Piston and Valves.jpg[/attachment]
Left Piston and Valve Assembly - Best of 4 valves was the Intake shown here, looks new but is only one with a broken spring!
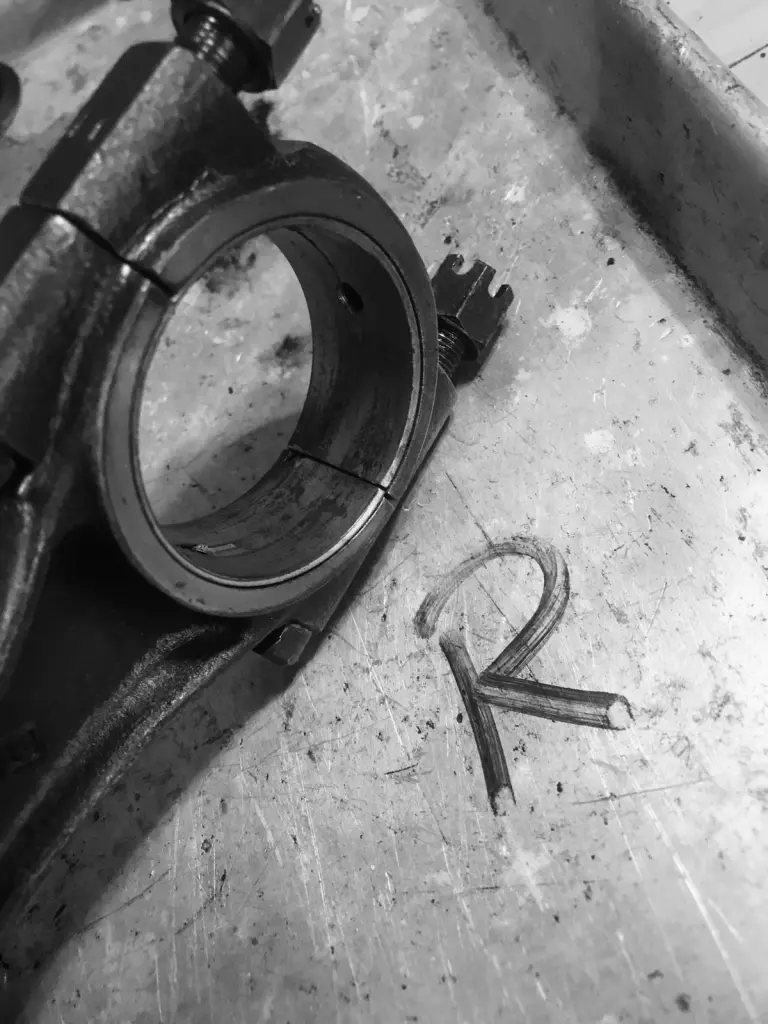
[attachment=61916]23 - Right Piston and Valves.jpg[/attachment]
Right Piston and Valve Assembly
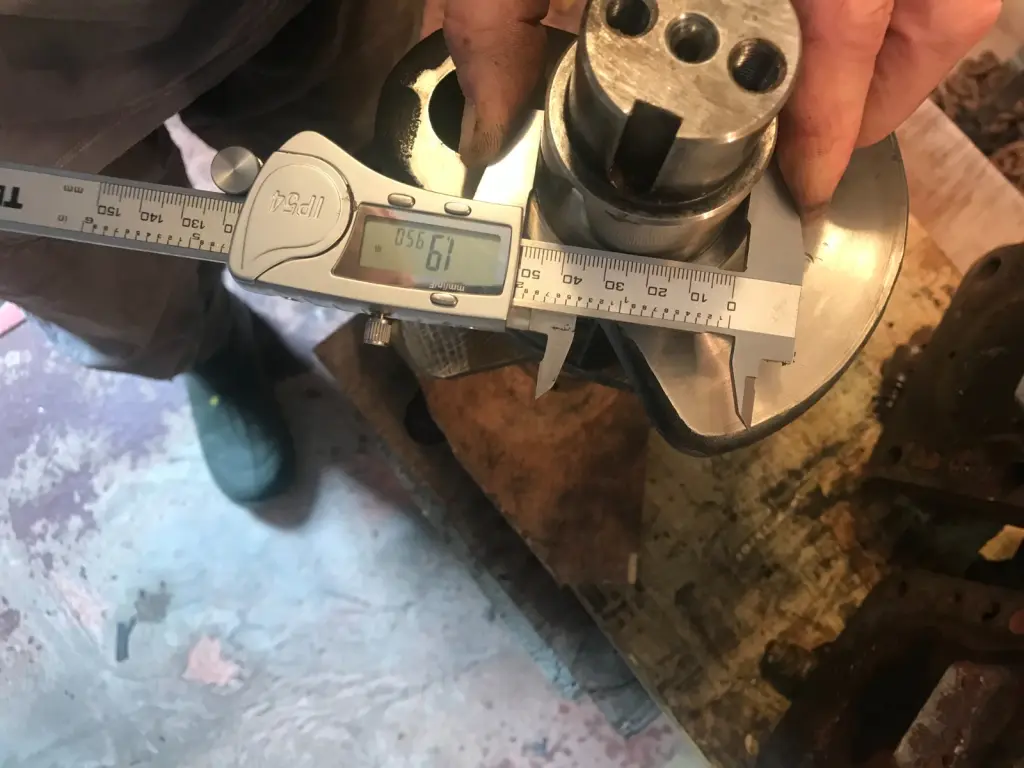
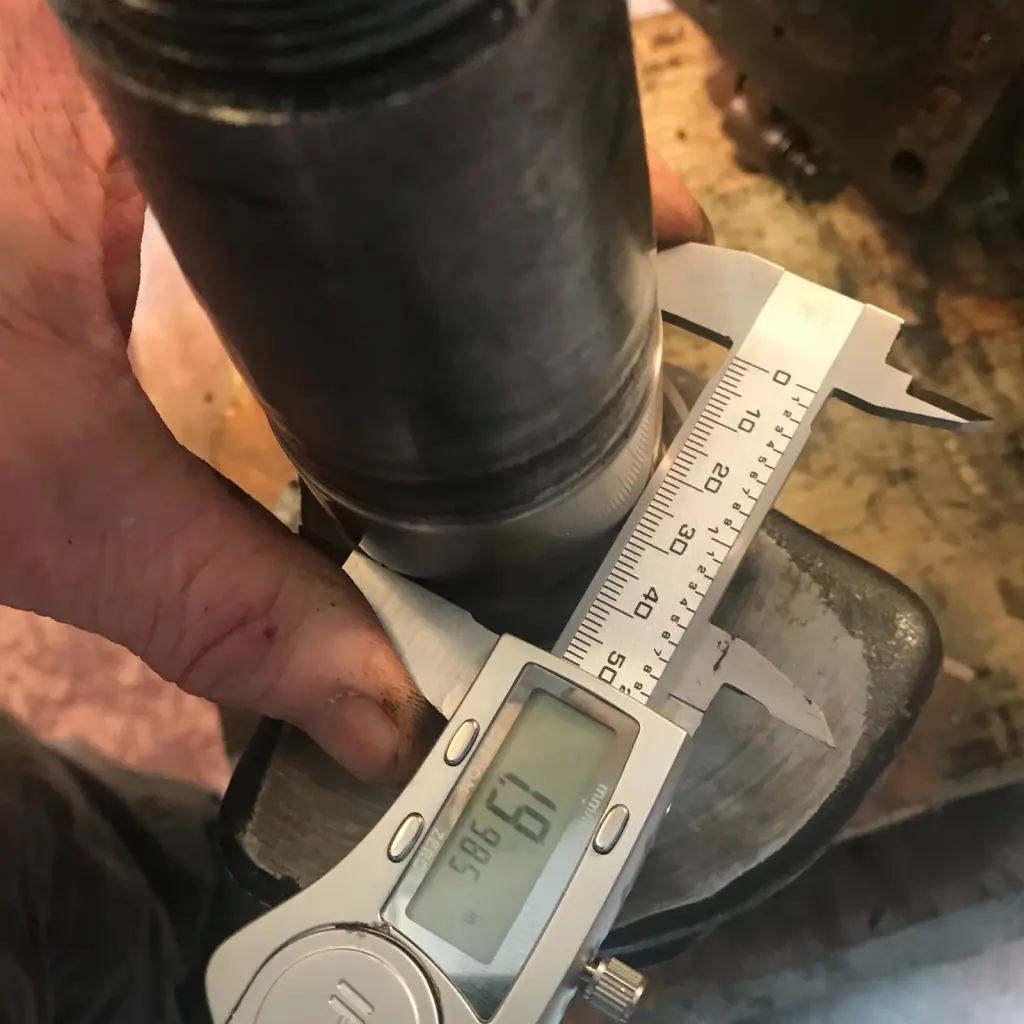
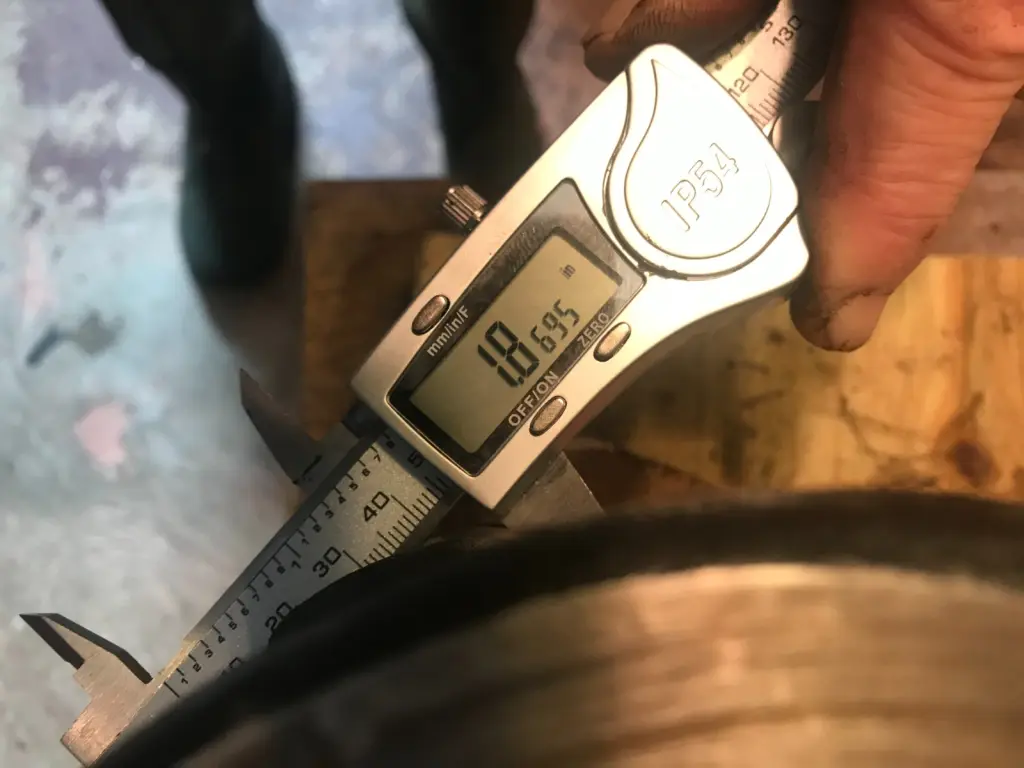
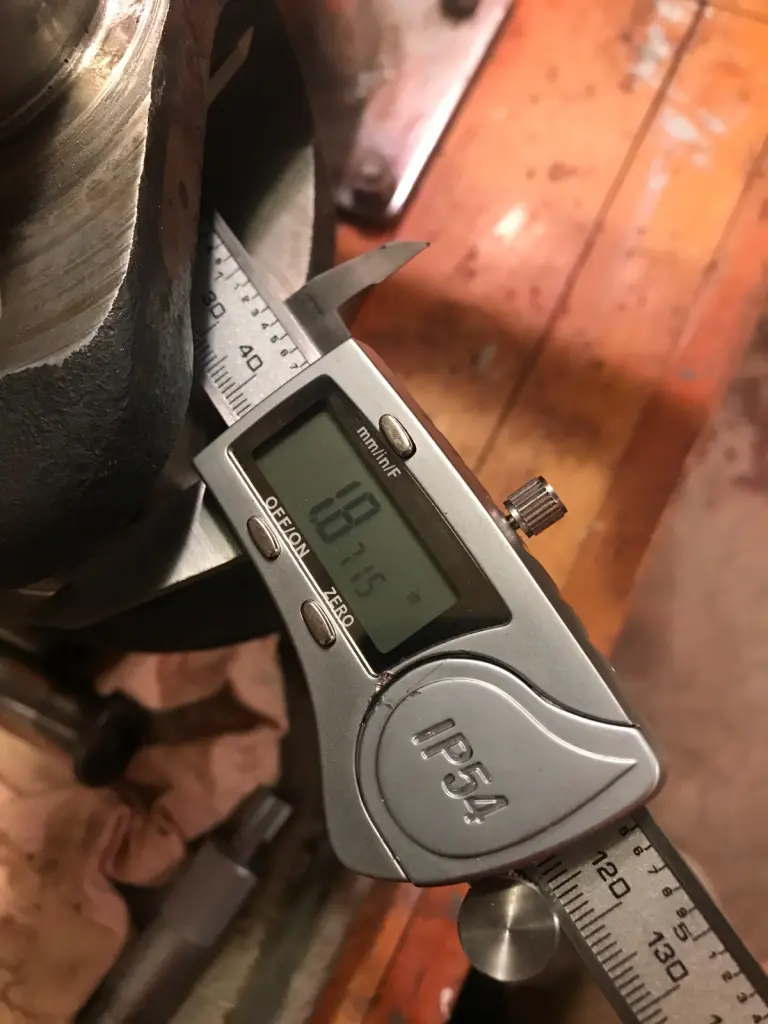
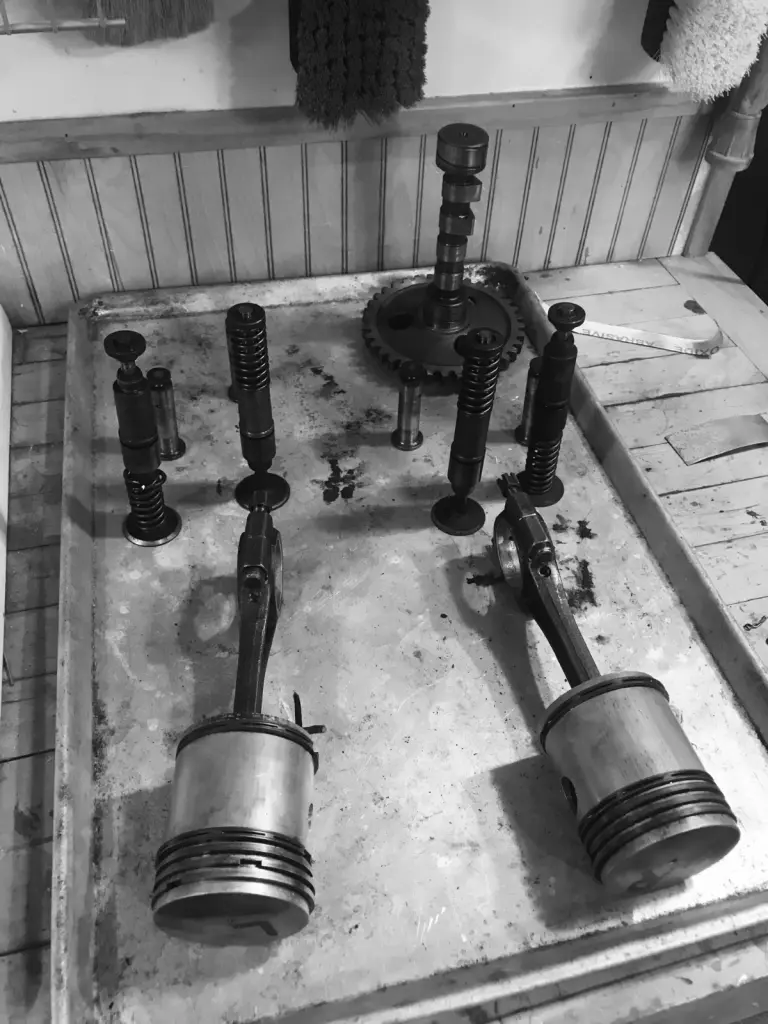
[attachment=61917]24 - Pistons, Valves and Camshaft.jpg[/attachment]
Pistons, Valve Assemblies and Camshaft; Pistons measure wear but do not appear to be severely scorn ...??? Triple checked measurements with difference between cylinder wall and piston skirt of 0.0206" vs 0.006" spec new and piston lands of 0.0350" vs 0.020" spec new.
[attachment=61918]25 - Exhaust Pipe, Flange and Block.jpg[/attachment]
Exhaust Pipe, Flange, and Block; Question - any thoughts on exhaust pipe replacement (2 parts). The parts are discontinued from CAT and expect it will be hard to find and if I find it may be expensive. Plan to ask around but wonder if I shouldn't have made up or idk..
[attachment=61919]26 - Water Pump.jpg[/attachment]
Water Pump; Here's another one. The pulley is worn down to the size of a potato chip on the left. Part is discontinued. Not sure what makes the most sense here, look for it and grab it or can it be built back up??
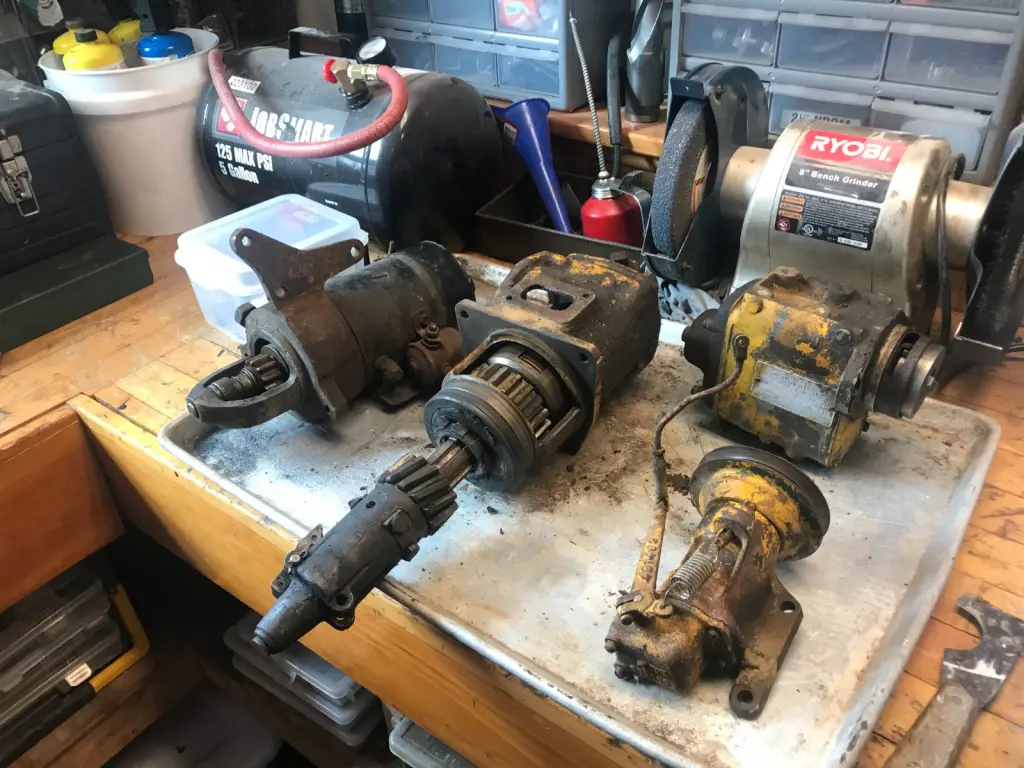
[attachment=61920]27 - Starter, Starter Pinion, Magneto and Governor.jpg[/attachment]
Starter, Starter Pinion, Magneto and Governor; Last of the teardown parts. If you look at the end of the Starter Pinion you'll see a missing dog ear. Engaging the dozer was a circus ... would have to hold the pinion in from popping out while trying to keep the Pony going and hitting the fuel. Funny but not! Remember seeing the missing dog ear inside the dozer flywheel housing, TG!! CAT wants $282 just for one ear!!! I'm diving back in to find it! lol
Any feedback is appreciated, thank you.
Scoop - you might be able to find some of those obsolete parts at Florin Tractor. I purchased a pair of pinion latches last year for my D2 much cheaper than Cat wanted.
If for some reason you're unable to find the exhaust manifold, a custom exhaust shop will be able to make that up no problem. I used to do a lot of replacements like that, substituting either mild or stainless for the cast tube. Cut the flanges off and reuse.
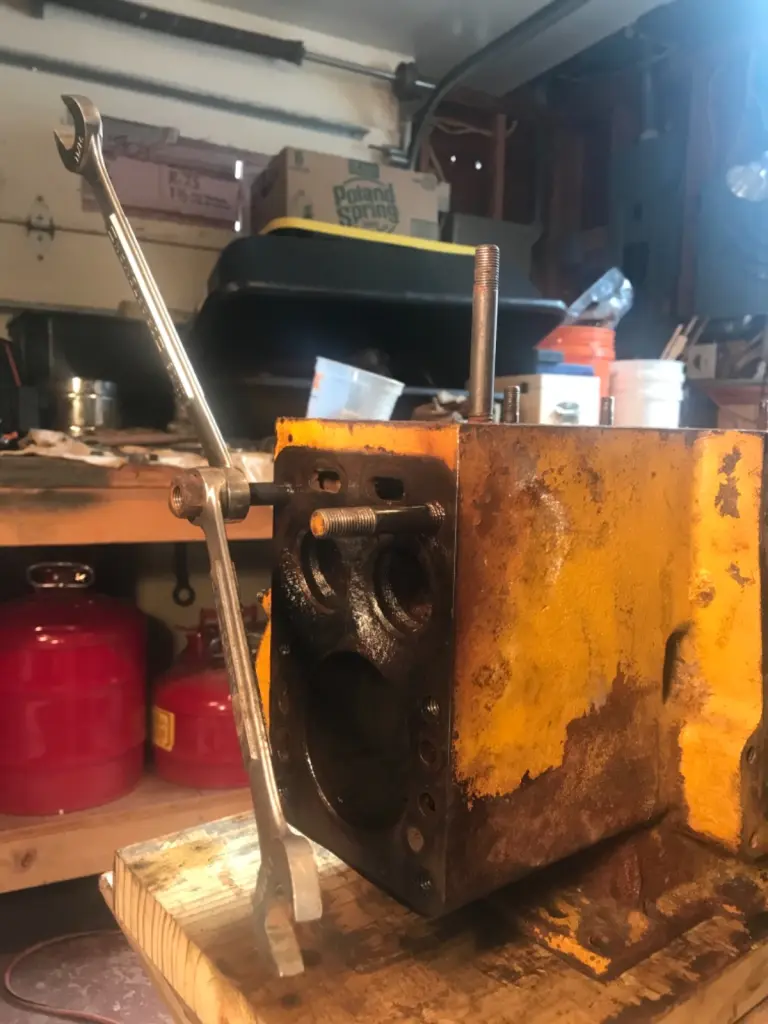
Any suggestions on how to remove head studs without breaking them? Found a machine shop in Port Jervis NY with press large enough to do the job. He’s a one man band and swamped so it’s going to take some time. Suggested I remove the head studs myself and said to be careful if they break it’s going to run into a lot of time and money for him to remove. Said not to heat which is contrary to anything I’ve ever done but I’m nonprofessional just a jack of all trades. Also said to tap block and end of stud with nuts on and take it slow.


Our channel highlights machines from the earliest Holt and Best track-type tractors, equipment from the start of Caterpillar in 1925, up to units built in the mid-1960s.
Antique Caterpillar
Machinery Owners Club
1115 Madison St NE # 1117
Salem, OR 97301
Terms & Privacy
Website developed by
AdCo
"I became a member recently because the wealth of knowledge here is priceless."
-Chris R