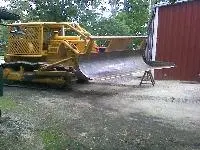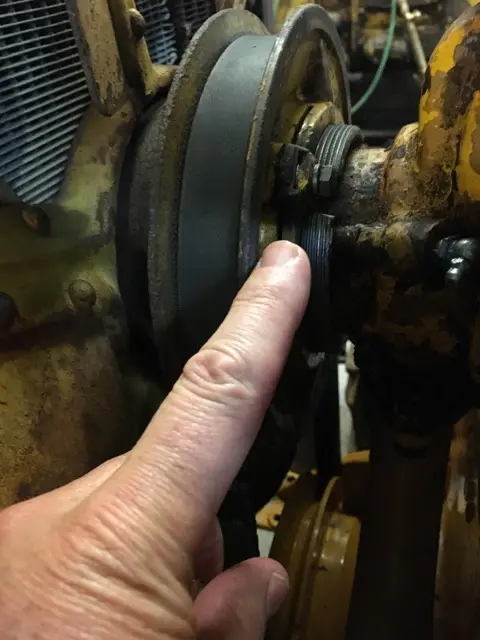
The procedure for the D4, which is similar to the D2 I believe, is to slacken off the fan pulley adjustment (remove two clamps on the back of the pulley and then turn the back half of the sheave which is threaded onto the front half), and then slip the belt off the crank pulley and then past each fan blade. It's helpful to find a spot on the periphery of the fan guard that gives the most space to slip the belt between the guard and the tip of the fan blade. Again, if it's like the D2, there's no requirement to remove any other parts. Picture shows clamp bolt and threaded sheave. I don't have my fan guard on but procedure is still the same.
[attachment=40924]IMG_4390.jpg[/attachment]
Were you able to separate the coupling? Should be able to move the 1/2 coupling and shaft forward enough with the #44 pump removed. If your hitting the radiator then it to will need to be removed. Doesn't take much room to slip the belt through there.
Later couplings had spacers that you could remove to install the belt but that is not the drive used with the 6W5644 pump.
Don't forget to put the plug back in that retains the gear forward in the coupling.
Thank You for the answers, I will have to check again in the morning and see if I can get belt to fit. The replacement belt we got is a cogged one on the inside, is there ribbed belt that would fit as I think it would be easier to bend and get in? What is meant by putting plug back in to keep gear forward in coupling?
See plug #5 or #17.
Cogged belt is correct. Target fit is sideways.
While your in that area check and make sure the water pump housing has a relief valve and not a grease fitting in both ports. Some tractors have the valve on top and the fitting on the bottom and some were opposite, check your parts book with correct serial number. If no relief valve grease gets pushed past the seal and fills up the pulley housing.
While your in that area check and make sure the water pump housing has a relief valve and not a grease fitting in both ports. Some tractors have the valve on top and the fitting on the bottom and some were opposite, check your parts book with correct serial number. If no relief valve grease gets pushed past the seal and fills up the pulley housing.
Rome, is this the same situation with the D2 pump? I just looked in the parts manual and it lists a 45 degree grease nipple 3B8485 and another fitting that looks like a grease nipple with the top part 'broken off' 4B4550 - is that the relief fitting? Does it matter which location it's in?
Yes same for the D2, the 4550 is the relief valve. not sure why some locations are different, may be the way the housing is made internally so check the parts book.
Ok, looks like I need to swap one of mine out : )


Our channel highlights machines from the earliest Holt and Best track-type tractors, equipment from the start of Caterpillar in 1925, up to units built in the mid-1960s.
Chapter Nineteen
| Cnr Hiller Lane and Ballarat Road, Hamilton, Vic, 3300Chapter Two
| Pitt Farm, Little Paxton, St Neots, Cambridgeshire, PE19 6HD, UKChapter Fifteen
| Historic Santa Margarita Ranch, 20000 El Camino Real, Santa Margarita, CA 93453, USAChapter Thirty
| Hartley - South Australia
Antique Caterpillar
Machinery Owners Club
1115 Madison St NE # 1117
Salem, OR 97301
Terms & Privacy
Website developed by
AdCo
"I also joined a year ago. had been on here a couple of times as a non-member and found the info very helpful so I got a one year subscription (not very expensive at all) to try it out. I really like all the resources on here so I just got a three year. I think its a very small price for what you can get out of this site."
-Jason N