
Nice old installation....
Yes, it does help with the priming if you fill the tower with fuel instead of having to do it with the hand pump or cranking.
Fuel travels from the tower through the fuel gallery passage at the back of the fuel pump housing to supply the injectors. You still need to bleed the injector pumps and more than likely the lines to the injectors as well.
It is normal to have the cavity behind the cover plate dry.
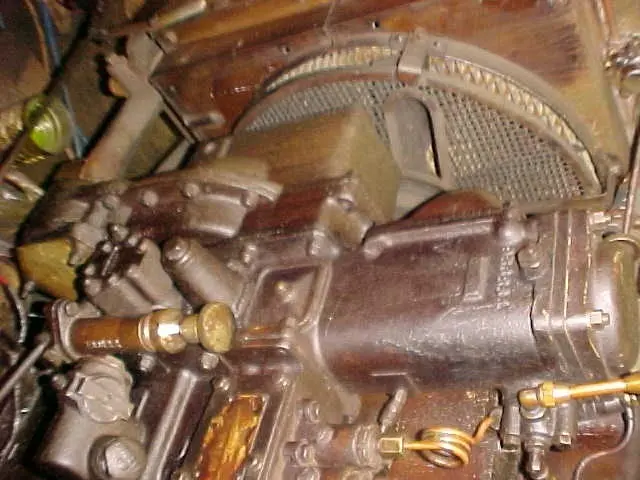
The picture is of the later pump but the configuration is pretty much the same.
Thanks for the quick reply and info. How does the fuel go from the fuel passage (standpipe) top to the injectors below. I think this is the problem. There is pressure in the fuel tower (indication on fuel pressure meter), but nothing is getting to the injectors. Could something be clogged somewhere below in the path to the injectors. I could then blow it out. Tony
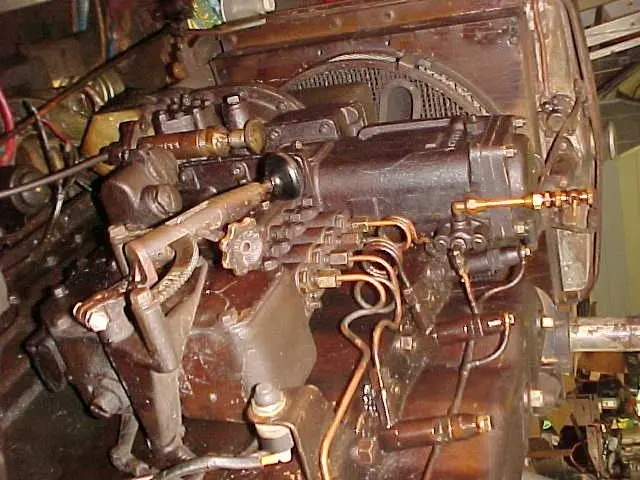
The stand pipe in the filter housing is on the fill side.
Check your filter head gasket installation. seems you may have blocked off the discharge passage.
If the passage is blocked furthur down past the gauge port there is no place to blow out a clog without removing an injection pump (end unit) or removing the complete injection pump assembly.
Thanks for the Fuel Pump and lifter assembly picture illustrating the front view. It printed and viewed with no problem. I didn't have that pump view, only the side view of it in my D3400 manual.
I did have a problem printing and viewing the other other illustration of the stand pipe. For some reason, I couldn't blow it up to see or read it. If you can resend it with a different Jpeg attachment, it would be appreciated.
Will let you know how things turn out. Tony
I have used these pictures before without problem. If you want PM me your email address and I can send it direct.
Try this one:
Hi Team,
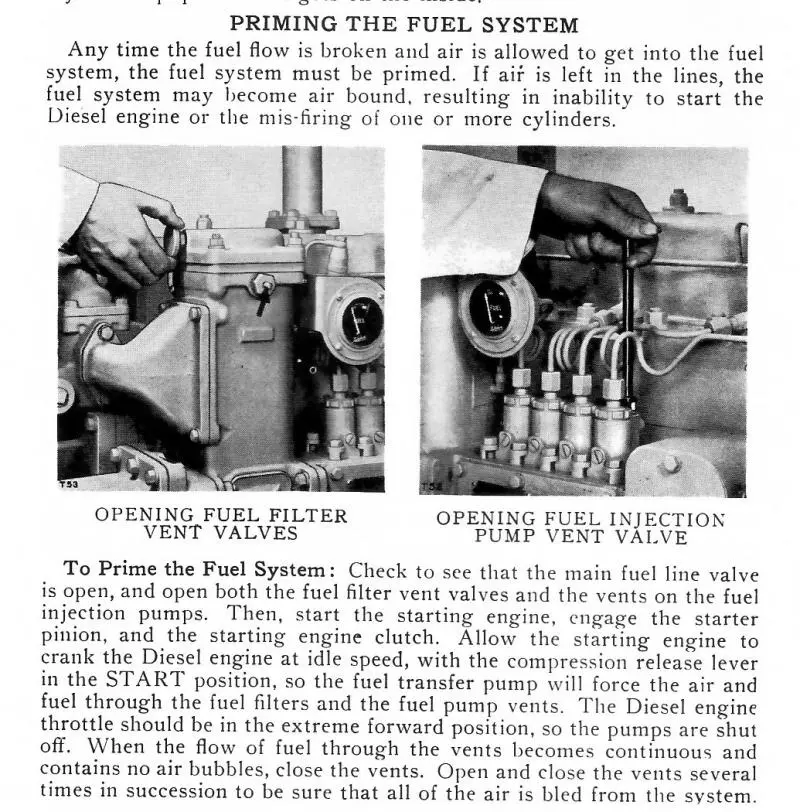
scaned below is the method from the Operators Guide (OMI)
With your Gen Set as you have the hand priming pump you can bleed most of the system with it alone.
With the fuel in the shut off position and the fuel injection pump bleed screws behind each pump unit loosened you should be able to get air free fuel from at least 3 of the pumps.
Then crack the fuel lines at each injector unit and again fuel should bleed from at least 3 lines--sometimes the lines are tight against the injector and the low bleed fuel pressure will not come out, so, just ease the lines away to allow bleeding.
A few old three card tricks I have encountered when filters have been changed is that the plate, with the filters on, and/or gaskets are orientated incorrectly so the passages to the injection pump fuel supply and the bleed screw galleries are blocked.
Hope this helps.
Cheers,
Eddie B.
Hello edb and old magnet: You guys have hit the nail right on the head! Old Magnet, I was able to open the fuel tower cutout (fuel filtering) no problem second time around. Can't understand why the first one couldn't open to the correct size, but that's another story. And edb you put the cream on the cake with priming the fuel system. Now we know where the fuel injection pump vent valve is located. We will try to get things cooking this weekend or next week. You have made a 77 year old electrical engineer very happy with your info, not to mention my two radio engineering buddies assisting on this project! Thanks loads again. Tony
I got to noticing the fuel filter picture was slightly larger than the 293kb limit. Still it posted but I think the canned program automatically resizes to a smaller picture that does not respond to the click on enlargement. That's my theory anyway, glad you got the info.
Hello Eddie B. and Magnet: Many thanks again for the input. Today we bled the system, mainly the injectors (with the strange needle valve square heads), pumped up the fuel pressure, and the puppy took off, and purred like a kitten after a bit. One last question...what is the part number or where can I purchase the tool to loosen the injector bleeder valve? We had to use one of my tiny ignition 1/4" wrenches and gas pliers to get them loose, however it wasn't much of a problem. I could get my machinist friend to make one up, but if they are available on the market, I'll go that way. Tony


Our channel highlights machines from the earliest Holt and Best track-type tractors, equipment from the start of Caterpillar in 1925, up to units built in the mid-1960s.
Chapter Nineteen
| 1234 Carngham - Lake Goldsmith Road Lake Goldsmith VIC 3373Chapter Two
| Folds Farm, Godshillwood, Fordingbridge, Hampshire, SP6 2LU
Antique Caterpillar
Machinery Owners Club
1115 Madison St NE # 1117
Salem, OR 97301
Terms & Privacy
Website developed by
AdCo
"I became a member recently because the wealth of knowledge here is priceless."
-Chris R