Before taking it off the machine , you better mark the leaking pipe ,
aswell try to complete fill with water and put some pressue on the system (with air compressor or so) and check for more leaks, so you don't have to take it apart an other time for more or other leaking pipes
then drain the rad, take out all bolts connected to radiator , take off in and outlet pipe(or tubes)
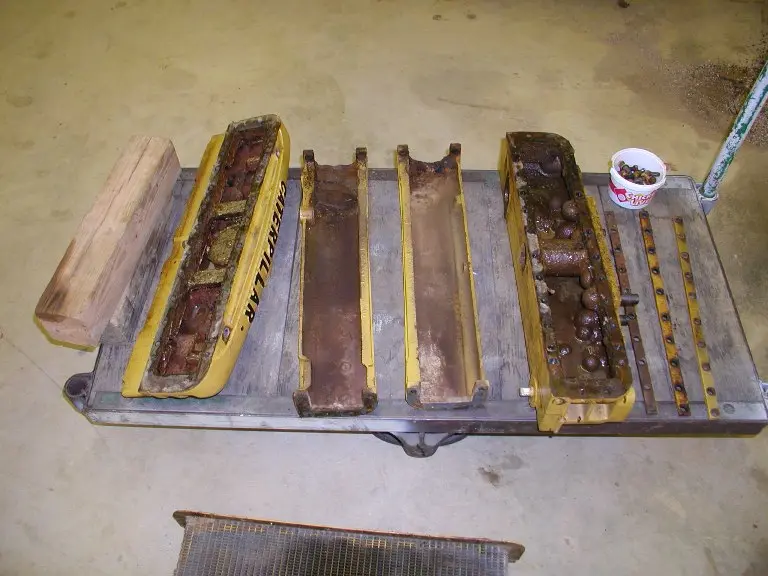
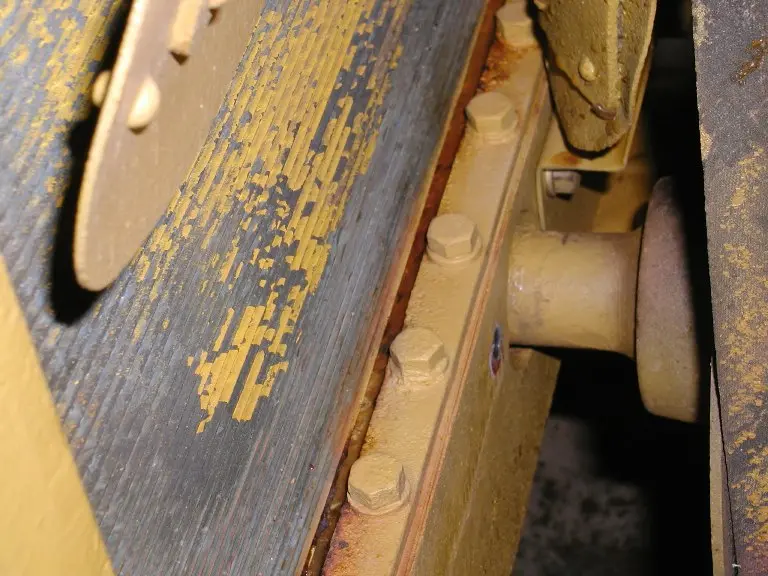
then if you got it off the machine take upper and lower block off aswell as the rad sides by taking out alotot of bolts,
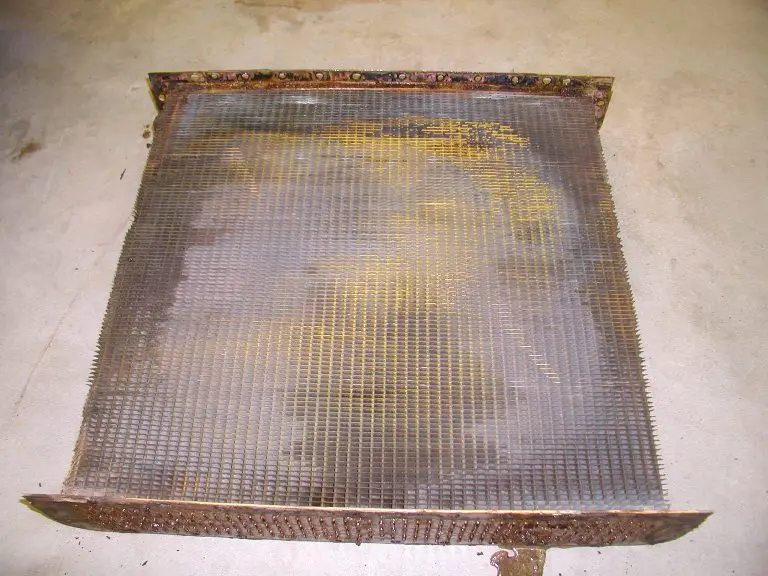
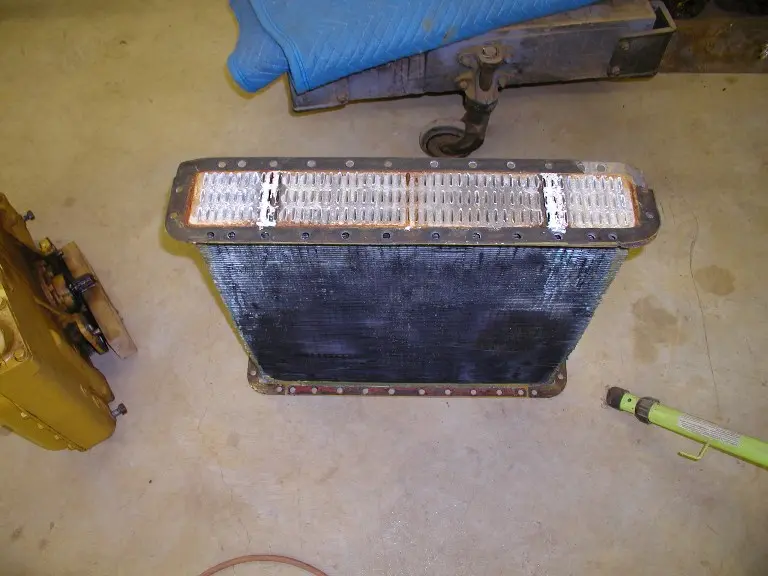
nice time for cleaning the core now ( i did it with a pressure washer and did it to all little pipes), and after that and now i just write here what i did for closing the radiator but mabe there are other ways of doing it:
i put a little piece of cork in the bad pipe, and press it in thebad pipe for 1/8 to 1/4 inch with a screwdriver,
this is because i dont want to put a lot of solder in the pipe.
so after the cork is in place then i cleaned the pipe with a little dremel tool / rotating file to take of all corrosion, then flux it with S39 brass flux and solder the pipe full with a propane torch,
then when cooled down i poored a bit superglue/fastglue on top as the solder did'nt "weld/flux"everywhere so good so the superglu was for safety closing up any little leaks,
then turned around the core and did the same at the other side on the bad pipe,
this was a succes for me as i did it with 5 leaking pipes of the rad.
[attachment=14808]DSC01833.jpg[/attachment]

4D2Ken,
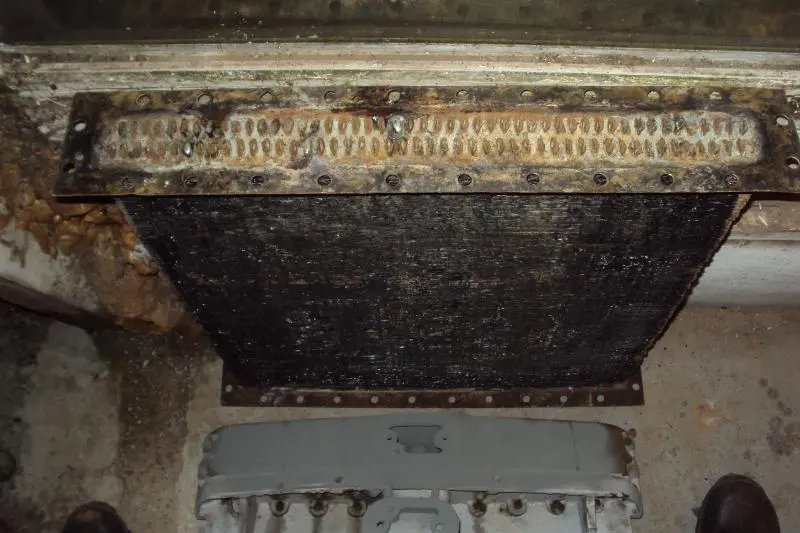
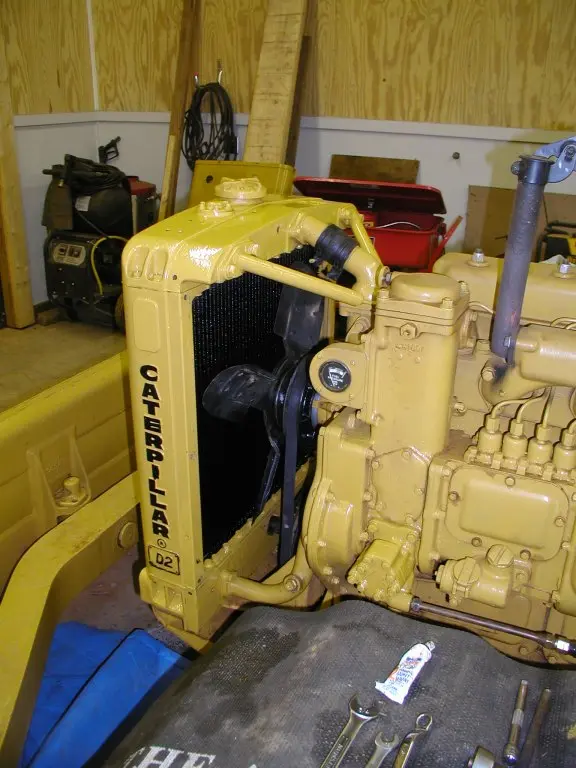
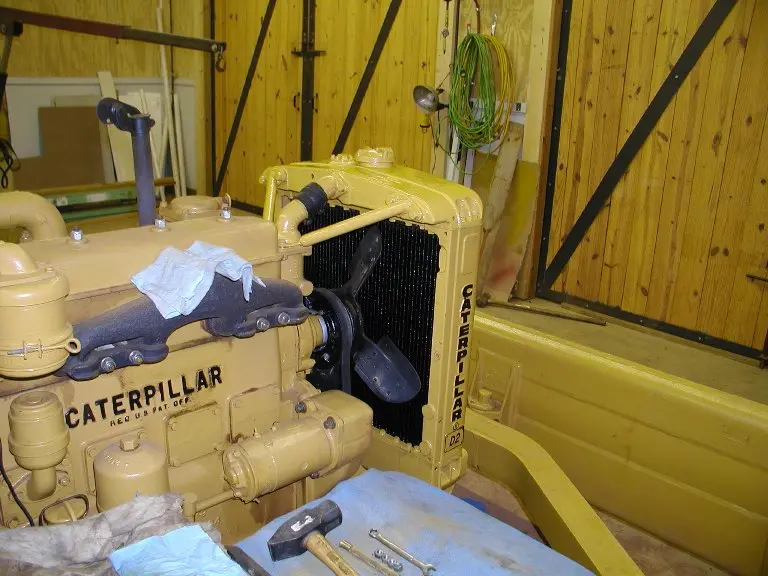
I had a very similar experience with a radiator leak. As you can see in the pictures the radiator didn't look bad but as soon as the radiator shop put some pressure on it it showed its age and leaked badly. The metal was "rotten" so to speak. I would take it to a shop and have it tested. It will save you a lot of time, skin on the knuckles and talking to yourself when you have to take it off a second or third time (Speaking from experience)... 😊 Getting the radiator off is pretty straight forward. You will have to take the brush gaurd off the front, disconnect the hydraulic lines, remove the bolts on the lower corners of the hydraulic pump. The unit should slide right off. Drain the water and remove the water lines. There are bolts under the lower tank that hold the radiator on the tractor. Removing them should release the radiator as a unit. A "cherry picker or chain hoist will be necessary to pick up the pump assembly and the radiator.
Of course this is a simplified version of removal as there are lots of little things to remove as well.
Have a good evening.......Bill
[attachment=14823]Radiator 4.JPG[/attachment][attachment=14824]Radiator 5.JPG[/attachment][attachment=14825]Removal of Radiator for Repair.JPG[/attachment][attachment=14826]Radiator 1.JPG[/attachment][attachment=14827]Old Core after ''repair''.JPG[/attachment][attachment=14828]New Radiator 3.JPG[/attachment][attachment=14829]New Radiator 2.JPG[/attachment]
In case you are wondering, new core prices in the USA for a D2 vary from around $400 to $550 delivered to your door, if the radiator core is getting "porous" as many old one's do, it's a never ending battle chasing leaks, and if your budget is tight right now then a can or two of "Alumaseal" will usually fix most leaks to get you out of trouble, that $6 investment is a bit quicker than a full pull down, as those small bolts in the top and bottom tanks can often be half rusted away and a pain to remove.
regards
Mike
Thanks for the tips fellas. I was actually considering trying a radiator "stop leak" additive before pulling the radiator out, so for the cost why not try, right? It only starts leaking after a couple minutes running the pony
Last fall I was using my M-F 255 to split wood. I only have to run the Perkins diesel at about 1000 rpm and the smokestack cap jingles and jangles at that rpm. Slowly I start to realize the jingle jangle sounds louder and louder, and before I could shut the engine down the radiator fan nut had backed off and the fan cut into the radiator core. Pardon my French, but that sucked as there was almost no clearance on the fan blade to the radiator, and of course no guard. Plus the center nut holding the fan on wasn't a nylock nor did it have any loctite. 😞
Well, I had a heck of a time getting the radiator out as the fan blades were bent, but finally was able to remove it. I took it to our local NAPA and they said they could 'try' to have it repaired for $150 but with NO GUARANTEE. They also quoted me a price for a replacement that was higher than I could purchase one on Fleabay.
By using some duct tape, old rubber inner tube, and hose clamps, I was able to seal the radiator and locate the leak. I ended up cutting the radiator fins to get at the core tube and cleaning the area spotless. I then used silver solder and my propane bottle to seal the leaking area. Once that was done I cleaned the patch again and mixed up some J-B weld as I still had a a tiny leak when I pressurized the radiator. The radiator hasn't leaked since, and I still have the same NO Guarantee that NAPA offered. Oh yeah, I also replaced the water pump while I was at it and the replacement pump came with a, you guessed it, nyloc nut for the fan assembly. I still gooped over the nut with some Permatex silicone seal!
Just a note of caution here, if you have to take the rad apart, just order new bolts for top and bottom. Note: there are different length bolts involved- 7/8" , 1 1/8" , and 1 3/8". Get the proper part number for the bolts involved. We had a bad experience several years ago with the local nitwit rad shop in town and they ended up using too short and too long of bolts with the end result of stripping holes and cracking castings. I had to put in numerous heli coils on the tanks and get side plates on the rest. Also use the Cat gaskets which are one piece. The clown that (fixed) our rad used cork and overlapped it at the corners and broke the side pieces when he tightened the things down, I even gave him the right gaskets. Needless to say, we don't use his services any more. Cheers, Larry.


Our channel highlights machines from the earliest Holt and Best track-type tractors, equipment from the start of Caterpillar in 1925, up to units built in the mid-1960s.
Antique Caterpillar
Machinery Owners Club
1115 Madison St NE # 1117
Salem, OR 97301
Terms & Privacy
Website developed by
AdCo
"I also joined a year ago. had been on here a couple of times as a non-member and found the info very helpful so I got a one year subscription (not very expensive at all) to try it out. I really like all the resources on here so I just got a three year. I think its a very small price for what you can get out of this site."
-Jason N