There probably aren't any videos because it's a bit of a battle sometimes to get it out and requires all your hands plus a couple of spare hands.
Remove the rear cover of the pinion assembly, and the rear cover of the governor. Removing that governor cover will not alter governor settings.
If you can, latch the pinion to shorten the overall length of the assembly. If you can't latch it, you will need to hold it compressed enough to navigate it out of the opening. This will be easier if you've removed the pony which removes the idler gear from the location.
Note also that the o-ring that seals the pinion assembly can make sliding the assembly out very difficult, so take your time and work it to and fro with plenty of lube. Don't be tempted to whale on the assembly mounting flange too hard - it will break. Use a lighter touch while simultaneously twisting the assembly and pushing from the pinion end if you have access to it. It took me a couple of days of working it to get my 5U assembly removed but I did so without damage.
There is a new o-ring part number that makes subsequent removal a little easier because it has a thinner cross-section - I can't find it right now but someone else might have it.
Hi Texasbanron,
You have to lift the pilot motor about an 1 1/2 inches so the gear on the pilot motor clears the starting clutch housing, otherwise you will not get it out and you break things.
Hope this helps too.
Regards
Get the area around the governor clean, you dont want any dirt falling inside and getting into the bearings or on the roller surfaces.
Im in Normangee where are you maybe i can guide you through it.
Hi Team,
these may help.
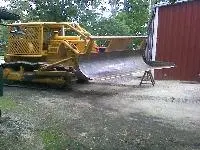
As Toby has the pinion assembly removed you can see the reason the pinion housing cannot be removed until the pony engine is lifted as described above.
Also that pesky O Ring needs plenty of lube to help ease the drag on its way out, also as described above.
https://www.youtube.com/watch?v=Jcz7qPz8QTE
https://www.youtube.com/watch?v=vo0m1XBqdBY
https://www.youtube.com/watch?v=5Xb9WzUxo5s&feature=endscreen&NR=1
Cheers,
Eddie B.
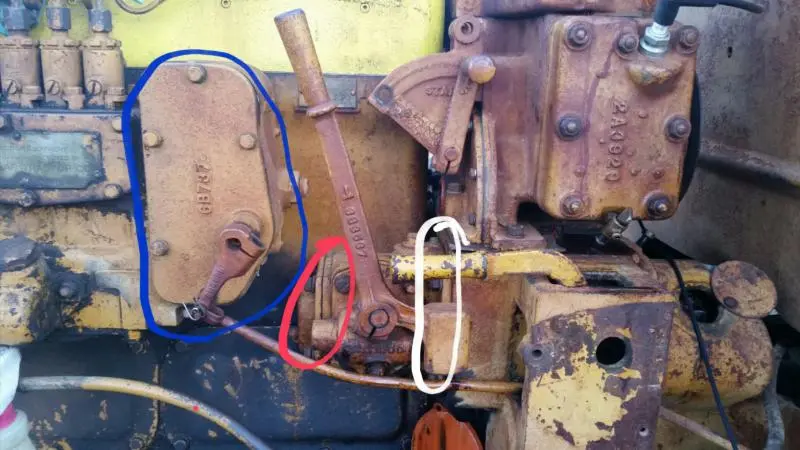
I'm good with the pony removal, I understand why and what hits the pony gear if pony is not removed. My fuel control governor is in the way, I think, and I wanted to remove it without having any injector timing issues. This grader was a mess, and I've done everything including getting seized pony running, and cracked main head replaced, without a manual of any sort, so I'm pretty competent mechanically, just making sure before I start pulling bolts. In pic blue circle is what's in the way, red circle is cover on end of pinion, and white circle is the other assembly bolts.
[attachment=51848]2018-12-18 18.41.38.jpg[/attachment]
As mentioned, take the rear cover of the pinion assembly off (circled in red). Just the cover is sufficient. You can, but don't need to, remove the bearing plate. With that engine model, my instruction for removing the governor cover is not relevant.
Thanks fellers. I'll try taking off just that cover, latching the pinion so it's shorter, and lift pony. I've already got it to move back and forth, but had not been able to latch it until now, and that cover was still installed and hitting the governor, so the oring thing is probably not my issue yet. I bet I need a new oring though, considering how hard it's supposed to make it, and it's not. I'll get to it tomorrow, since I'm shade tree. I'll let ya know. Thanks again!
Texasbanton - your setup is exactly how our 212 grader was when I removed the pony and pinion for repair, and after the pony is lifted you'll need to remove that governor lever, the front plate of the pinion clutch housing, and I will also recommend taking out the 3 bolts that secure the pivot plate for the pinion clutch engagement lever and removing the lever, shift yoke, and plate as an assembly from the side of the pinion clutch housing to further decrease the size of the assembly you're trying to remove. I've never made any videos of that process since I've never had the camera out when I was actually doing that work, but just happen to currently be in a position to make a decent video of just what I described above in the next day or two.


Our channel highlights machines from the earliest Holt and Best track-type tractors, equipment from the start of Caterpillar in 1925, up to units built in the mid-1960s.
Antique Caterpillar
Machinery Owners Club
1115 Madison St NE # 1117
Salem, OR 97301
Terms & Privacy
Website developed by
AdCo
"I became a member recently because the wealth of knowledge here is priceless."
-Chris R