It's a standard R H thread, no special method apart from using a spanner cut from 1/2 inch plate in conjunction with a 7lb hammer. Most difficult part is holding it all without damage anything, your own body included.
It's a standard R H thread, no special method apart from using a spanner cut from 1/2 inch plate in conjunction with a 7lb hammer. Most difficult part is holding it all without damage anything, your own body included.
Seeing as the bearing is removed anyway, you could make an extended body socket from a Chinese socket and pipe to fit over the shaft. Then use impact wrench. Or,, weaken the nut by drilling, split with cold chisel and fit a new nut( check availability)
Might be easier to refit the bearing cages then undo the nut.
Hi Team,
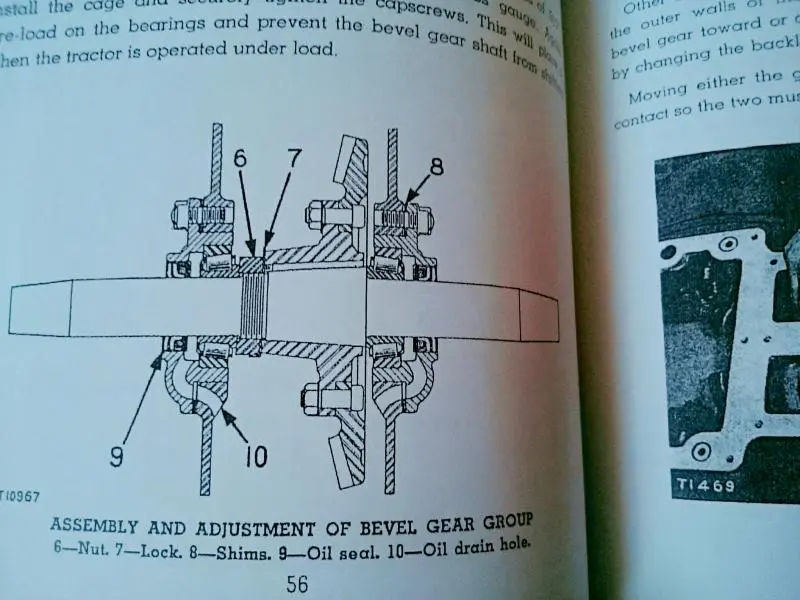
from memory we had a special stepped horseshoe to fit between the B/G nut and the rear face of the Timken bearing.
You can only remove/unscrew the nut about 1/8" at a time as you run the nut and bearing off so you do not run out of BG nut and shaft thread. If you try and run the nut off more than about 1/8" at a time you risk striping the threads and ruining the shaft. The H/Shoe has long legs and they are stepped in about 1/8" steps to suit--a range of H/Shoes of different thicknesses would likely work just as well or better.
Essentially the same deal as D4 etc outer final drive sprocket outer hub bearings.
Trying to find a pic in the Tool Catalogue.
Only specs. I have are for the 933 Traxcavator which essentially is a D2 trans etc.
B/G nut torque for 933 is 700 to 750 lb/ft
Press fit B/G hub to shaft is 12 ton
933 bearing preload is 0.017" of shims removed after end play is taken out of bearings, OR Torque to rotate B/G shaft is 50 to 60 lb/inches
B/G pinion back lash is what is etched on the B/G rim, or what you measured it at before dismantling, or is given as :- 0.006" to 0.008" --may need to be more to allow for worn gears so the teeth do not run on a wear step line and so spall/chip out, and fail along that line due to a high pressure loaded line.
Cheers,
Eddie B.
It's a standard R H thread, no special method apart from using a spanner cut from 1/2 inch plate in conjunction with a 7lb hammer. Most difficult part is holding it all without damage anything, your own body included.
Might be easier to refit the bearing cages then undo the nut.
I tried that as well. Thanks
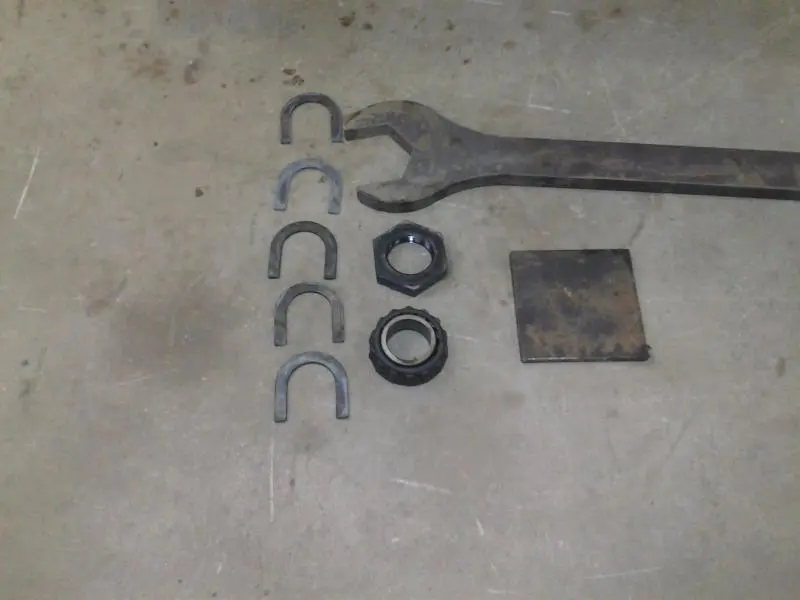
Using advice from A couple people I have gotten it off. First I made A wrench from 3/4" plate. I made A 5" X 5" plate to put between one of the bevel gear bolts and the bottom of the housing to prevent the shaft from turning. I used A forklift under the wrench and lifted the Cat then I jumped on it until the nut moved after that I could turn the wrench by hand.
After I pushed the bearing off 1/8" + I ran the nut back on and added A horse shoe to keep from running it off the threads. I did this 4 times until the bearing was free.
[attachment=43932]0808171329.jpg[/attachment]


Our channel highlights machines from the earliest Holt and Best track-type tractors, equipment from the start of Caterpillar in 1925, up to units built in the mid-1960s.
Antique Caterpillar
Machinery Owners Club
1115 Madison St NE # 1117
Salem, OR 97301
Terms & Privacy
Website developed by
AdCo
"I also joined a year ago. had been on here a couple of times as a non-member and found the info very helpful so I got a one year subscription (not very expensive at all) to try it out. I really like all the resources on here so I just got a three year. I think its a very small price for what you can get out of this site."
-Jason N