Try Florin for your gaskets, or Olson. You should remove the plugs and pumps from the injection housing to clean it, and I'm not sure about the 3400 injection pumps but on my 311 pumps, I just pulled the plunger out of the pump and flushed everything with clean diesel. The gallery in the injection housing on mine was full of crud so I'm glad I cleaned that out or I could have ruined the pumps. That conical seal is actually just a regular o-ring if I recall correctly - could be wrong
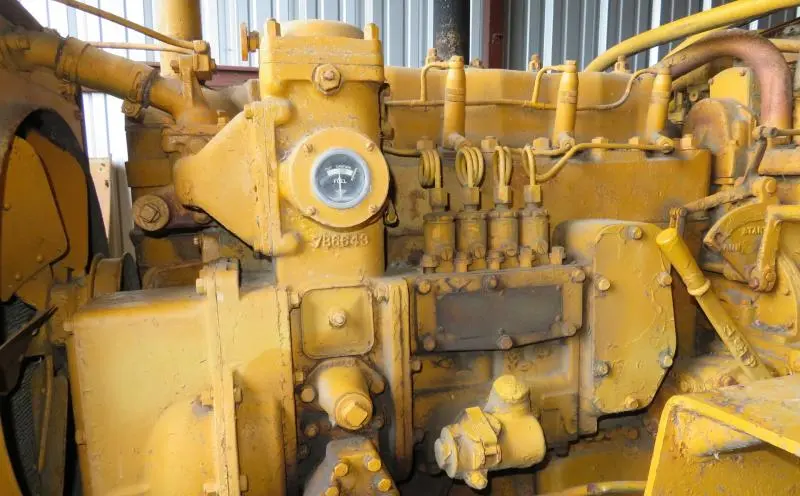
In the photos on the fuel tower is the funnel shaped cone with the plug?
That should be the bottom of the fuel tower. (If I remember correctly?) Remove the filters and take a look down there. I did one a long time ago that was full of crud and stuff. Using a long handle screwdriver and coat hanger to scrape and push the crud to the bottom while pouring lots of diesel through to flush. The O-Ring is correct, they become Conical with age.
I attempted to drain the fuel filter tower in place but what came out was more like diaper leavings so I disassembled the whole thing for complete cleaning.
It looks like draining and flushing was never done. Perhaps last time was 50 or 60 years ago. Judge for yourself.
[attachment=55021]IMG_2009 - Copy.jpg[/attachment]
Not uncommon that's for sure. My 5U looked just the same. A thorough cleaning and it's as good as new. Surprised it even ran before but then I guess the sediment was just in the right place to avoid being picked up. I added an inline filter before the transfer pump that will clean the fuel very well before it gets near any components
Florin had some of the gaskets needed.
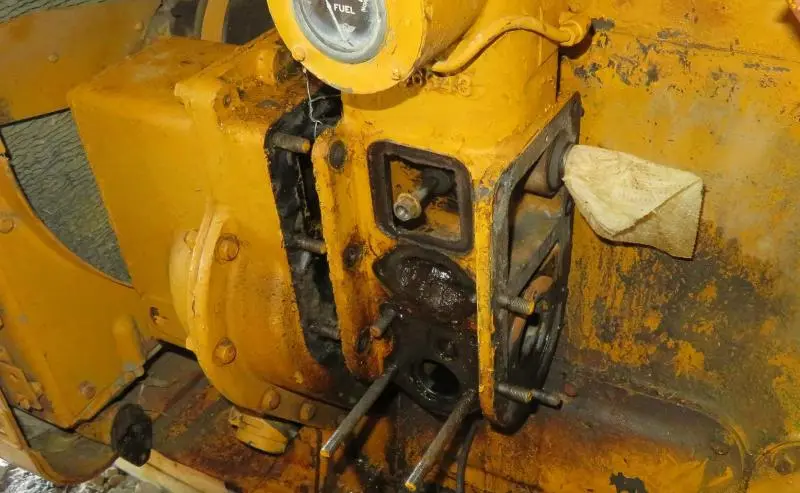
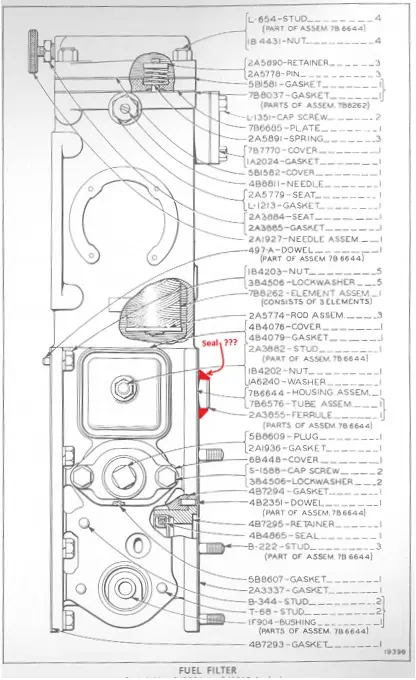
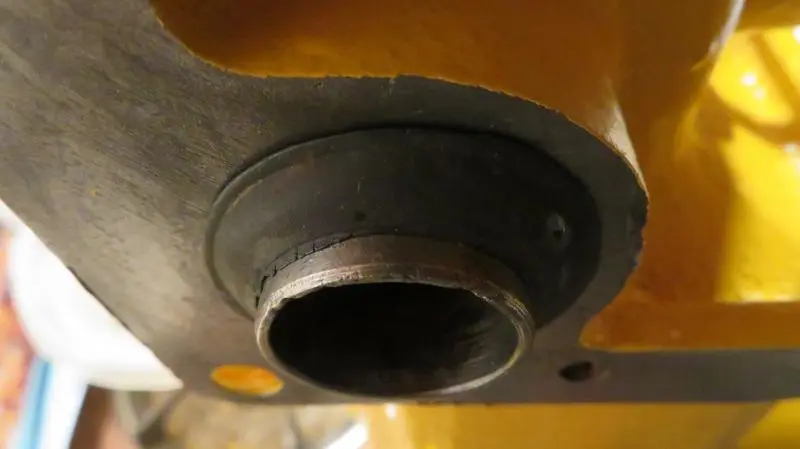
There is a seal for the clean fuel passage of the filter tower to the injection pump. My parts manual does not show it. My local Cat dealer cannot bring up the fuel filter assembly to even search.
Check out the images. Any idea of a part number?
[attachment=55154]CleanFuelSealToInjectionPump.jpg[/attachment][attachment=55155]IMG_2043.jpg[/attachment]
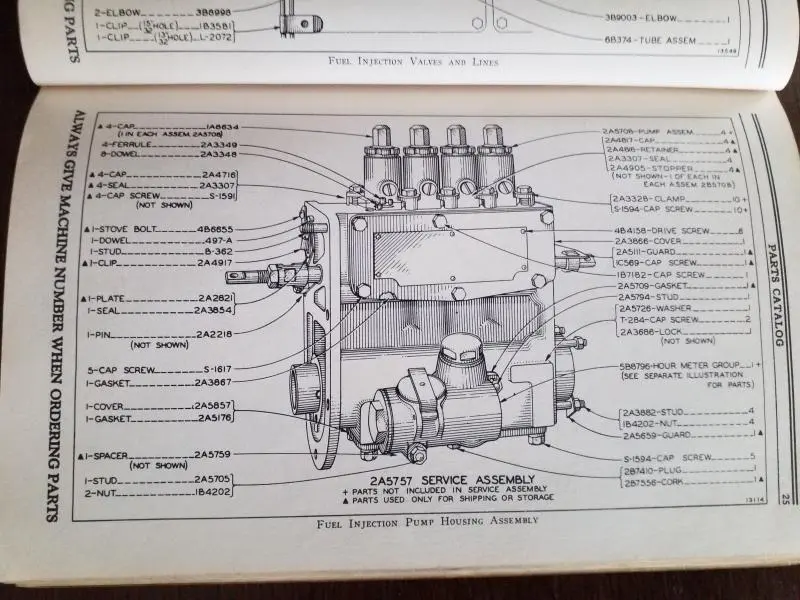
Should be 2A3854
[attachment=55156]20190830_083559-3096x2322.jpg[/attachment]
Wish my parts manual had that detail. Thanks.
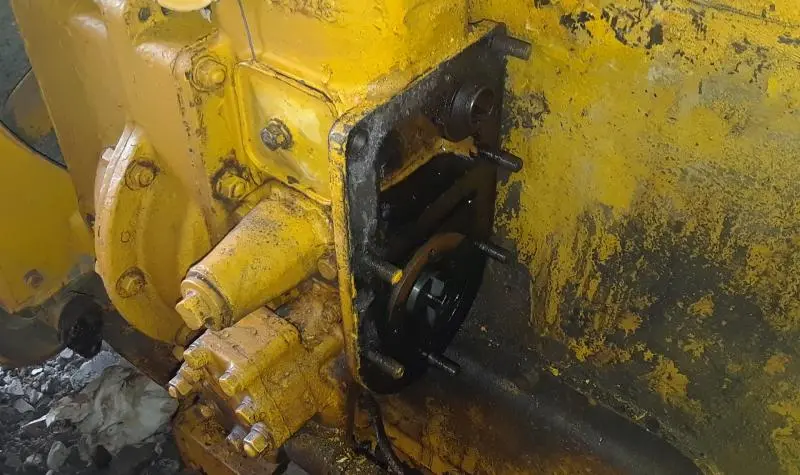
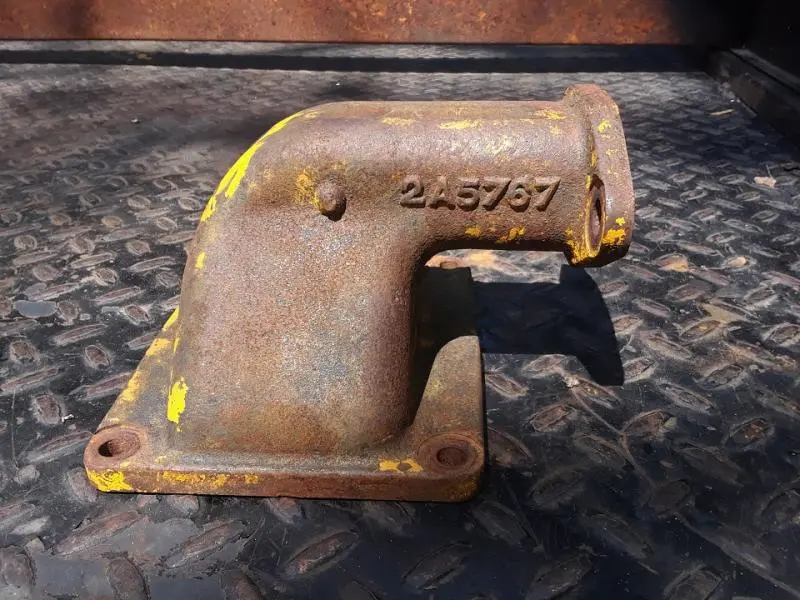
The one last item i need to deal with is the coolant diverter or whatever it is called that provides heat to the fuel filter tower.
Again my parts manual does not show this which makes me think it was an option. I need the gaskets part numbers.
[attachment=55216]20190903_132819 - Copy.jpg[/attachment]
I have been fortunate that Cat or Florin has had 90% or more of the gaskets and seals needed for this D2.
Easier to buy them than make especially if the gasket is used to establish clearances between parts.
Thanks again.
It's all in the parts book, just have to know where to look.
Look under water lines.
Elbow is a 2A5767, gasket is a 2A5769
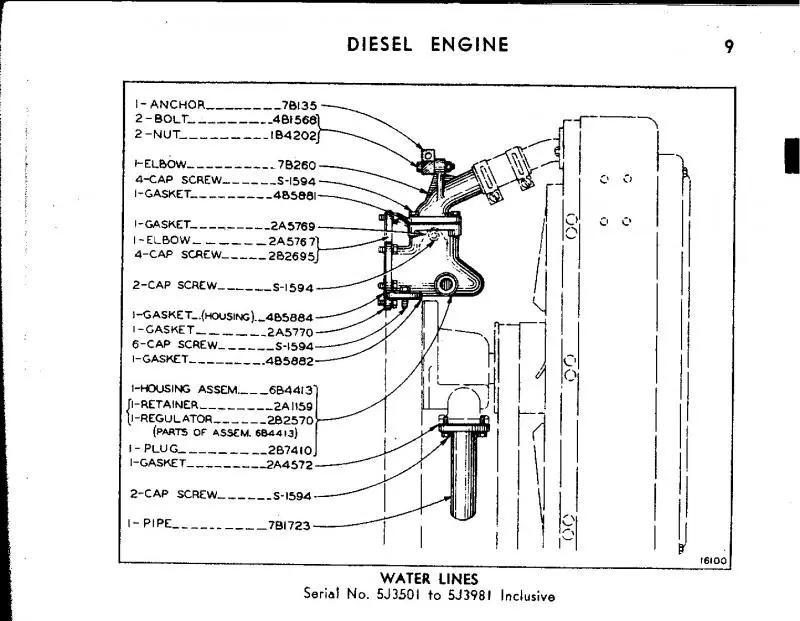

I think I have a different configuration that what my parts book says I should.
I have a parts book that covers 5J3501-5j10561 which is correct for my tractor.
It say I should have a 6B4413 thermostat housing. Mine looks way different.
[attachment=55221]WatreLines.jpg[/attachment][attachment=55222]IMG_1147_Elbow.jpg[/attachment]
Could this configuration be pre-5J3501? My tractor SN says it is early 1941.
The main engine and pony blocks were cast in 1940.


Our channel highlights machines from the earliest Holt and Best track-type tractors, equipment from the start of Caterpillar in 1925, up to units built in the mid-1960s.
Antique Caterpillar
Machinery Owners Club
1115 Madison St NE # 1117
Salem, OR 97301
Terms & Privacy
Website developed by
AdCo
"I became a member recently because the wealth of knowledge here is priceless."
-Chris R