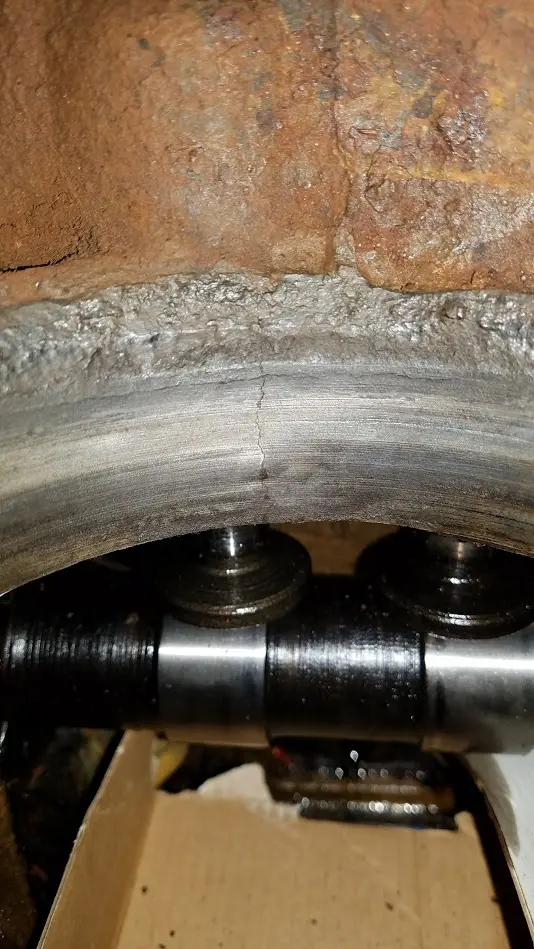
Here is a picture of the crack;
[attachment=46075]D2-crack1.jpg[/attachment]
D46U straight blade,D46U cat angle blade,allis chalmers AD4 grader and Khoering 404 dragline. D4C 40A,D4 2T and scraper.
a good machine shop should be able to fix that. prolly drill and pin then weld the crack.
I'd be game to try your JB weld fix. That's not really a high stress area. V out and stop drill the crack.
That was my feeling also, just wanted to make sure I'm not nuts for thinking it :crazy:
JB is good but - there are some industrial epoxy that claim to be better. Bob
Are there additional cracks just below the rust line running right and left?? Bob
JB has proven itself to me to be reliable assuming the appropriate prep work has been done. I plan to drill ends of crack, grind sufficient depth for the weld to adhere in to, heat the area with a small torch to remove oil residue then clean thoroughly acetone. After application I will give it several days to cure before proceeding.
I don't think so but I'll look real close again to make sure. I think that is just a raised area in the cast iron.
Thanks,
Jordan
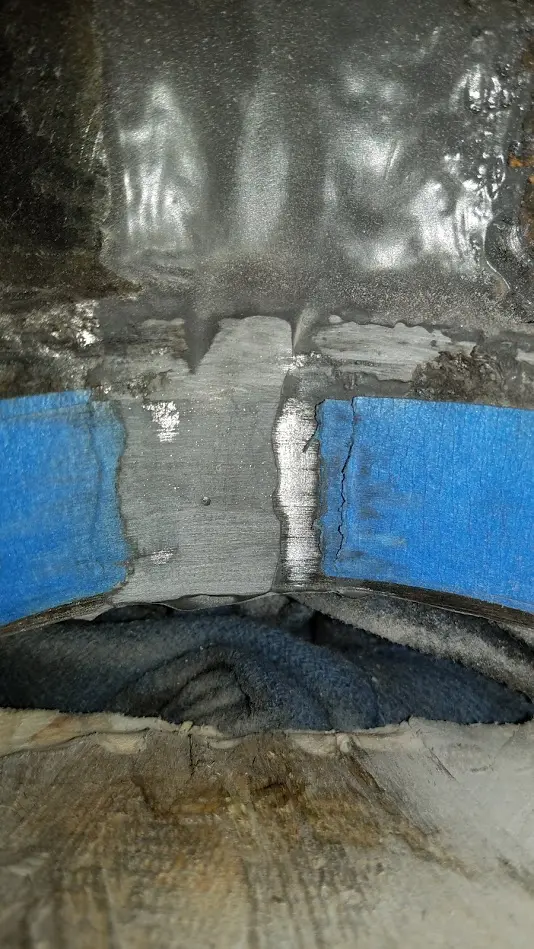
Making some progress on this today. Have crack grooved out and surrounding area ground and cleaned, heated, sanded with 80 grit, cleaned again and have applied first (maybe only) layer of JB Weld.
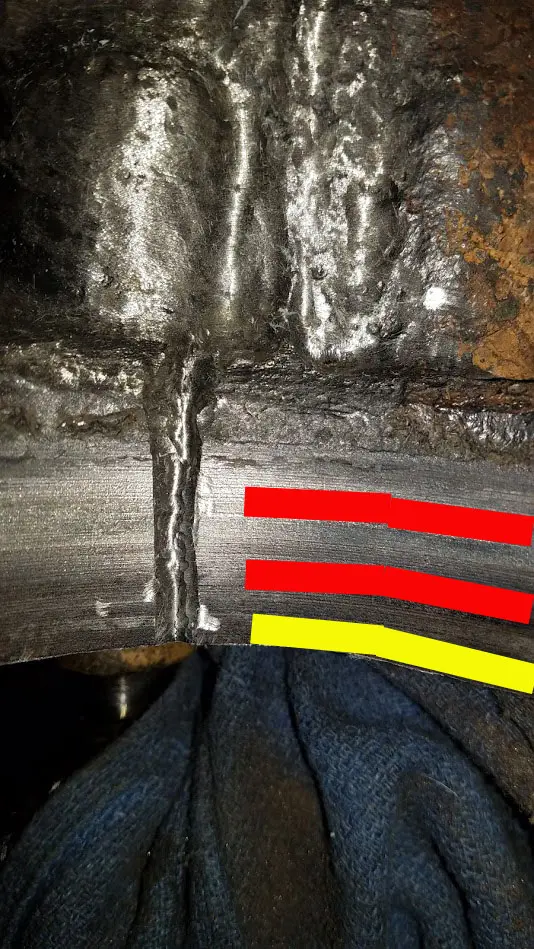
I got to thinking about how I would do the re-assembly. The image below shows in red roughly where the liner O-rings sit in the block. What do you guys think about putting a thin ring of Permatex "The Right Stuff" or "Super 300" around the block in the yellow area right at the very bottom? I would put it on the block, not the liner, so that when I slide the liner in none of that would touch the O-ring area and the excess would just push out the bottom. I still plan to lube the o-rings up with Crisco so it will slide in easier but even that will be above this area and the Crisco wouldn't/shouldn't come in contact with the very bottom of the block.
I just thought this might add an extra layer of seal but wasn't sure which sealant would be appropriate, or would neither or is this a bad idea in general?
[attachment=46146]D2-crack2.jpg[/attachment]
Thanks,
Jordan
I used jb weld on an allis challmers six cylinder diesel block that was ate up pretty bad from electrolysis and the liners were leaking into crankcase. worked great


Our channel highlights machines from the earliest Holt and Best track-type tractors, equipment from the start of Caterpillar in 1925, up to units built in the mid-1960s.
Chapter Two
| Highacres Farm, Dewey Lane, Brackenfield, Derbyshire DE55 6DB, UK
Antique Caterpillar
Machinery Owners Club
1115 Madison St NE # 1117
Salem, OR 97301
Terms & Privacy
Website developed by
AdCo
"I also joined a year ago. had been on here a couple of times as a non-member and found the info very helpful so I got a one year subscription (not very expensive at all) to try it out. I really like all the resources on here so I just got a three year. I think its a very small price for what you can get out of this site."
-Jason N