Whoever put the precups in didn't time them correctly.
Bob
[quote="bluox post=256141 userid=2232"]Whoever put the precups in didn't time them correctly.
Bob[/quote]
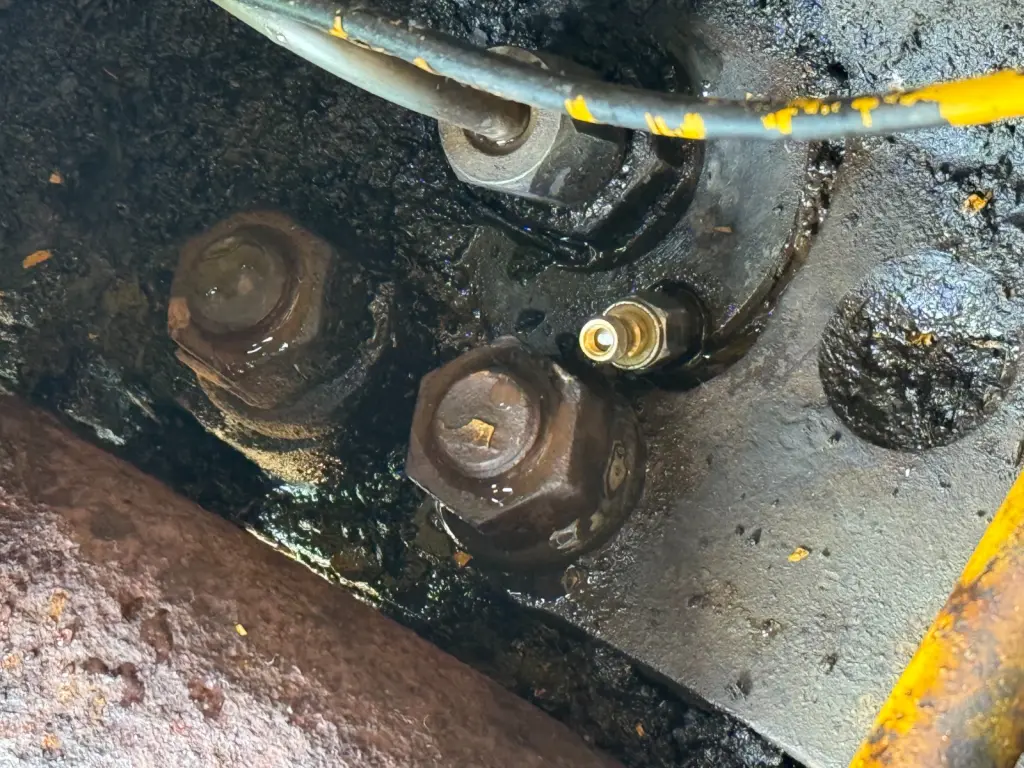
Thanks, I wondered if that was the case. Thankfully the other 3 don't have this issue. Is there any way to correct the timing without removing the head? Any other ideas? I was thinking of grinding a little bit off that nut and adding some kind of insulating jacket on the plug. I'm definitely open to ideas!
You generally don't have to pull the head but you need some special tools, so grind away.
Bob
You generally don't have to pull the head but you need some special tools, so grind away.
Bob
[quote="bluox post=256144 userid=2232"]You generally don't have to pull the head but you need some special tools, so grind away.
Bob[/quote]
Out of curiosity, what special tools would be needed to move the precups?
[quote="ksliger post=256147 userid=17769"]
[quote="bluox post=256144 userid=2232"]You generally don't have to pull the head but you need some special tools, so grind away.
Bob
Out of curiosity, what special tools would be needed to move the precups?
[/quote]
[/quote]
The special splined tool to undo the chambers. You also need different thickness washers to move the preheat to a different index and depending on how stuck they are a puller to pull the capsule injectors out. Some have made a puller using an old injector line nut with a slide hammer attached. I've never had that much trouble getting them out and only have the nut with a pry bar under it.
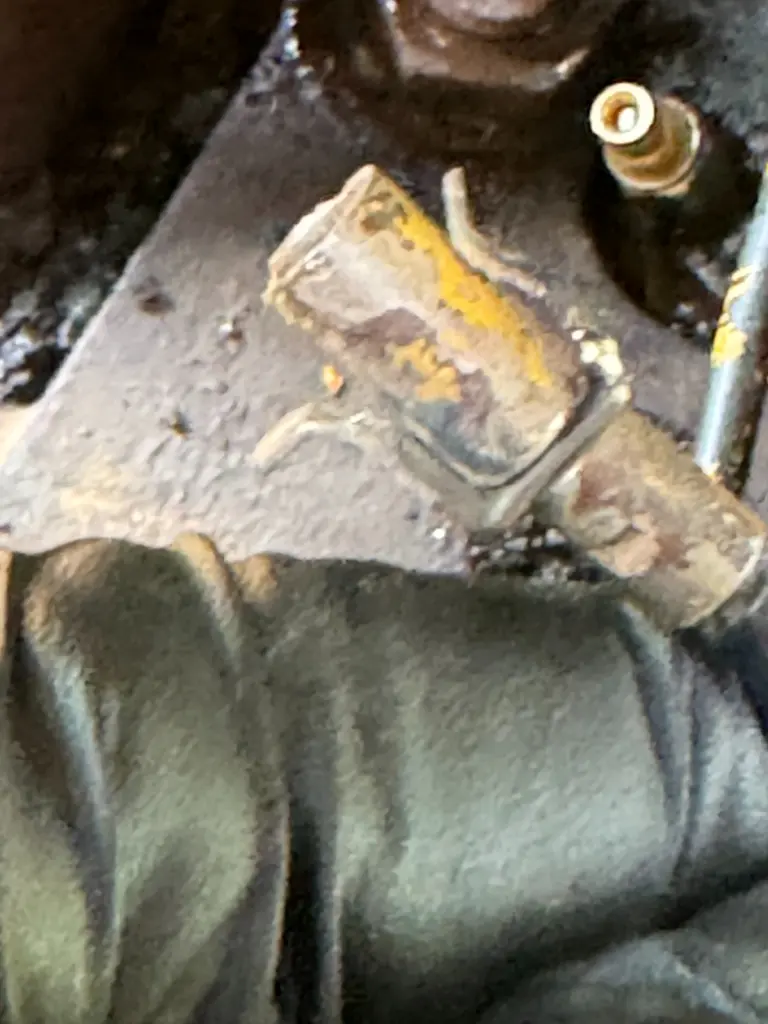
If you can, you can also tighten that head nut just a little bit of a turn to give more space, and then you can grind in the middle of the nut's flat so that you don't lose any ability to tighten/loosen the nut. I would also add a boot of some description to provide insulation, despite that not being OEM, if you end up not re-clocking the chamber
[quote="neil post=256158 userid=911"]If you can, you can also tighten that head nut just a little bit of a turn to give more space, and then you can grind in the middle of the nut's flat so that you don't lose any ability to tighten/loosen the nut. I would also add a boot of some description to provide insulation, despite that not being OEM, if you end up not re-clocking the chamber
[/quote]
Thanks for the reply. I was back at it today and made progress. I removed the glow plug and then removed that head nut. I put the glow plug back in and tested it with a light probe tester. I got continuity at the glow plug so I went ahead and hooked it up to the harness. I moved the starter switch to "heat" and was pleased to see the expected 5 amp draw on the ammeter. I unplugged that first glow plug and turned the switch to heat again and there was no amp draw. So, I am happy to report that at least my first glow plug is working. The others appear to be dead. This old D7E has not started without requiring a little sniff of starting fluid (lubricated style) since I have owned it. I held the switch on heat for about 30 seconds and then tried to start it. To my shock and amazement she fired up after just about 1 or 2 seconds of cranking with NO starting fluid! It's pretty amazing that it just takes one working glow plug to make such a difference. I went ahead and ordered 3 more glow plugs and I hope to have them in hand tomorrow. I took the head bolt home with me and did a little grinding on it to shorten up one of the points. This should still give me enough meat on the nut to torque it down sufficiently, while also leaving more of a gap between the glow plug. Also, I have some heat shrink tubing for electrical wire that is the perfect size to make an insulative boot for the glow plug lead. I am going to put that on tomorrow on all 4 of my leads. I'm excited to see how she starts when all 4 glow plugs are working. I will report back on my progress.


Our channel highlights machines from the earliest Holt and Best track-type tractors, equipment from the start of Caterpillar in 1925, up to units built in the mid-1960s.
Chapter Twenty Nine
| Hawkesbury Showground, Racecourse Rd, Clarendin, NSW, AustraliaChapter Eighteen
| Geoff Ralph Drive, Taabinga, 4610, Kingaroy, Qld.Chapter Thirty
| 3429 Copper Coast Highway Paskeville, SA 5572
Antique Caterpillar
Machinery Owners Club
1115 Madison St NE # 1117
Salem, OR 97301
Terms & Privacy
Website developed by
AdCo
"I also joined a year ago. had been on here a couple of times as a non-member and found the info very helpful so I got a one year subscription (not very expensive at all) to try it out. I really like all the resources on here so I just got a three year. I think its a very small price for what you can get out of this site."
-Jason N