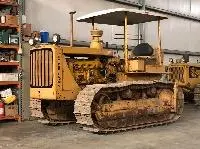
No talk of trouble lining up splines on the shaft to the pully unit, sound like a reasonably good day to me. I have spent hours getting the rear Be-Ge and similar hydraulic pumps to all slide together. No room to just reach in and turn the shaft just a bit.
All very good advice for those that have not done it before.
Sounds good Grant. When we fitted the pto to my cousin's Twenty Two, it had bolts for the steel cover so we had to order the studs for the pto if I recall correctly
The 4 inch bolts with the cut off heads would go a long way toward having the shaft line up with the coupling. I struggled to keep the unit squarely upright so that the coupling would find the shaft. You cant see anything. Sliding it into place on the long bolts would be much easier and much more likely to have the shaft lined up. I took the top plate off but it does not give you any view. I am going to order the proper studs and change them out one at a time.
One project almost scratched off of the list. YIPPEE. Grant.
#3 method is used here quite often. I keep a toolbox drawer of different sized "guide pins" made from the long bolts as described. I learned the hard way once trying to fit a BeGe to one of my D4s; I brainstormed and it worked great. Since then I have shared that with some wishing to add some bling bling to the back end of their tractor. Makes life so MUCH easier, as one can do an unit install in a jiffy and no cussing or bruised hands involved. It makes me look like I actually know what I'm doing! Hehehehe.
Thank you Grantj for sharing, a handy bit of advice for sure. JM
Dowel pins - do try to cut a slot in the outside end - makes removal much easier with a screwdriver
have an assortment of bolts with "rings" welded to the heads, very handy for lifting attachments -
Don't forget the anti-sieze compound!
Yes, on the anti seize . 90 year old rust is almost as strong as welding. Does anyone know what the thread count is on the end of the stud that goes into the case. I want to go to McMaster Carr and order new studs. Grant.
Thread Pitch -
Grant - did you not take a bolt out of those locations that held the cover plate?
Do you have a thread pitch gauge? One of the handiest small tools you can own, along with a caliper to determine diameter.
Just as a guess - they are probably USS threads, but I can only guess.
Do you have set of taps and dies? It is not impossible to make your own studs if they are difficult to find. Start with a bolt and then run threads on the other end.
You can also use the tap to check threads in a hole, just use your fingers to turn it -- it must not be turned with a wrench as you will destroy threads if incorrect.
"keep 'em crawlin"
cts
Grant,
I took one of my cap screws out to check. The threads are 1/2 - 13. Threads are about 7/8 inch deep but the hole goes into the bevel gear case. This bolt's threads are 1 inch. This 22 did not have any pto so it used cap screws. The one that I took a pto off of did have studs.
Pete
Yes, I took both a tap and a die to clean the threads on the studs and nuts but the studs came out of the case very easy so I didnt run anything into the case. That is how I knew the outside threads of the studs were 1/2 by 20. I did not realize that I needed longer studs until I had the unit in place so I did not check the threads. It was a fight to get it all lined up so I was not about to pull the whole unit again. Now that I know the threads I will try to order what I need. I started the Cat up this morning and the PTO seems to work just fine. I wont work it until I have the longer studs in place. Thanks Peter. Grant.


Our channel highlights machines from the earliest Holt and Best track-type tractors, equipment from the start of Caterpillar in 1925, up to units built in the mid-1960s.
Chapter Thirty
| Booleroo Centre, 54 Arthur St, Booleroo Centre SA 5482, AustraliaChapter Fifteen
| Tulare, CaliforniaChapter Nineteen
| 34 Henty Hwy, WarracknabealChapter Nineteen
| Cnr Hiller Lane and Ballarat Road, Hamilton, Vic, 3300
Antique Caterpillar
Machinery Owners Club
1115 Madison St NE # 1117
Salem, OR 97301
Terms & Privacy
Website developed by
AdCo
"I became a member recently because the wealth of knowledge here is priceless."
-Chris R