You're probably right.
If you want to confirm, take off fan belts, run engine and look for source of oil leak. It will take a while for engine temp to get up to worrisome levels
Takes a 1S4604 (CR-24941) seal. Kind of buried in there back of the pulley. Hopefully hasen't grooved the crankshaft.
D46U straight blade,D46U cat angle blade,allis chalmers AD4 grader and Khoering 404 dragline. D4C 40A,D4 2T and scraper.
before you start taking things apart you should check the crank case breather to make sure it isn't clogged.
Sounds like a plan. Just remember that even though there may be a stud in the radiator neck that's in the perfect spot to lift by........don't use it, instead hook to hard nose etc.
I probably misunderstood you saying you will look inside the crankshaft pulley, oil isn't going to leak in there it'll be behind the pulley in the space between it and the front cover of the engine.
Pulling the crankshaft pulley or hub of the pulley can be hard. It will take a good stiff puller. Mine is built from 1" plate and a 7/8" nut welded together and a piece of all thread rod for the pushing screw with another nut welded on it to turn it. I drill holes and patterns to fit any application required. I had it on D333 and D318 pulleys and once I got it tightened up, it frequently takes a shot with a 2pound hammer on the end of the screw to get them off the nose of the crankshaft. Comes off with a bang!
I got everything apart this weekend. The front crank seal actually looks fine. I started it up and looked around while it was running and didn't see any oil appear anywhere around the front of the engine. Definitely not around the front seal. I verified the crank case breather was open as well. No restrictions there. However, I did find several other issues:
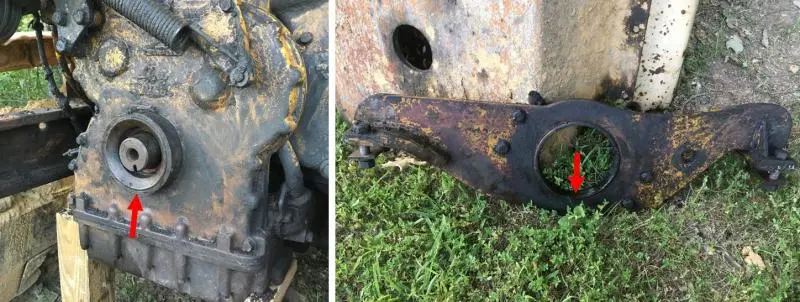
1. Front Support Assembly - Rubber collar that separates the 2 steel collars around the timing cover boss is gone, so the steel collars are resting against each other and have worn. Is this serviceable? I couldn't find a number in my parts book for it. The service manual states it needs to be cut or burned off to remove it and a new set should be pressed onto the timing cover.
[attachment=54720]Front-Support.jpg[/attachment]
2. Water Pump - Does not appear to have been leaking, but bearings are noisy and have noticeable play. Are the bearings here just lubricated by the grease fitting on the housing? I didn't even know there was a grease fitting here until I had everything apart. I assume it hasn't had grease applied in quite some time. I was hoping this was the source of my oil leak, but it doesn't seem to have an oil supply to the bearings. I assume I can rebuild this, but I have read where the impeller can be problematic to remove/reinstall?
[attachment=54721]water-pump-1.JPG[/attachment]
3. Belt Tightener - Bearings need to be replaced here as well. Noticeable play and rocking of the pulley. Bearings and seal are available and should be relatively easy to rebuild.
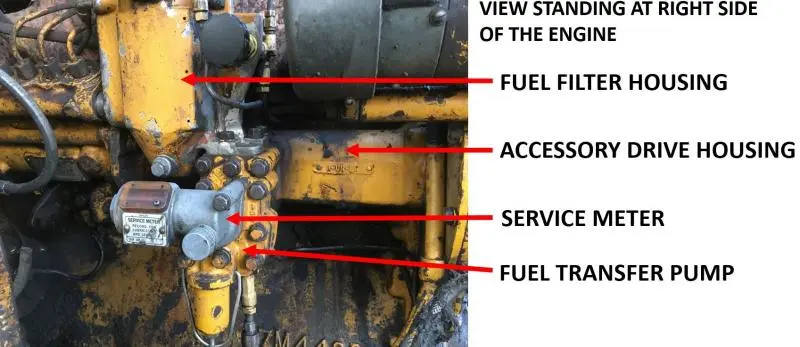
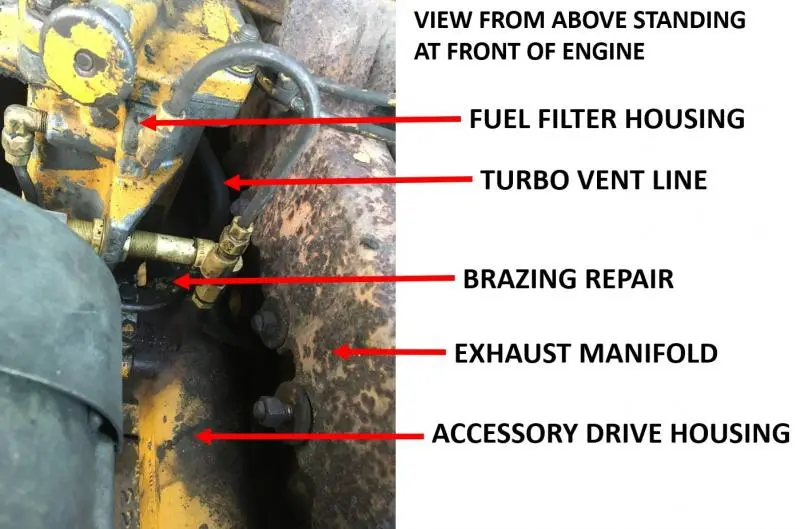
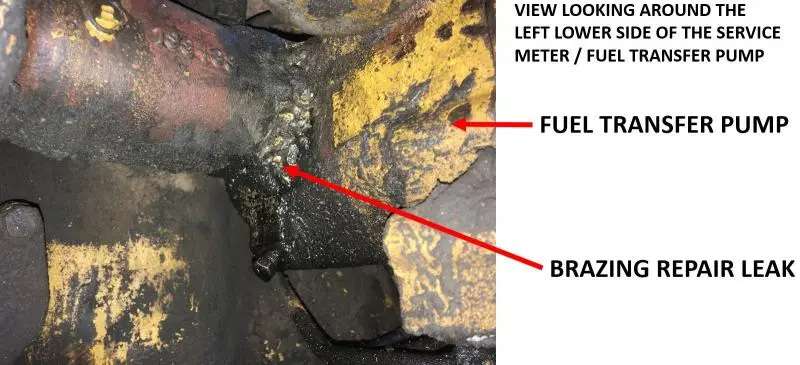
4. Accessory Drive Housing - This is the source of at least one oil leak, and maybe the problem? It has been brazed all around the center section behind the fuel filter housing where the turbo vent (??) line attaches. Not sure what happened previously to cause this part to break, but the repair is not holding up very well. Oil drips down onto the side of the engine block here. Maybe the fan is pulling air forward hard enough for this oil to accumulate on the fan blades and belts and get slung around?
[attachment=54715]Accessory-Drive-Housing-1.jpg[/attachment]
[attachment=54716]Accessory-Drive-Housing-2.jpg[/attachment]
[attachment=54717]Accessory-Drive-Housing-3.jpg[/attachment]
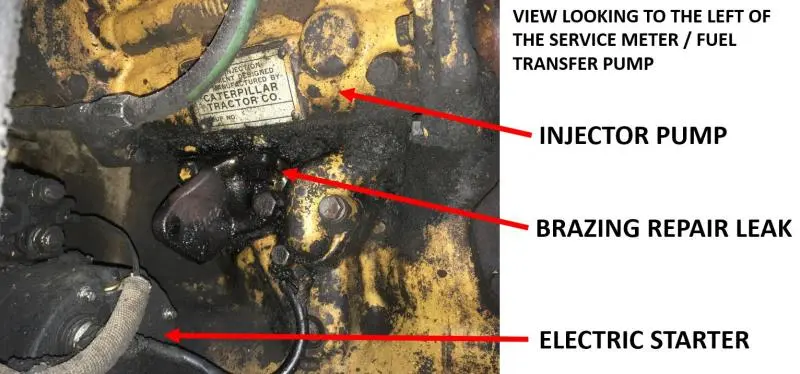
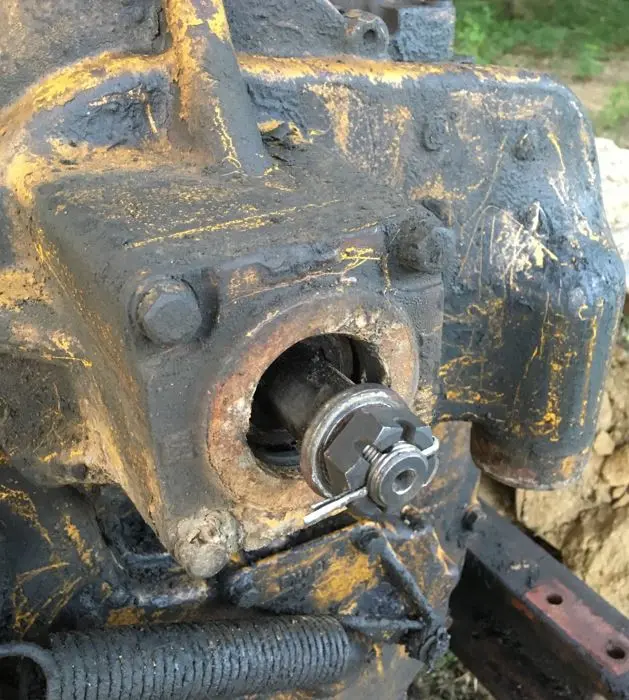
5. Injector Pump - This is another source of an oil leak. It too appears to have been brazed. I haven't cleaned it up enough to see what exactly was repaired here, but it also drips oil down onto the engine block. Less dripping than the Accessory Drive Housing, but still enough to keep the block wet from oil.
[attachment=54718]Injector-Pump-1.jpg[/attachment]
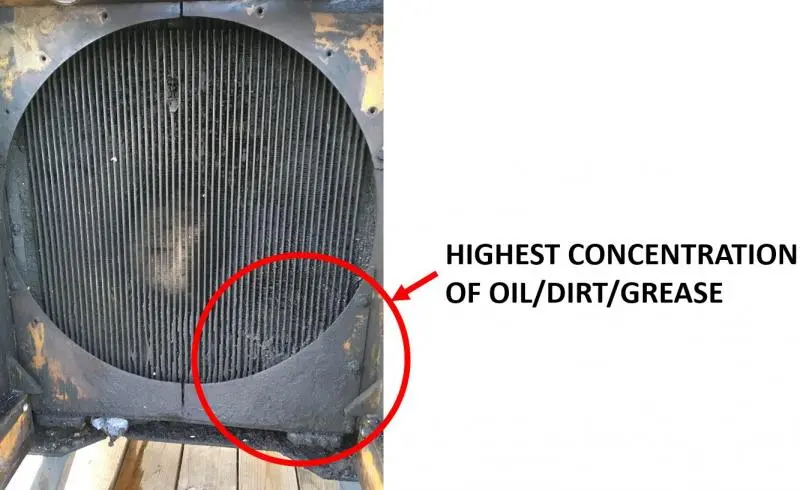
The timing cover looks fine - no noticeable leaks on or around it. The engine and torque converter oil coolers look tight and have no visible signs of oil leaks. I really can't find any other spots that would create the mess of oil I was having. Here is a pic of the radiator and housing. You can see the bottom right corner has the most accumulation of oil/dirt/grease. This is directly in line with the leaks on the right side of the engine.
[attachment=54719]Radiator.jpg[/attachment]
On that front support, are those four bolt holding a plate with the bushing assembly? I believe the current solution is to replace that plate with a new bushing already installed. You'll have to check with Cat for the part number (unless someone on here knows) and their price will be outrageous but then check ebay for aftermarket version.
I'm thinking those brazed fixes are the source of the oil leakage.
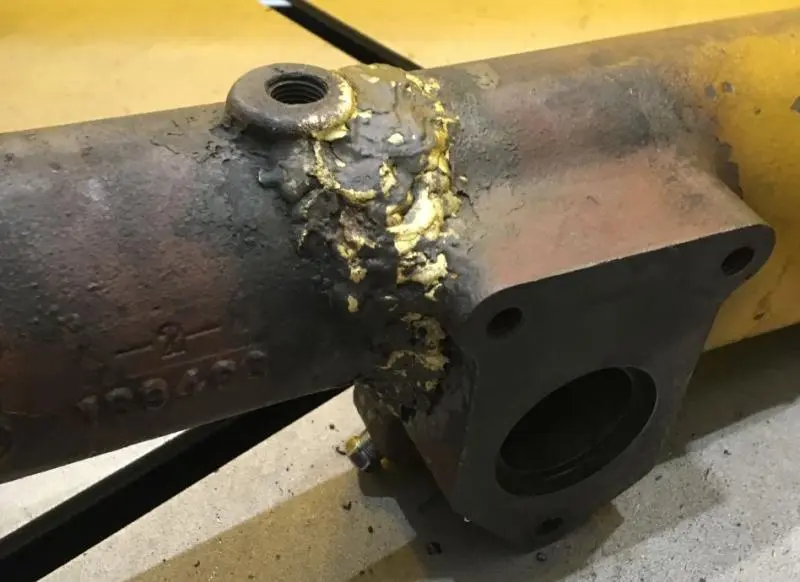
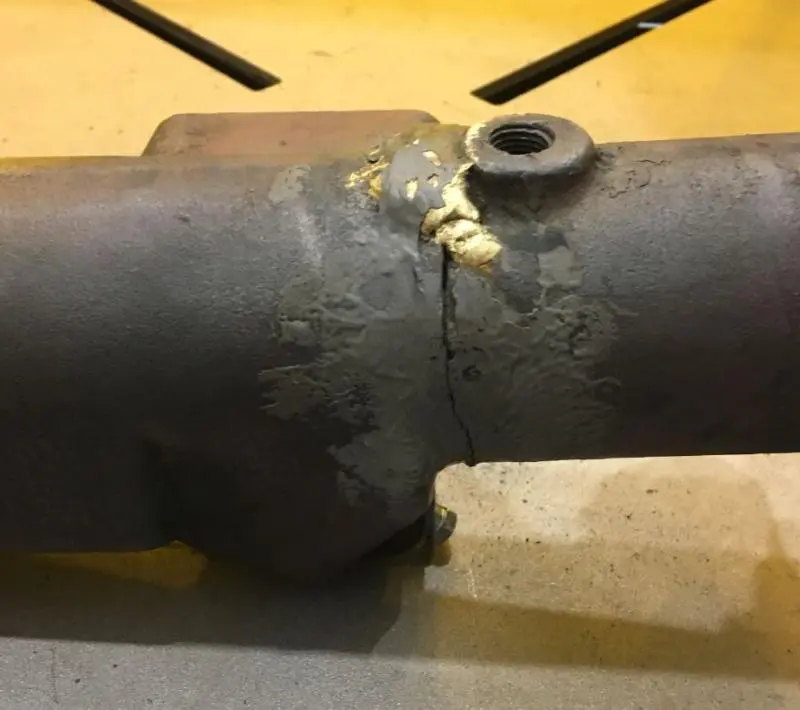
Got my oil leak fixed. The accessory drive housing was previously broke and I think an attempt was made to braze together while on the machine. Braze was applied to the front side, epoxy was smeared on the back. I took it off, cleaned it up, grooved it out and brazed it back up tight. No more oil leak. Here's the before pics. I forgot to take photos after the repair, but I'm confident its fixed correctly now.
[attachment=55310]Acc Drive Front.jpg[/attachment] [attachment=55311]Acc Drive Back.jpg[/attachment]
While laying under the machine putting things back together, I look up and see several of the bushings on the left side track are worn through to the pins. Awesome. Can I do significant harm to the undercarriage if I finish this pond I'm digging before addressing the worn-out track? I probably have another 100 hours worth of work to finish my pond project.


Our channel highlights machines from the earliest Holt and Best track-type tractors, equipment from the start of Caterpillar in 1925, up to units built in the mid-1960s.
Antique Caterpillar
Machinery Owners Club
1115 Madison St NE # 1117
Salem, OR 97301
Terms & Privacy
Website developed by
AdCo
"I also joined a year ago. had been on here a couple of times as a non-member and found the info very helpful so I got a one year subscription (not very expensive at all) to try it out. I really like all the resources on here so I just got a three year. I think its a very small price for what you can get out of this site."
-Jason N