Hi CCJ,
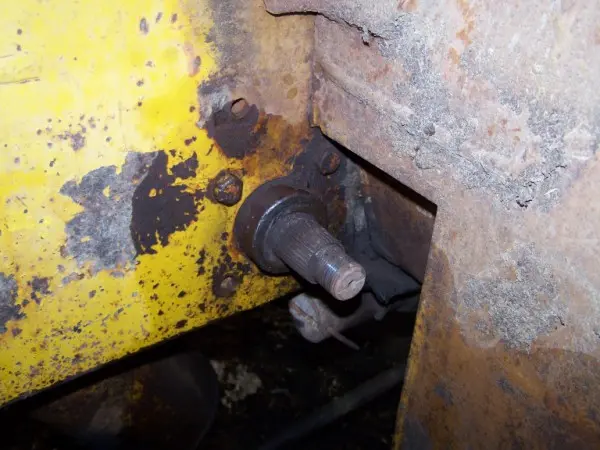
from memory the follower pin is a self contained double timken tapered device with the pin protruding.
The whole pin/bearing set is pressed into the sector arm up against a shoulder machined into the bore of the arm, or was it a shoulder on the outer race of the pin assembly. It really should not be able to come out.
The upper column shaft is splined to the worm shaft so the worm shaft can rise and fall against the resistance of the followup linkages to operate the hydraulic valve.
Most likely the splines are rusted away.
Water ingress thru cracked plastic steering wheel hub covers was always a problem--Usually found someone has stolen the pretty Caterpillar insignia covers for wall plaques and this allowed dirt and water into the innards of the box, hence we worked on lots of them back in the day at the Dealer.
I believe they were a Ross steering box.
Cheers,
Eddie B.
.webp)

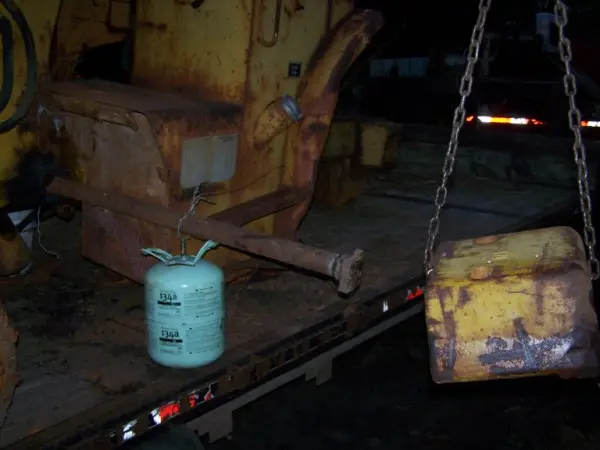
The steering box on these loaders looks like it's just sitting there waiting for a good tap with a block of wood and a big hammer to loosen it up..............All I can say is looks are deceiving! 😆
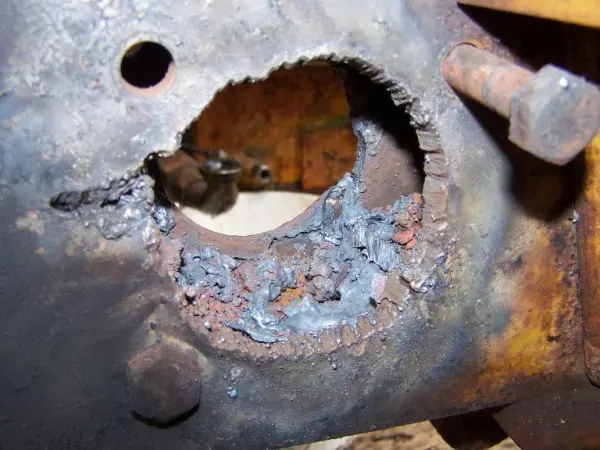
Couldn't get up with the guy with the 16# sledge hammer, so we rigged up this big whammer with one of the smaller counterweights off the spare parts machine frame. Even with that and a torch heating each side of the frame, the steering box quill ended up mushroomed on the end and we cut the frame out to release it. Hated to do it, but it had to come out!
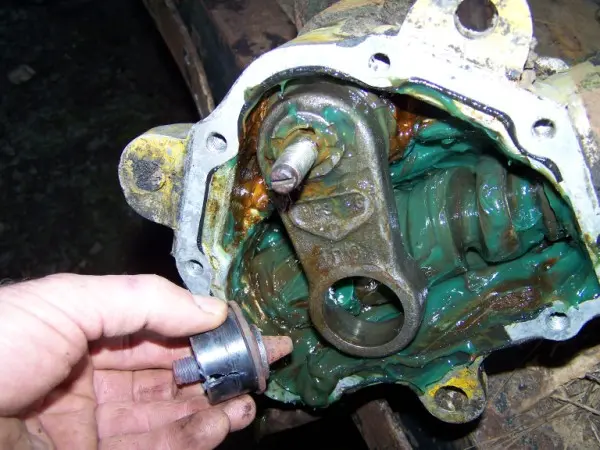
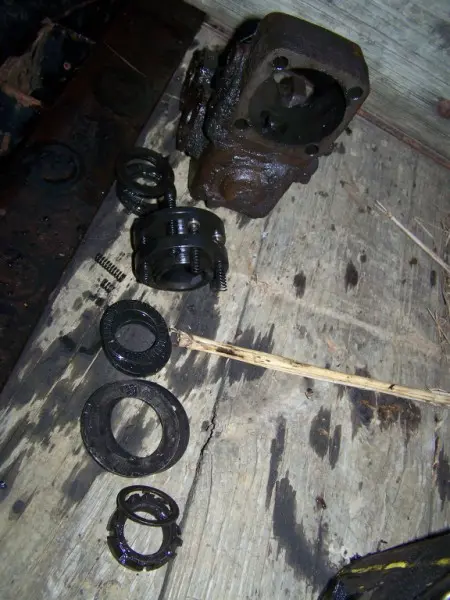
This loader was partially disassembled and engine/trans and rear axle put in the shed before we got it. it appears to have much less wear on pedals, forward/N/reverse lever pivots etc than the one we have been running. So it's a parts machine and we're glad to have it. Especially after finding that the follower we needed was $500 from CAT. Unfortunately the steering wheel was open to the weather on this one too and though the follower was in good shape, the steering valve actuator below it was in worse shape than the one from the running machine. So no good springs in it. Springs are ~$20 each (3 required) and ~$5 each (3 required). Also discovered that the nut on the bottom of the steering shaft which retains the steering assist actuator assembly was stripped and laying in the bottom of the housing. Probably why it became a parts machine instead of being the runner!
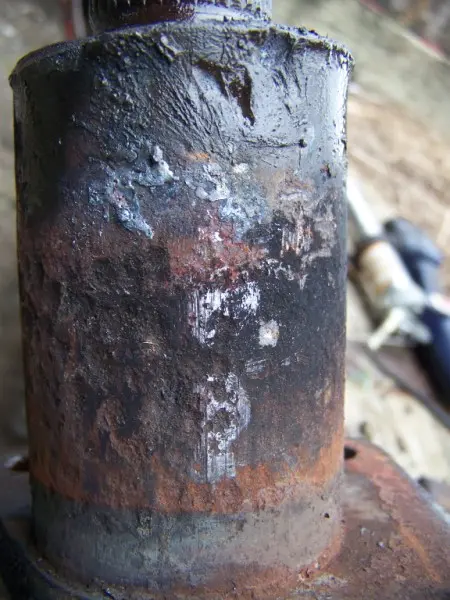
Not wanting to go through this process with the "good" box, we looked at swapping the complete lever shaft with follower, but it will not clear the housing even if the hydraulic filter is removed, so that won't work. So we decided to swap just the follower. It was tedious and took a couple trys to get it right, but we did it in the end. The tedious part is the fact that this is a double timken roller bearing assembly with loose rollers (no cages). The picture is of the type that failed, the rollers run directly on the hardened follower shaft and there is a hard washer under the retaining nut and lock plate that keeps the rollers in. The type we installed has a normal race on the end next to the retaining nut, so putting in the rollers wasn't quite as easy as the other type would have been, but we were able to stick them all to the race with grease and install it without dropping any. Actually got it all together the first time and then discovered a roller had fallen into the space between the inner rollers and the outer rollers and had to remove the back race fish the rollers all out and stick one in the front where it was needed and then reinstall.
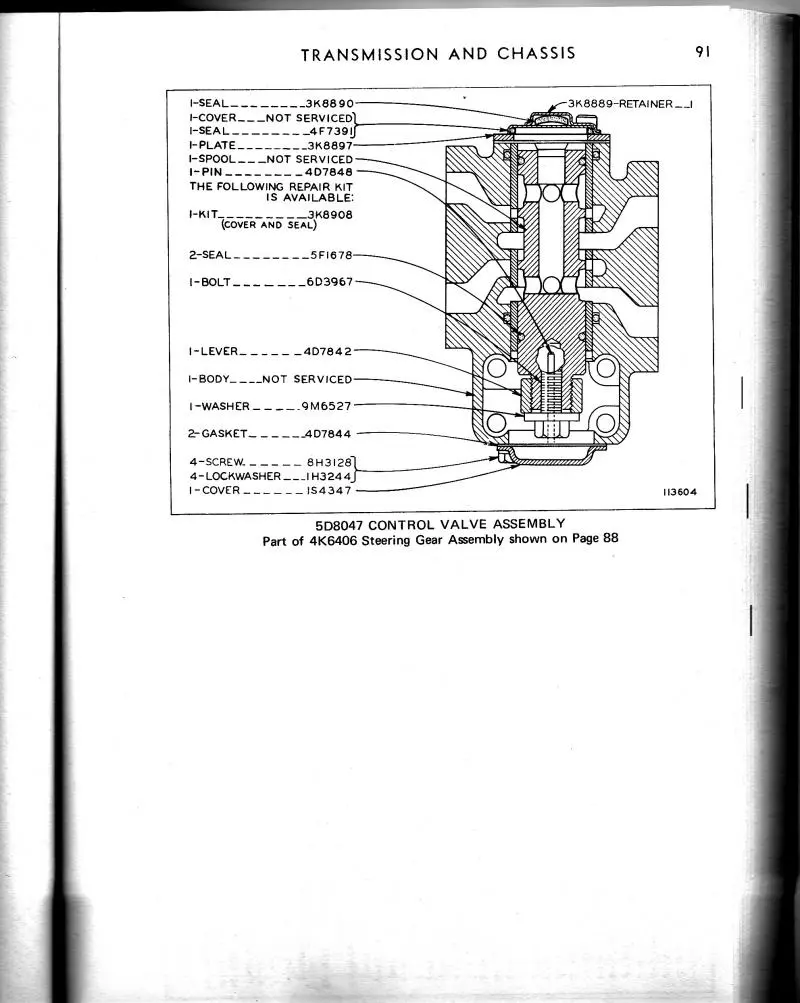
So the gear box is now closed back up, and we're waiting on the springs to come from CAT before we can reinstall the steering assist valve. I really need a diagram showing the order of assembly for these parts! The local CAT dealer (60 miles away) only has it on microfiche and has no way to print of fax me a diagram. I may have to go by and take a picture of his viewer screen unless someone has a parts book I can get a scan from.


Our channel highlights machines from the earliest Holt and Best track-type tractors, equipment from the start of Caterpillar in 1925, up to units built in the mid-1960s.
Chapter Two
| Highacres Farm, Dewey Lane, Brackenfield, Derbyshire DE55 6DB, UKChapter Nineteen
| 2 Winkleigh Rd, Exeter TAS 7275
Antique Caterpillar
Machinery Owners Club
1115 Madison St NE # 1117
Salem, OR 97301
Terms & Privacy
Website developed by
AdCo
"I also joined a year ago. had been on here a couple of times as a non-member and found the info very helpful so I got a one year subscription (not very expensive at all) to try it out. I really like all the resources on here so I just got a three year. I think its a very small price for what you can get out of this site."
-Jason N