Note the mention of "push pull" tooling.
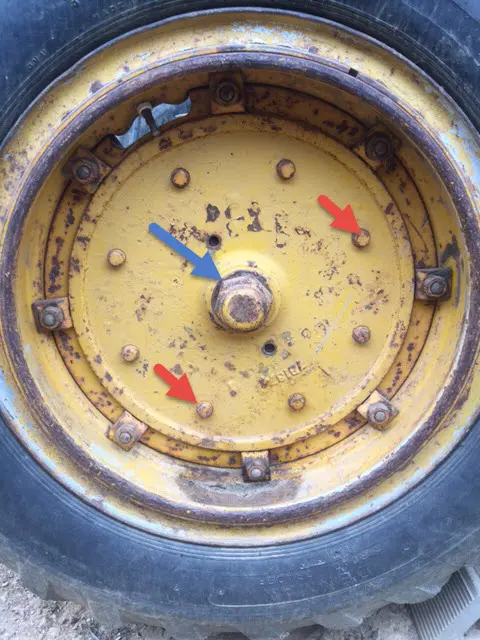
Once you get the wheel off and repair the brakes, you must press the wheel back on the tapered spindle. Simply tightening the nut is not going to make it stay tight long-term. I bought a 212 with a bad spindle and wheel from running loose. Got some used parts and fixed it.
The puller can be a simple (BIG!) steering wheel type puller. The one i borrowed had about a 7/8 fine thread screw in it. Or a hydraulic type may be available. Used some regular grade 5 all thread rod to screw into the wheel and tightened it up tight before hitting it with a sledge hammer. Popped right off.
I made a fixture to use 2 hydraulic jacks to press the wheel back on. As I remember the desired pressure is 40 tons....DRY....no lubricant of any kind on the taper parts. Anyway I used two 20 ton jacks. I still have part of the tooling if you would like to do something similar.
Note the mention of "push pull" tooling.
Once you get the wheel off and repair the brakes, you must press the wheel back on the tapered spindle. Simply tightening the nut is not going to make it stay tight long-term. I bought a 212 with a bad spindle and wheel from running loose. Got some used parts and fixed it.
The puller can be a simple (BIG!) steering wheel type puller. The one i borrowed had about a 7/8 fine thread screw in it. Or a hydraulic type may be available. Used some regular grade 5 all thread rod to screw into the wheel and tightened it up tight before hitting it with a sledge hammer. Popped right off.
I made a fixture to use 2 hydraulic jacks to press the wheel back on. As I remember the desired pressure is 40 tons....DRY....no lubricant of any kind on the taper parts. Anyway I used two 20 ton jacks. I still have part of the tooling if you would like to do something similar.
It's been 10 years or so, but I think I got a press value here or over on ACME. Since I was repairing one that had come loose, I was making sure it wasn't coming off anytime soon! I think the 212 is one of those rare CAT machines without a Serviceman's Reference book, so the #12 version is probably as good as it gets.
I pressed 2 wheels on using two 20 ton jacks without incident. While I probably didn't actually get 40 tons on the taper I had one jack on each side of the spindle and pumped both up as tight as I dared. I bought a hex nut to fit the spindle thread and welded a piece of flat bar in a loop (really looks more like a very tall A) to it so i could screw it onto the end of the spindle, slip a chunk of drawbar I had through the loop and then set a jack between each end of the bar and the flat surface of the hub. I think the flat bar is 1/4 x 1 or so and the drawbar piece was probably 1.5 x 3 turned so the jacks were pushing against the 1.5" edge. I think I have still got the nut with the A welded on it if it will do you any good. The chunk of drawbar is long gone though.
Removing the rim is not required and it may be easier to do the job without unless you can lift the hub and drum assembly. Getting the rim to come loose can be difficult. Tried punching the ruined hub out if the rim with a backhoe bucket (assembly laying flat on concrete) without even shaking the rust loose! Not having any better ideas, in frustration, I grabbed a 10 pound sledge and walloped it a dozen more times or so and it popped loose!
The second one I did was to repair the brakes. Borrowed the large T type puller to get it off and pressed it back as described already. The lining on one shoe has fallen apart, so I bought a strip of friction material and using vise-grips, I clamped it to the shoe and drilled, countersunk and riveted the lining on. Lining and rivits came from Automotive friction in Birmingham Alabama. Drilling done with typical carpenters tools though I modified the angle of the bit used to countersink the rivet heads to match the rivets instead of the typical wood screw.
This is what's shown in the #12 SRM (all same) or the service tool catalog shows substituting the 30 ton push pull hydraulic cylinder for the screw.
This is what's shown in the #12 SRM (all same) or the service tool catalog shows substituting the 30 ton push pull hydraulic cylinder for the screw.
Tried that screw puller on my model 12. What a joke. Finally put together a hydraulic set up and had to use grade 8 rod. Dandy Dave.
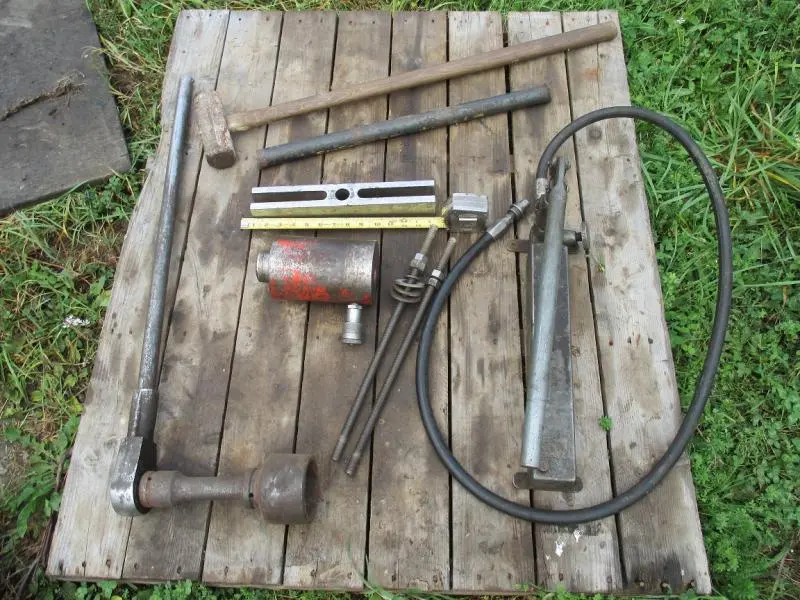
Here is a photo of the tools that worked for me. Hydraulic Porta power pump. 4 and 1/2 inch push/ pull cylinder. 1 inch drive 2-7/8ths socket. Threaded Rod is grade 8. Cross bar is OTC and around 14 inches long. Solid bar and Sledge. Not photo'd, a one inch air impact wrench. First time I tried it with off the shelf threaded rod and it just stretched it like a cork screw and blew apart. Grade 8 worked. After getting enough pressure on everything to the point that I was uncomfortable, I used the solid bar behind the wheel and lined up with the key way and wacked her with the sledge. Both sides gave up with some persuasion. Note that the tandem drives were separated from the frame at the time so I did not have a frame or motor in the way.
[attachment=31379]Puller and tools. Cat model 12..jpg[/attachment]


Our channel highlights machines from the earliest Holt and Best track-type tractors, equipment from the start of Caterpillar in 1925, up to units built in the mid-1960s.
Antique Caterpillar
Machinery Owners Club
1115 Madison St NE # 1117
Salem, OR 97301
Terms & Privacy
Website developed by
AdCo
"I became a member recently because the wealth of knowledge here is priceless."
-Chris R
