You have a wonderful day. Best wishes. Deas Plant.
Hi, Construction Bob.
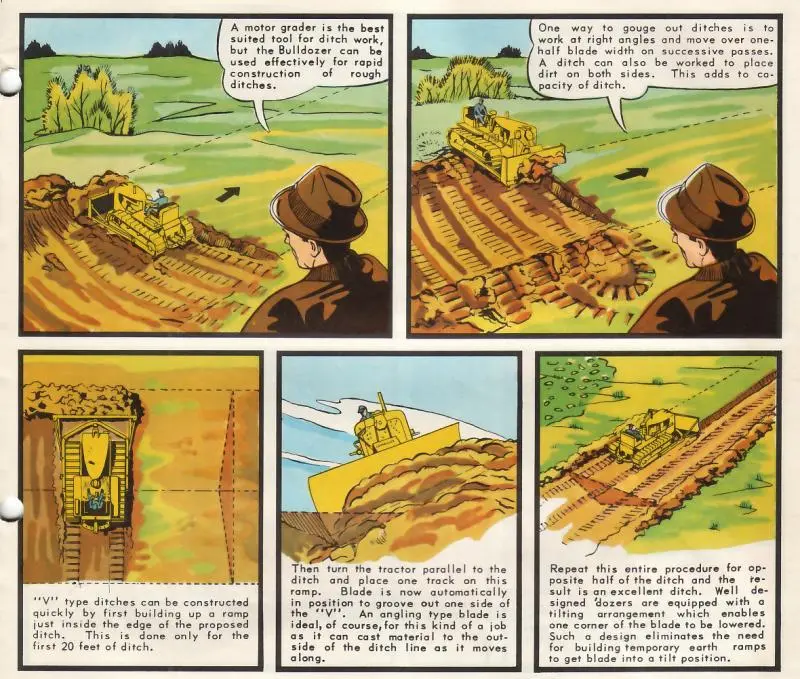
You have not mentioned whether your little jigger has a tilt system on the blade. On straight blades, this is usually in the form of a screw adjustment from the push arms to the top corners of the blade but not ALL straight blades came with this 'luxury' item back in those days. If fitted, this would allow you to tilt one corner of the blade down lower than the other - assuming that it still works.
If not, then you would need to start off at right angles to the line of your trench and push up a small windrow of dirt about 3 to 4 blade widths long where your want the track on the high side to run. Then place that track on the windrow. This will tilt the opposite corner down a little. Then you can take short cuts, always turning the cut material toward the high side so that you continue the windrow that is keeping your high track high. To achieve this, you need to be lifting your blade toward the end of your turns. (The tighter the blade pins, etc. are, the better this works.)
This method is slow due to the constant turning, stopping, reversing and going forward again but it does work. You will also most likely end up with a windrow of some sort on the side of the trench away from where you are turning the material to. If you don't want that windrow there when you have finished, you can always get some more practice spreading it around away from the trench. The easiest way to achive this is to back-blade it away. (I can hear the 'purists' now, screaming, "FOUL".)
Hope this helps
Hi Bob, you also didn't state how wide you want the finished prpoduct to be. If it were me, and I wasn't too concerned about the width, I would bulldoze a blade-width or so trench to the desired general direction of the existing trench, depending on finished depth, I would go about half that depth and allow the spillover from the ends of the blade to create the windrow Deas was talking about. I would then move over so my track was on one windrow and trim the edge of the earlier cut whilst cutting into the center of the trench with the corner bit. I would then finish to the desired depth. It doesn't look too deep, so if that is what you desire, I doubt it would take too many passes to accomplish.
Good luck, and make sure you have a helper taking plenty of pictures. 👍
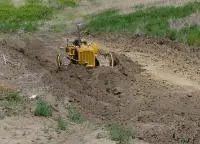
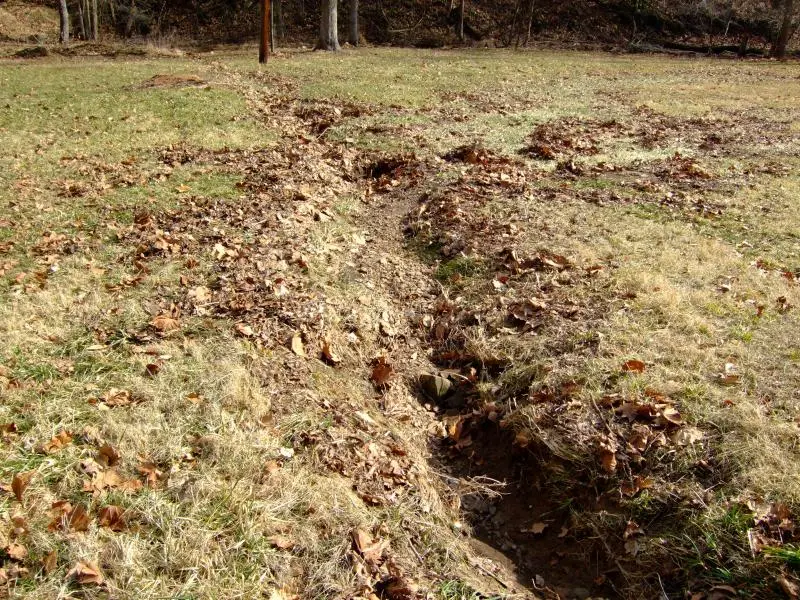
Well I always thought it would be nice to be able to cut a ditch with my D4-9'4" blade but how? The only way I figure to do it is to build a digger that mounts to the end and below the blade,something like an old backhoe bucket that could mount on a pivot bar and rest on the blade.Just a thought not an answer as you could only dig in one direction. Sounds like a Winter project. Don
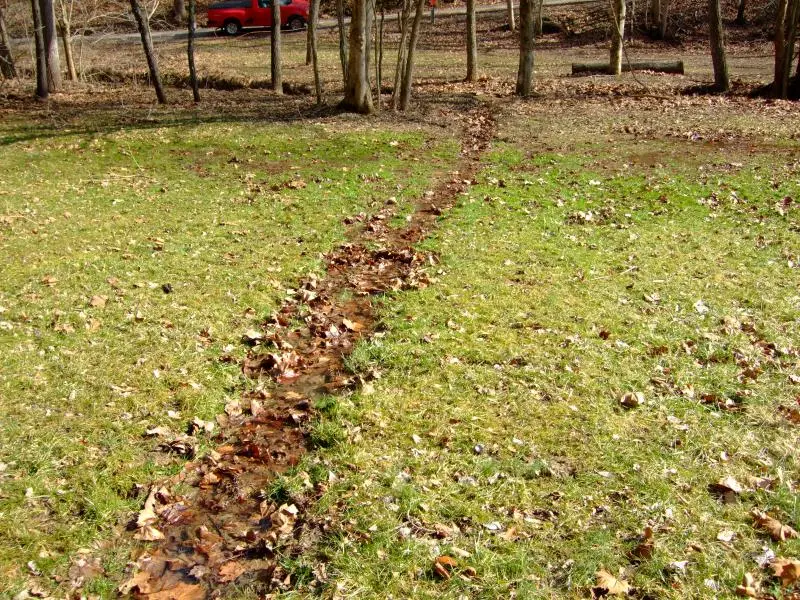
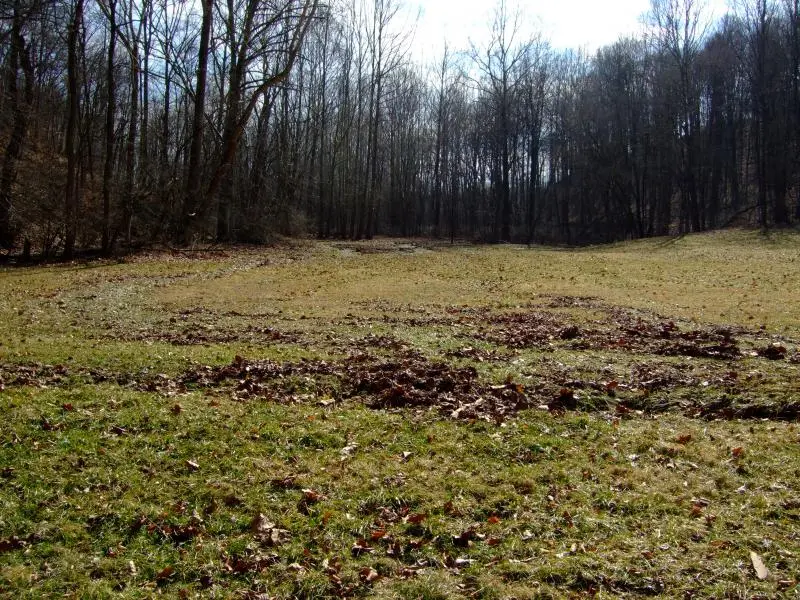
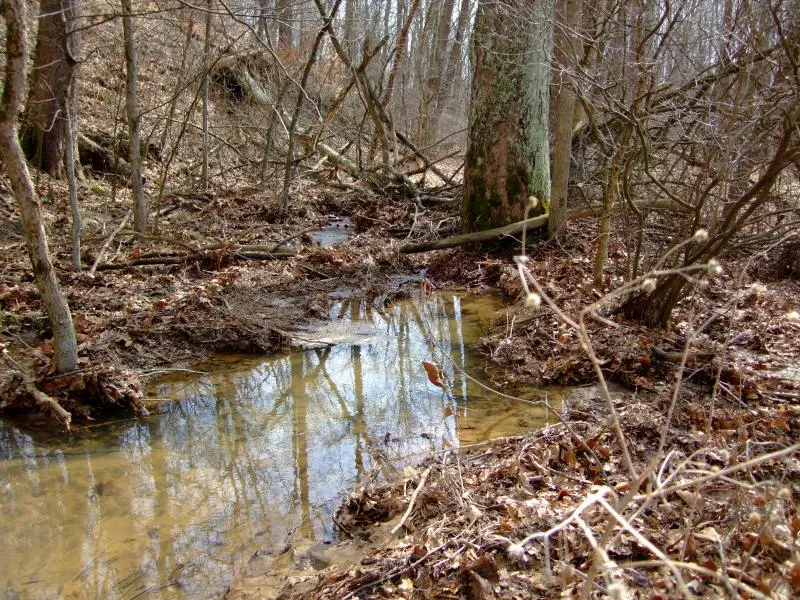
Yes, Deas has it correct. If you want a 2 foot deep ditch, with a 2:1 side slope, that would roughly be around a 4 foot wide side slope each side. Not wide enough for a D2 or D4 to operate on. Start 90 degrees to the ditch, at the end. Make 4 passes side by side digging down the 2 foot. Push the dirt to the opposite side. As you a passing the flow line of the ditch raise your blade up and push the dirt pile about 4 foot farther than theside of the ditch. Make 4 passes wide, you should have a windrow of dirt 2 foot high and 20 foot long. Now put the tractor with one track on the 2 foot pile and the other track in the flowline of the ditch you made. Your tractor should be on a 2:1 to 3:1 sideslope now. Make short passes cutting down to flowline grade, while turning uphill to continue making the 2 foot high berm for your up hill track. Cutting just one side slope of the ditch is easier, cutting both sides takes skill to keep a good flowline, with out leaving a windrow of dirt in the bottom.
When the ditch is cut to grade and you are done in the ditch, it's time to move the spoils or berm you made for your track. This is neccessary for the water to get in the ditch. As Deas stated, back dragging the dirt away from the ditch and spreading it thin, is the way to go. It takes practice, but it can be done. A angle blade would make it easier, as it would side cast the dirt up hill easier. With a dozer that has tilting capbilities by either hydraulic tilt or by manual screw rods on the blade, you wouldn't need to make a windrow of dirt for the dozer to sit on. To really make life easy on you call Bakersfeild Mike for the mighty D-4, as it angles and tilts with the 6-way blade he fabed for it. Have fun-glen
Cats Forever


Our channel highlights machines from the earliest Holt and Best track-type tractors, equipment from the start of Caterpillar in 1925, up to units built in the mid-1960s.
Chapter Two
| Highacres Farm, Dewey Lane, Brackenfield, Derbyshire DE55 6DB, UKChapter Nineteen
| 2 Winkleigh Rd, Exeter TAS 7275
Antique Caterpillar
Machinery Owners Club
1115 Madison St NE # 1117
Salem, OR 97301
Terms & Privacy
Website developed by
AdCo
"I also joined a year ago. had been on here a couple of times as a non-member and found the info very helpful so I got a one year subscription (not very expensive at all) to try it out. I really like all the resources on here so I just got a three year. I think its a very small price for what you can get out of this site."
-Jason N