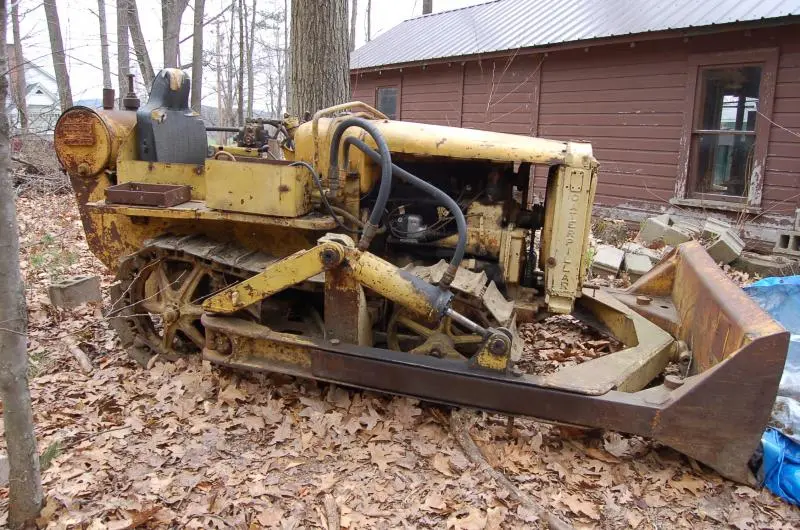
I would say the blade must come off, (doesn't look like too bad a job to do it) .. actually,taking the blade off will probably be the easiest part of this whole project! ..
Also I would remove the fender ( In the way , and i think fender or floorboard is bolted to some final parts)
The sprocket is recessed between the side frames and the side frames must spread apart (at the pivot) a bit to get the sprocket to come off the sprocket shaft, ( at least on a narrow machine)
While you are at it check and/or do both sides, and also check the steer clutch release ball bearing ( mine was about 2 hours from losing all the balls from the bearing) You may have an idea that maybe you can unbolt the final drive at the first flange???,, nope that don't/ wont work... you must take the whole chunk, all the way back to the trans housing. Then there is a special procedure to get the final to come off the trans housing without breaking the drum , which should be documented in previous posts , if you do a search on here...
I am sure a few others should chime in,,, if not you can call me , and i maybe can advise... Good luck!! Dave 920-210-2875
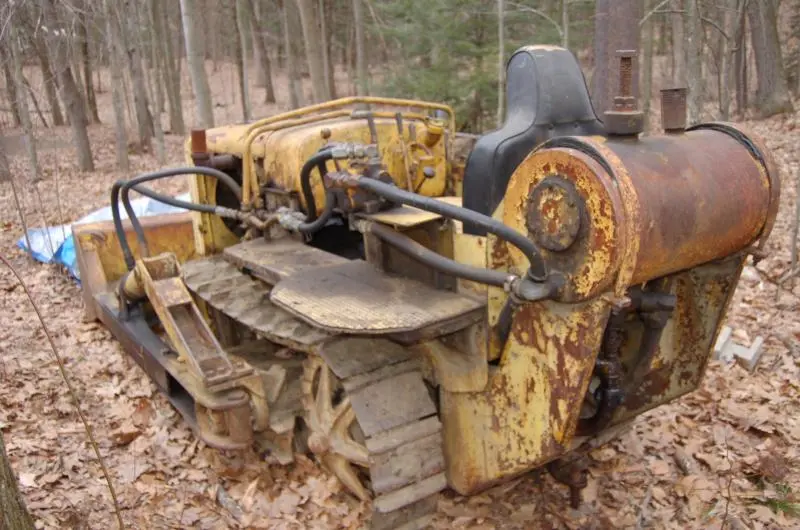
Dave is in the "Know"! He took apart enough of them to be able to give good advice! Speaking of Dave, do you have yours back together? That big hydraulic system on the back looks to be more trouble getting off than the blade.
I would say the blade must come off, (doesn't look like too bad a job to do it) .. actually,taking the blade off will probably be the easiest part of this whole project! ..
Also I would remove the fender ( In the way , and i think fender or floorboard is bolted to some final parts)
The sprocket is recessed between the side frames and the side frames must spread apart (at the pivot) a bit to get the sprocket to come off the sprocket shaft, ( at least on a narrow machine)
While you are at it check and/or do both sides, and also check the steer clutch release ball bearing ( mine was about 2 hours from losing all the balls from the bearing) You may have an idea that maybe you can unbolt the final drive at the first flange???,, nope that don't/ wont work... you must take the whole chunk, all the way back to the trans housing. Then there is a special procedure to get the final to come off the trans housing without breaking the drum , which should be documented in previous posts , if you do a search on here...
I am sure a few others should chime in,,, if not you can call me , and i maybe can advise... Good luck!! Dave 920-210-2875
[quote="nw4evr"]I would say the blade must come off, (doesn't look like too bad a job to do it) .. actually,taking the blade off will probably be the easiest part of this whole project! ..
Also I would remove the fender ( In the way , and i think fender or floorboard is bolted to some final parts)
The sprocket is recessed between the side frames and the side frames must spread apart (at the pivot) a bit to get the sprocket to come off the sprocket shaft, ( at least on a narrow machine)
While you are at it check and/or do both sides, and also check the steer clutch release ball bearing ( mine was about 2 hours from losing all the balls from the bearing) You may have an idea that maybe you can unbolt the final drive at the first flange???,, nope that don't/ wont work... you must take the whole chunk, all the way back to the trans housing. Then there is a special procedure to get the final to come off the trans housing without breaking the drum , which should be documented in previous posts , if you do a search on here...
I am sure a few others should chime in,,, if not you can call me , and i maybe can advise... Good luck!! Dave 920-210-2875[/quote]
Thanks, Dave, for the advice. Any suggestions on the best source of for brake and clutch parts? I'll try to take lots of photos and document the process for others' information. Thanks also for the phone number and offer of assistance. Although I have done lots of work on cars and trucks, this is my first effort on my CAT22, which had belonged to my brother-in-law.
I would say the blade must come off, (doesn't look like too bad a job to do it) .. actually,taking the blade off will probably be the easiest part of this whole project! ..
Also I would remove the fender ( In the way , and i think fender or floorboard is bolted to some final parts)
The sprocket is recessed between the side frames and the side frames must spread apart (at the pivot) a bit to get the sprocket to come off the sprocket shaft, ( at least on a narrow machine)
While you are at it check and/or do both sides, and also check the steer clutch release ball bearing ( mine was about 2 hours from losing all the balls from the bearing) You may have an idea that maybe you can unbolt the final drive at the first flange???,, nope that don't/ wont work... you must take the whole chunk, all the way back to the trans housing. Then there is a special procedure to get the final to come off the trans housing without breaking the drum , which should be documented in previous posts , if you do a search on here...
I am sure a few others should chime in,,, if not you can call me , and i maybe can advise... Good luck!! Dave 920-210-2875
[quote="nw4evr"]I would say the blade must come off, (doesn't look like too bad a job to do it) .. actually,taking the blade off will probably be the easiest part of this whole project! ..
Also I would remove the fender ( In the way , and i think fender or floorboard is bolted to some final parts)
The sprocket is recessed between the side frames and the side frames must spread apart (at the pivot) a bit to get the sprocket to come off the sprocket shaft, ( at least on a narrow machine)
While you are at it check and/or do both sides, and also check the steer clutch release ball bearing ( mine was about 2 hours from losing all the balls from the bearing) You may have an idea that maybe you can unbolt the final drive at the first flange???,, nope that don't/ wont work... you must take the whole chunk, all the way back to the trans housing. Then there is a special procedure to get the final to come off the trans housing without breaking the drum , which should be documented in previous posts , if you do a search on here...
I am sure a few others should chime in,,, if not you can call me , and i maybe can advise... Good luck!! Dave 920-210-2875[/quote]
Dave,
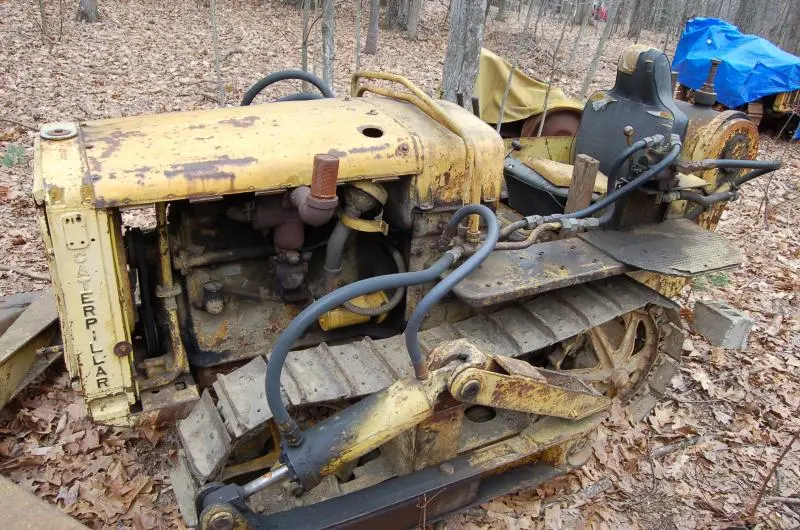
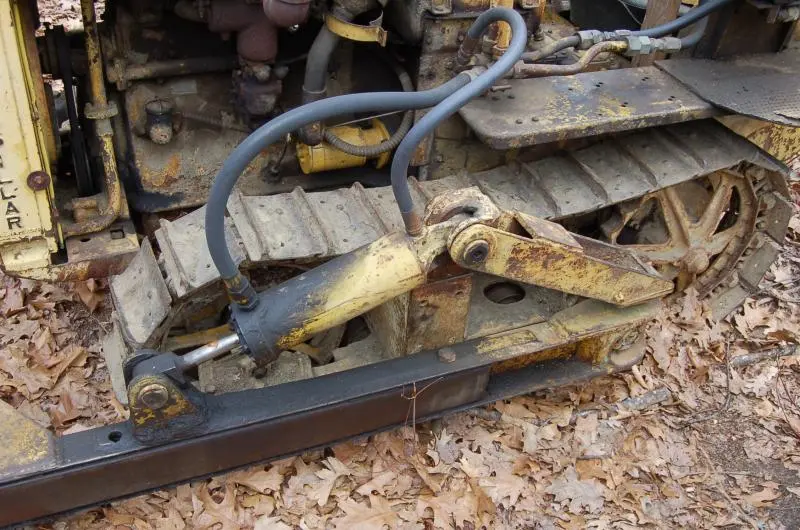
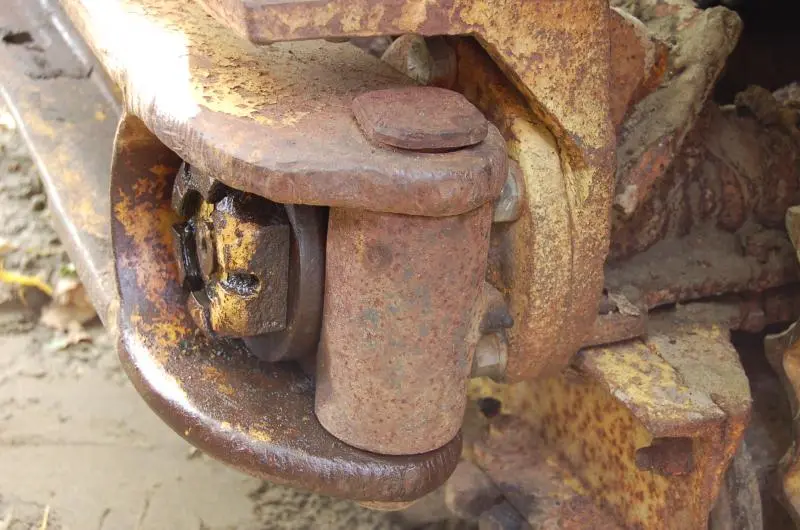
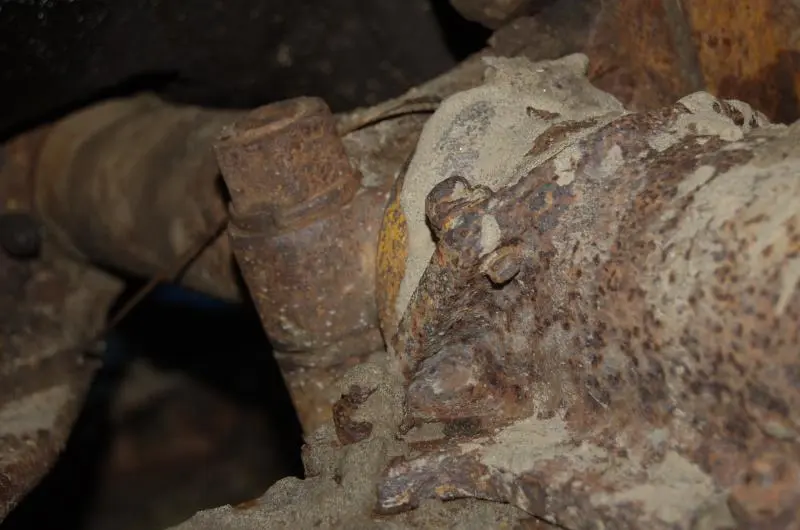
In order to remove the blade and support frame from my 22 it looks to me like I need to pull the pivot shaft out. I don't see any other way to do it. I suspect that the pivot shaft length has been extended in order to provide the pivot for the blade support frame (see photos above). I have removed the large nuts (I call them Jesus nuts, about 4" OD) but the shaft does not budge when I try to persuade it with a 6 lb hammer and drift. In looking at the parts manual I see the bracket, part number V-266 on each side. It looks like this bracket, since it is split, is used to clamp onto the pivot shaft and keep it from moving side to side. Is that correct? If so, I will need to loosen the bolt that squeezes the bracket onto the shaft. Is there any secret I need to know about how to get to this bolt and nut? I can get onto the bolt head, but the nut is not accessible unless I raise up the tractor and crawl under it. Is that what it takes to release the shaft so I can slide it out? Also, does anyone know what the diameter of the shaft is? The end that I see when I remove the Jesus nuts outside the blade frame is about 2" in diameter. Does that sound right? Thanks for your help. Ray
I think Dave is looking at the pins at the back of the blade frame. Pull them and back out? Blades were added after the tractors were built. I'm almost sure that no one lengthened the shaft?? I haven't been under a 22 in a while but those clamping bolts should be bolted into threaded holes in the transmission case, not with nuts?. Am I correct in my memory Dave?
Jeff
As I recall, they're pretty much the same as the later D2 J and U as far as the pivot shaft goes. To have lengthened it to mount the blade to would have been a major undertaking as there's a plate on both ends of the pivot shaft with a cap over it that takes the side thrust from the track frames.
There are two clamp blocks underneath as Jeff said that hold the shaft to the bottom of the tranny with either 5/8 or 3/4" (I think) bolts that go into the bottom of the tranny. Tight squeeze getting under the critter unless you're a skinny midget😆 so it's easier to run it up onto some blocks first,then jack it up a little and block up the front and rear of the critter.


Our channel highlights machines from the earliest Holt and Best track-type tractors, equipment from the start of Caterpillar in 1925, up to units built in the mid-1960s.
Chapter Two
| Highacres Farm, Dewey Lane, Brackenfield, Derbyshire DE55 6DB, UKChapter Nineteen
| 2 Winkleigh Rd, Exeter TAS 7275
Antique Caterpillar
Machinery Owners Club
1115 Madison St NE # 1117
Salem, OR 97301
Terms & Privacy
Website developed by
AdCo
"I became a member recently because the wealth of knowledge here is priceless."
-Chris R