
Andy, NICE JOB! you can take my D2 and work on it anytime you want to!
Ha Ha
Regards
Dennie
Great pictures, thanks for taking the time to post.👍
Did you sand blast the engine before painting too?
Fantastic job. It will be a beauty!
Thanks for sharing, I hope my D2 4U looks as good when I finally get her back together. I'm curious about the sand blasting too, how long did it take to do the whole tractor and did you do it yourself, or pay someone, and if so how much did it cost, and also, how many gallons of paint have you used so far?
thanks
Mike
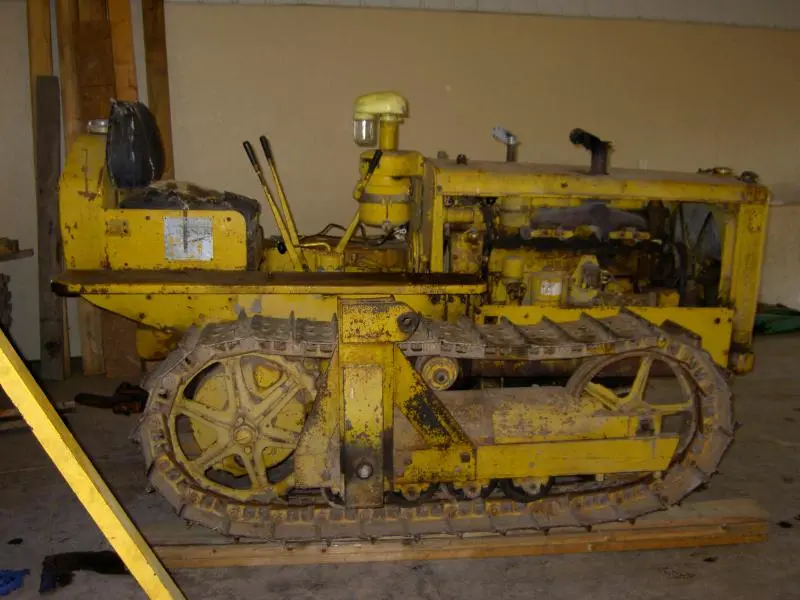
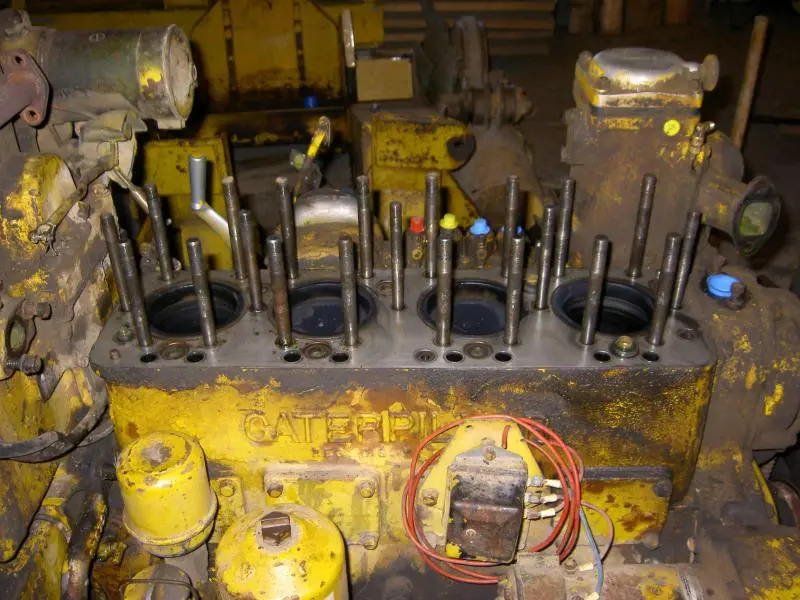
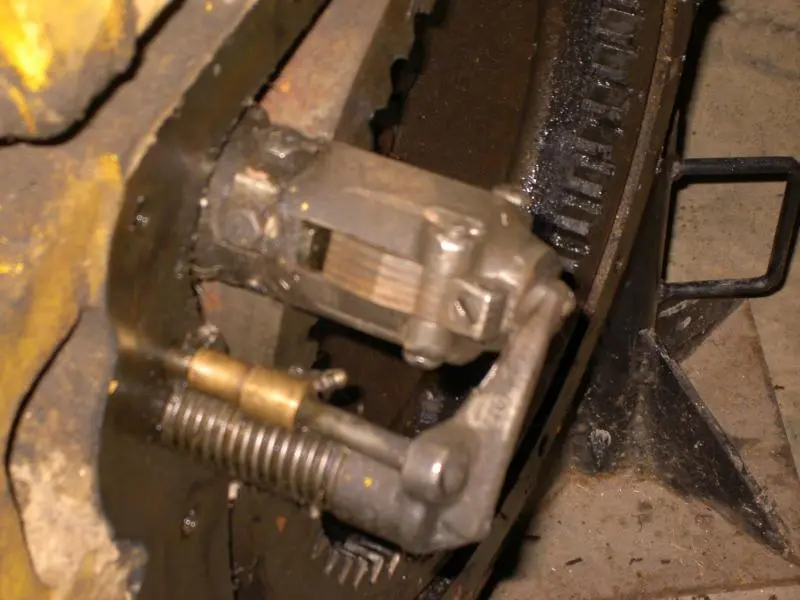
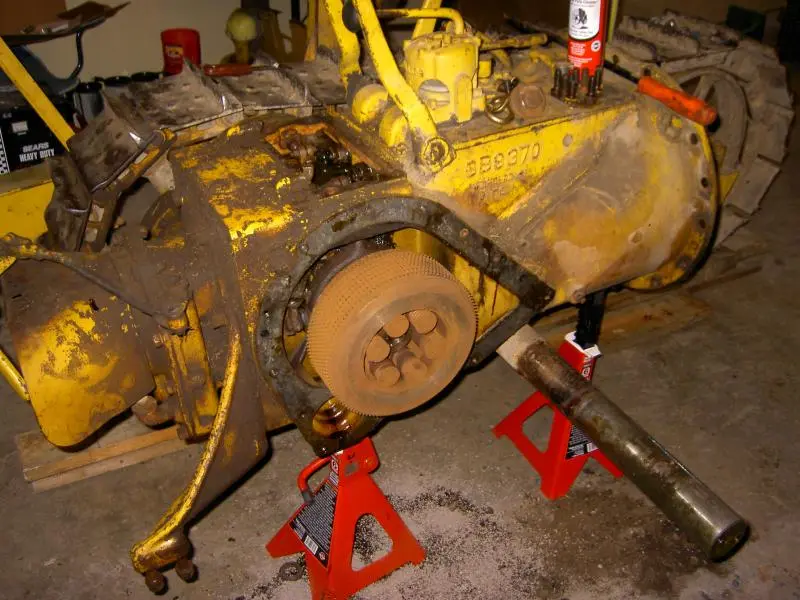
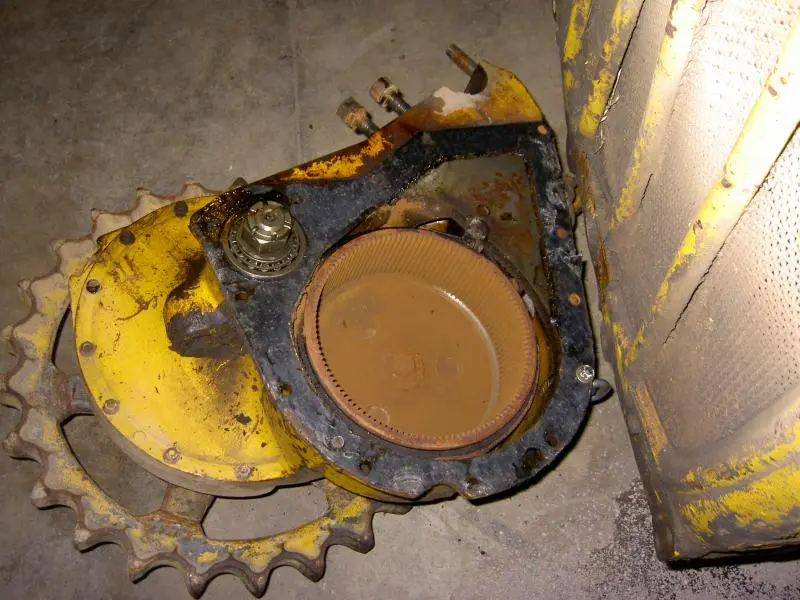
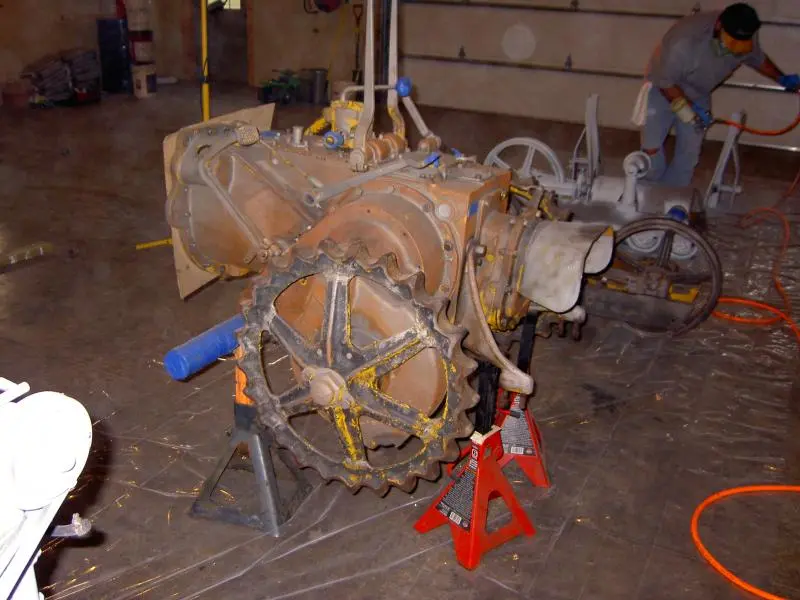
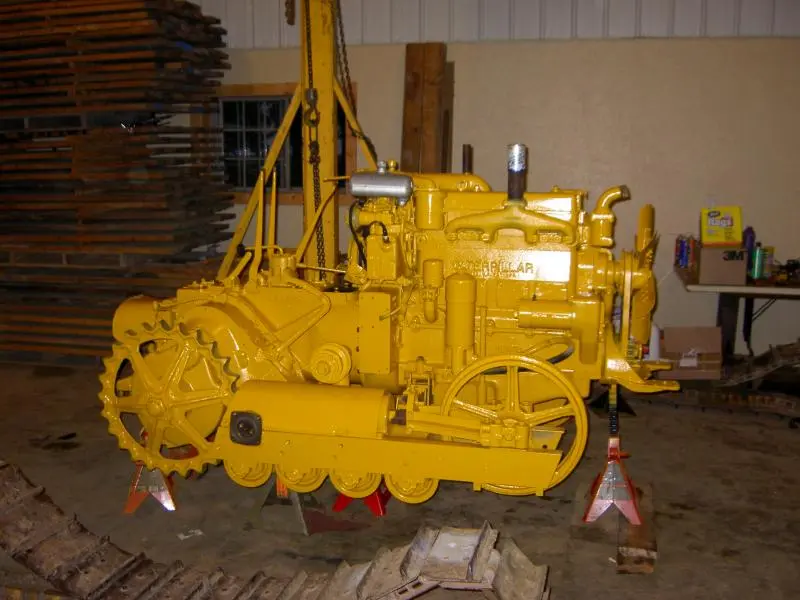
I did sandblast the engine being very careful as to where I was pointing the nozzle. I spent a considerable amount of time preping it to make sure all openings were protected and blocked off. I tried to stay away from the injection pump/governor areas as much as I could. I had the tractor disassembled when I sanblasted/painted. Engine, trans, roller frames, sheet metal, fuel tank, radiator and fenders.
My friends dad let me use his sandblasting pot which he bought for a job he did on one of his tractors a year or so ago. I followed his advice and rented a large air compressor at cost of around $95 per day (8 hrs. on the hour meter). I believe it was a 385 cfm compressor. It had no problem supplying enough air for the job. That was a huge help!
The sand I used was a product called Black Beauty that I purchased from my local Menards hardware store at around $6-$7 dollars per 50lb bag. and I used about 20 bags total. It is supposed to be lower in free silica than your typical silica sand. I made sure to use a good quality respirator. Give yourself 8-10hrs to do the job. It was a little slow for me at first til I got familiar with the equipment. My advice would be have everything ready to go so you can move from part to part. I didn't blast the tracks or it would have taken more time.
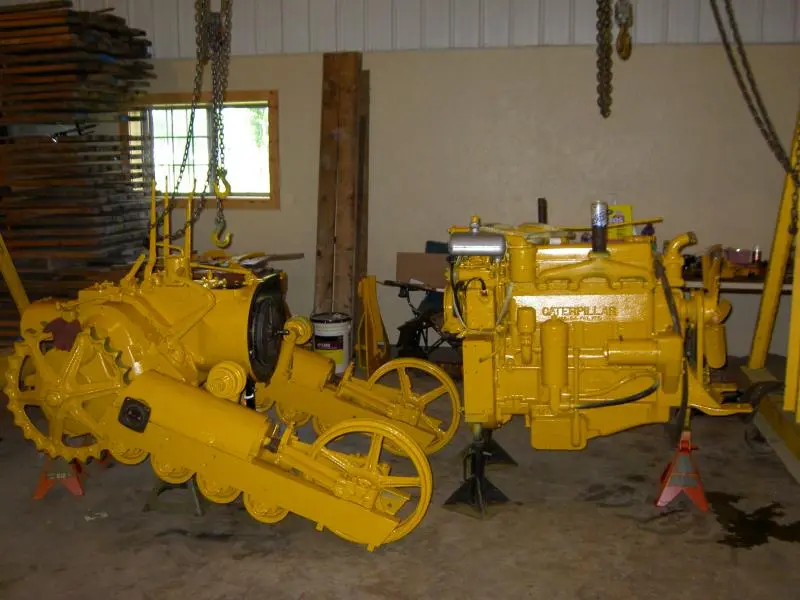
I have never painted anything before so my friend painted it for me. He had painted two tractors prior to mine so he had some experience doing that. I bought 2 gallon worth of 2 -part epoxy primer (each part is one gallon). We gave it 2 coats of primer that I bought at an autobody supply store. I don't remember what I paid for it (it was fairly cheap though). We then followed it with 2 coats of "Hi-way Yellow" Caterpillar paint. I bought it at my local Cat dealer for around $60/gallon. We used 1-1/2 gallons of paint. We also used a HVLP paint gun.
Again, I think taking my time and a hell of a lot of prep time made the job look good. It has its flaws but I am very pleased with the results.


Our channel highlights machines from the earliest Holt and Best track-type tractors, equipment from the start of Caterpillar in 1925, up to units built in the mid-1960s.
Chapter Two
| Newby Hall, Ripon, Noth Yorkshire, HG4 5AJChapter Two
| Freshfield Farm, Sloop Lane, Scaynes Hill RH17 7NP UKChapter Two
| Avalanche adventure, Welford Rd, Sibbertoft LE16 9UJ, UKChapter Two
| Highacres Farm, Dewey Lane, Brackenfield, Derbyshire DE55 6DB, UK
Antique Caterpillar
Machinery Owners Club
1115 Madison St NE # 1117
Salem, OR 97301
Terms & Privacy
Website developed by
AdCo
"I also joined a year ago. had been on here a couple of times as a non-member and found the info very helpful so I got a one year subscription (not very expensive at all) to try it out. I really like all the resources on here so I just got a three year. I think its a very small price for what you can get out of this site."
-Jason N