looks great steve, can't wait to see the rest of the process, thanks for sharing
Looking good Steve I have to come and check it out👍
Super job Thanx for sharing.Looking forward to more progress updates!
I forgot I had my album on here filled with all the early pictures of this rebuild. Here's a link to it:
http://www.acmoc.org/bb/album.php?albumid=6
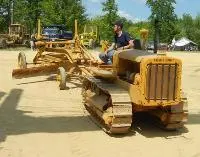
Steve,I hate to say it but been there done that.Your pictures look just like the one I have of my 15 motor patrol.They bring back some fond memories.Other than the nice building you have there to work in I would say you were doing mine.Keep us all posted on your progress.Mike Durkin
Steve, that is awesome. It's such a pleasure to see the pictures before and after. Makes me think that my D2 (still not started...) won't be unpossible : ) Just looking at that screw mechanism makes me think how much solid technology these things have in them - not rocket science but good solid engineering. Can't wait to see the picture of you grading with it down the main straight at the show.
Cheers,
Neil.
Steve,if you are still looking for the gearbox,there is a Cat 10 or 11 grader listed in the for sale section.It alittle far but you may be able to buy just the parts you need.Mike
Looks great Steve.


Our channel highlights machines from the earliest Holt and Best track-type tractors, equipment from the start of Caterpillar in 1925, up to units built in the mid-1960s.
Chapter Nineteen
| 34 Henty Hwy, WarracknabealChapter Fifteen
| Placerville, CAChapter Two
| Stradsett, Nr Downham Market. Norfolk PE33 9HA UK
Antique Caterpillar
Machinery Owners Club
1115 Madison St NE # 1117
Salem, OR 97301
Terms & Privacy
Website developed by
AdCo
"I became a member recently because the wealth of knowledge here is priceless."
-Chris R
