Good Luck and if you need any parts let me know I have several carbs in diff states of dis repair and for you I would part with some of the parts even though you let the guy from American Loggers take my seat at the show.
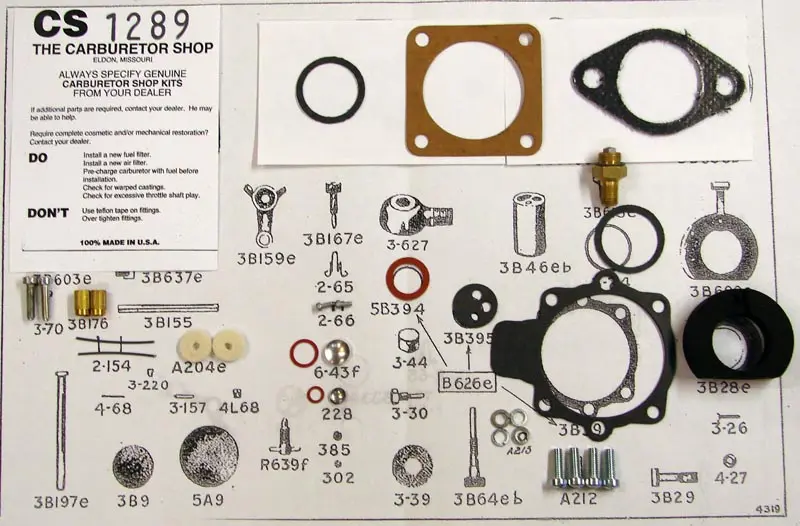
Dave, I've got a PV Fifteen carb to rebuild and I have the kit from Campbell. Maybe we can have a "Carb Rebulid Day." LOL. Good luck with the job. From what I understand, it's not too terrible a task.
Willie - Thanks for the offer on the parts. Hopefully I don't mess something up so bad I need to take you up on it. I had to watch the show after I got home to even know who that guy at the table was. I figured you wouldn't mind sitting a few steps closer to the bar.
Bruce - A "carb party", now there's an idea!
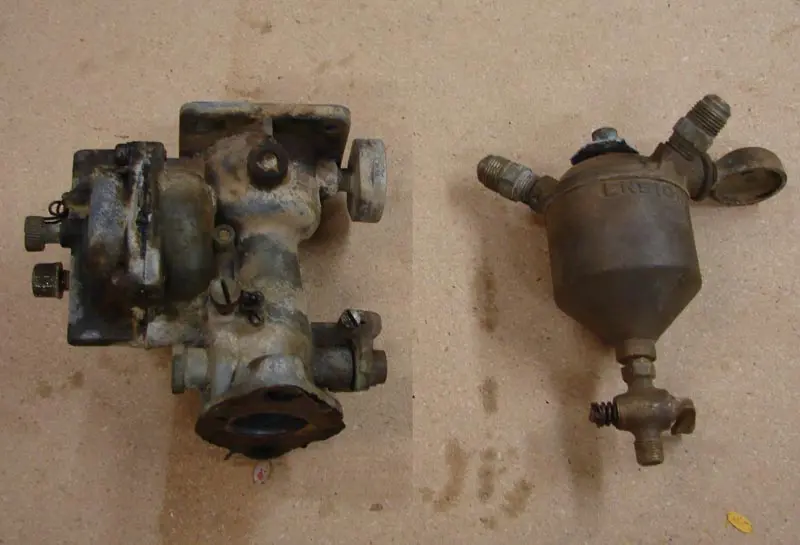
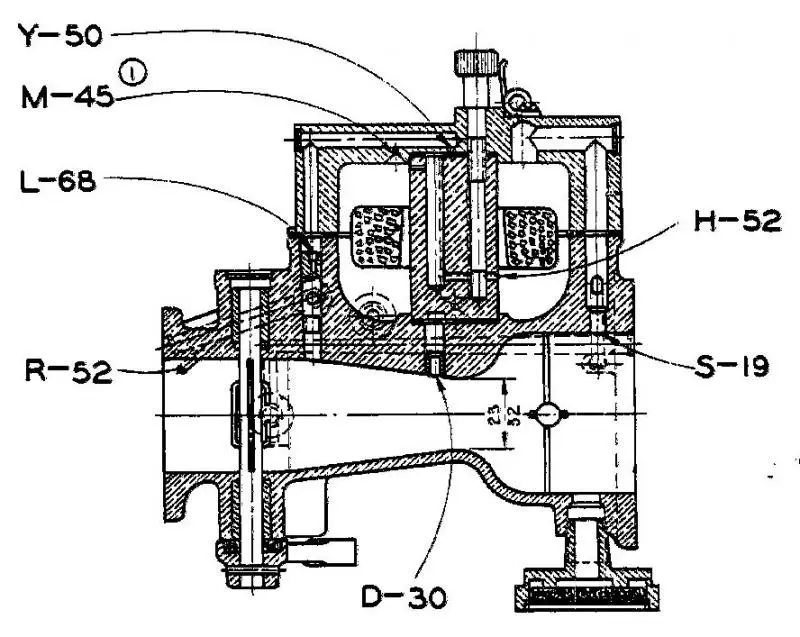
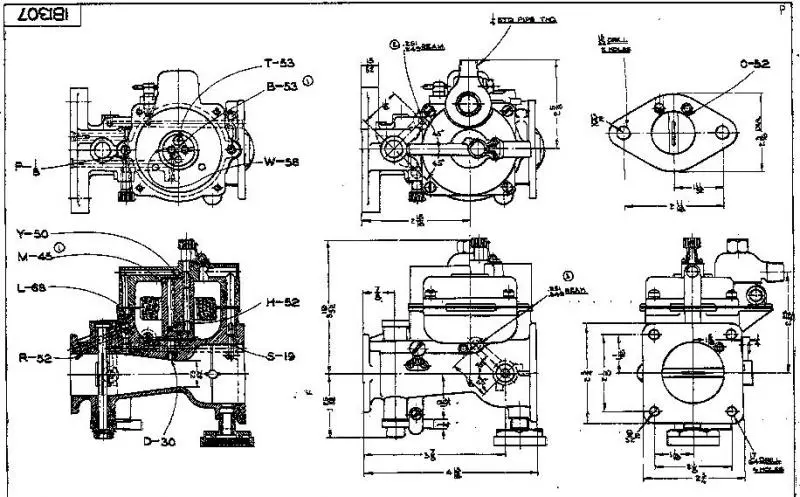
I thought I would pass along a little more background info I turned up. Cat doesn't have prints for all the parts because they all were made by Ensign, but I did find the different views of the assembled carb helpful, especially the sectional view.
[attachment=8859]1B1307-01.jpg[/attachment] [attachment=8858]1B1307-02.jpg[/attachment]
In trying to learn more about how the carb worked, I used the sectional view to compare to Ensign patent drawings and came across U.S. Patent 1826061. I haven't dug into it deep enough to know if it is completely identical to the Ten carb, but looks pretty similar.
Dave
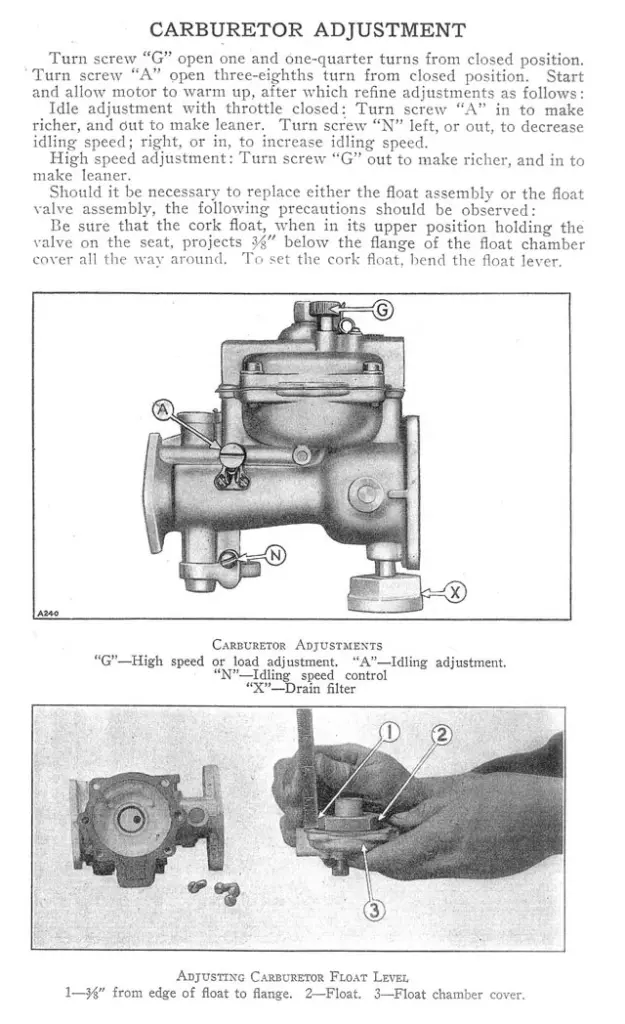
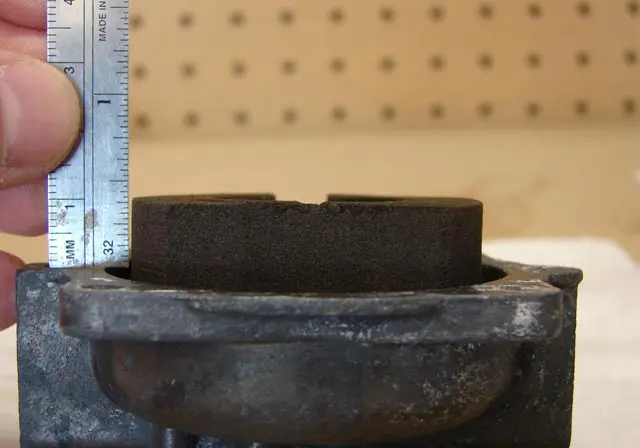
I'm starting to put the carb back together, and ran into an issue assembling the float. When I reassemble it the way it was, I can only get the float to project about 1/4" from the flange. I don't see how I can bend the float arm enough to get it flat and 3/8" all around like the manual says. I can, however, flip the float over so that the arm attaches to the side that is flat instead of the one that has the slot in it. That puts it right at 3/8". The only other thing I can think of is if the needle and seat don't screw down as far into the cover as they should, but the new parts look the same in that regard as the old ones. Any ideas?
[attachment=8920]carb_adjust.jpg[/attachment] [attachment=8921]floatset_01.jpg[/attachment] [attachment=8919]floatset_02.jpg[/attachment]
Hi dtallon,
at The Dealer over the years I often found things assembled incorrectly by others trying to overcome problems.
When you have new parts that do not seem to fit unless major bending or otherwise is needed to fit them, I used to do as you have done, and try other variations if the manual/parts book etc did not give a definate pic of the way it should be.
Seeing as you have found a way for it to fit without mangling anything, and being the carby is easy to access and rectify if this way does not work in practice.
To me it looks correct your way, as well as achieving the setting dimension. GO FOR IT.
Cheers,
Eddie B.
I thought I would post a follow-up on the carb rebuild project.
I did end up installing the float in the position that I think is upside down, but it didn't seem to negatively affect it's operation any. Later, I talked to Jim Zimmerman, and he said he didn't think the height of the setting is as critical as just making sure it is level when the needle is set on the seat. He also mentions he coats the floats with Red Kote for added durability, but didn't think it was absolutely essential to do so.
After reinstalling the carb, the tractor started back up on the 4th crank! It was running a little rich, but running nonetheless. I noticed a little fuel dribbling out of the bottom, and based on the other posts on here knew to try making my own pedistal gasket. Sure enough, by using a bottom gasket made from 1/16" cork instead of the 1/32" paper one that came with the kit, it cleared up the dribble.
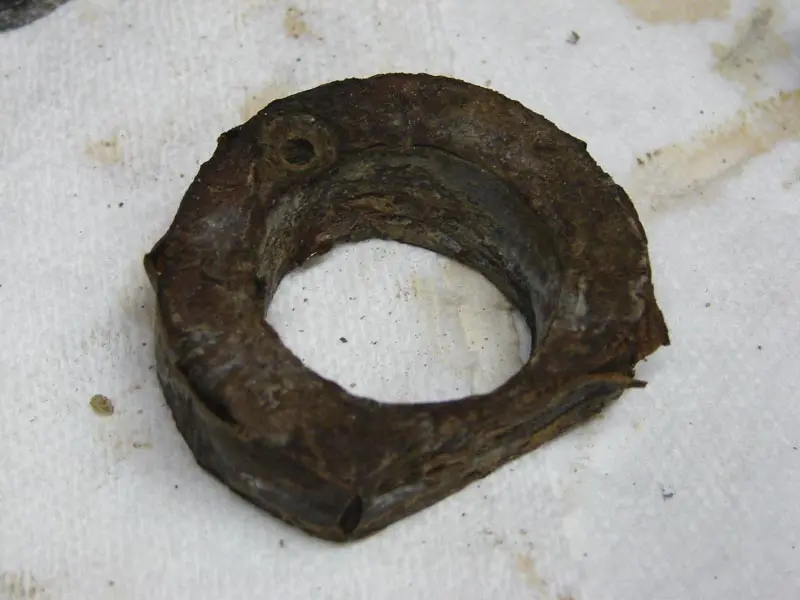
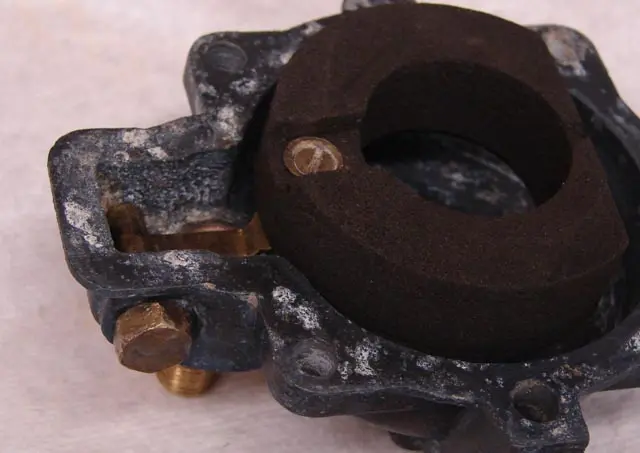
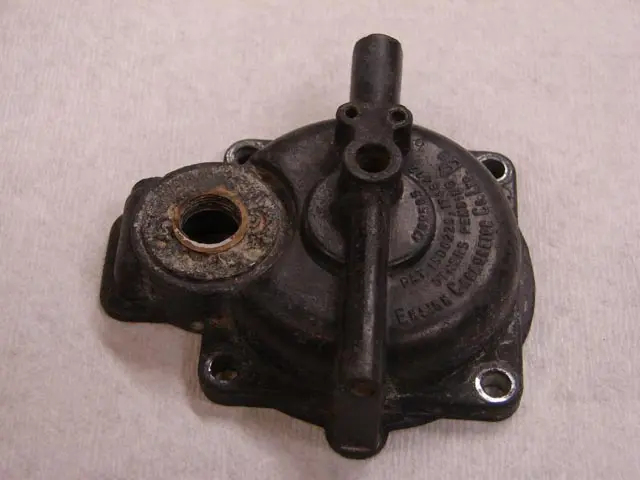
I guess I should say, it cleared up one of the dribbles. There was still some fuel seeping out around the banjo fitting. As I took the carb apart, I could tell that someone had made a repair to the threads for the float valve. I tried to be as gentle as I could, and not tighten it or the banjo fitting nut too much as I put it back together. Still, after taking the tractor to a show over the weekend, the seeping got worse. An attempt to tighten it further just resulted in the threads slipping.
So, two questions. The area on my carb around the float valve is pitted and doesn't look normal, what is it supposed to look like? Also, anybody have a good experience with fixing a problem like this one?
Thanks,
Dave
[attachment=8980]carb_04.jpg[/attachment]
Good Luck and if you need any parts let me know I have several carbs in diff states of dis repair and for you I would part with some of the parts even though you let the guy from American Loggers take my seat at the show.
Do you still have parts for the Cat Ten carb?
Dave,
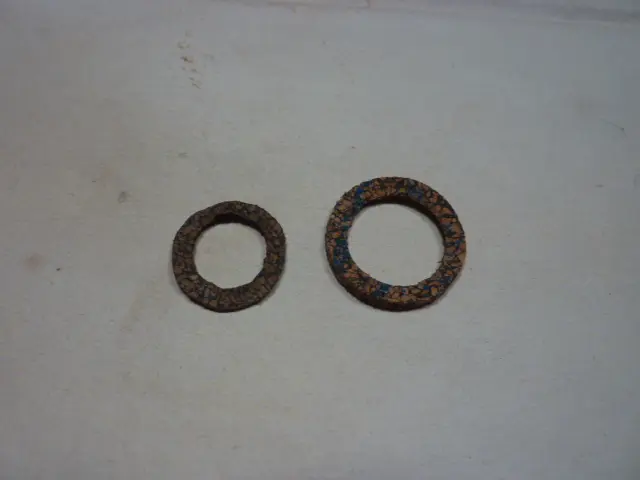
I did what you did on a PV 15 carb pedistal to solve the leak. I used a rubberized cork material from Fel Pro. Initially it stopped the dripple but on a restart several weeks later, the dripple came back. On inspection, I found that the cork material had shrunk dramatically. See picture of fresh original cut compared to the one that came out of the carb. After several trials and errors, I ended up using a thicker paper gasket that has been good for several years now. G


Our channel highlights machines from the earliest Holt and Best track-type tractors, equipment from the start of Caterpillar in 1925, up to units built in the mid-1960s.
Chapter Two
| Highacres Farm, Dewey Lane, Brackenfield, Derbyshire DE55 6DB, UKChapter Nineteen
| 2 Winkleigh Rd, Exeter TAS 7275
Antique Caterpillar
Machinery Owners Club
1115 Madison St NE # 1117
Salem, OR 97301
Terms & Privacy
Website developed by
AdCo
"I also joined a year ago. had been on here a couple of times as a non-member and found the info very helpful so I got a one year subscription (not very expensive at all) to try it out. I really like all the resources on here so I just got a three year. I think its a very small price for what you can get out of this site."
-Jason N
