
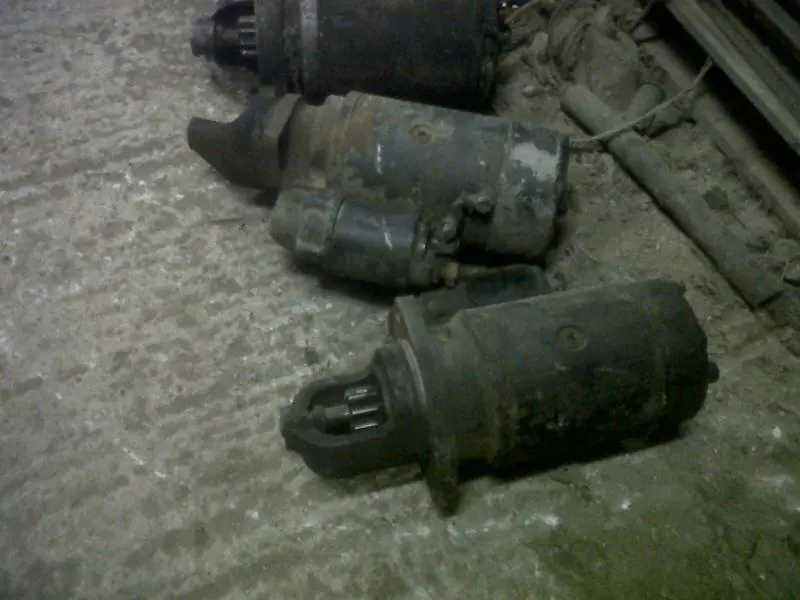
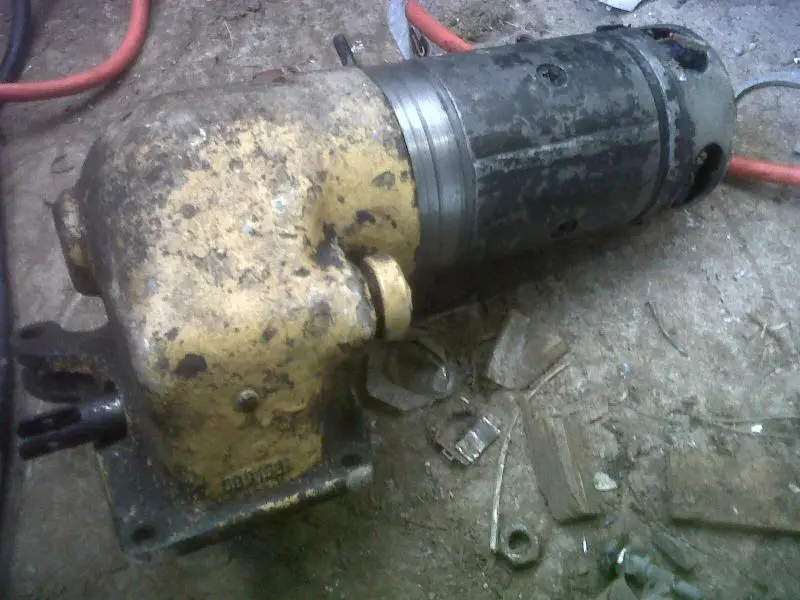
The D7/8 uses a Delco Remy Starter #1107029.
The drive end housing is a #1881191 and the drive is a #2A-5127.
2A-5127 is Delco's new numbering system.....the old number for the Bendix Drive is a 1868804....fits a whole bunch of stuff.
The factory starter does use a helical drive bendix. I just replaced the one on my D73T. The entire assembly slides on the shaft and is held in place with a set screw.
Matt
Here is a link to the one I purchased, it is listed for a John Deere tractor but they are the same.
http://cgi.ebay.com/ws/eBayISAPI.dll?ViewItem&item=250610306628&ssPageName=STRK:MEWNX:IT
Thanks for the links guys. I probably should have just asked in the first place. But I am beginning to enjoy this little project. I am between jobs at the moment and a spell polishing up my machining skills will keep me out of mischief!!
Just worked out something else to do with the rotation of the thing. That donkey engine runs the other way round to a normal engine. It has to because the pinion is turning the flywheel of the main engine. I think I am going to be OK still, a) because I am pinning the starter gear onto the old bendix shaft and b) it looks like my donor starter ran the other way and pulled the gear into the flywheel of whatver it was on originally rather than pushed it onto it.
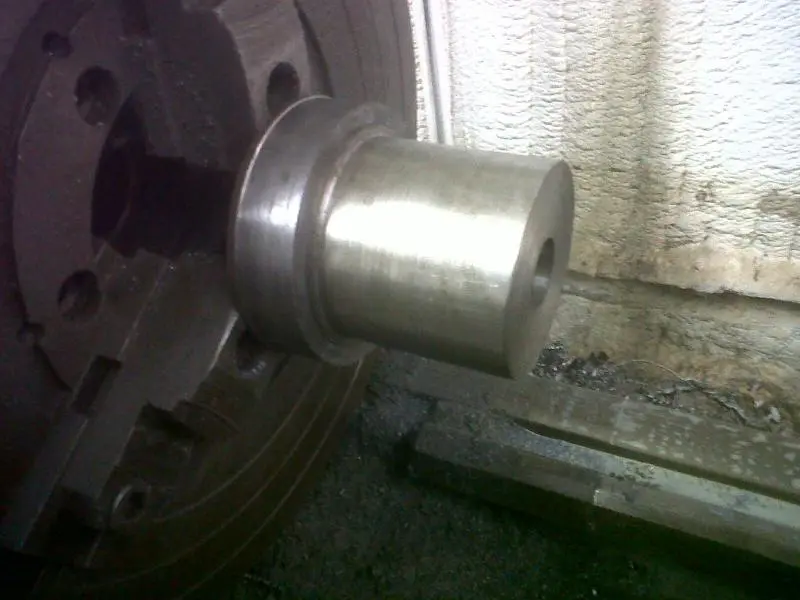
[attachment=8384]IMG00432-20110302-1806.jpg[/attachment][attachment=8382]IMG00431-20110302-1806.jpg[/attachment]
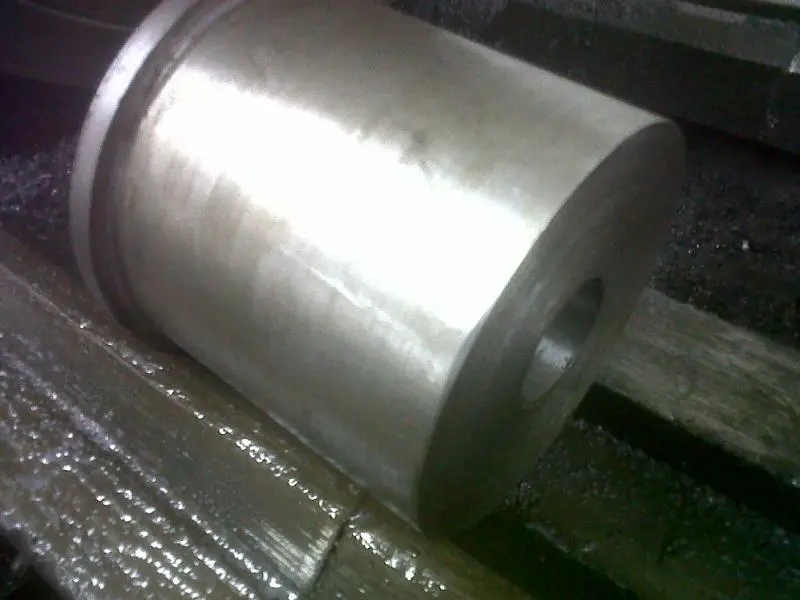
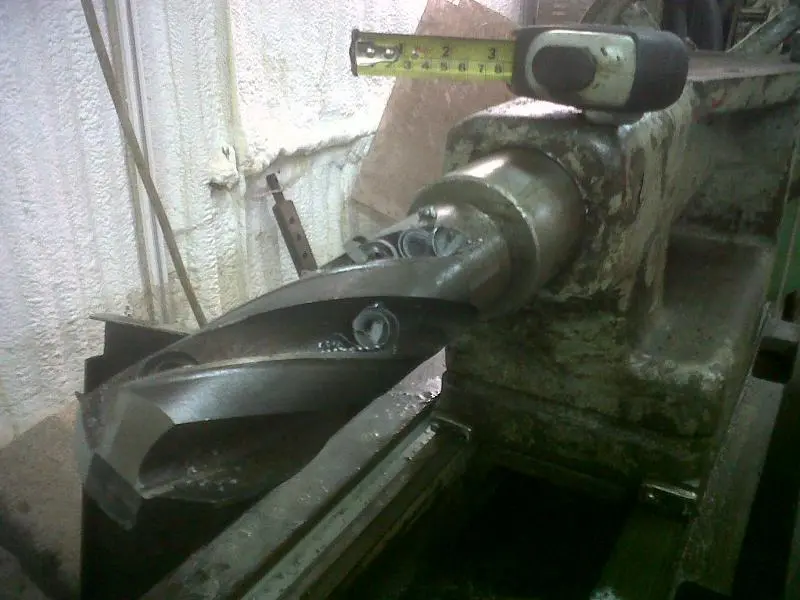
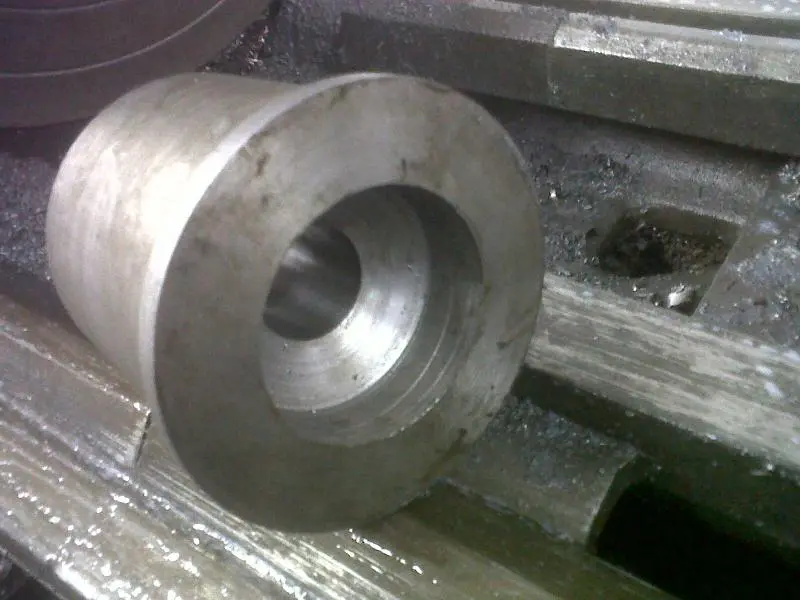
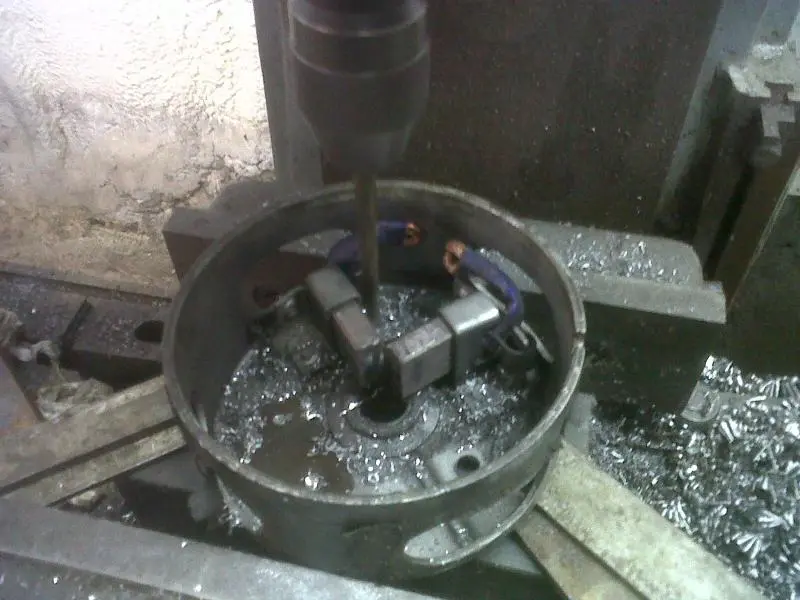
I managed to finish turning the first part last night. The long cylindrical piece is to slide down into the CAT housing, the existing starter gear and its female bendix sleeve fits up the middle. The small flange on the end butts up to the starter. The original starter end had no bearing as such, just ran in a bush, so I have just machined the inside of the piece to a very fine tolerance to allow the starter gear piece to rotate in there. The other photo shows the end of the piece that will mate up to the starter body itself, I have opened this out to give it a bit more room. Photo of the 2 1/2" drill I used to rough this out on the lathe.
[attachment=8383]IMG00433-20110302-1807.jpg[/attachment]
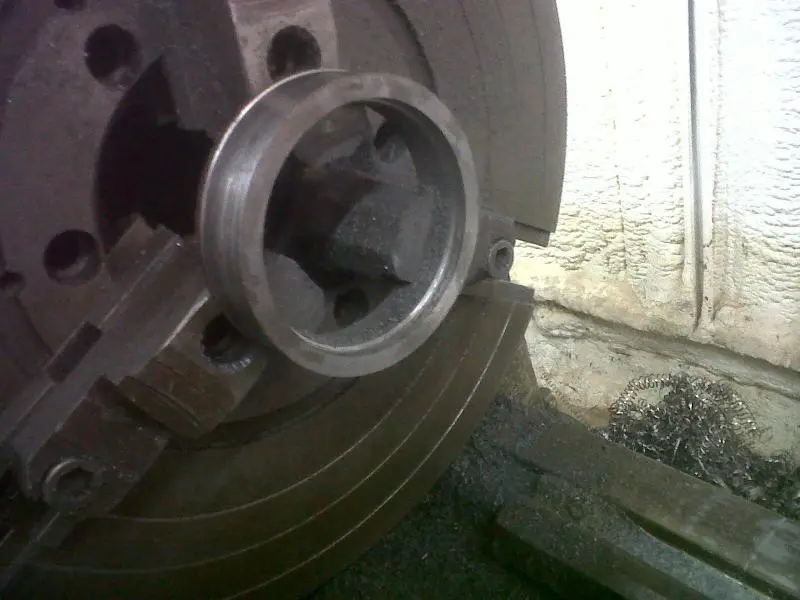
I had a slight technical problem here as the only blank billett I had, whilst big enough diameter to make the piece that slides down into the CAT housing wasnt big enough to be able to turn down the match up into the starter. I now have to make a short piece to connect the two, this is a help anyway as it allows me to work on the starter mods in sections.
I'll do a bit more tonight.
Nick
Fowler, if you get into a snag, I have a motor or 2 in my heap of things that might be handy one day??, it looks like you are making a Top job of getting things sorted with what you have, its good to see the progress you have made, well done.
tctractors
excellent and informative post ,thanks for taking the time to post 👍
hope all go's to plan ,keep us updated
thanks graham
A bit more progress. I have now turned out the extra piece of starter casing that I needed. As explained, the billet I used for the nose cone wasnt big enough diameter to match the starter so I found a bigger lump, an old cast chain sprocket.
[attachment=8391]IMG00429-20110302-1806.jpg[/attachment]
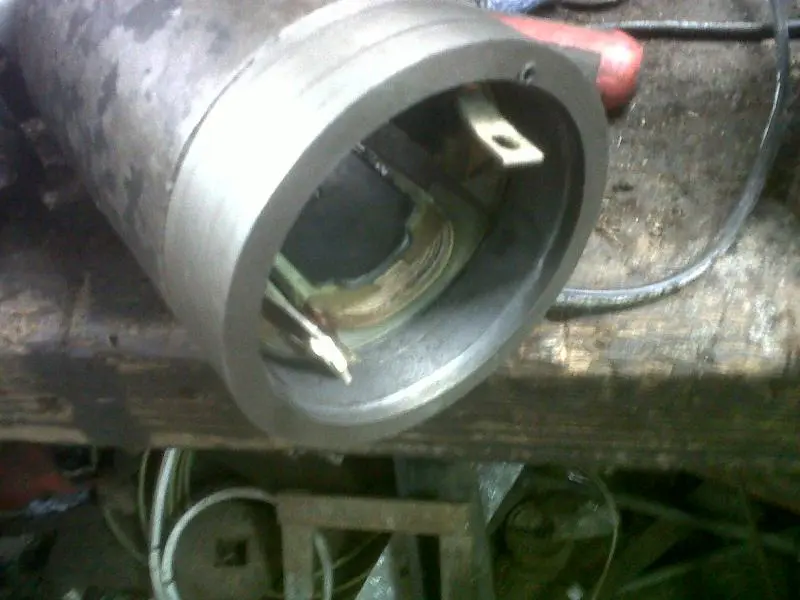
Turned this down to match the outer shell of the starter and have enough room inside for the works. It needed a lip on either end, one to match the starter housing and one to hold the nose cone. Also had to mill out a groove in the one end to take the locating tab on the starter. I put a dowel in the other end to match up with a slot in the nose cone, all helps to stop the housing spinning.
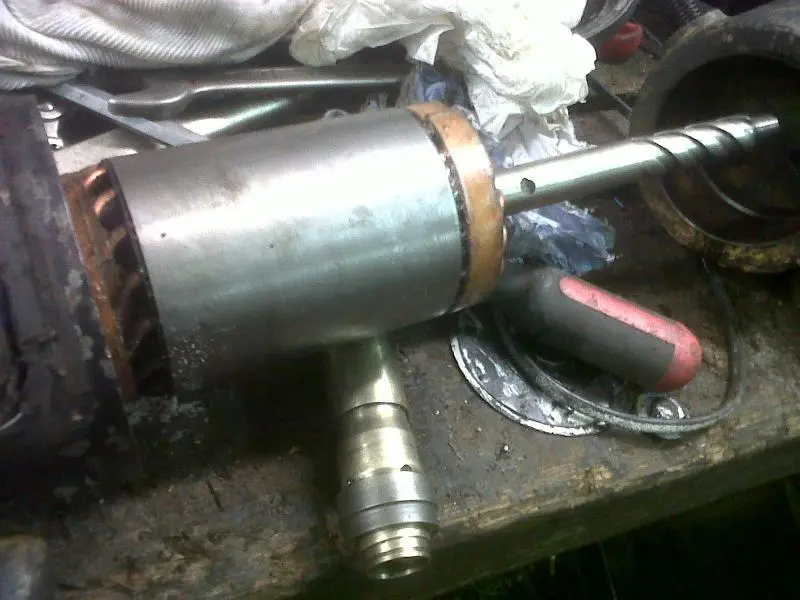
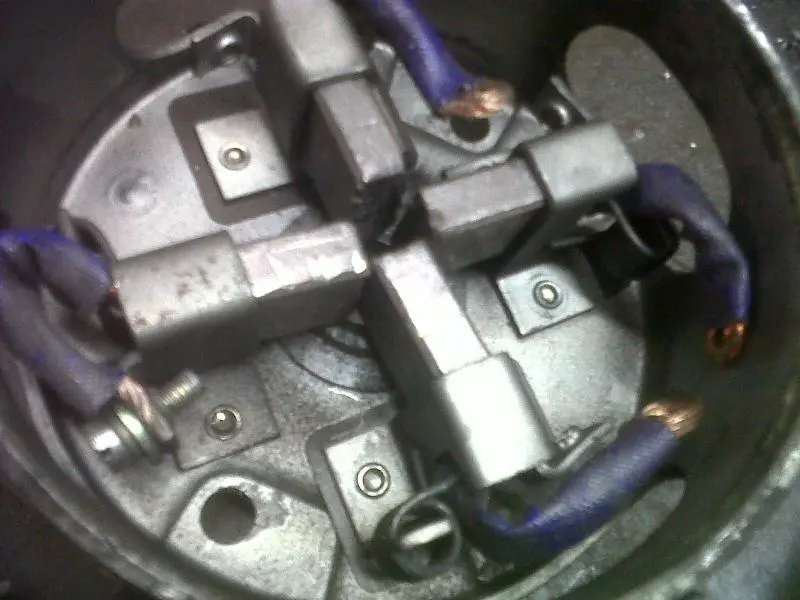
It fits. [attachment=8392]IMG00437-20110304-1032.jpg[/attachment] You can see the two copper lugs sticking out that connect back to the field coils.
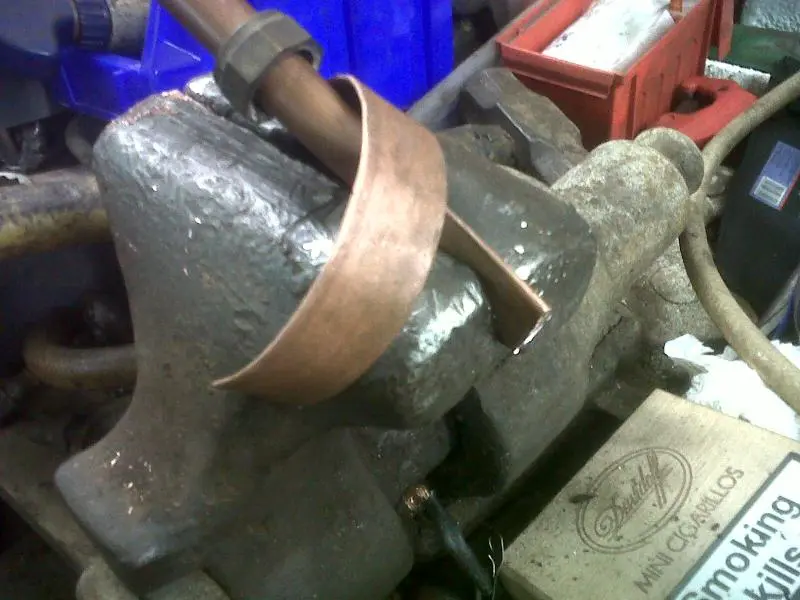
Next issue was the fact that the old nose cone on the starter used to house a solenoid and all the switch gear. I have done away with that and so needed to reconnect the field coils. I used a piece of flattened copper pipe to fashion a sort of buzz bar,
[attachment=8393]IMG00438-20110304-1125.jpg[/attachment]
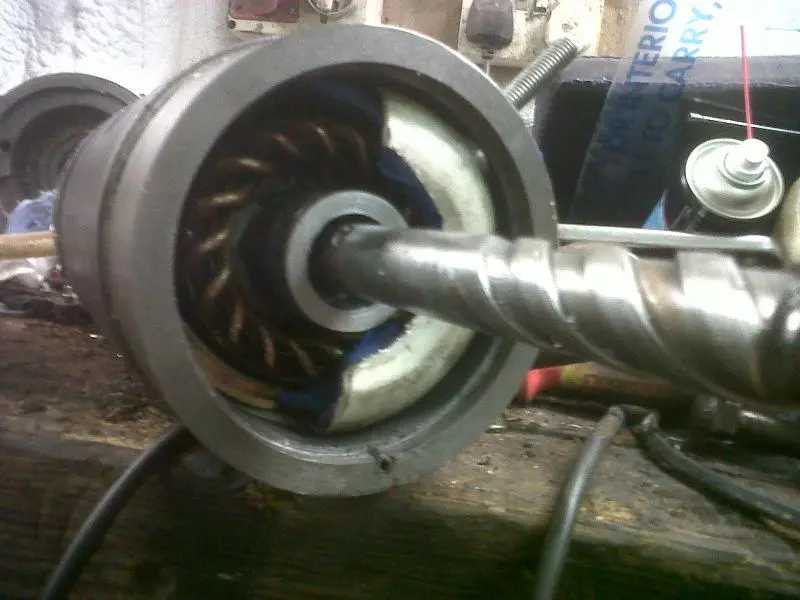
power comes to this through a bolt that sticks out through a hole I drilled in the new housing extension. Insulation of the power input is by running the bolt up through a hard plastic tube.
[attachment=8395]IMG00441-20110307-1923.jpg[/attachment]
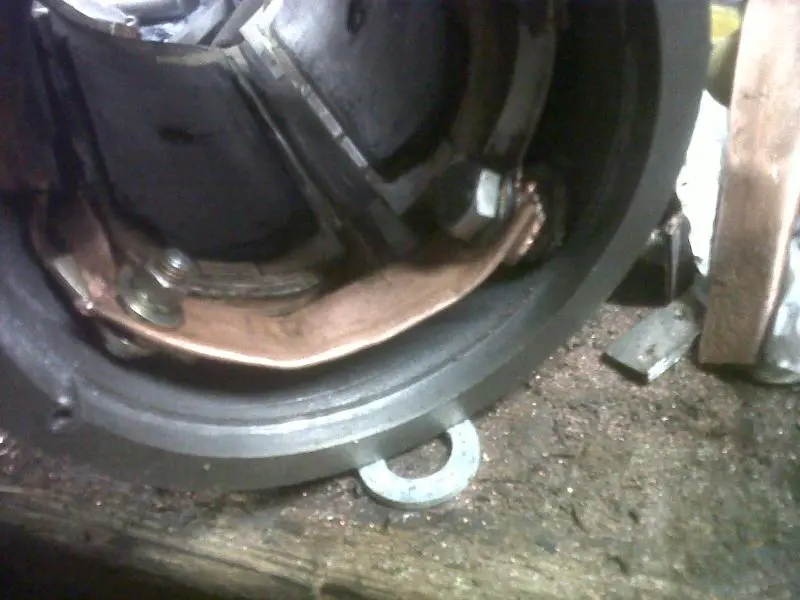
And there it is, all neatly fitted together, new and old housing shells, shaft and rotor, final piece of insulation shield, the white semi circle, (a piece of thick plastic bottle!) and ready for the nose cone.
[attachment=8394]IMG00443-20110309-0925.jpg[/attachment]
Next job is to drill and tap holes in the nose cone, this will allow two lengths of threaded bar to pass from back to front of the starter and pull it all together.
Nick
Nicely done. Quite the bit of ingenuity.
Matt


I decided that the bendix was redundant but now have to lock the starter sprocket in some way. Didnt fancy drilling and pinning it as ti might weaken it. So simple solution is to make a long spacer, over the bendix spiral that prevents the gear coming back down the shaft. It stays out at the end where I want it, I left a bit of space so it can move around a bit out there.
machining the spacer shaft, with a hole up the middle.
[attachment=8396]IMG00442-20110308-1530.jpg[/attachment]
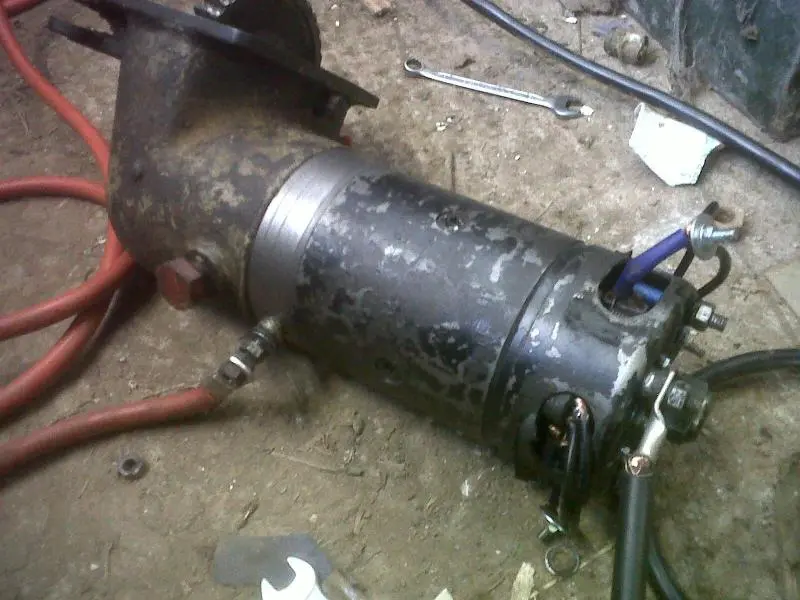
And here is the finished article, most of the hard work is hidden on the end of the starter up inside the CAT housing.
[attachment=8397]IMG00444-20110309-1025.jpg[/attachment]
I spun it up, but had a bit of a disaster as I had forgotten to fit the circlip on the brush end of the motor and the rotor tried to come out of the other end.
[attachment=8398]IMG00445-20110309-1437.jpg[/attachment] A lot of noise, but only a bit of damage. Should be OK. Ran it up again and guess what? Although it runs up sweet as a nut, the motor is going backwards!! I have no idea what that arrow on the side of the motor body is for but it ain't showing the direction of rotation.
From memory, the way to reverse a DC motor is to switch over either the field coils or the armature, but not both, (hence just switching polarity of the overall feed does nothing). I will check this out first, but I think this is still doable. At least the motor and my workmanship is good, (have to look on the bright side).
Nick
I seem to remember an old fellow telling that those starters used on the pony motors were the same as some starters used on Chevrolet cars of the 30's & 40's. Finding one of those would probably be impossiable now though.


Our channel highlights machines from the earliest Holt and Best track-type tractors, equipment from the start of Caterpillar in 1925, up to units built in the mid-1960s.
Chapter Two
| Highacres Farm, Dewey Lane, Brackenfield, Derbyshire DE55 6DB, UKChapter Nineteen
| 2 Winkleigh Rd, Exeter TAS 7275
Antique Caterpillar
Machinery Owners Club
1115 Madison St NE # 1117
Salem, OR 97301
Terms & Privacy
Website developed by
AdCo
"I became a member recently because the wealth of knowledge here is priceless."
-Chris R