Hi Phil,
the housings are cast steel--a touch with a grinder disc will soon tell if is cast or steel--
Google Spark Testing Metals for images and vids. on this subject.
https://verichek.net/wp-content/uploads/2016/10/spark-test-metals.png
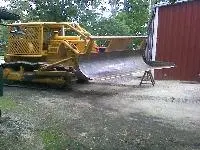
The 955K is similar to a D4/6 F/Drive with an extra intermediate pinion for low gearing to lessen stresses on the gear teeth etc. so is nothing different to other crawlers in the Cat line except the Dead Axle--Sprocket Shaft is shorter as the track frames are rigid to the chassis on the 955K so the axle section for the diagonal brace of the pivoting track frame as used on crawlers is not utilized.
An often used bush method is to remove the final drive cover complete with sprocket attached to the sprocket/bull gear hub as a unit--loggers used to bring F/D's like this so they did not have to pay for someone to come out and pull or push to sprockets off/on in the bush.
Makes things interesting if they bring it in with the outer hub bearing and sprocket nut removed--have to chain the sprocket to the housing etc. to stop it launching out the door, thru the roof or back of their ute, taking the pressing gear with it.
As an aside -- Sprockets have been successfully removed by explosives in the past without damage by persons versed in the finer points of explosive use.
Hope this helps.
Cheers,
Eddie B.

Hello Eddie
Yes I guess I thought way too much about it. I was kind of hoping there would be some shortcuts in the manual instead of removing the entire track frame although it turned out it had to be removed due to broken bolts and rollers needing replacement. Had a lot of trouble getting some of the bolts out but got to this stage today.
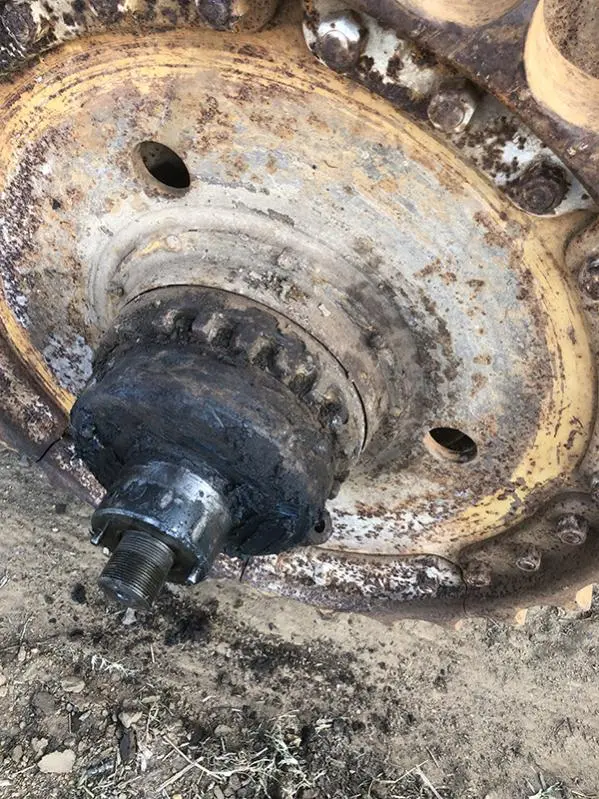
[attachment=55469]Sprocket.jpg[/attachment]
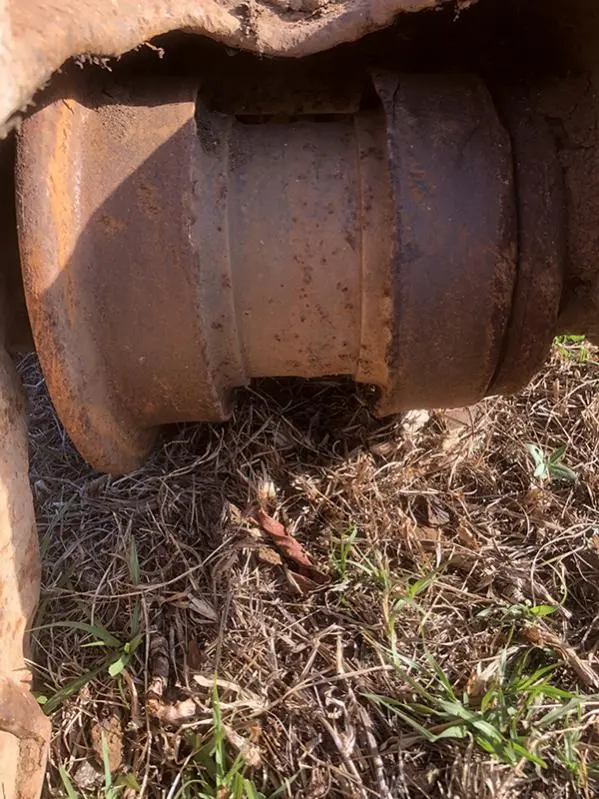
The first roller will need replacing and maybe the next two.
[attachment=55470]Roller.jpg[/attachment]
There is one on the other side missing part of its flange.
[attachment=55468]Roller 2.jpg[/attachment]
In regards to the composition of the housing and judging by the way the piece is broken out of the housing I would say it is Cast Iron and not Cast Steel (unless it is very high carbon steel) which means I now have to weld a piece into a cast iron housing. Just to be sure I will have a look around tomorrow to see if there are any welded parts on the housing.
[quote]
An often used bush method is to remove the final drive cover complete with sprocket attached to the sprocket/bull gear hub as a unit[/quote]
That's what I was hoping to do so I can at least get an overview of what damage has been done inside the housing without making a big puller up but the Holder Assembly does not want to come off either.
Regards
Phil
What a pos! Thats going to be a money pit! Better look for something else.
It all depends on the condition of the final drive internals. If they are OK and it only needs bearings and a little welding then it is hardly a POS. This machine is otherwise in very good shape. One reason I bought it is because I already have a suitable engine. Even if I had to spend twice what I paid for it on the final drive it would still be cheaper than running ones here in Australia.
Ten-4, hope it works out for ya.
Hi Phil,
if you tighten heck out of the sprocket shaft outer bearing adjuster and with a suitable adaptor on the end of the dead axle that bottoms on the thread shoulder and not imparts hammer blows to the thread it should pop off with a few blows-retightens of the bearing adjuster and a re-check that the adaptor is still snug on the shoulder of the axle is how we did them at The Dealer on most machines of that design.
As you see it is vital to not hammer or allow hammer forces to impact on the nut threads--or you will be up for an axle or repair of the threads.
Also suggest you check the tightness of the axle before reassembling the F/Drive.
Use same adaptor and give axle a few swift blows then check the castellated nut in behind the F/Drive under the machine for tightness--remove spring ring lock and with a suitable flat punch see if the nut moves--tighten if need be and re-drill for the lock ring tang to engage into.
Broken Track Frame bolts--welcome to the world of Traxcavators Mate! now you will see why so many T/Frames on these things are welded on. If repair is needed--out with the gouger/grinder.
Be aware that the T/Frames need to be aligned to the machine using the shims shown in the Parts Book and Service Manual--think toe in and toe out and parallel to machine centre line, twisted and /or bent frames etc. for best undercarriage life.
For best results align the frames and make 1 thick shim to space them as needed--a multi shim stack tends to be spongy and be a cause of loosening of the bolts. Good clean dirt/rust free surfaces help a lot too.
Enjoy the experience, you will learn mega.
Cheers,
Eddie B.
Hello Eddie
Thanks for the information. I had a look at the housing and although I can't find any factory welding on the housing I think you are right, it is cast steel. That makes it much easier to weld but I will do the spark test beforehand.
Luckily there are only two broken bolts. The bolts on top of the track frame had rusted heads which made it hard to get a socket to bite on them. 1" drive single hex impact socket got most of them out.
What is the best lubricant to put on the bolts? I seem to remember my father saying a Stag product was best and he said it was black like tar and nearly as thick but the Stag we use today is nothing like that and is a thread sealant. Nickle anti seize is good but does not last indefinitely. Then again maybe a thread sealant would work better at keeping moisture out of the threads.
Do you think alignment problems could have caused the final drive issue and the roller damage?
Regards
Phil
Hi Phil,
am not saying that mis-alignened T/F's could or could not have caused the current F/D failure.
I was simply alerting you to the fact that the T/F's need to be aligned for best undercarriage component life.
A wildly out of alignment T/F, I guess, could cause excessive sprocket side loadings and so lead to possible F/D problems over time. One could say that almost anything is possible with mechanical devices.
Cheers,
Eddie B.
Undercarriage alignment...


Our channel highlights machines from the earliest Holt and Best track-type tractors, equipment from the start of Caterpillar in 1925, up to units built in the mid-1960s.
Chapter Two
| Highacres Farm, Dewey Lane, Brackenfield, Derbyshire DE55 6DB, UKChapter Nineteen
| 2 Winkleigh Rd, Exeter TAS 7275
Antique Caterpillar
Machinery Owners Club
1115 Madison St NE # 1117
Salem, OR 97301
Terms & Privacy
Website developed by
AdCo
"I became a member recently because the wealth of knowledge here is priceless."
-Chris R