Hi Tognot,
never done one but have seen similar on lift trucks etc.
I would try removing the Allen screws, slide a possible outer dust seal carrier plate out of the barrel and there could be a big circlip holding an inner plate in situ.
Others can have a circular circlip that needs to be removed thru a slot in the side of the barrel at the head plate area.
I am sure there are other possibilities and variations also, as others will no doubt tell us about.
Your mileage may vary.
Cheers,
Eddie B.
You have a wonderful day. Best wishes. Deas Plant.
Once the outer plate is removed, you should be able to bump the "head" into the cylinder and expose a retaining ring that is seated in a groove cut in the cylinder wall. Usually this will be a round spring steel wire and it can be pried out with a screwdriver. The groove is frequently cut with a bit of a ramp running inward so by driving the head in plenty far, you will have room to push one side of the retainer inward so its easier to pry it out.
Use a block of wood to drive the head into the cylinder and to protect the rod from dings by the hammer!
Once the retainer is out you can snatch on the rod and pull the head out of the cylinder. It is a good idea to check for burrs on the outer edge of the retaining ring groove before you snatch on it. Sometimes there will be quite a large ridge from the retaining ring working in the cylinder over time. The outer plate seems to have been good and tight, so that may have prevented the pounding action and the inside of the cylinder will be smooth except for the groove.
Ok I will get those out - eventually- and report back. Thanks
Ok I did what you guys suggested - and you were right- after removing the three cap screw ( Allen head) bolts I was able to "walk off" the end cap with a special tool ( chisel and hammer ).
I then found a spiral spring acting as a retainer. I pulled that out and attempted to extract the shaft and seal assembly by placing the cylinder between two posts and using a come a-long. My guess is I need to keep trying , or try harder but I don't want to cause damage due to ignorance.
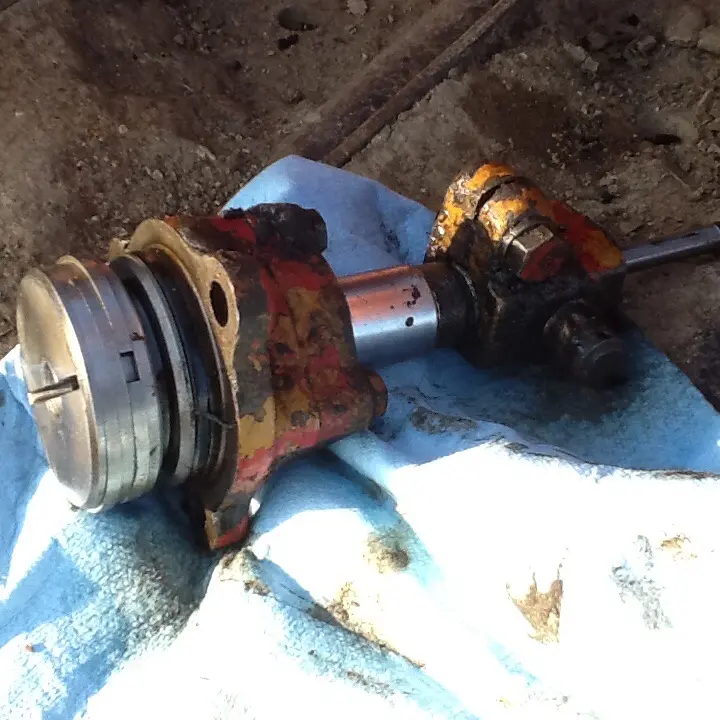
Here is a pic of the end of the housing. I see nothing more to remove. Just pull it apart ? Maybe hook it up to the D2 and try to pull the td15 ? Thanks
[attachment=39182]image.jpg[/attachment]
Have you pushed the head into the cylinder? Will it go farther than shown in the picture? I would worry that there was an additional retainer still trapped in the space between the head and cylinder wall. Guess I haven't seen one with a retainer that wasn't trapped by the head moving outward.
I have had some trouble getting them out, but nothing like you are having.
Hi TOGNOT,
as CCJ said above, push the inner head into the barrel a bit and check for burrs raised by the circlip working in its groove.
This burr may inhibit the head coming out.
Cheers,
Eddie B.


Our channel highlights machines from the earliest Holt and Best track-type tractors, equipment from the start of Caterpillar in 1925, up to units built in the mid-1960s.
Chapter Fifteen
| Historic Santa Margarita Ranch, 20000 El Camino Real, Santa Margarita, CA 93453, USAChapter Thirty
| Hartley - South AustraliaChapter Two
| Newby Hall, Ripon, Noth Yorkshire, HG4 5AJChapter Two
| Freshfield Farm, Sloop Lane, Scaynes Hill RH17 7NP UK
Antique Caterpillar
Machinery Owners Club
1115 Madison St NE # 1117
Salem, OR 97301
Terms & Privacy
Website developed by
AdCo
"I also joined a year ago. had been on here a couple of times as a non-member and found the info very helpful so I got a one year subscription (not very expensive at all) to try it out. I really like all the resources on here so I just got a three year. I think its a very small price for what you can get out of this site."
-Jason N