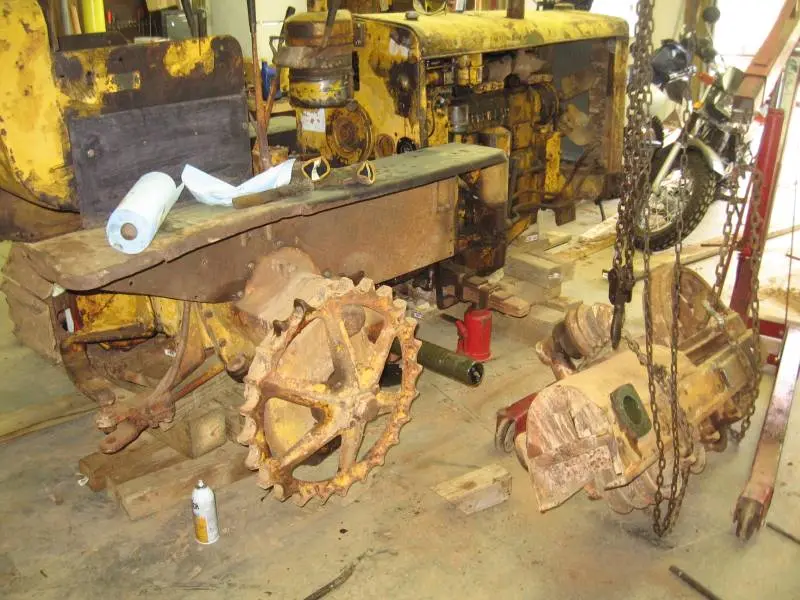
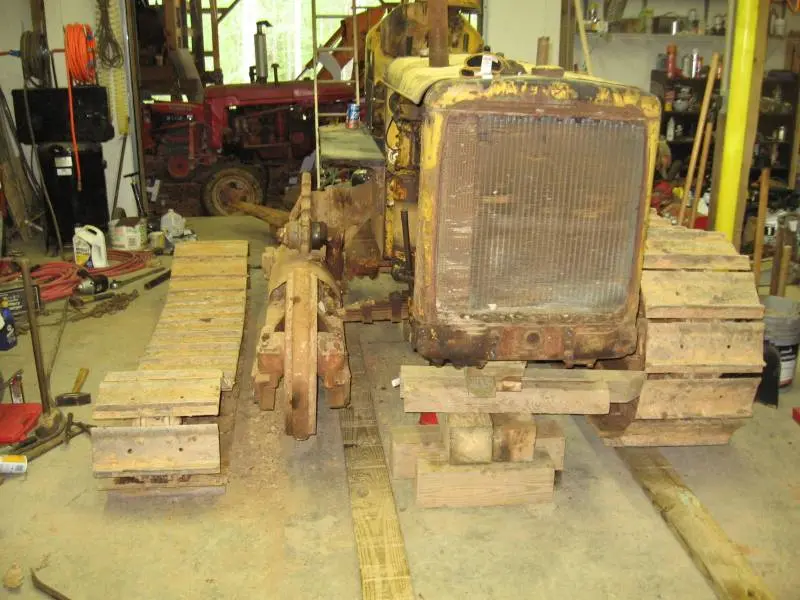
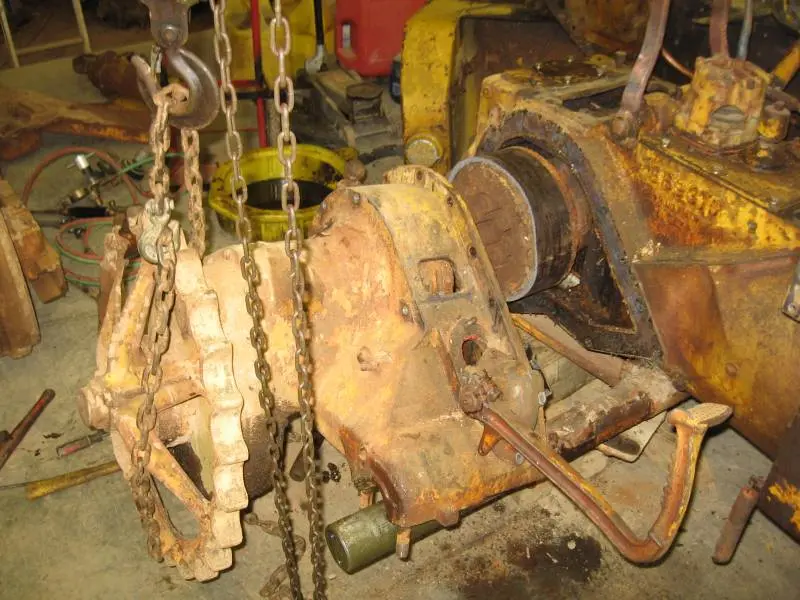
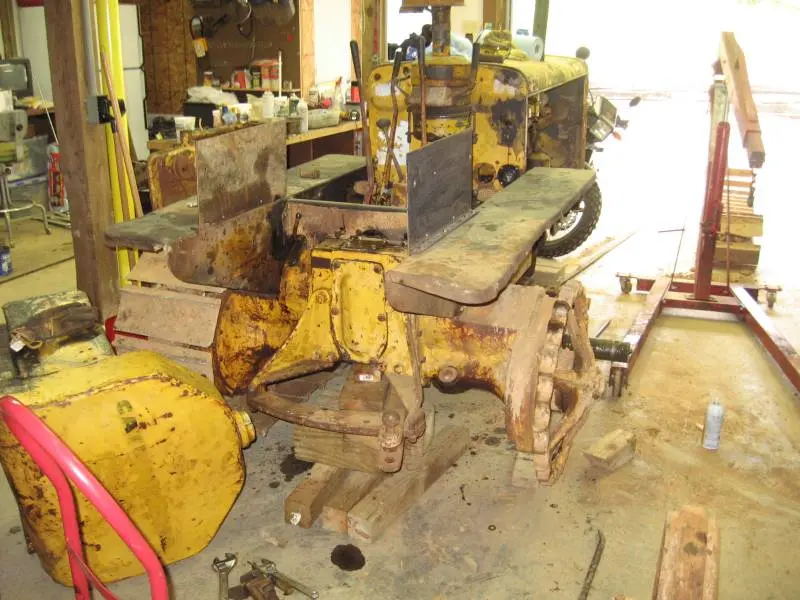
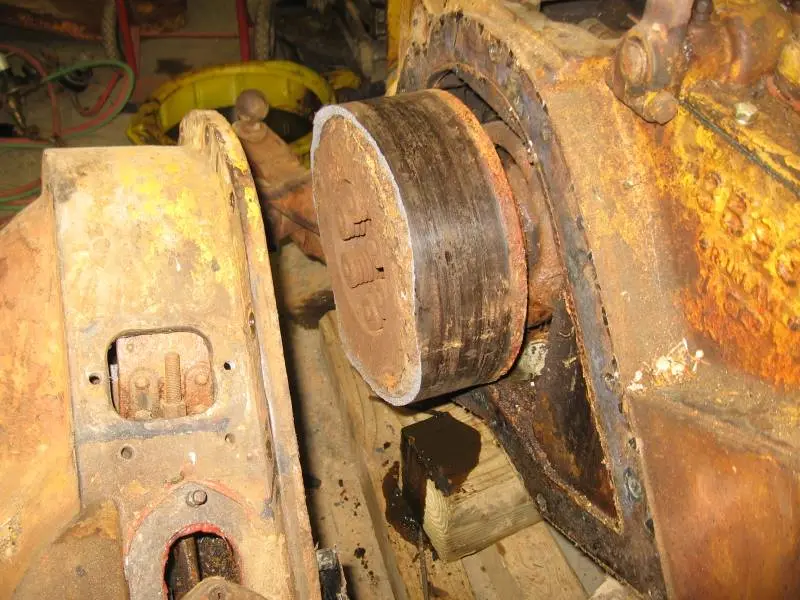
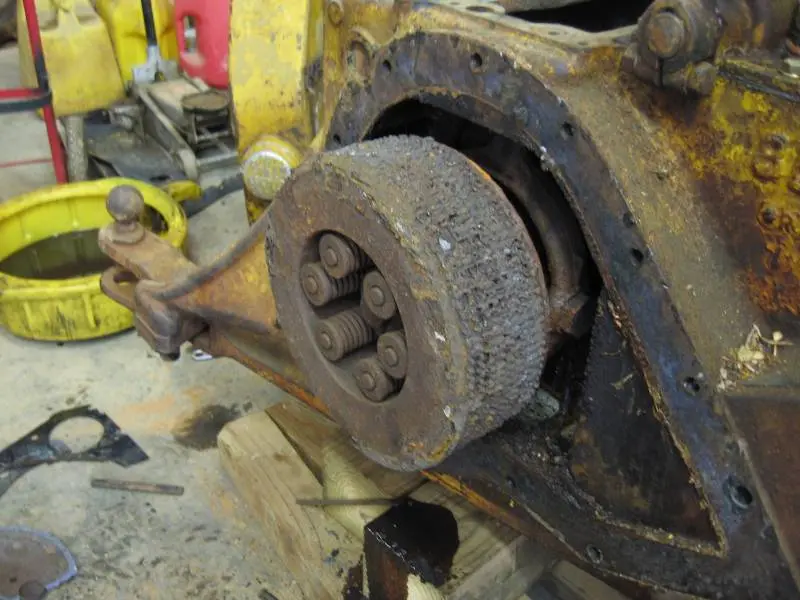
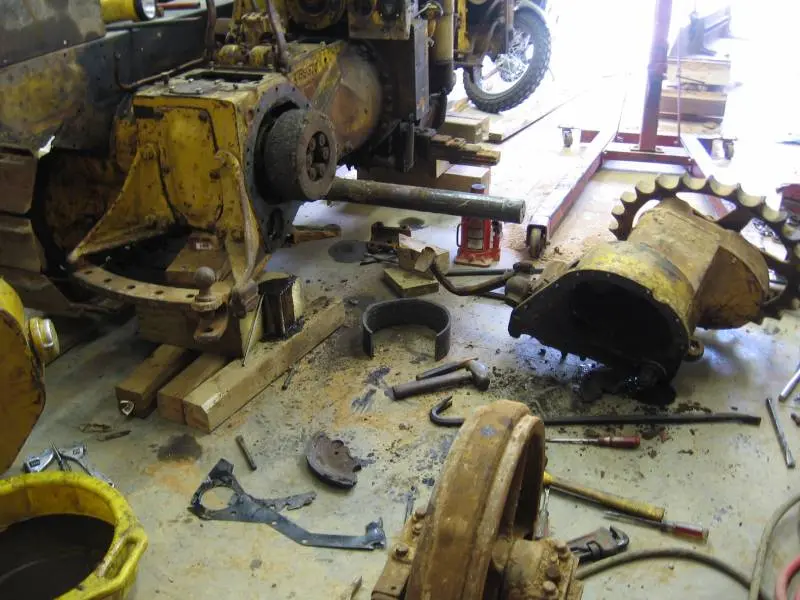
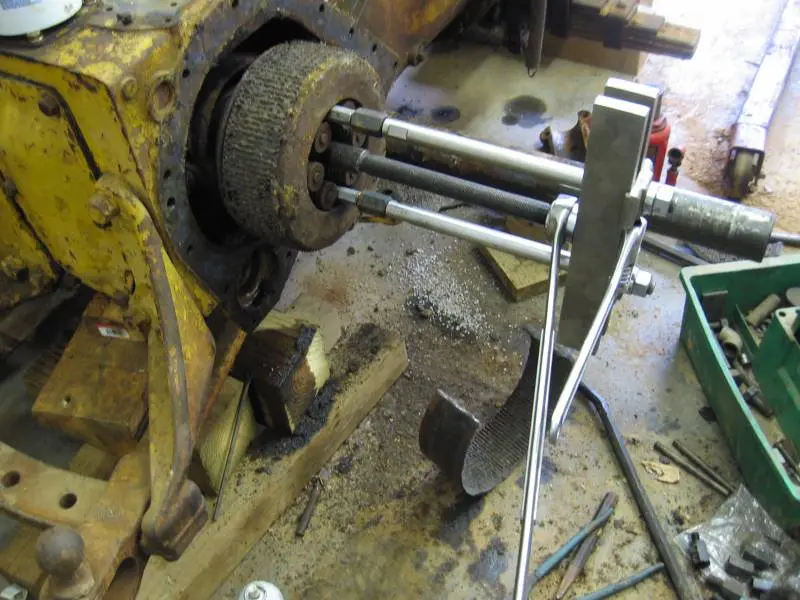
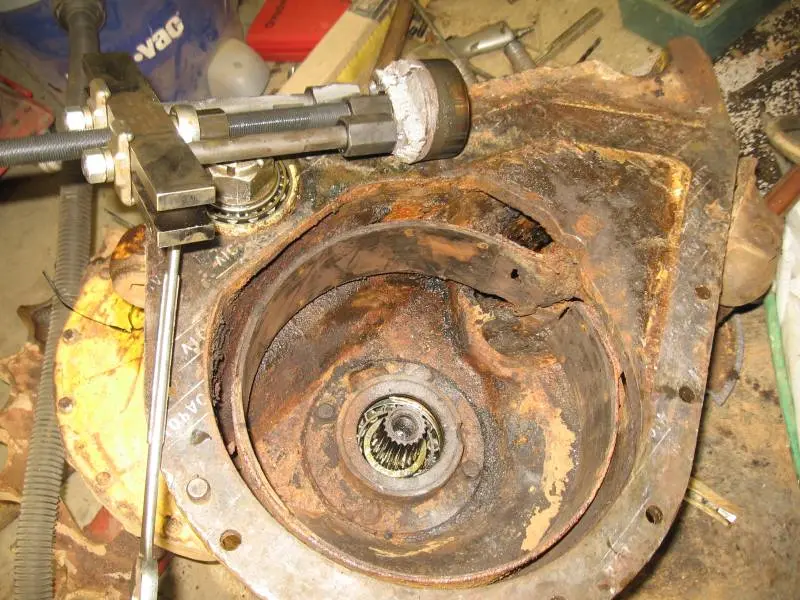

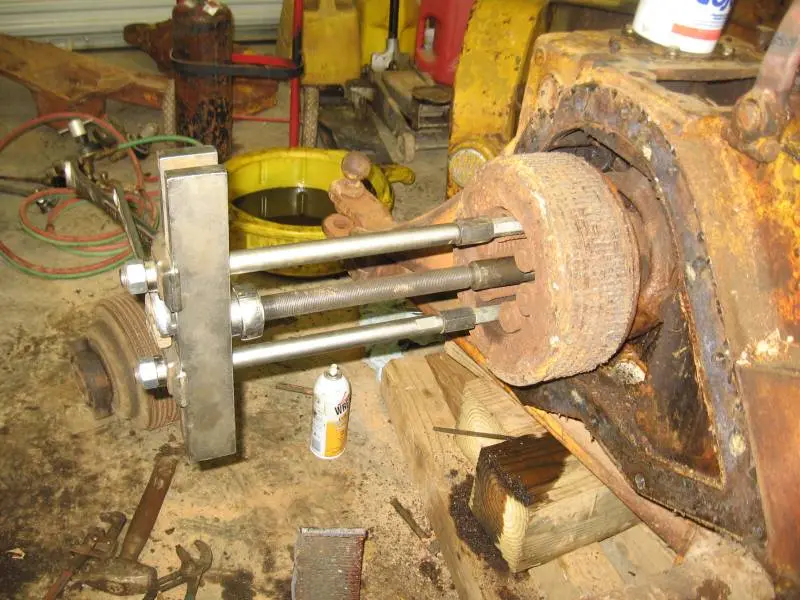
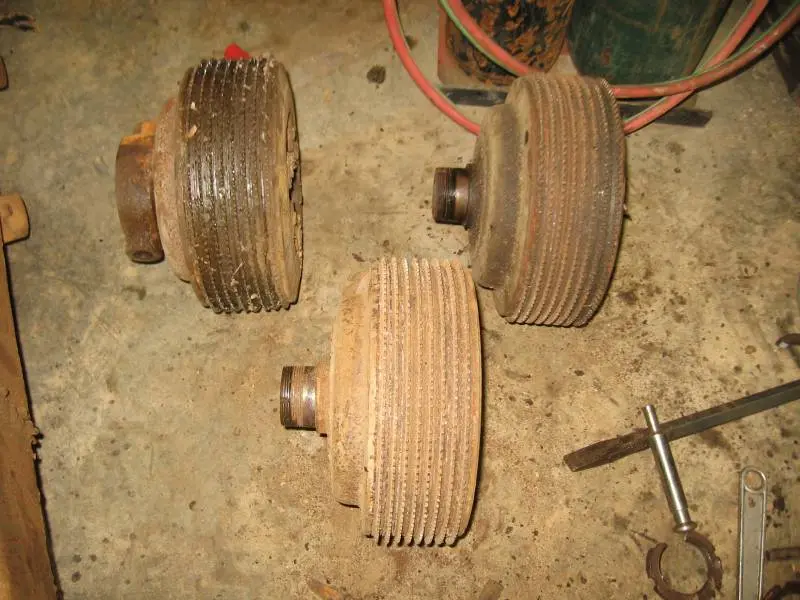
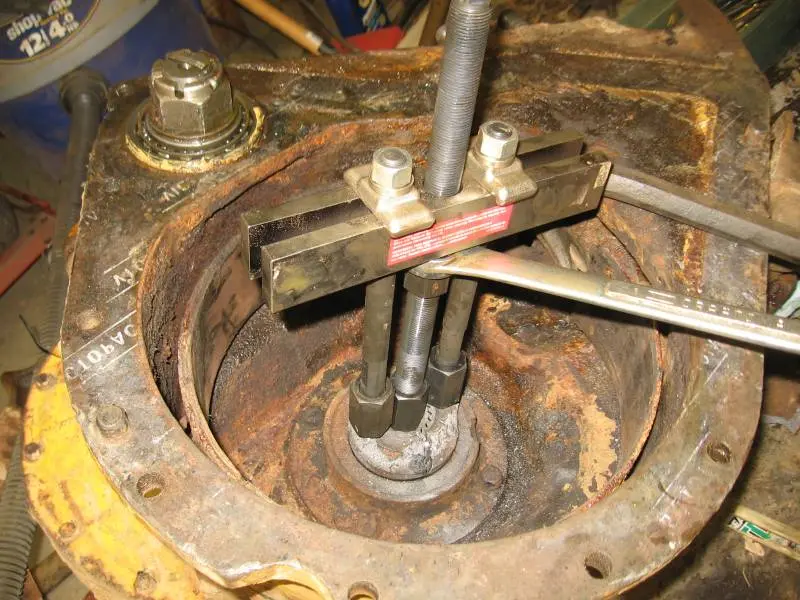
Removing the clutch pack and also the remains of the brake drum from the final. New seal waiting for me at CAT for behind the brake drum. Only $8. I used an OTC 938 17 1/2 ton puller to pull the clutch. I pulled the busted brake drum collar with a 10 ton OTC puller. It's a little smaller in size and suited the job better. I have various threaded couplers for the pullers and I use threaded rod and couplers to attach the pullers to whatever is getting pulled.
Great posting!!! Detailed instructions with pictures---better than a shop manual! 👍
Nice pictures
Great job
You can see how important it is to work the right tool
Most importantly you have the tool
👍 👍
Itzik
Arthropod,
Thanks for the great and detailed pics, I'm sure it will be a good referance for all that follow!
Mike. 👍
.
Arthropod,
Thanks for the great and detailed pics, I'm sure it will be a good referance for all that follow!
Mike. 👍
.
[quote="lyoncat"]Arthropod,
Thanks for the great and detailed pics, I'm sure it will be a good referance for all that follow!
Mike. 👍
.[/quote]
Arthropod, I have the same job coming up this summer, very valuable info
regards Dennie
Glad it will help.
I had the seal part numbers listed wrong. This should be the correct seals-
Seal behind brake drum - old number: 4B4967 - New number:5K2595 @ $11.64 each.
Seal behind clutch pack - old number:4B3675 - New number:8F3522 @ $7.49 each.
They also still have the grease tube for the throwout bearing - 1H6752 @ $36 each.
Good post, thanks. Does the new "grease tube" come with a new carrier for the thrust bearing, because the old thrust bearing relies on the lube oil flowing along a channel into the race, and I can't see how grease would do the same as it doesn't flow.
It would be like simply replacing the small oil cups on top of the trannies with grease zerks, and then thinking you have converted your old oil lube system in the thrust bearings with a new grease system. My RD4 had that "conversion":jaw: Those thrust bearings rely on the flowing ability of oil to reach them, so I'm interested to see the new grease line set up.
Keep up the good work.
regards
Mike
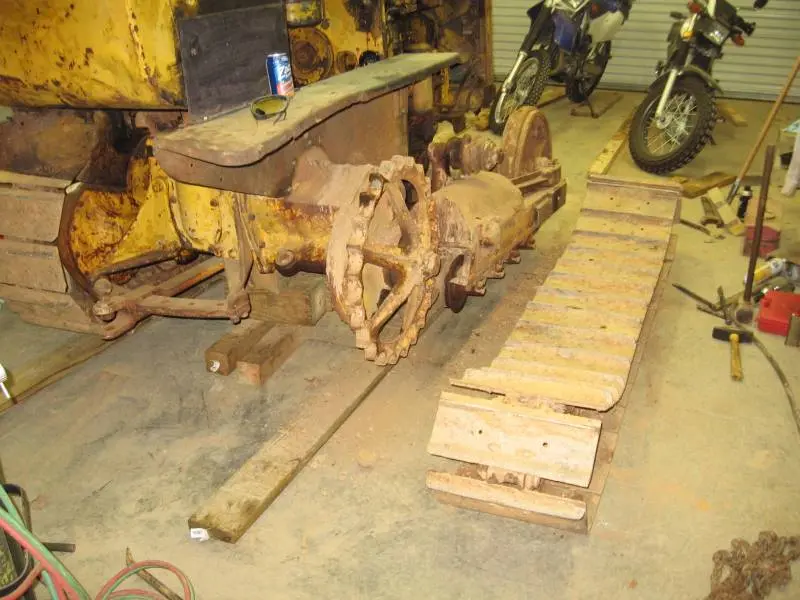
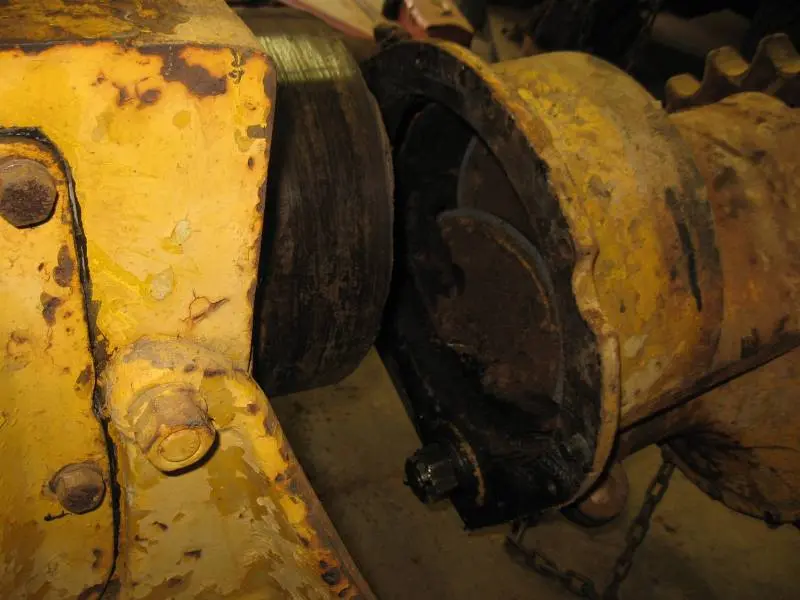
I don't have a scanned picture handy, but I'll explain best I can. There are two styles. The earlier style is like you say, there is an oil cup at the bottom of a metal tube that catches oil and channels it to the bearing. On the later style the cup is gone and instead a grease hose tightens to the rear yoke pivot bolt just like a brake line attaches to a brake caliper. So pumping grease into the grease fitting up top forces the grease into the bearing via the tube and then on through the rear pivot bolt (that has a hole through its middle). The left side of this machine is the old style with the oil cup and the right side happens to have the updated style.


Our channel highlights machines from the earliest Holt and Best track-type tractors, equipment from the start of Caterpillar in 1925, up to units built in the mid-1960s.
Chapter Fifteen
| Placerville, CAChapter Two
| Stradsett, Nr Downham Market. Norfolk PE33 9HA UKChapter Two
| Faulkner Farm, West Drove, Wisbech, Cambridgeshire, PE14 7DP, UK
Antique Caterpillar
Machinery Owners Club
1115 Madison St NE # 1117
Salem, OR 97301
Terms & Privacy
Website developed by
AdCo
"I also joined a year ago. had been on here a couple of times as a non-member and found the info very helpful so I got a one year subscription (not very expensive at all) to try it out. I really like all the resources on here so I just got a three year. I think its a very small price for what you can get out of this site."
-Jason N