If there are puller holes ,the center wheel is on a tapered on a keyed shaft ,like the rear wheels .
I think if I was faced with your problem .I would still try to get the rim off the wheel ,by soaking the rim with penetrating oil ,use a 16 or 20lb mall on the back of rim or possibly a hydraulic ram or jack to jack against the inside of rim to the goose neck .
If you do sucksede in taking the inner rim off the whole assembly is going to be heavy to handle .
Most of the tires I have seen changed on graders ,the tire was dismounted by just jacking up the wheel ,and braking the tire off the rim still mounted on the grader ,and reinstalled .Thats where an experienced tire man comes into play,and may pay you in the long run.
I have not tried this on a model 212 but it will work on an 8t series 12.
You do not need to pull the hub from the axle to fix the tire. Use a jack horizontally between the chain case and the rim. It will come loose. You may have to rotate the wheel so that the jack can be located against the rim opposite from where you started.
If you need to remove the hub and the machine will run and travel about, remove the large nut that holds the hub to the axle. Next remove the thick washer beneath the nut and reinstall the nut, but do not tighten it against the hub. Leave about 1/16 inch space between the nut and hub. Put the machine to work and keep an eye on the hub/nut/axle. It will eventually loosen itself. You would ideally stop work when it does, jack up the tandem and remove the hub/wheel/tire assembly. We never used a press to reinstall the hub onto the axle; just tightened the nut onto the axle against the hub and the machine worked many years afterward without the hub working loose.
Now if the tire/tube are flat and going to be replaced anyway, resourceful/lazy folks have opted to remove the lugs from the rim, together with the lock ring on the rim, and run the machine until the flat tire breaks loose from the rim and/or the rim breaks loose from the hub. Saves wear and tear on the maul, break down tools, and back.
Good luck with it,
Thomas
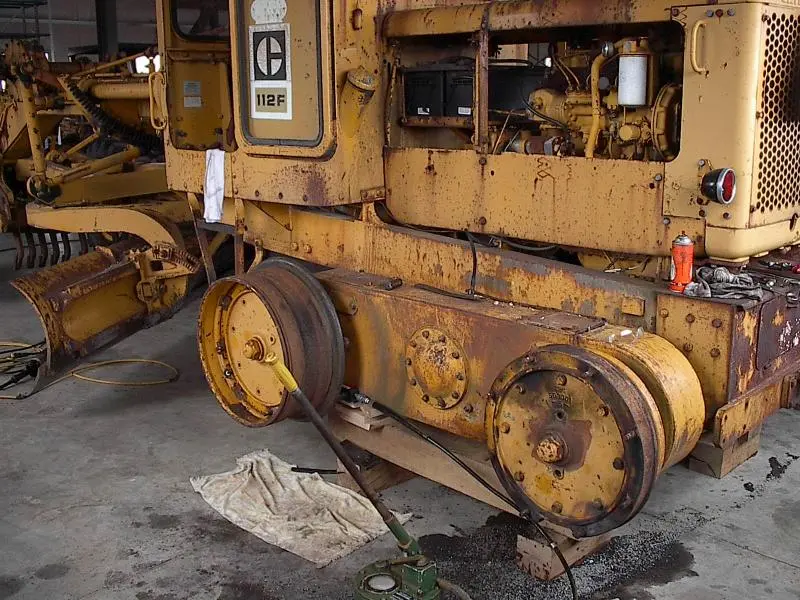
I removed tightly rusted rims on a 112F using the following process:
1. Removed tire and all related rubber components.
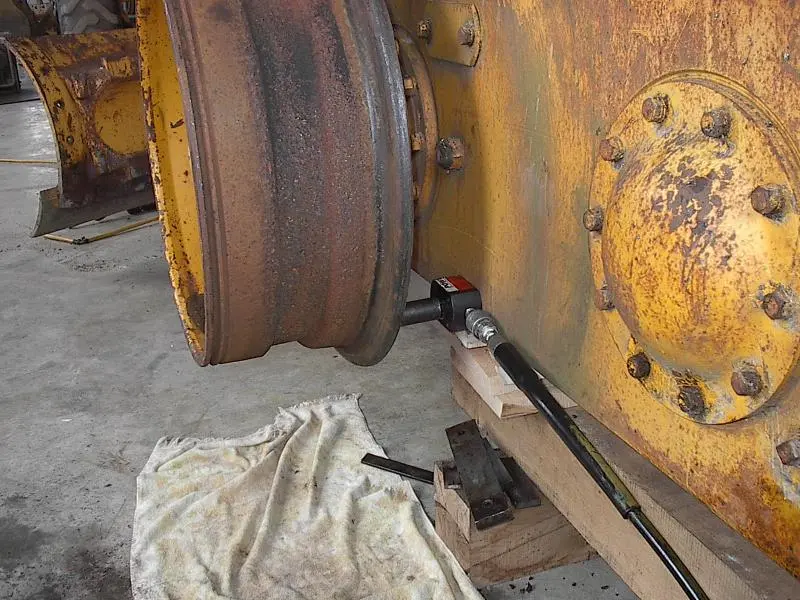
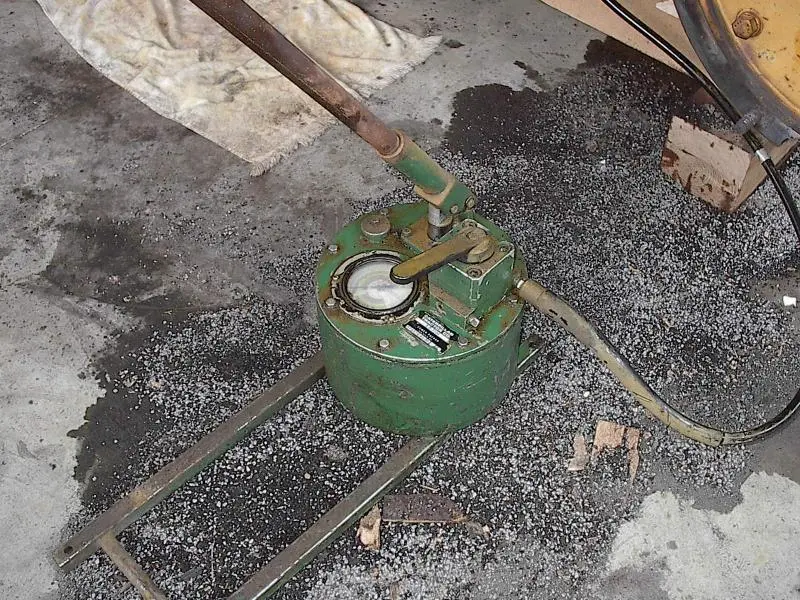
2. Set up small hydraulic ram between tandem case and rim. Used CAT manual pump (service tool) to power ram.
3. Pressed against rim with ram, then rotated wheel in 45 deg increments and repeated pressing with ram. (this is much more controllable than using sledge hammer and does not damage rim)
4. On very stubborn rims, applied Kroil to joint and also heated rim with rose bud at inside center over full 360 deg. This both breaks the rust and expands the rim to help press off.
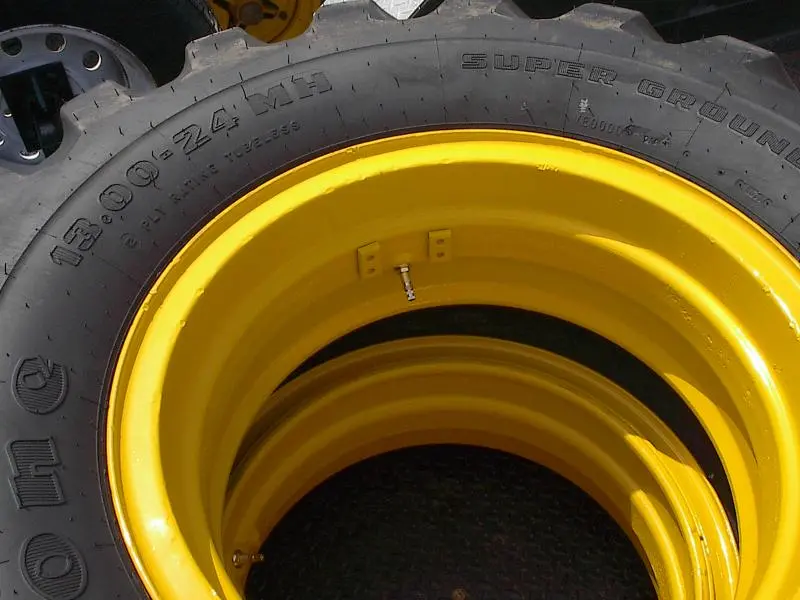
5. After sandblast and paint, rims could be mounted very easily with about 1/8" clearance all around cast center.
[attachment=18503]IM003553.jpg[/attachment] [attachment=18504]IM003549.jpg[/attachment] [attachment=18505]IM003551.jpg[/attachment] [attachment=18506]IM003538.jpg[/attachment]
Thanks for all of the insight. I have been stopping by and spraying the rim every chance I can get with Sea Foam "Deep Creep" and PB Blaster (don't have any Kroil handy). Problem is I am working on it in the digging are of Rough & Tumble in Kinzers and not at my shop. I placed a jack in behind the rim and with having that under full pressure on the rim and me under the machine with a sledge, there is absolutely no movement.
I am most likely going to remove the tire from the rim where it sits and get the tube replaced.
Thanks again for the information.
Have a good one,
Ken
The easy way to deal with this is to just jack it up and take the tire and tube off the rim and leave the steel rim on the hub. Finding the correct sized tube for those 10.00 tires is near impossible and all the available -might fits- are too thin and the stem is in the wrong location. Reposition the stem by cutting off, patching hole and installing replacement in correct position and the tube will work.


Our channel highlights machines from the earliest Holt and Best track-type tractors, equipment from the start of Caterpillar in 1925, up to units built in the mid-1960s.
Chapter Nineteen
| Victoria Park, Urana NSWChapter Nineteen
| 1234 Carngham-Lake Goldsmith Rd, Lake Goldsmith VicChapter Nineteen
| 2 Winkleigh Rd, Exeter TAS 7275
Antique Caterpillar
Machinery Owners Club
1115 Madison St NE # 1117
Salem, OR 97301
Terms & Privacy
Website developed by
AdCo
"I also joined a year ago. had been on here a couple of times as a non-member and found the info very helpful so I got a one year subscription (not very expensive at all) to try it out. I really like all the resources on here so I just got a three year. I think its a very small price for what you can get out of this site."
-Jason N